DIY Wire Jewelry-Braided Bracelets

If you are looking to get into the world of handmade jewelry, this tutorial is the perfect place to start! Learn, step-by-step, how to make an amazing braided wire bracelet.
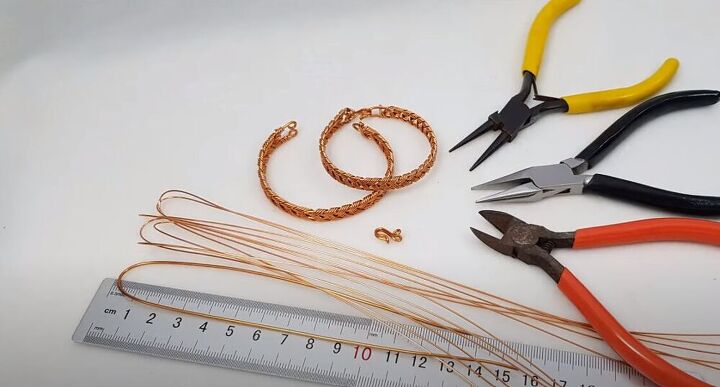
Tools and materials:
- Pliers
- 17 gauge (wire diameter 1.1mm) 32cm (13 inch)
- 23 gauge (wire diameter 0.6mm) : 6 x 50cm (20 inch)
Start yourself off
Start with the curved, thicker piece of base wire. Slide two curved pieces of the thinner wire onto it.
Move the two pieces onto the other side of the bracelet base wire and then slide on the other four pieces of wire so that they are on the opposite side.
The wires should look like this before you begin working to make the bracelet. Make sure that the thin pieces fall behind the base piece.
First, take the two pieces at the top and bend them forward. Then tuck the rest of the wire behind the base piece on the left. Then take the next four pieces, bend them forward and tuck them behind the base wire on the right side.
So far your bracelet should look like this.
In the above picture, you can see the different wire groups labeled as 1, 2, and 3. This will help as you begin to braid your bracelet.
Start braiding
To start braiding, take piece 1 and bend it forward towards the left. Then just as you did before, make sure to put it behind the base wire.
Continue braiding with piece 2 and then 3, making sure to tuck behind the base wire each time.
This picture shows a zoomed-in version of the braiding process. Take the section that is highest, and bend it over towards the front.
Then make sure to always tuck it back behind the base wire on the other side.
Continue the braiding process to make your bracelet longer.
Measure to make sure your bracelet is the right length for you!
Finish the bracelet
To finish off the bracelet, you’ll need to get your wire ends to look like this.
First, turn the bracelet over. Take the middle section and use your pliers to bend it forward.
Turn the bracelet back the other way. Bend the left piece towards the front around the base wire. Use pliers to wrap the top wire of that section around the base wire.
Once that top wire is wrapped, use your pliers to cut the extra wire from that section. Go ahead and cut the excess wire from the first section that you bent as well. Use the pliers to tighten the wire piece you just cut.
Repeat the same on the other side for the last section of wire.
Next, take pliers and create two loops on each end of the base wire.
Your bracelet end should look like this.
Use your hand to bend the wire and create the round bracelet shape.
To finish the bracelet, open up the two ends of the clasp
Attach them to the two loops you made.
Then use pliers to close the two ends of the clasp tight.
There you have it! An amazing braided bracelet! What other handmade wire jewelry do you want to try making? Let me know in the comments below!
Enjoyed the project?
Suggested materials:
- Pliers
- Copper wire
The author may collect a small share of sales from the links on this page.


Comments
Join the conversation
Beautiful work, have pinned it and will be looking at your YouTube channel, thanks for posting.
this looks awesome!