Grab 2 Plastic Containers and Make These Gorgeous Resin Earrings

Hi, guys! Today, I’m going to show you how to make resin-pressed flower jewelry. This tutorial is great if you’re a resin beginner or you just want some resin jewelry ideas. Let’s get started!
Tools and materials:
- Resin
- Resin hardener
- Earring Blanks
- Dried flowers
- Jump rings
- Fishhook earrings
- X-Acto knife
- Plastic containers
- Popsicle sticks
- Tweezers
- Pliers
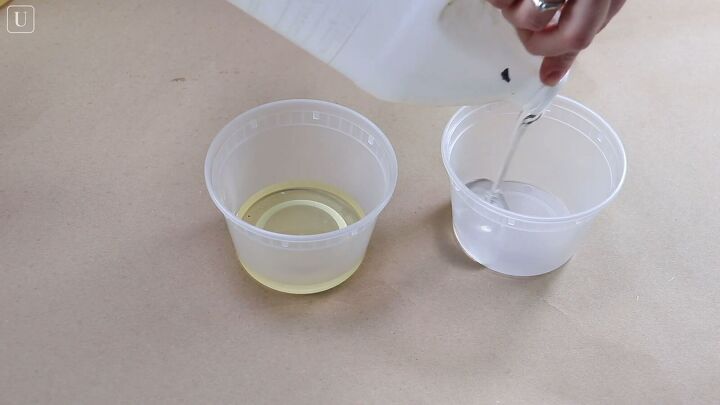
1. Pour equal amounts of resin and resin hardener
Pour equal amounts of resin and resin hardener into two plastic containers. You want to make sure that both amounts are exactly the same.
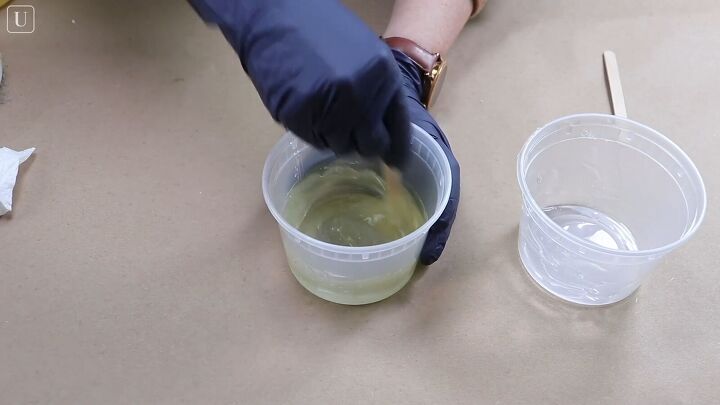
2. Pour resin into the hardener cup
Pour the resin into the hardener container. Use a popsicle stick to scrape out all of the resin inside of the cup, and then give it a very good stir.
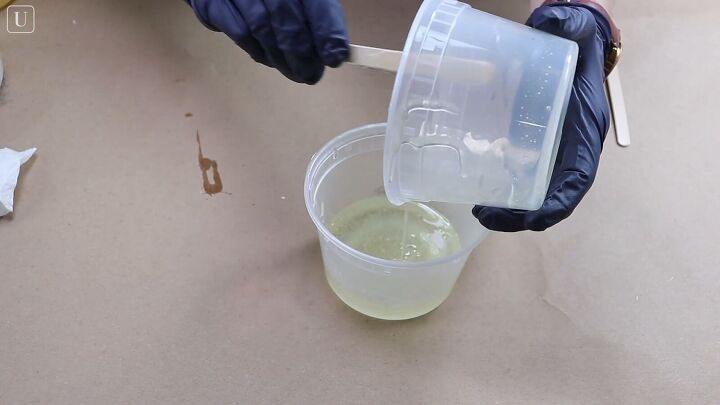
3. Pour the mixture back into the resin cup
Then, pour it back into the original container the resin was in, and again, scrape the sides to make sure you get all of the resin. Mix it again, and repeat this process a few more times.
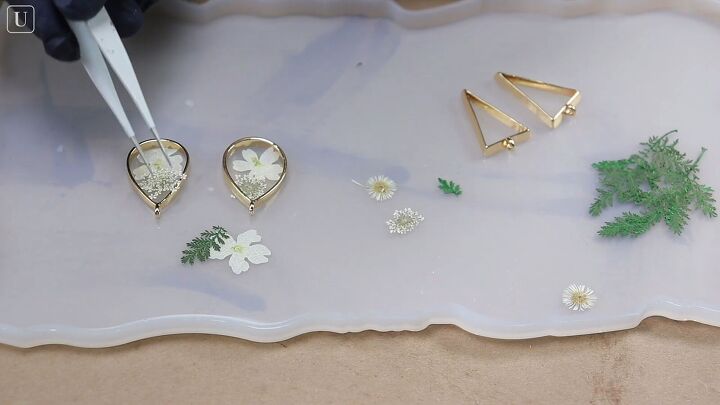
4. Arrange your earrings how you like
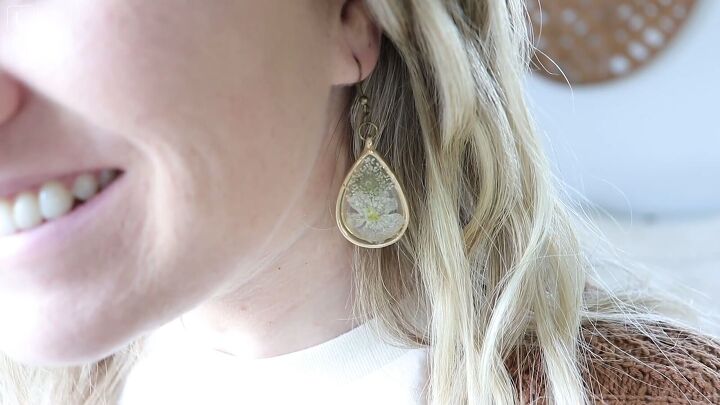
Next, I have these earring blanks and these dried flowers that I got from my local craft store. You can also find flowers out in your yard, just make sure they are small enough. Use a pair of tweezers to place the flowers inside of the earring blanks, arranging them in a way that you like. For the teardrop earrings, I used two of the white flowers.
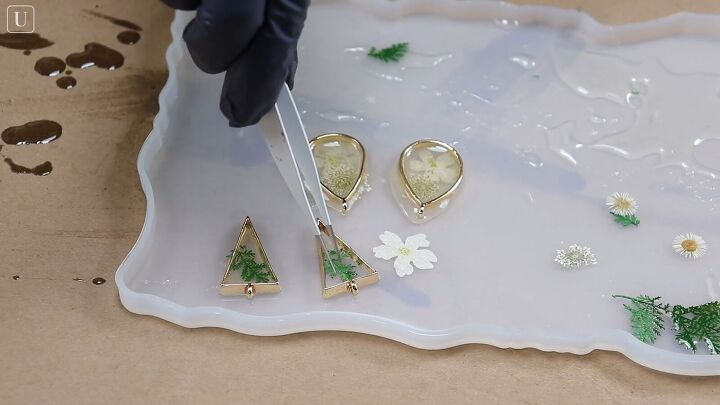
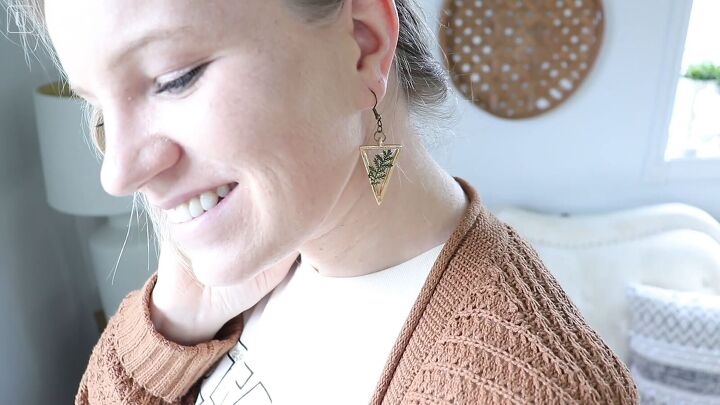
For the triangle earrings, I used the greenery pieces.
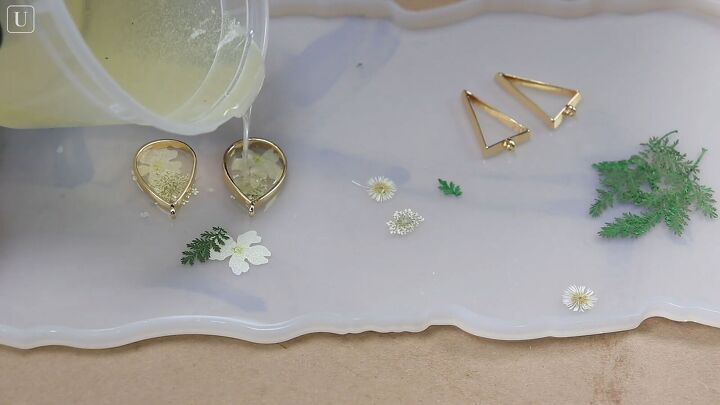
5. Pour resin
Once I have them set, I’m going to gently pour in the resin over top, making sure it doesn’t come out too fast.

If any oozes out over the side, I’m just going to take a piece of paper towel and wipe it away.
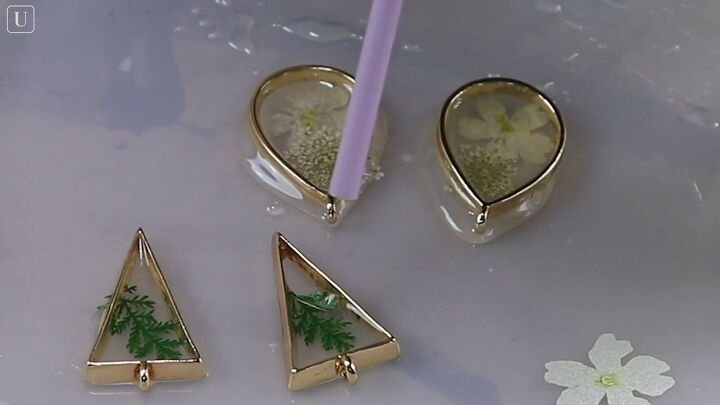
6. Blow out the bubbles
Use a straw to blow on them gently to remove any air bubbles.

7. Leave overnight
Leave the earrings to sit overnight until they’re hard.
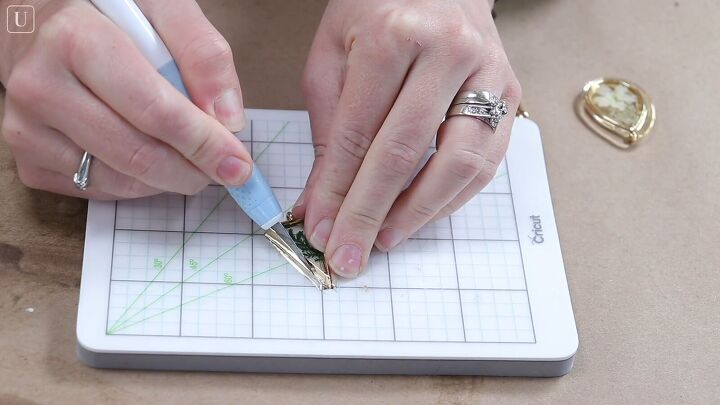
8. Trim excess resin
Once they’ve hardened, use an X-Acto knife to trim off any resin that spilled out from underneath or over the sides. You can also use a bit of sandpaper to smooth off any resin.

9. Add jump rings
Once the earrings are done, it’s time to attach the jump rings. Use pliers to attach the larger jump ring to your earring first.
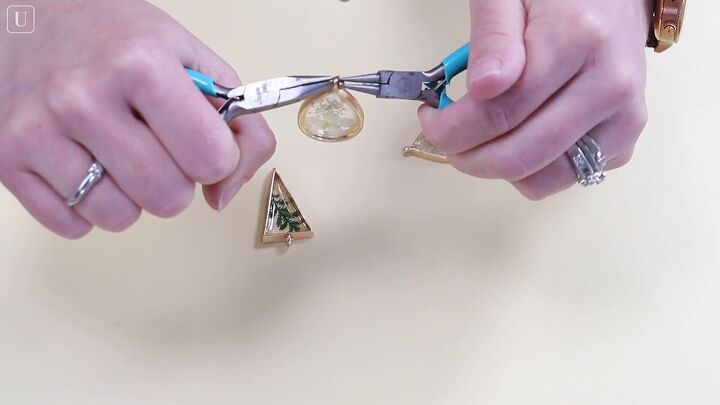
Then place on the smaller jump ring, and close the larger.
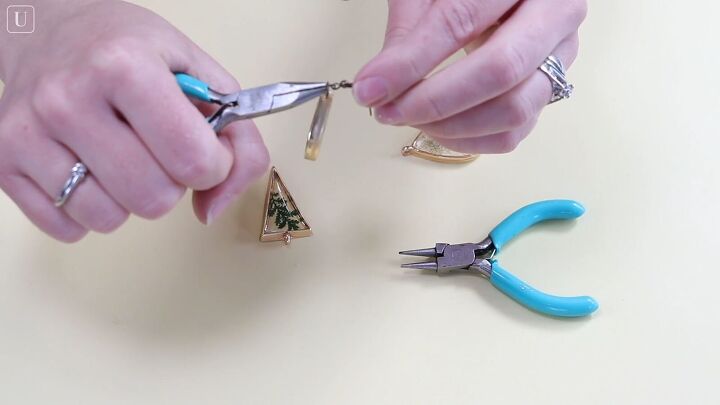
10. Attach the fishhook earring
Before closing up the smaller jump ring, attach a fish hook earring style to the jump ring. Repeat this process with your other earrings until you’re finished! You can also use a kidney ear or a lever back style if you don’t like the fishhook.
How to make resin-pressed flower jewelry
Here is the finished dried flower resin jewelry! There are so many ways you can make DIY jewelry resin, you don’t have to use flowers. You can put whatever you like inside these earring blanks, but this is just one idea. I’m super happy with how these earrings turned out. They’re stylish and classic and would look great with any outfit. Let me know what you think about this project!
The author may collect a small share of sales from the links on this page.


Comments
Join the conversation