Stand Out From the Crowd With This Beautiful Statement Necklace

There’s no better way than making a statement with a beautiful statement necklace. This is the kind of accessory that never gets old, and you can dress up in plain, monotonic clothes and still look like a gem! I am going to show you how to make this DIY statement necklace in a few easy steps. Ready? Let’s get our boho on!
Tools and materials:
- Rope
- Stretchy fabric
- Hardware
- Glue
- Cap barrel clasp
- Tape
- Crochet hook
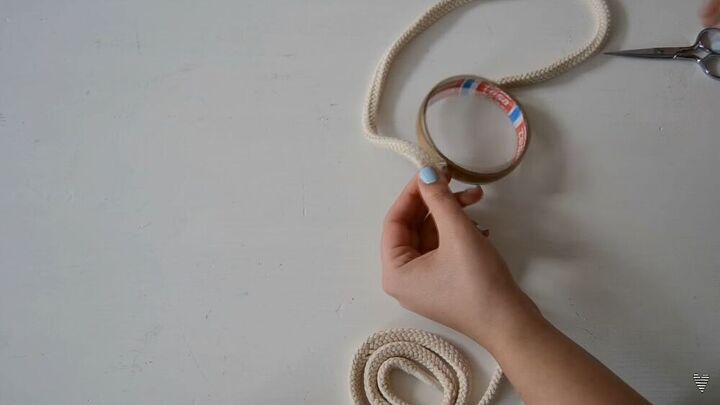
Cut your necklace to size
Take your necklace rope and cut it to size. I opted for a medium-length necklace, but you can go for any length you like. Place some tape by the ends of where you will cut the necklace and cut.
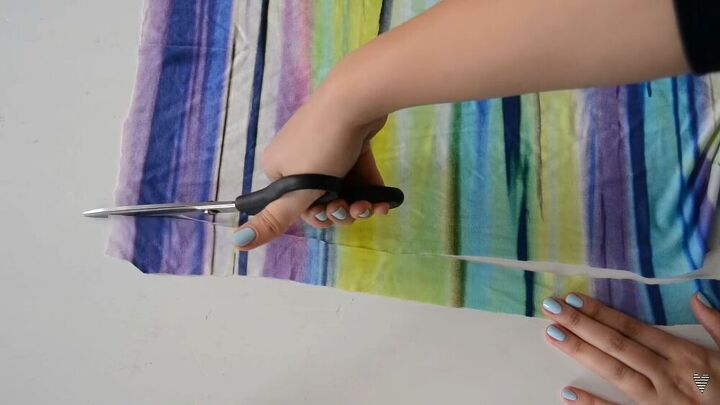
Cut your fabric
I chose a lovely pastel and bright colored stretch fabric. I wanted a multi-colored print because the fabric will be somewhat crochet onto the rope, and since the fabric will be rolled, I wanted an array of colors popping out. By all means, choose something that suits your style. A monotonic-colored fabric would also look great! So, cut your fabric lengthways, making sure you have one long strip.
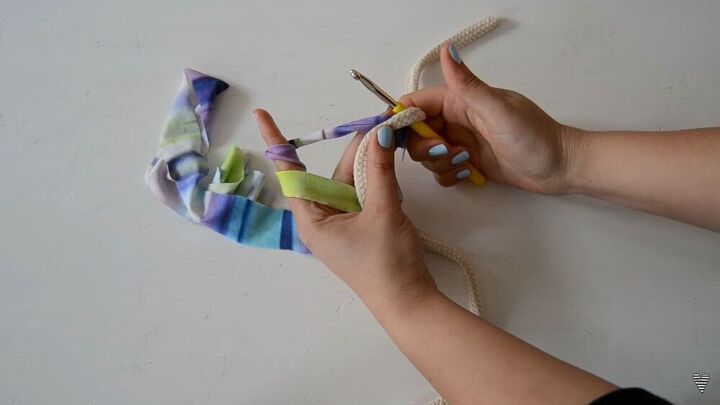
Crochet your fabric around the rope
Next, crochet the fabric around the rope. To start, wrap the fabric around your index finger a couple of times. With your other hand, hold the hook together with the rope, as shown. Loop, twist, and intertwine the fabric so that it fits snug around the rope. This is a fantastic project for crochet beginners to practice their skills, and of course, if you have the know-how, this step shouldn’t take long. I crocheted along the necklace until I was happy with the length.
When you get to the end of the fabric, simply tuck the end under the loops and cut off the remaining fabric once you get to the middle loop.
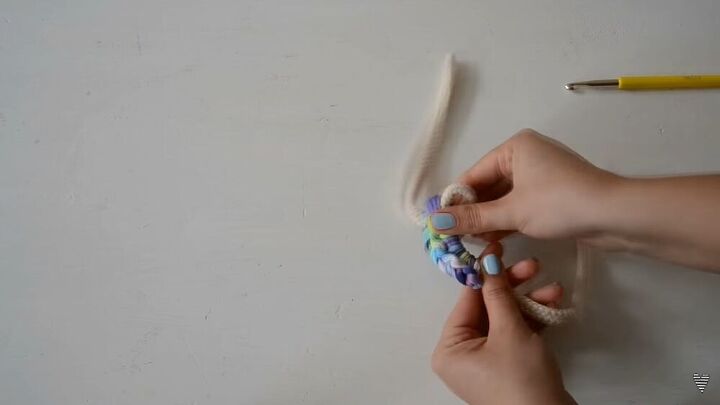
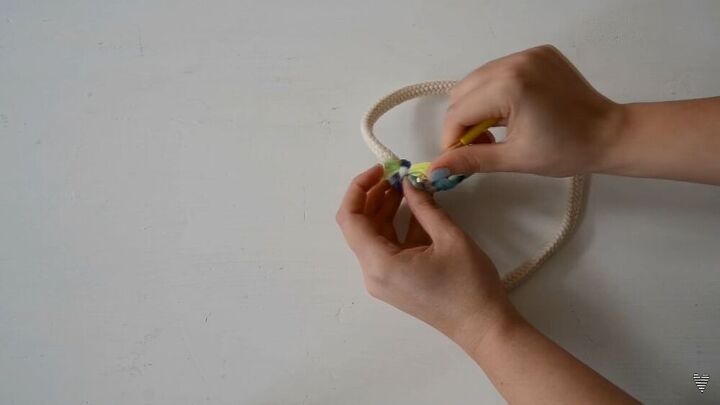
Make sure your crochet piece is in the middle of the necklace. If it’s not, simply pull the fabric until it’s centered.
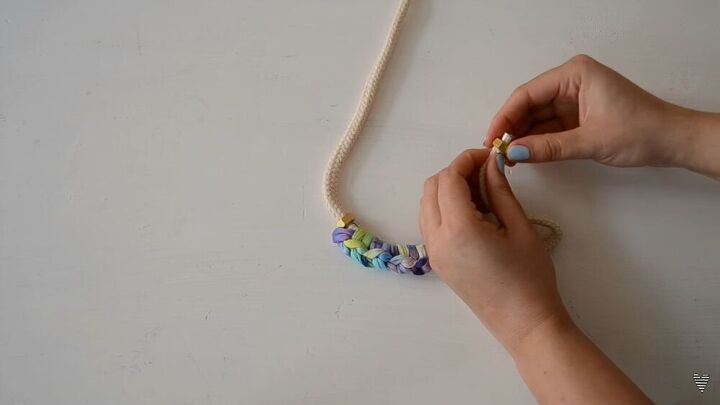
Add the hardware
I added gold embellishments to either end of the intertwined fabric. This acts as a stopper and also gives a more sophisticated vibe to the statement necklace.
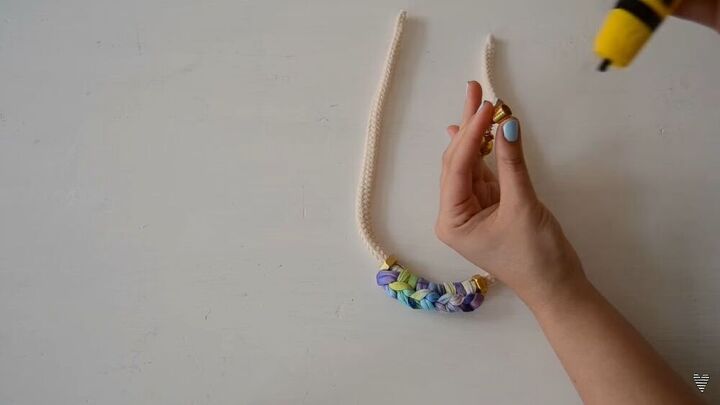
Glue the clasp
I used a cap barrel clasp, and I glued it onto the ends. I like this type of clasp because it’s funky and chunky, giving the statement necklace another bold element.
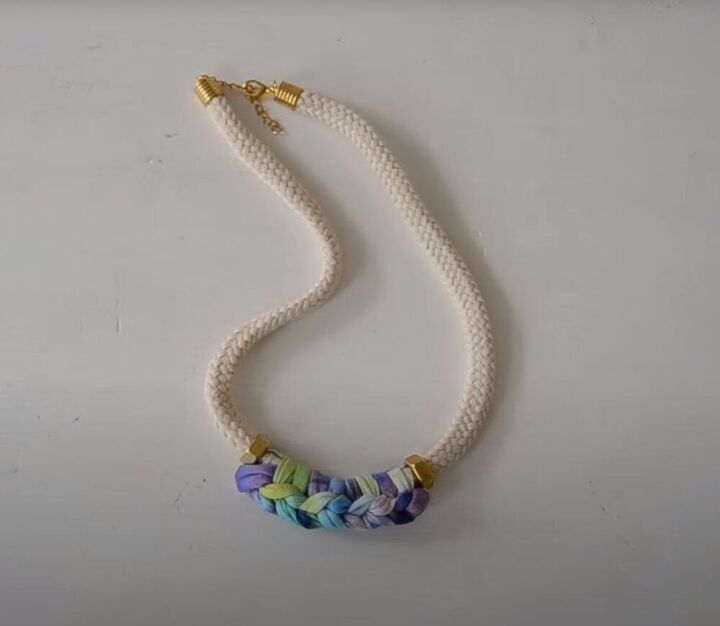
This is how the clasp should look like once both sides are glued.
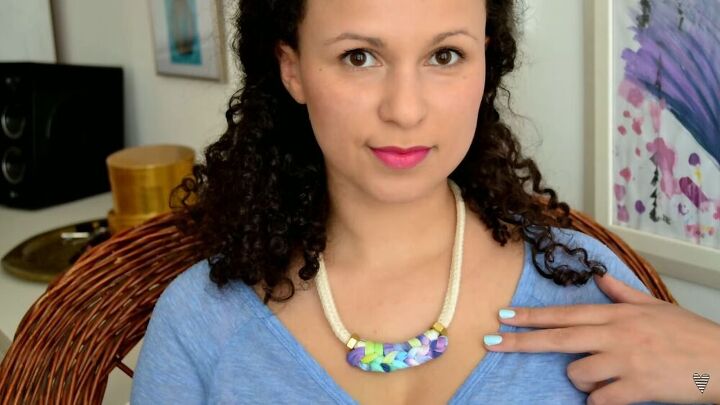
Yay! Would you look at that work of art? It’s so stylish and oh-so-boho! This is fun and pretty easy to make once you get the hang of the lovely crochet part. As I mentioned, you can wear this necklace to jazz up your outfits. It’s fun to make something from scratch and flaunt your creation, too. I hope you enjoyed this tutorial as much as I enjoyed showing you!
The author may collect a small share of sales from the links on this page.


Comments
Join the conversation
Very nice. I really like that.
Awesome