How to Easily Turn an Old Bridesmaid Dress Into a Jumpsuit

Today, I'm going to show you a fun way to turn old an bridesmaid’s dress (or prom dress) into a jumpsuit! This is a great way to revamp an occasion dress and make it more wearable for your everyday life. Let's get started.
Tools and materials:
- Bridesmaid or prom dress
- Seam ripper
- Baggy pair of pants or jumpsuit
- Scissors
- Ruler
- Pins
- Sewing machine
- Markers
- Paper
- Measuring tape
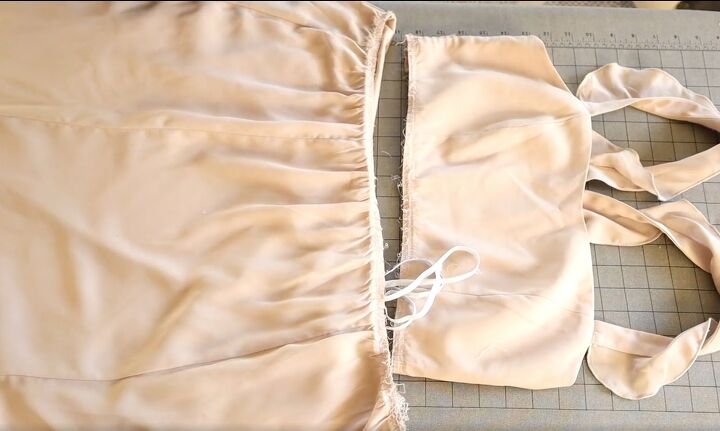
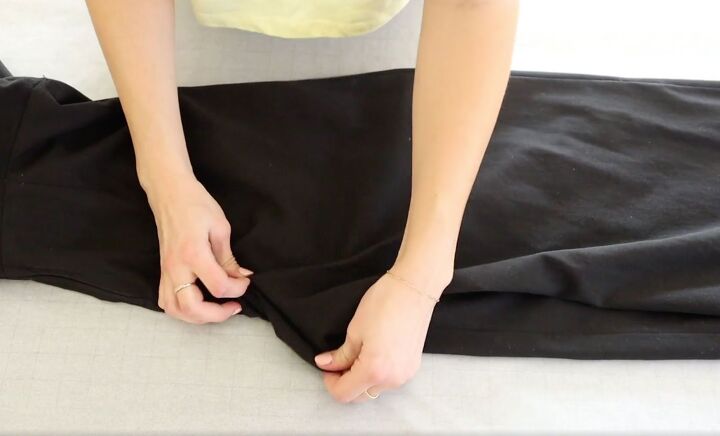
1. Take apart the dress
To start this project, I first turned the dress inside out.
I used a seam ripper to separate the bodice from the skirt, unpicking the seams around the waistline until they were fully disconnected.
Once that was done, I had a bodice, a skirt, and a piece of elastic that I saved to use later.
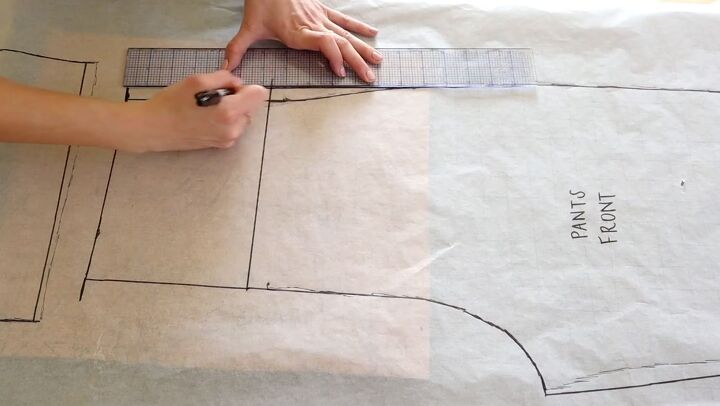
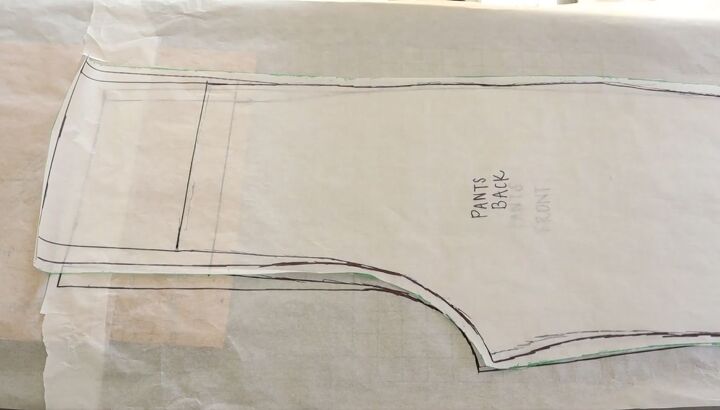
2. Make the pants pattern
Next, I grabbed a jumpsuit to use to draw a pants pattern. You can also use a pair of pants that are a little bit loose-fitting.
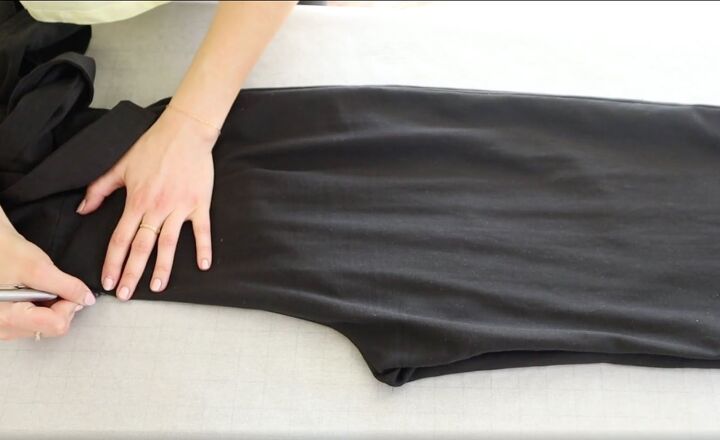
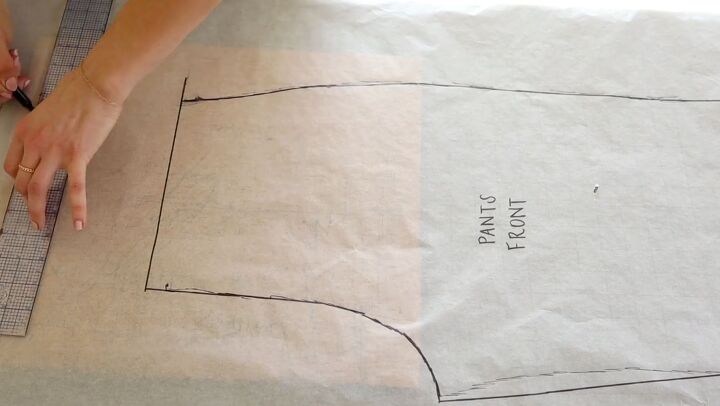
To make the pattern, I folded the pants in half and traced the front side of them. I pulled out the seams so I could lay them as flat as I could because I wanted to trace right along the seam line.
After I traced, I used a ruler and a marker to straighten the lines a little bit.
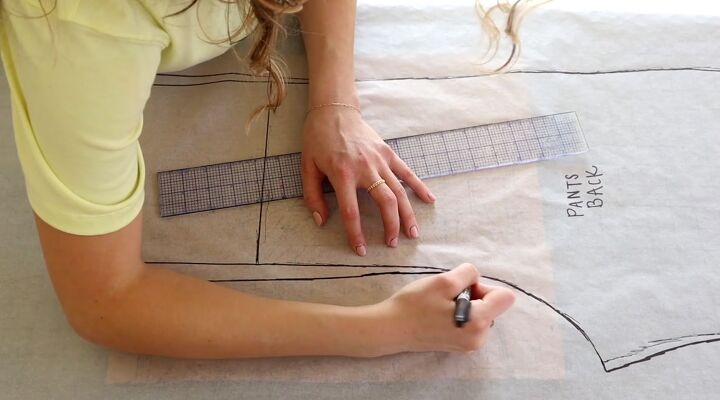
For the backside of the pants, I folded the pattern pair in half again and laid them out, pulling the crotch seam out as best as I could. I wanted them to lay as flat as possible to get the most accurate lines.
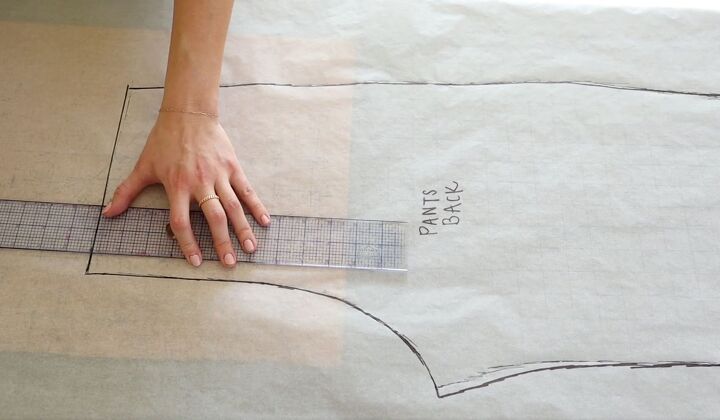
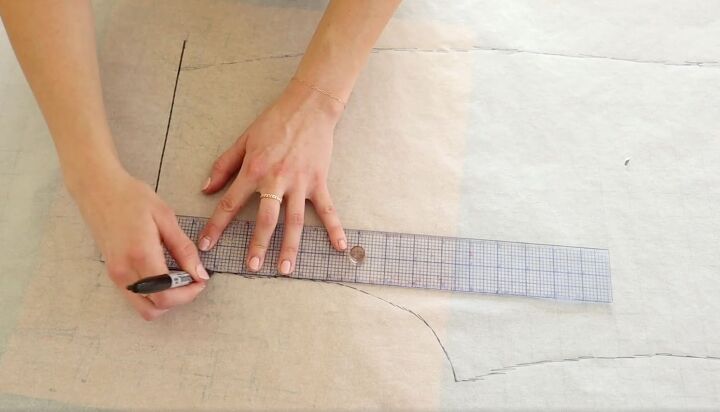
I needed to add a little bit of length to the waist because the bodice I had was a bit short.
To do that, I added about 5 inches onto the pants to make up for that extra distance.
Once I added the 5 inches to the waist on the back, I did the same thing to the front.
I also wanted to add a little bit of width to the waist. I measured my hips at the widest part, which was 39 inches. I took that measurement and divided it by 4 because one pant leg pattern goes around a fourth of your body.
I drew out the added width and then straightened my lines and blended them in a little bit.
I did the same to each side.
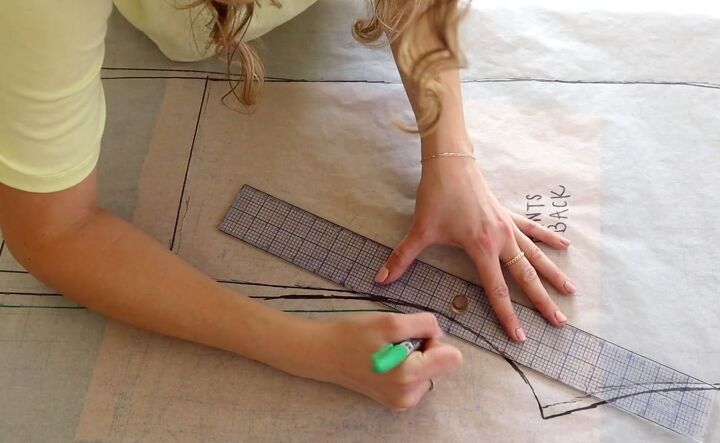
Finally, I added half an inch for seam allowance all around and about an inch on the bottom for hem allowance.
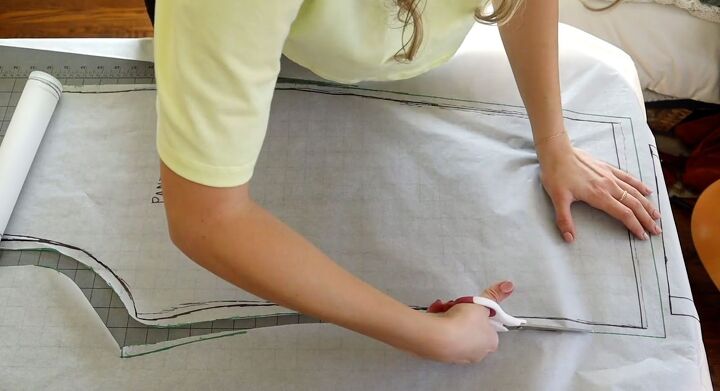
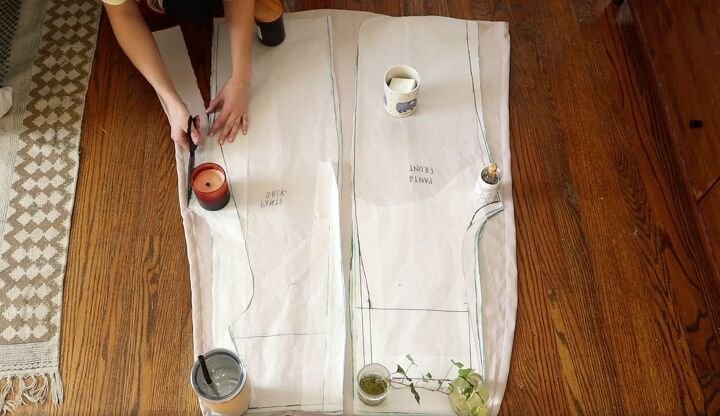
3. Cut the pattern
Then, I cut it all out.
Once they were cut out, I laid the backside of the pants on top of the front to make sure they matched up at the correct places.
I also ended up adding a little bit more width near my hips. I realized that I don't want these pants to be skin tight, so added about an inch.

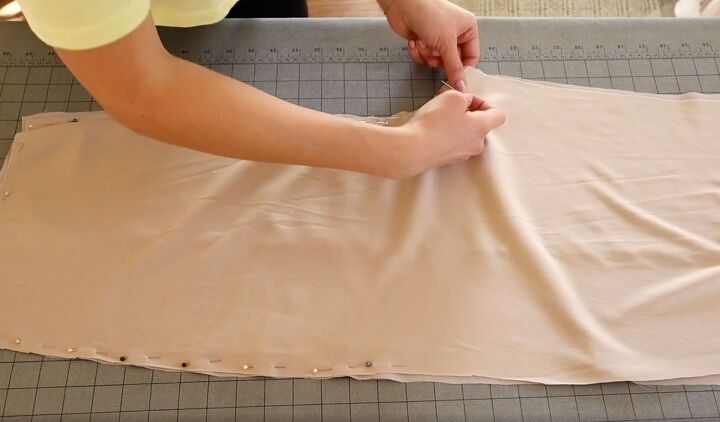
4. Cut the fabric and the lining
My skirt had a lining in it so I had to separate the lining from the skirt piece by cutting it along the top. This allowed me to be able to pull out the lining and work with the two pieces separately.
First, I cut the pants pieces out of the regular fabric.
Then, I cut the same pieces out of the lining. You don’t need a lining if you don’t have one. My fabric was a little bit see-through so I definitely needed a lining.
5. Sew the lining and the fabric together
I went ahead and sewed the outside of the fabric to the lining. I laid them wrong sides together and pinned them. I also did the same thing for all of the pants pieces.
6. Sew the pants
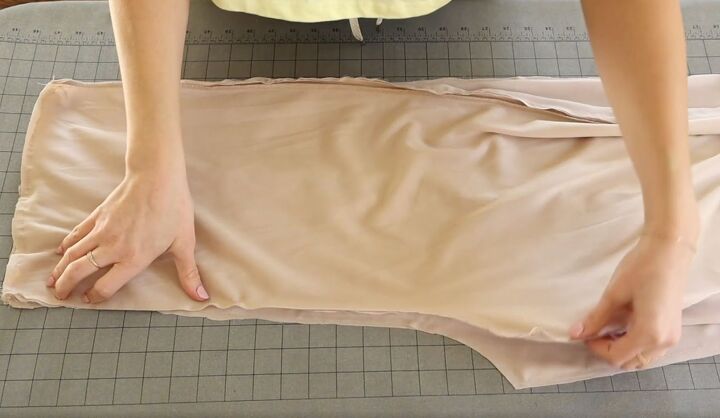
Then, it was time to connect the pants. I laid the front right leg and the back right leg down, right sides together, pinned down the inseam and the side seam, then sewed them.
Once both pant legs were done, I needed to connect them along the crotch. I flipped one pant leg right side out and placed it inside the other pant so that the pieces were right sides together.
Then, I pinned it along that crotch seam and sewed it.
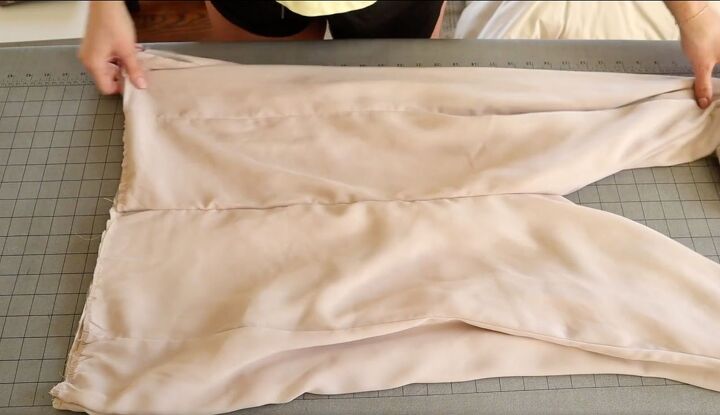
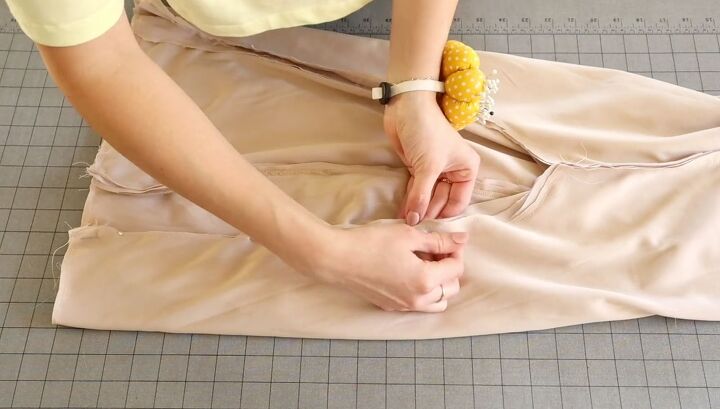
Now came the fun part! I flipped the pant legs right side out and had a pair of beautiful-looking pants.

7. Add the elastic
Remember that elastic that I saved? Next, I measured my waist and cut the elastic to that measurement.
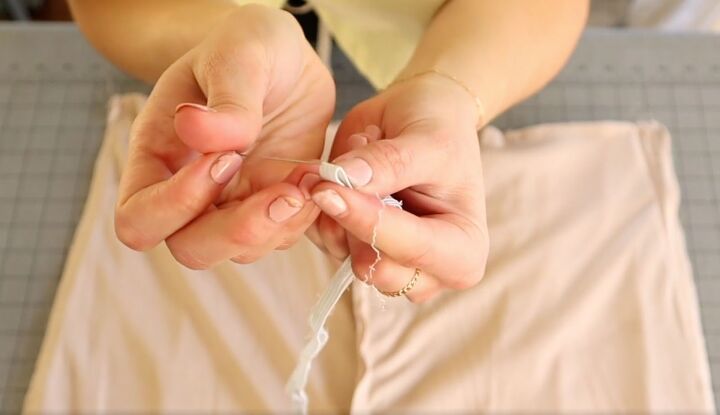
I marked the center point of the elastic with a pin.
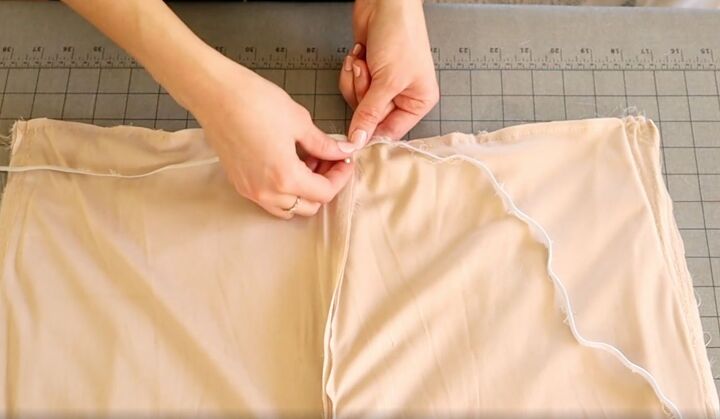
I lined it up with the middle of my pants.
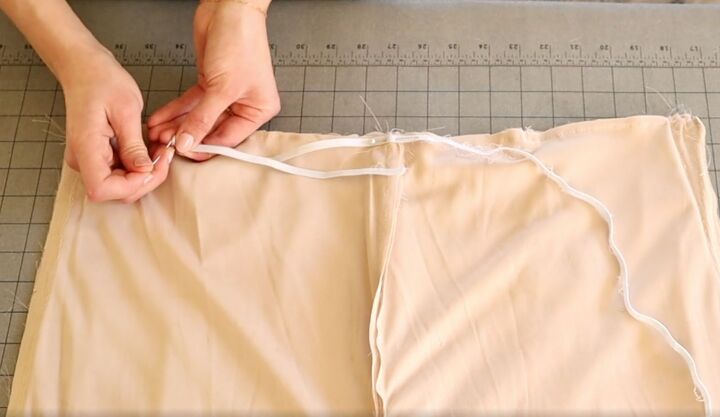
Then, I folded each half in half and marked the halfway point with a pin.
I attached those halfway points to the side seams of the pants. Basically, I pinned the elastic equidistant around my waist.
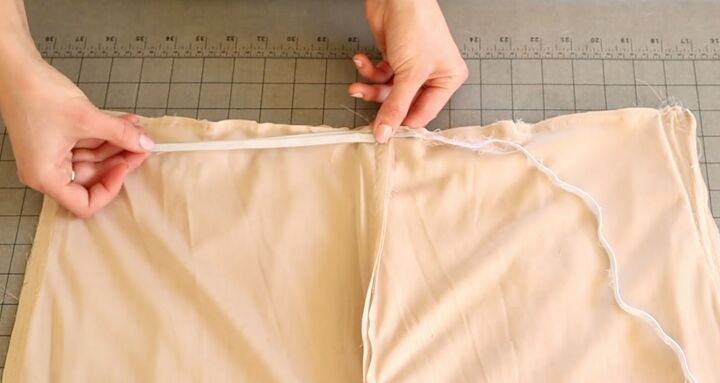
With the elastic in place, I sewed it to the pants, stretching the elastic out as I sewed.
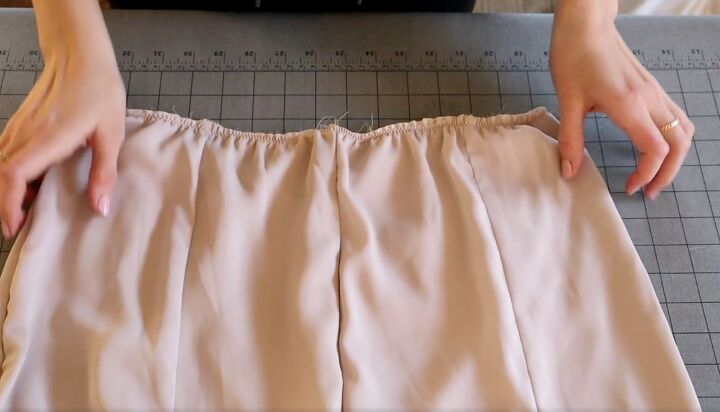
I wanted the elastic to look like this and cinch the waist when it was done.
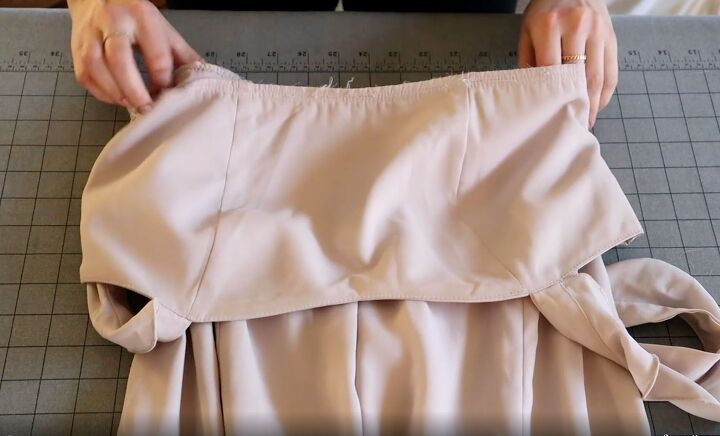
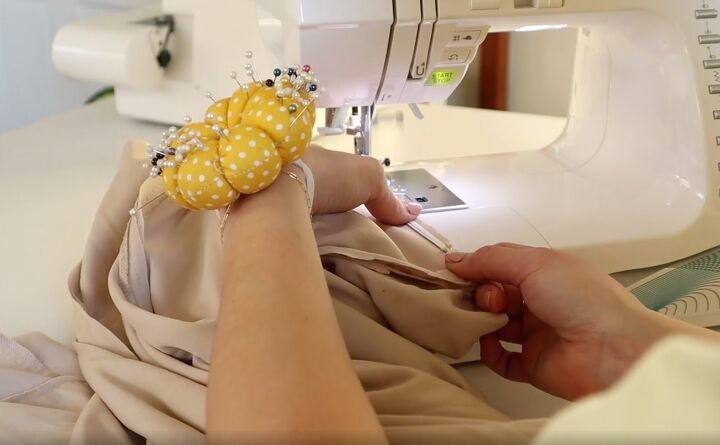
8. Add the bodice
Once the elastic was sewn in, I connected the bodice to the pants. To do that, I flipped the bodice inside out and placed it around the pants, making sure to match up the side seams.
I pinned and sewed it in place.
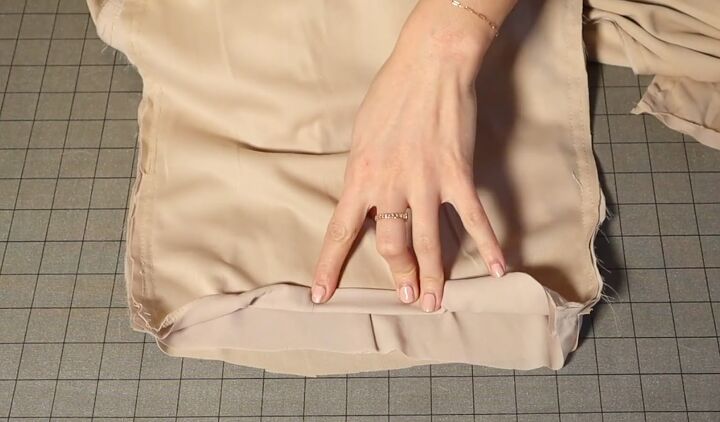
9. Hem the pants
Last but not least, I hemmed the bottom of the pants. I folded the hems up once and then folded them up again a half an inch. I pinned the hem in place and sewed it down.
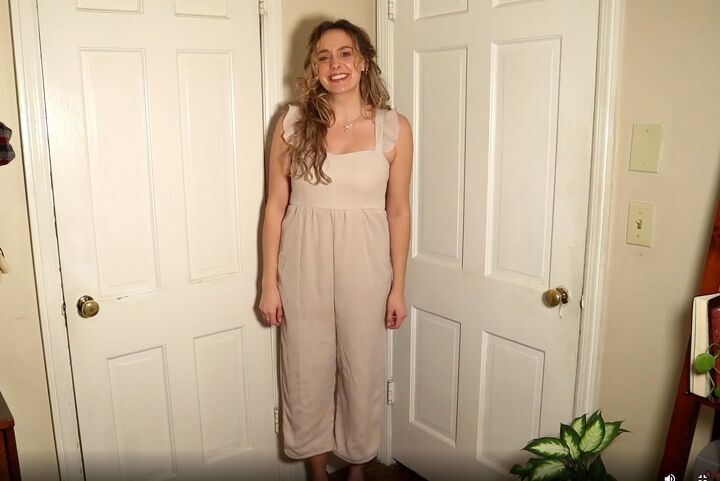
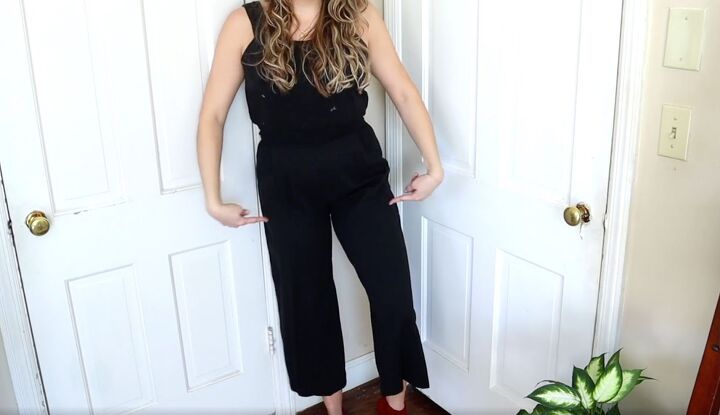
How to turn a bridesmaid dress into a jumpsuit
How adorable is this jumpsuit? This is such a fun way to turn a dress into a jumpsuit and use that old formal dress that might be sitting in the back of your closet.
I hope you enjoyed this bridesmaid dress makeover. Let me know what you think of this tutorial and the final result in the comments below.
The author may collect a small share of sales from the links on this page.


Comments
Join the conversation
It started as a DRESS??? Would have been nice to see what it started out looking like.