See How I Made These Cute High Waisted Pants From Scratch

There is nothing better than having that perfect pair of pants that not only fits you well and looks good, but that is actually comfortable to wear. It can be almost impossible to find such a precise fit. So, instead of looking for it, I decided to make my very own. Check out this tutorial to see the awesome and comfortable high-waisted linen pants I made. I, for one, am super happy with the results!
Tools and materials:
- Loose linen fabric, 2 meters (2.2 yards)
- Measuring tape
- Fabric chalk
- Scissors
- Sewing pins
- Sewing machine
- Overlocker
- Iron
- Elastic
- Safety Pins
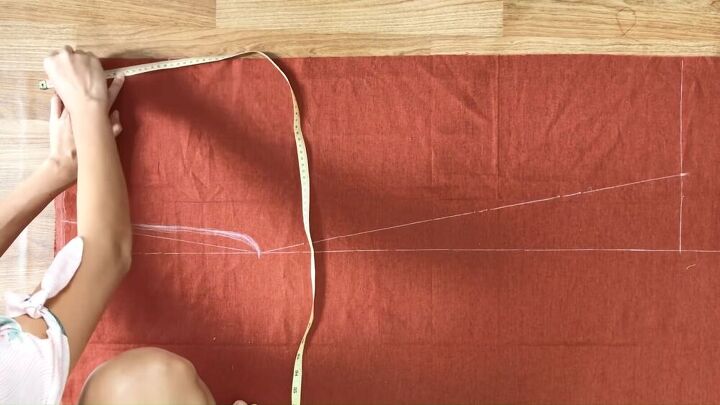
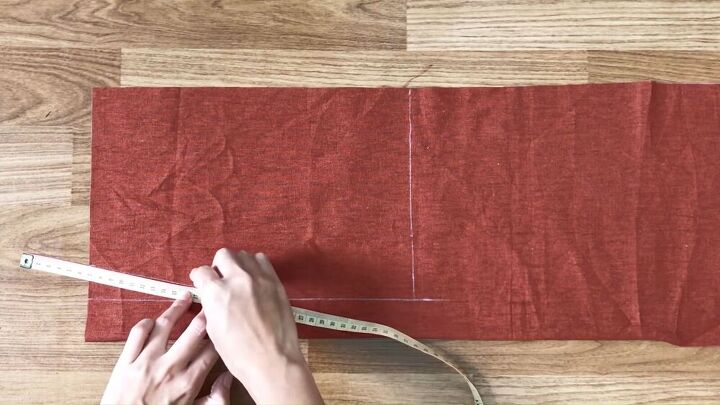
With my fabric folded in half, the first thing I did was draw two rectangles on the fabric. To determine my width, I measured my hip size, then I took ¼ of my hip measurement and multiplied it by 1.5. I then subtracted 3 cm (1.2”) from that number and that gave me my width, which was 31 cm (12.2”). Next, I marked 80 cm (31.5”) which was to be the length of the pants.
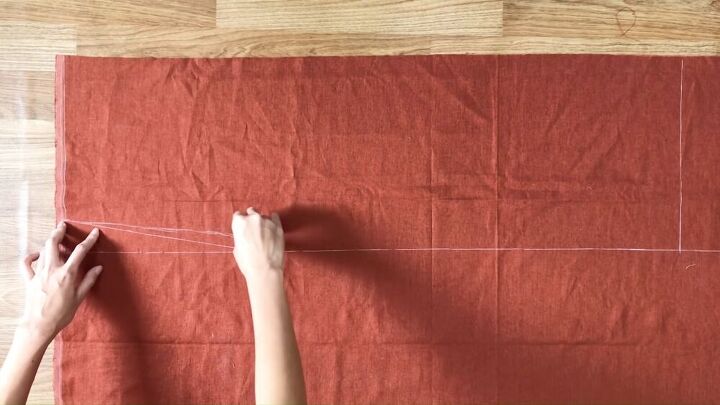
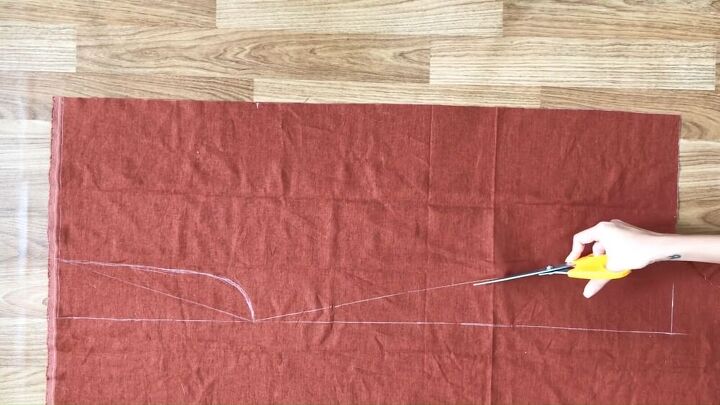
At the bottom of the left side, I marked 5 cm (2”) up from the line and then marked 28 cm (11”) on the line. This was the measurement from the belly button to the crotch of the pants. I then drew a diagonal line connecting both those marks and drew a curved area above that to be the crotch. Next, I marked 18 cm (7”) down from the top right and connected that with another diagonal line to the end of the crotch curve. At the top left, I marked 3 cm (1.2”) and marked 16 cm (6.3”) out from there. I then connected those two marks, which would be the pocket area of the pants. Then I cut along the cut lines and was left with the two front pieces.
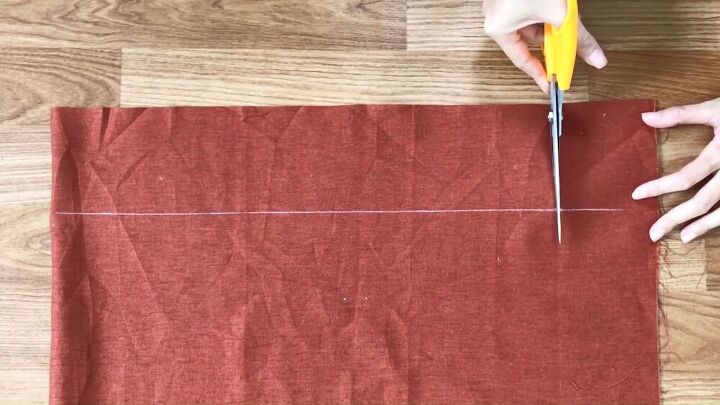
To make the back of the pants, I drew two rectangles. The width was ¼ of my hip size X 1.5. This gave me 34 cm (13.4”). The length was 80 cm (31.5”). The curve on the back needs to be bigger as it has to cover the butt, so I marked 8 cm (3.1”) up from the left of the line. I then marked 28 cm (11”) on the line and connected the two points with a diagonal line. Again, I created a curve above that line. At the legs, I went down 21 cm (8.3”) which was 3 cm (1.2”) bigger than the front. I then cut along the cut lines and had my two back pieces.
For the waistband, I took more fabric and marked 10 cm (4”) width. The length I needed was 98 cm (38.5”) which is the total length of the front and the back of the pants. So, with my fabric folded, I marked a line of 49 cm (19.3”). This is half the total of the front and back of the pants. When I opened up the folded fabric after it was cut, I had the total length that I needed.
Next, it was time to make the pockets. I drew rectangles of 20 cm (7.9”) width and 30 cm (11.8”) length. At the bottom left, I went up 3 cm (1.2”) and marked 16 cm (6.3”) on the line. I then connected those two points with a diagonal line. From there, I measured and marked 7 cm (2.8”) and connected that mark with a diagonal line to the top right corner of the vertical line. I then drew a curve below the diagonal line. Once I was done marking the pockets, I cut them out. I then traced the outline of the front pockets to create the back pockets, this time leaving out the connected area.
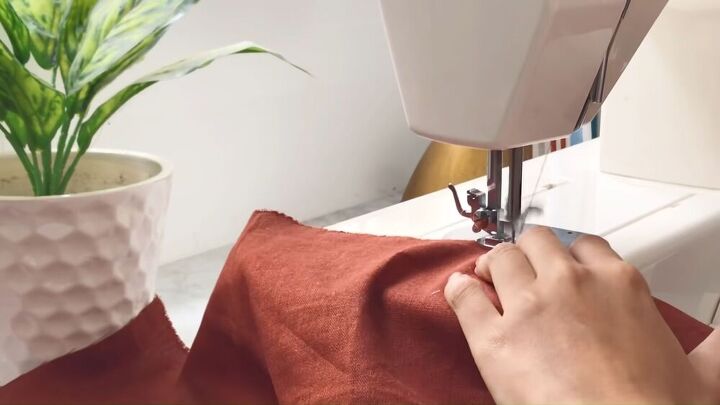
With all my pieces cut out, I wanted to protect the fabric. So I overlocked the edges of all the different pieces to prevent any fraying.
It was now time to start putting the pants together. First, I connected the two front pieces and two back pieces together with pins. Then I went over to my sewing machine and sewed along where I pinned, removing the pins as I fed the fabric through my machine.
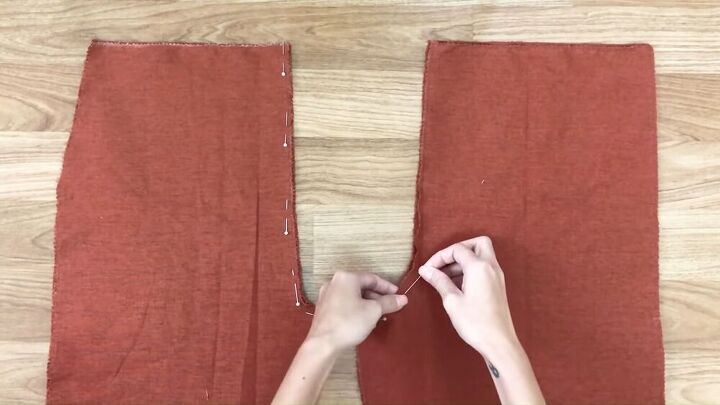
Once the fronts and backs were sewed together, I laid out the front piece and attached the pockets. Then I sewed them in place on the outer line. After making that first seam, I opened the pockets and made a second seam next to it to gather the extra fabric to one side. I then repeated the same process with the back of the pants.
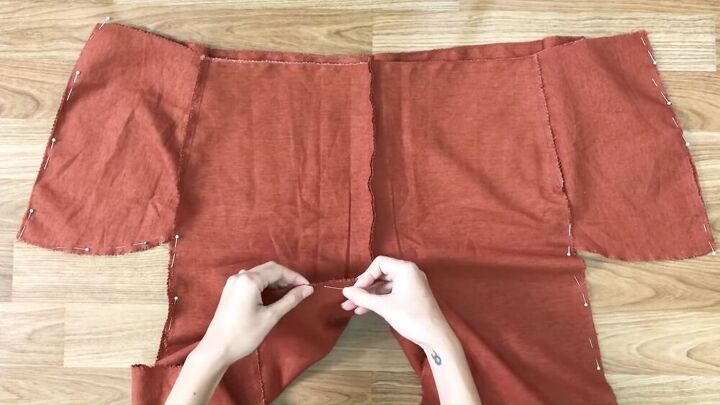
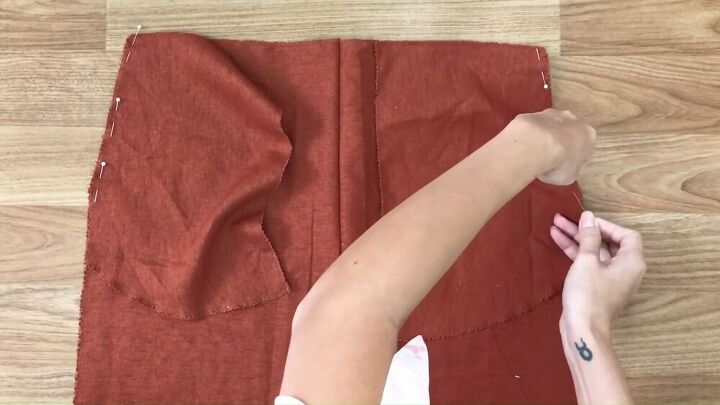
The next thing I had to do was to connect together the front and back pieces of the pants. I started at the top corner of the pockets and pinned all the way down the sides of the pants. I also pinned from the crotch down the inner legs. Then I sewed all along where I had pinned.
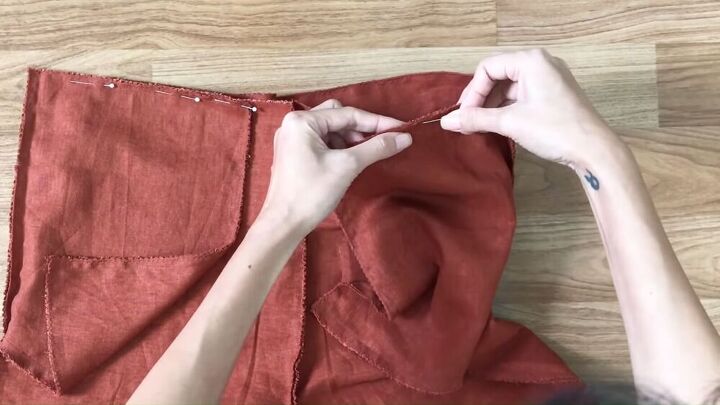
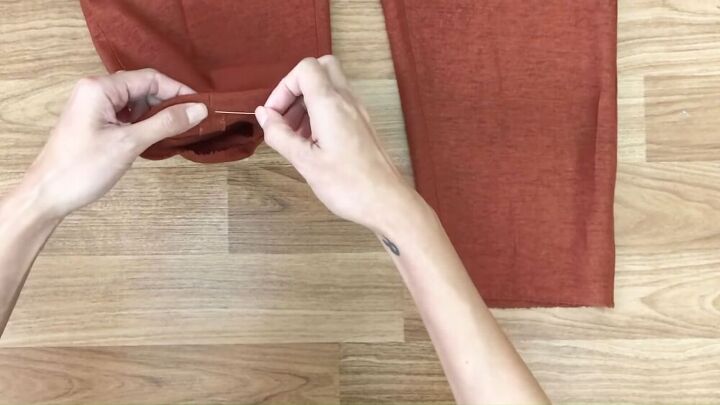
To create the depth for the pockets, I sewed up to 7 cm (2.8”) from the end of the pocket. I made sure the seam was close to the seam that was already there, to make it look neater. Then I pinned and sewed the top of the pockets to the pants.
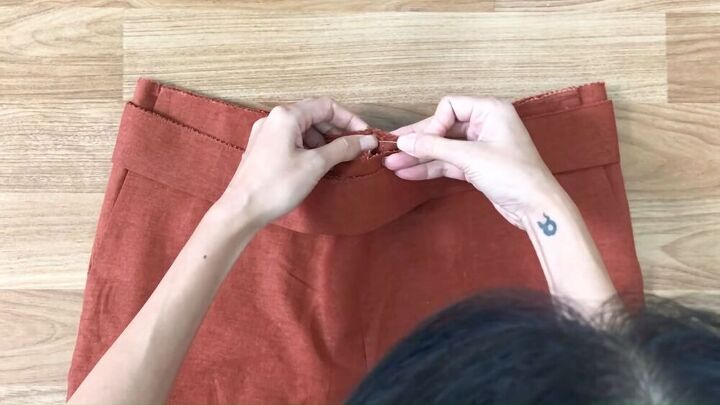
Next, I took the rectangle of fabric for the waistband and connected the ends together. I then folded the waistband in half and ironed it on the fold. I then pinned and sewed the waistband to the pants, keeping a small opening through which I would later be able to insert the elastic for the pants.
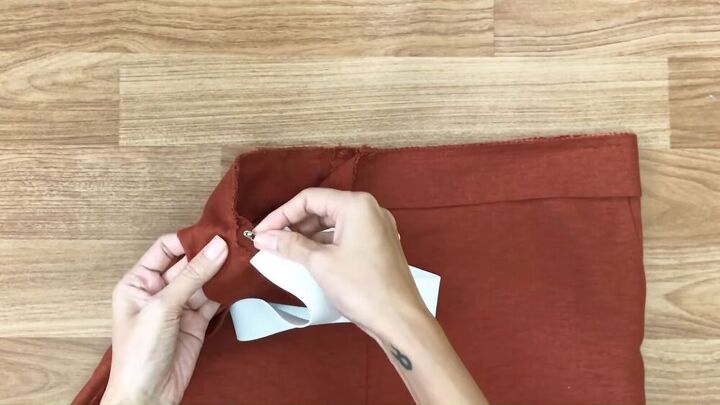
I used a safety pin to connect one side of the elastic to the pants. I then attached another safety pin to the other side of the elastic and used it to feed the elastic through the waistband opening. Once the elastic was all the way through, I removed the safety pins and sewed the ends of the elastic together. Then I sewed closed the opening.
The last step was to finish the ends of the legs. I folded the end of the fabric on the leg inwards, then folded it again. I pinned it in place, then repeated the process with the other leg. After I finished pinning the legs, I sewed the hem. Once I was done with that, my pants were complete.
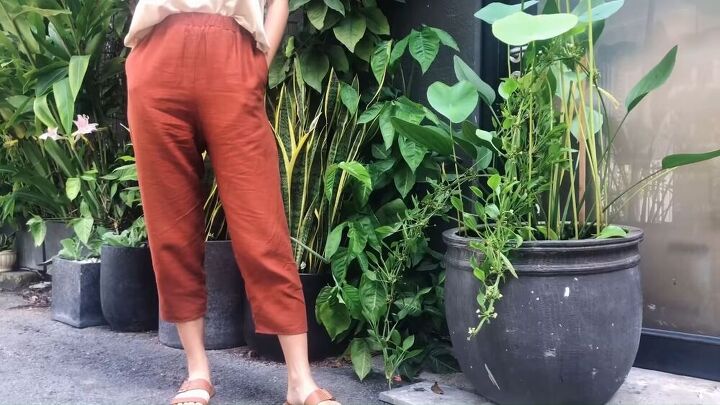
That’s how I made my high-waisted linen pants. I’m so happy with the way they came out. They’re so comfortable and really suit my style. I’m definitely excited to wear them. You can make these pants in any color or pattern you’d like, depending on the fabric you choose, so feel free to get creative. If you try this project for yourself, I’d love to see your results, so leave me a picture in the comments!
The author may collect a small share of sales from the links on this page.


Comments
Join the conversation
Those pants are lovely and fit you very well, plus, you wear the longer capri perfectly. These pant leg lengths can make a person look awful if not the right cut, length and fit. I applaud that you make mention that the back pattern is different from the front which I rarely see. Please be proud of your pattern, making pants to fit exquisitely is hard and it looks as if you accomplished that. :)