Easy Paperbag Shorts Pattern Tutorial

Today, going to show you how to make paper bag shorts. These minimalist-style shorts can be used for either a classy or casual look. Let's get started!
Tools and materials:
- Paper
- Pen
- Ruler
- Scissors
- 1 meter of linen fabric
- Pins
- Iron
- Knitting needle or other long stick
- Sewing machine
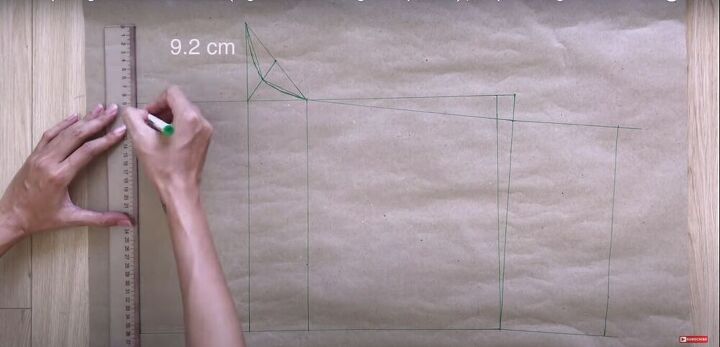
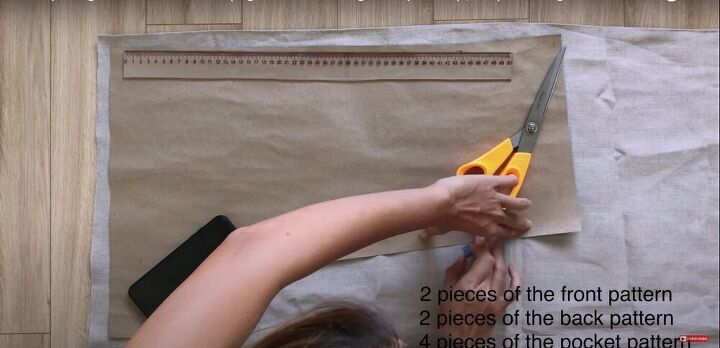
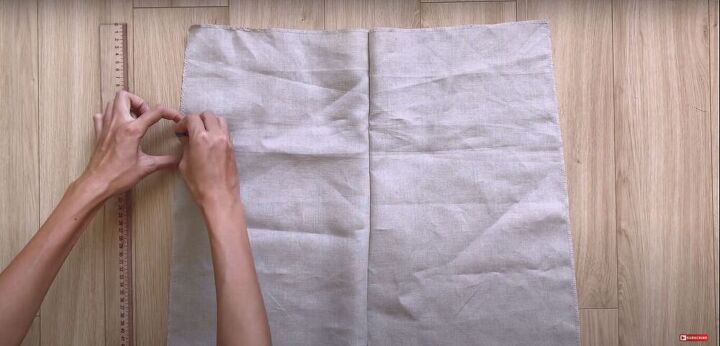
1. Draw and cut
To begin, follow the steps in the video from 2:30-6:50 to learn how to draw the front and back pattern pieces for the shorts. Once that is complete, cut out the pieces.
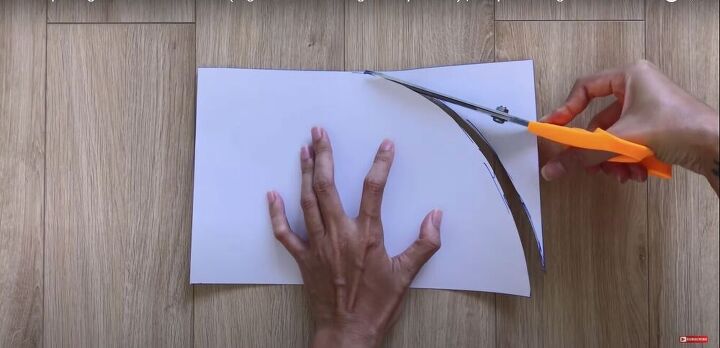
2. Cut out a pocket pattern
Cut a rectangle with the dimensions of 15 centimeters by 28 centimeters (6 inches by 11 inches).
Mark the middle of the top edge of the rectangle. Then, draw a curved line from the center of the top edge to the bottom-right corner. Cut along the curved line.
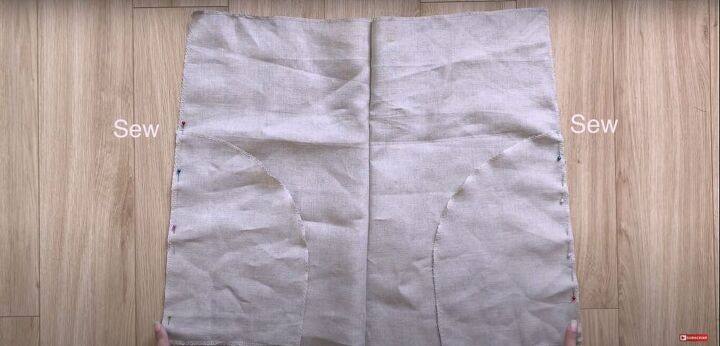
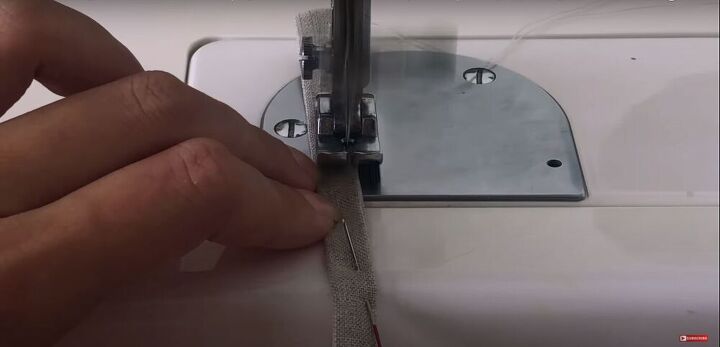
3. Overlock
Once everything is cut out, overlock all the raw edges with a zigzag stitch.
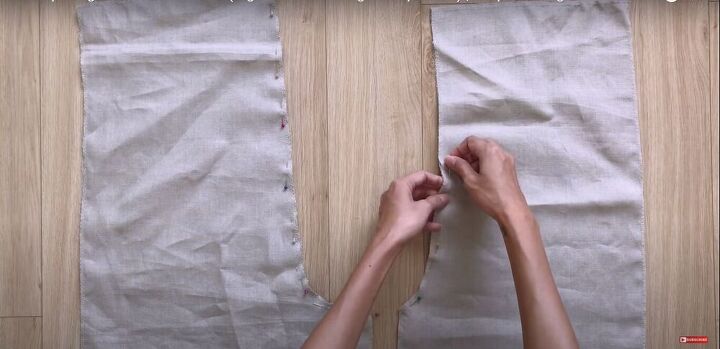
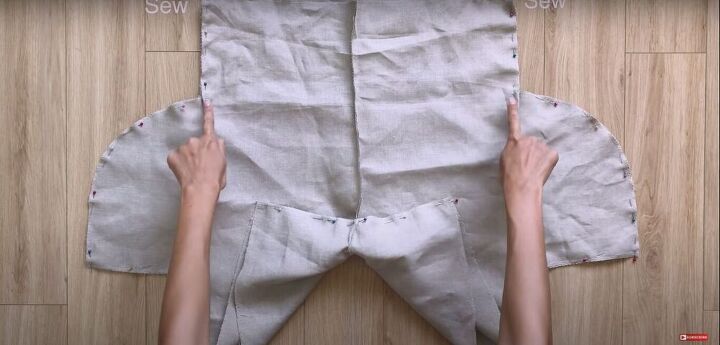
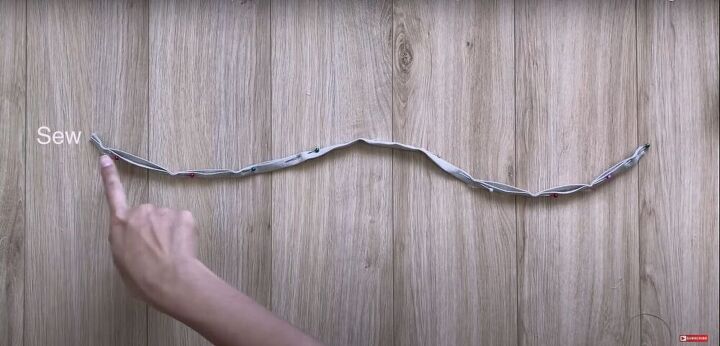
4. Pin and sew the front pieces and back pieces
Lay the two front pieces on top of each other, right sides facing, and pin them together along the crotch seam. Do the same for the two back pieces. Then sew down both seams.
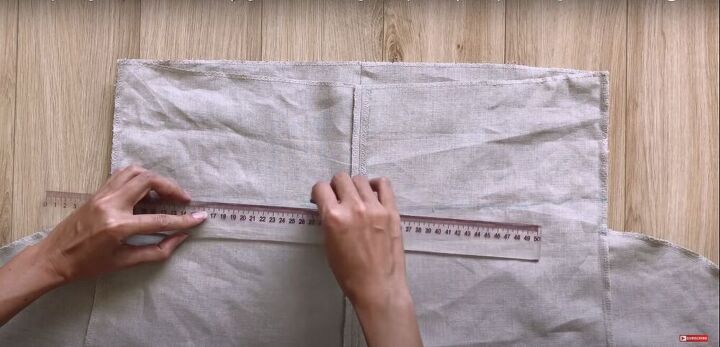
5. Measure and mark
Open the front and back pieces so the right side is facing up and the seam runs down the middle. On either side, measure 16 centimeters (6½ inches) down from the top edge and mark it.
Place the pocket pieces, right sides facing, at the point you marked, and pin the pocket pieces to the shorts. Then sew them in place.
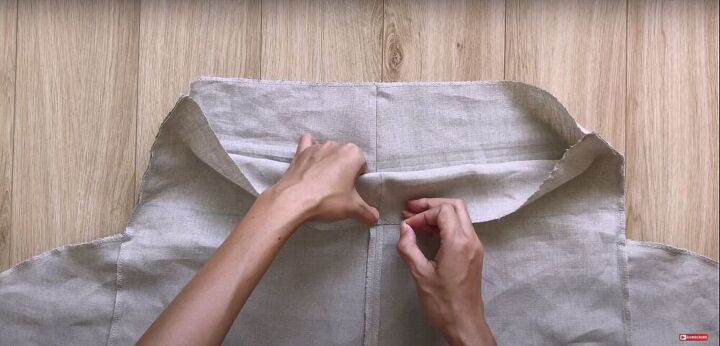
6. Pin and sew
Lay the front and back pieces one on top of the other, right sides facing. Pin them along the side seams, the curved edges and short edges of the pockets, and the inseam.
Make sure all seams are matched up, and the pockets are aligned properly. Then sew all the seams.
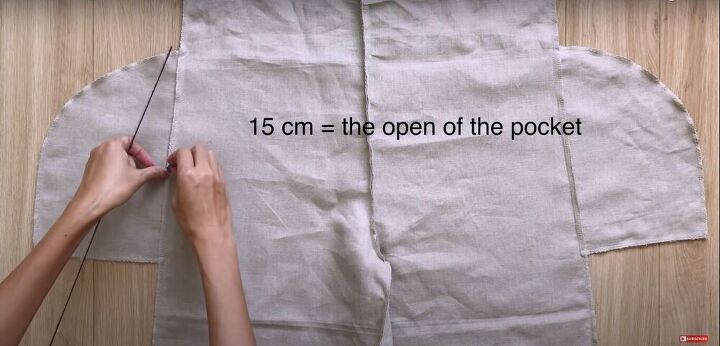
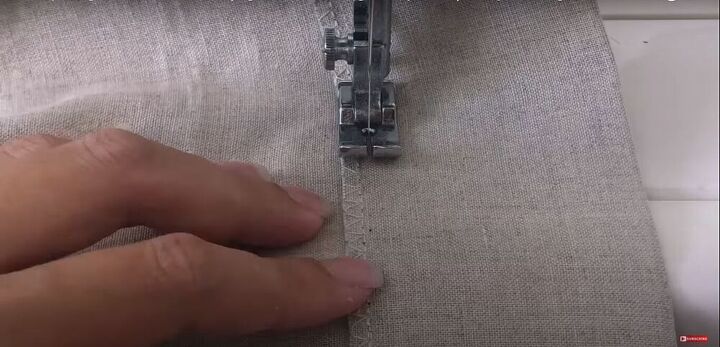
7. Sew the openings of the pockets
Mark 15 centimeters (6 inches) down from the top of the pocket, along the side seam. This will be the open part of the pocket. Sew down the rest of the seam.
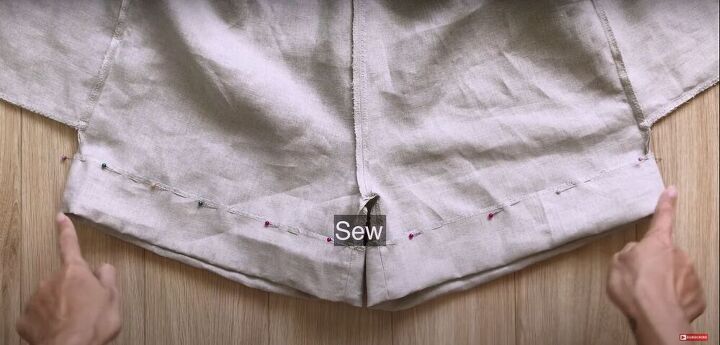
8. Sew the hem around the waistband
Mark a few points 13 centimeters (5 inches) down from the top edge of the shorts and connect them with a straight line.
Fold the top of the shorts down so the top edge meets the line you just drew. Pin it down, leaving an opening of a few inches.
Sew down the waistband, making sure to leave a few inches open so you can insert the elastic band.

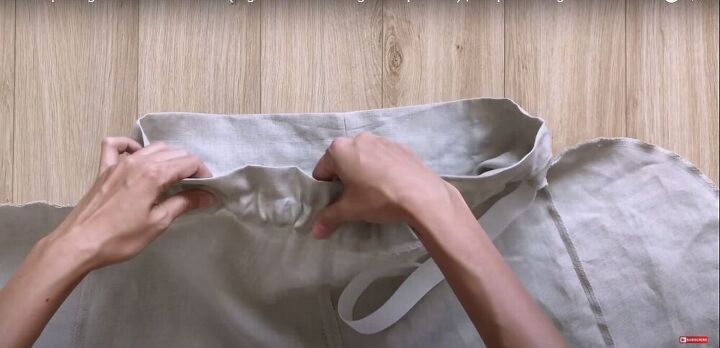
9. Mark and sew a tunnel for the elastic band
Use the elastic to measure how much space you need between the lines of stitching along the waistband.
Make a few marks of that measurement along the front and back of the waistband. Connect them with a straight line. Then sew along the line.
10. Insert the elastic
Attach a safety pin to one end of the elastic band and insert it into the gap you left in the stitching along the bottom edge of the waistband.
Guide the pin through the waistband, pulling the elastic along with it, until you can pull it back out through the gap in the stitching.
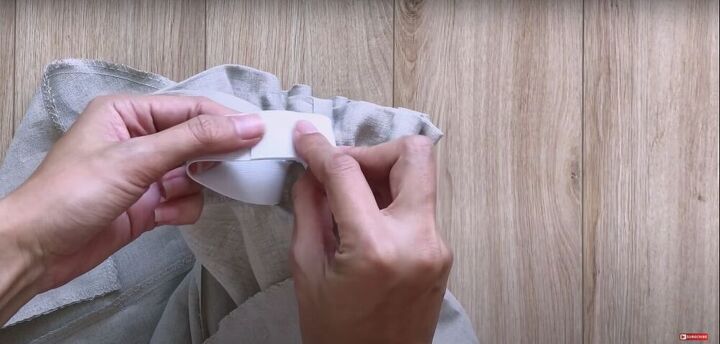
Once the elastic has been pulled all the way through the waistband, sew the ends of the elastic together. Then, sew closed the gap in the stitching.
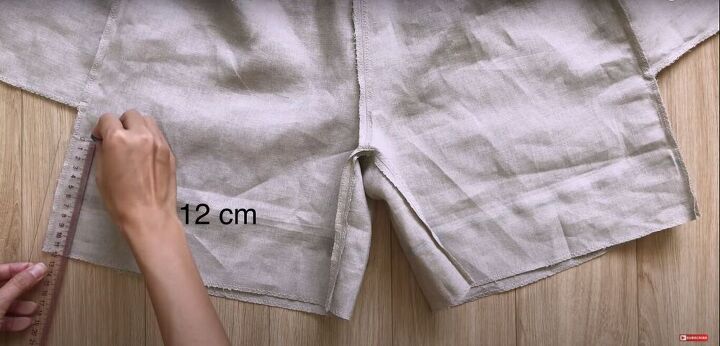
11. Hem the bottom of the shorts
Make a few marks 12 centimeters (4¾ inches) from the bottom edge of the shorts. Connect them with a straight line.
Fold the bottom edge of the shorts up until the edge meets the line you marked.
Pin down the edges and sew them down.
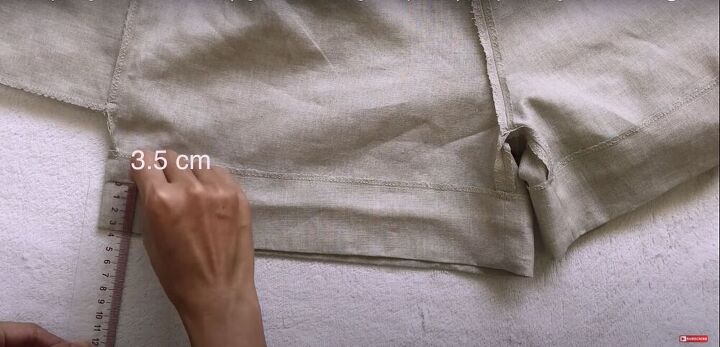
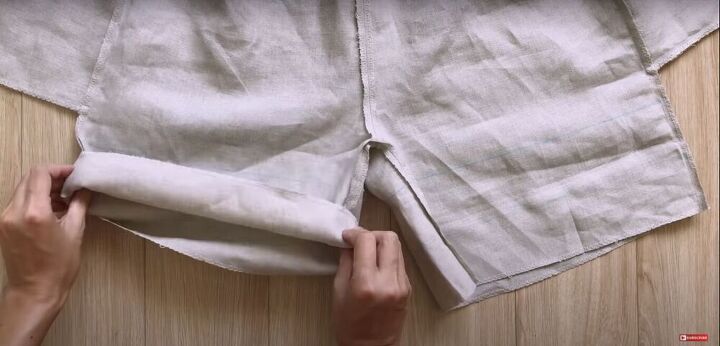
12. Make a cuff
Make a few marks along the hem of the shorts 3½ centimeters (1¾ inches) from the bottom edge.
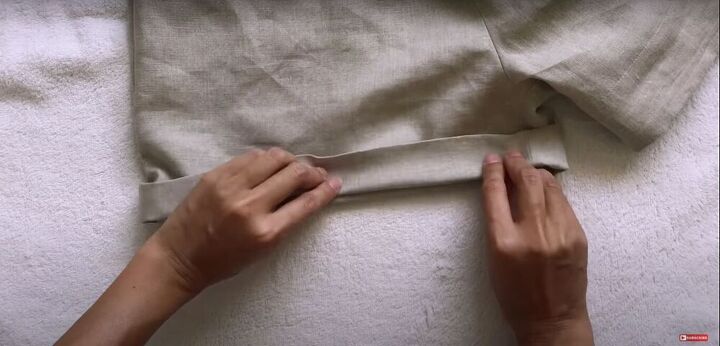
With the shorts right side out, fold the hem of the shorts upwards, so the line you marked is on the fold of the cuffs.
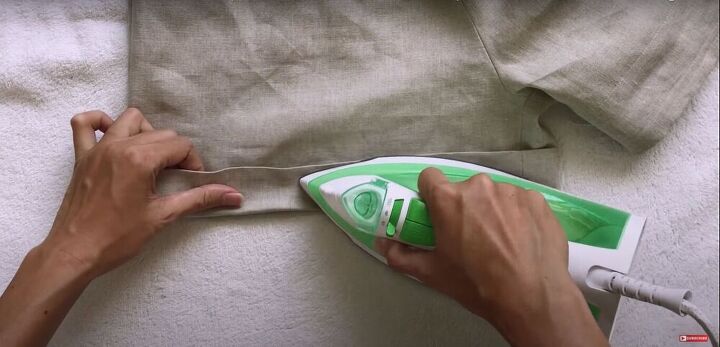
Then iron the cuffs, so they stay folded.
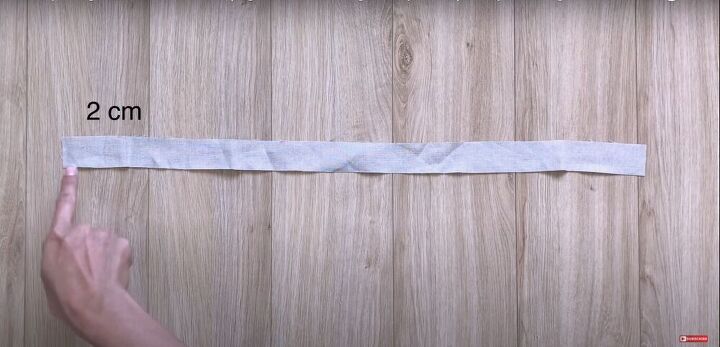
13. Make the belt loops
Cut a strip of fabric that is 30 centimeters (12 inches) long and 2 centimeters (¾ of an inch) wide.
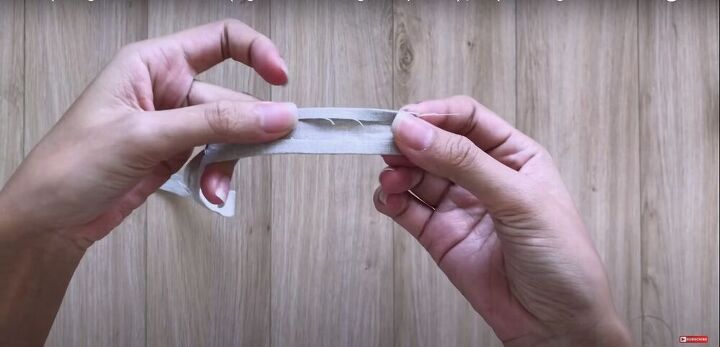
Fold the long edges of the strip inward and iron them down so they stay folded.
Then fold the strip in half lengthwise and pin the edges down.
Sew down the pinned edge of the strip.
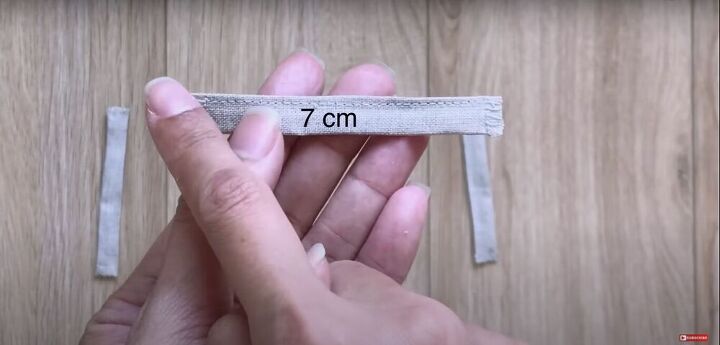
Cut the strip into smaller pieces, each about 7 centimeters (2¾ inches) in length. Overlock the cut edges of the smaller strips with a zigzag stitch.
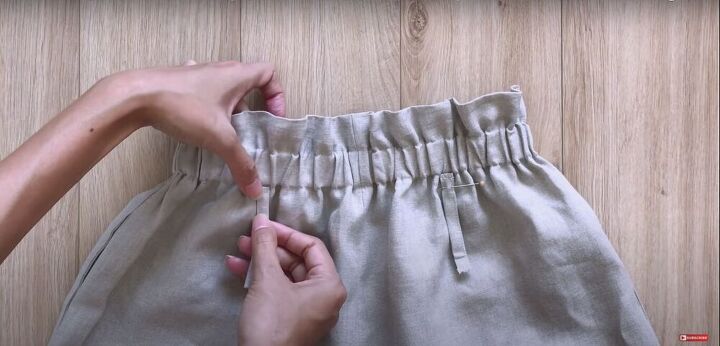
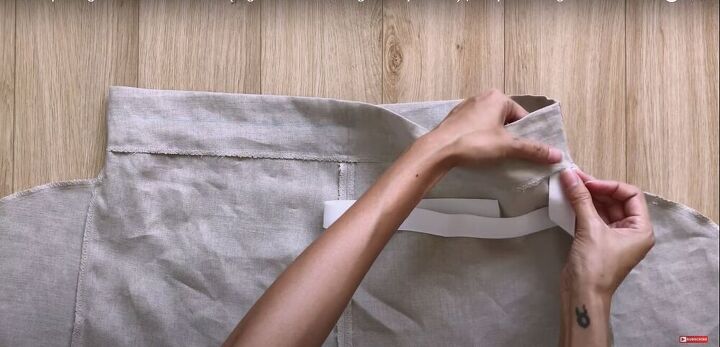
14. Attach the belt loops to the waistband
On the front of the shorts, attach two belt loops by aligning the edges of the belt loops with the bottom edge of the waistband. Then, pin and sew them down.
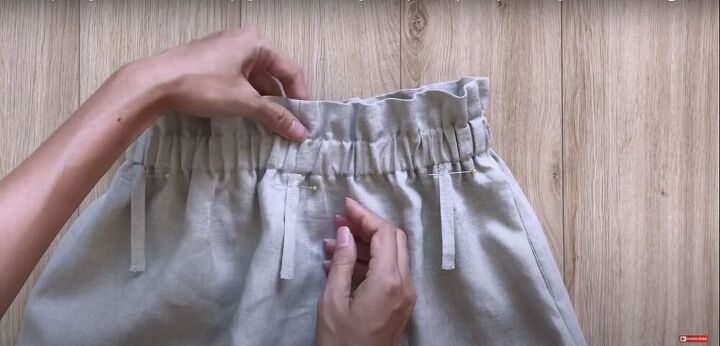
On the back of the shorts, attach three belt loops in the same manner.
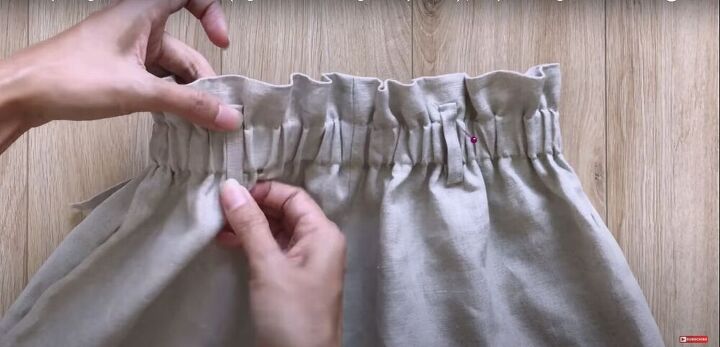
To attach the belt loops to the top of the waistband, fold the end of the belt loop inward before pinning and sewing it to the waistband.
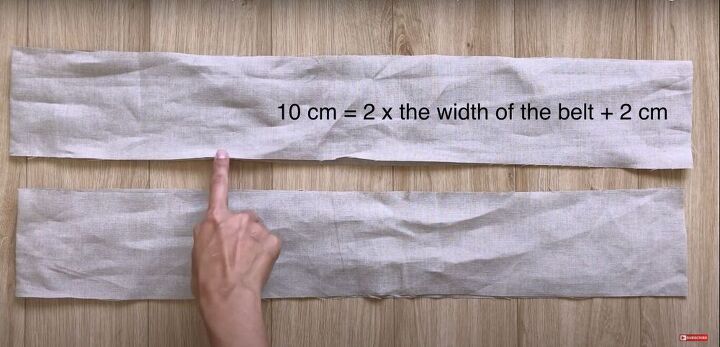
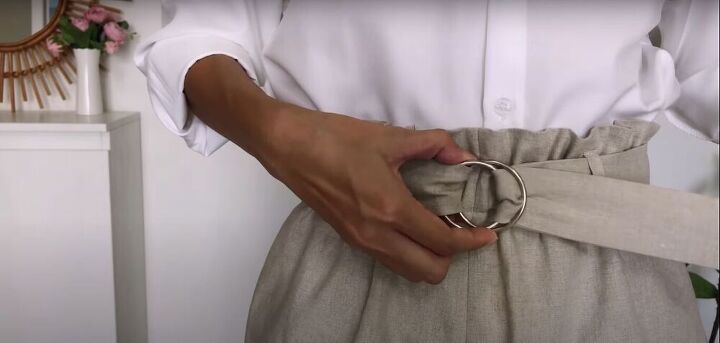
15. Make the belt
To make the belt, cut two strips of fabric, each one 10 centimeters (4 inches) in width, and about 70 centimeters (27½ inches) in length.
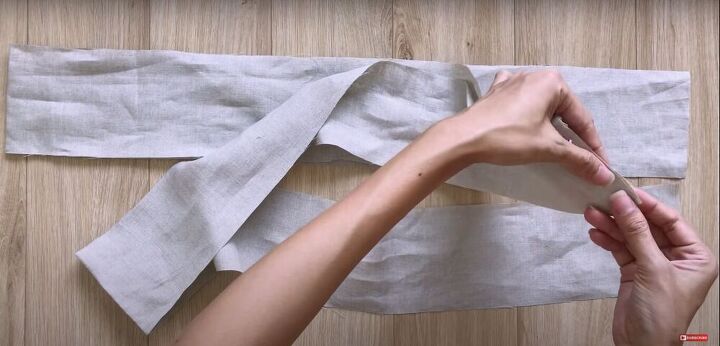
Connect the two strips along one short edge.

Fold this long strip of fabric in half lengthwise. Pin it all along the raw edges. Make sure to pin the ends closed, as well.
Sew down the pinned edges but leave a gap of a few inches unstitched in the center of the belt.
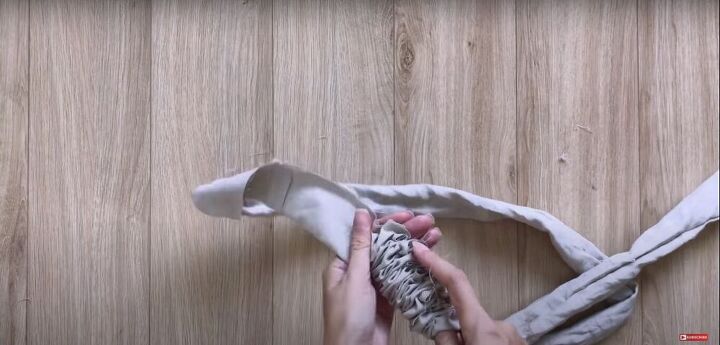
16. Turn the belt right side out
Insert a long stick into the fabric on one end of the belt. Then bunch the fabric up along the stick until the fabric on the end of the stick emerges from the gap left in the stitching.
Pull the fabric through the gap so the fabric is now right side out and the seam is hidden inside. Repeat from the other end of the belt.
Once the belt is completely right side out, sew the gap in the stitching closed.
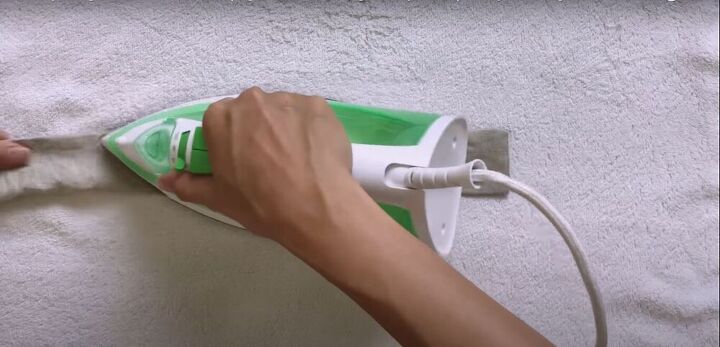
17. Iron the belt
Iron the belt so it lays flat.

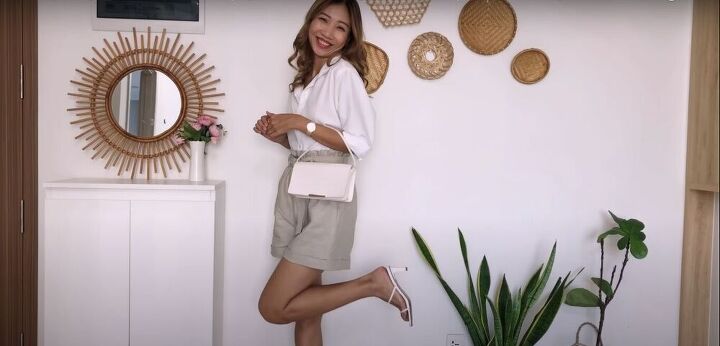
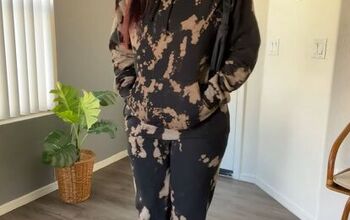
Paperbag shorts pattern: Completed shorts
You now have a beautiful new pair of paperbag shorts!
They are a perfect piece to use in both classy and casual outfits.
How did you find this paperbag shorts pattern? Let me know in the comments below!
The author may collect a small share of sales from the links on this page.
![Swing Dress Pattern & Tutorial [Easy & Free!]](https://cdn-fastly.upstyledaily.com/media/2020/12/20/6348151/swing-dress-pattern-tutorial-easy-free.jpg?size=350x220)


Comments
Join the conversation
They are attractive. Now we need some patience to get it done.
I wished i had understood you, as the shorts are nice.