How to Quickly & Easily Sew a Shirred Top in 3 Simple Steps

Shirred waistlines are not only flattering and figure-enhancing, but their elasticity makes them super comfortable too. Have you ever wanted to know how to sew a shirred top?
This quick and simple DIY tutorial is going to show you how to revamp a baggy top by turning it into a cute shirred top in just three simple steps. It is so straightforward, you really can't go wrong. Let's get started!
Tools and materials:
- Black baggy top
- Chalk
- Ruler
- Sewing machine
- Elastic thread
- Scissors
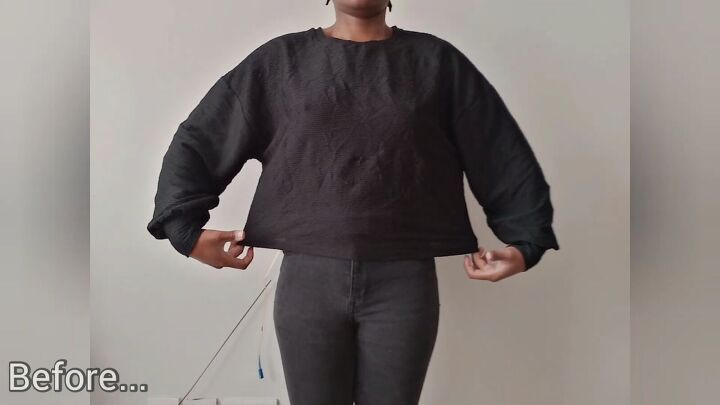
This is the top I decided to upcycle by adding a bit of shirring at the bottom. As you can see, it's quite baggy and doesn't create a particularly flattering silhouette. By taking in the bottom and making it more fitted, I know I'll wear this sweater a lot more.
1. Mark the top
First, measure 4 inches (10cm) up from the bottom of your top and then make markings at 0.5-inch (1cm) intervals going upwards. You will have a total of eight marks. Repeat this several times along the bottom of the top on both the front and the back.
2. Connect the marks
Once done, take a ruler and connect all of your markings horizontally to form lines. These will be used as guides for the shirring.
3. Sew with elastic thread
The next and final step is to sew over all the lines with elastic thread. Ensure that the lines are straight for a flawless finish.
How to sew a shirred top tutorial
Here we have our finished look! Whereas the top was baggy before, it now cinches in at the waist and helps to define my figure. I hope you enjoyed this DIY shirred top tutorial and you’ll give it a go yourself. I'm really pleased with how it turned out.
Let me know what you think of this tutorial and the final result in the comment section below. Happy sewing!
Enjoyed the project?
Suggested materials:
- Black baggy top
- Chalk
- Ruler
- Sewing machine
- Elastic thread
- Scissors
The author may collect a small share of sales from the links on this page.


Comments
Join the conversation