Crop a Hoodie & Add Ruched Sleeve

Sweatshirt Refashion: How to Quickly Crop a Hoodie & Add Ruched Sleeves
October 28, 2021 15 min Read
I love refashioning clothing. Giving a thrift store garment new life is so rewarding! Plus, it’s faster (and cheaper) than making the item from scratch.
Now that fall is in the air – it’s sweater weather! So, it’s the perfect time for a fun sweater refashion. Hoodies are one of the most common and inexpensive items found at most thrift stores, which makes them perfect for a refashion project!
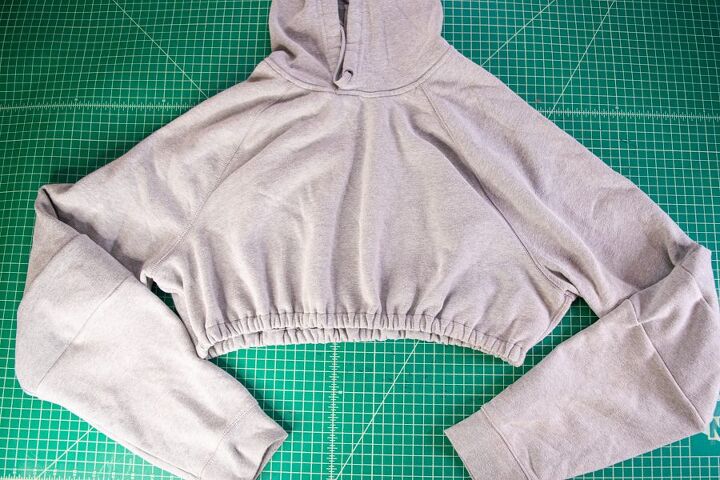
I picked up this gray hoodie from my local thrift shop because I love a good neutral gray hoodie! Also, because it was oversized, I had more fabric to work with for my refashion.
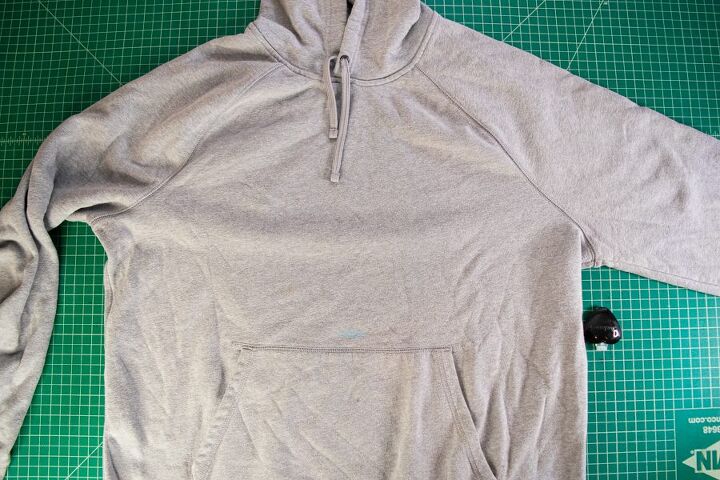
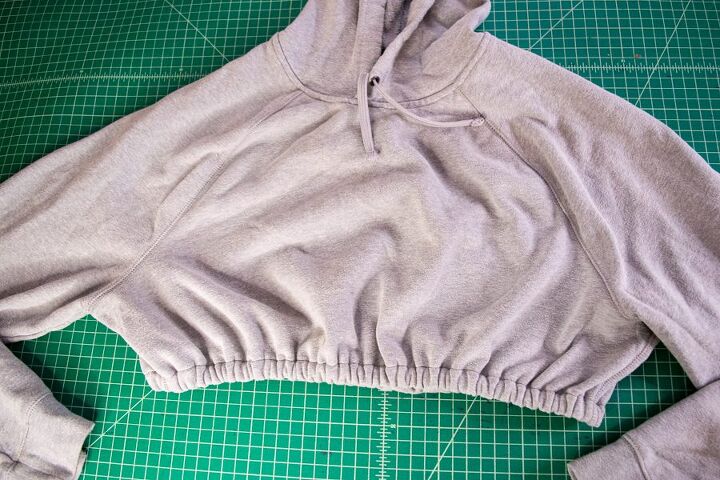
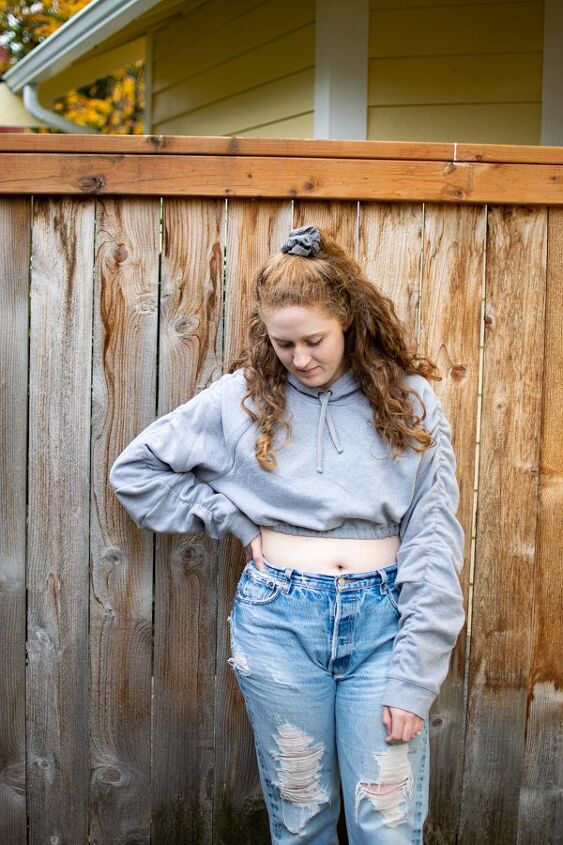
I decided I wanted to make a cropped hoodie – because I love wearing them with high waisted jeans – but I wanted it to have a twist! So, today we’re making a cropped hoodie with an elastic waist and ruched sleeves. It sounds like a lot of details in one hoodie, but I’m so happy with how it turned out!
If you want to recreate this hoodie for yourself, read on for the full tutorial!
What you need
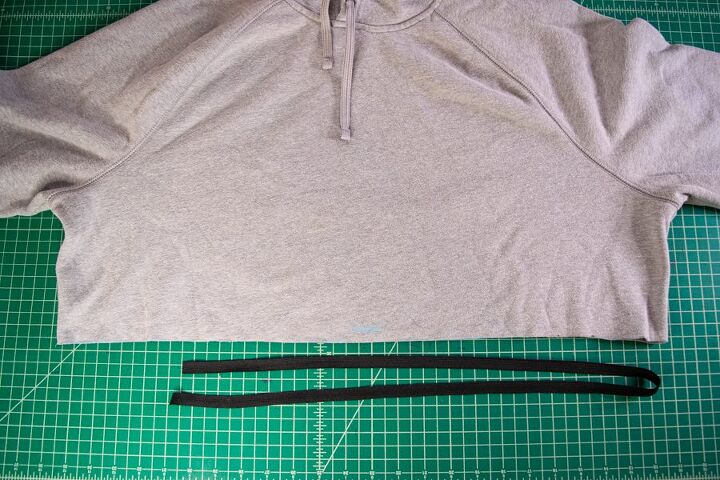
- Oversized hoodie to refashion
- ½ inch elastic (1 yard)
- ¼ inch elastic (2-3 yards)
- Fabric chalk or marker
- Ruler
- Scissors or rotary cutter
- Thread
- Iron
- Sewing machine
TIP: Elastic is often sold in “hanks” at fabric and hobby stores. It may be less expensive to buy hanks instead of having a salesperson cut yardage for you. Make sure you buy enough to complete the project.
Step One: Crop the Hoodie
Try on your hoodie and mark where you want it to be cropped, then bring it to your sewing table.
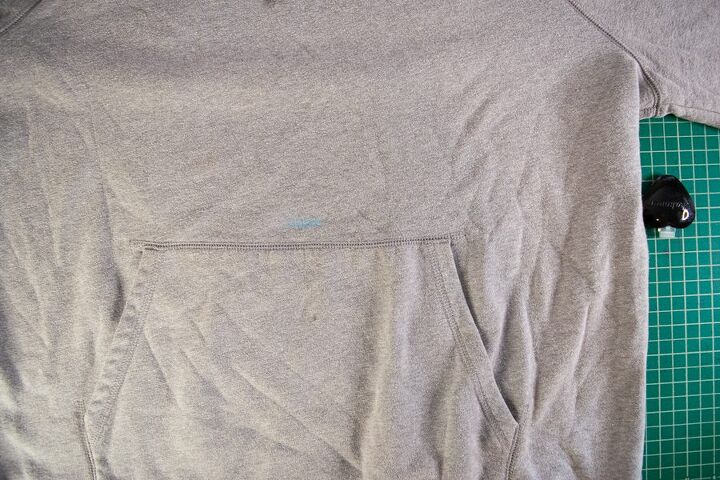
Next, carefully lay out the hoodie so that the side seams and bottom edges of the hoodie are matched up. This is important so that when you cut across the hoodie it will be straight on both the front and back.
Then draw a straight line about 1 inch below your mark (for seam allowance) from side seam to side seam with your ruler. You may need to seam rip off the top edge of the pocket to do this, depending on how cropped you want your sweater to be.
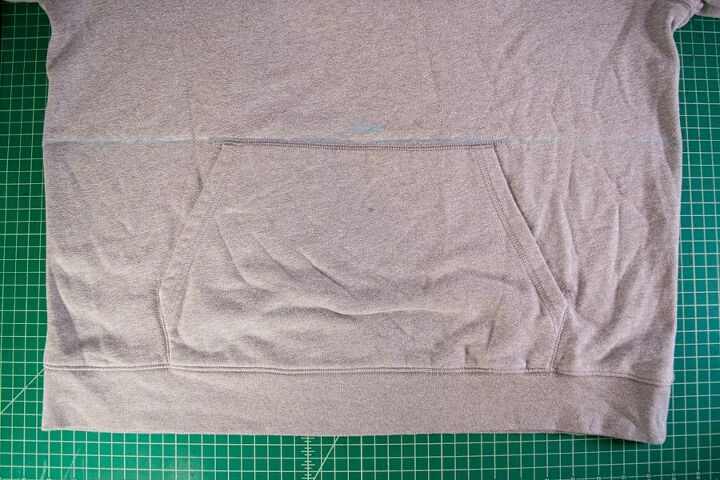
Once you’re confident you’ve got a nice straight line – go ahead and cut along your line, cutting through both layers. There’s no going back now, so hopefully you cropped it to the right length!
Step Two: Hem and Add Elastic
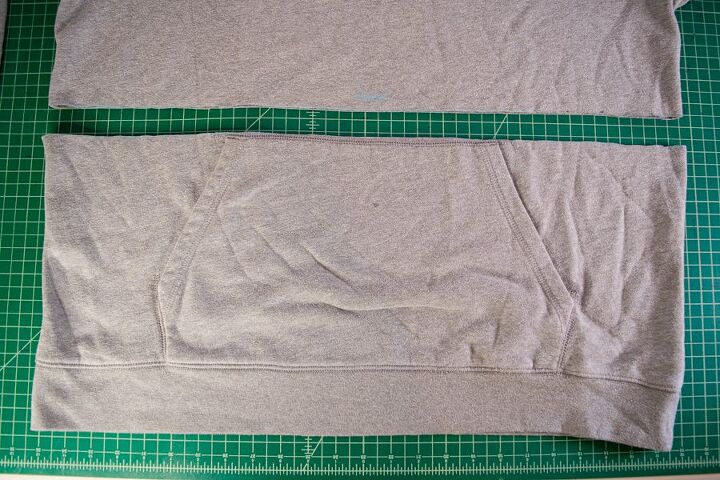
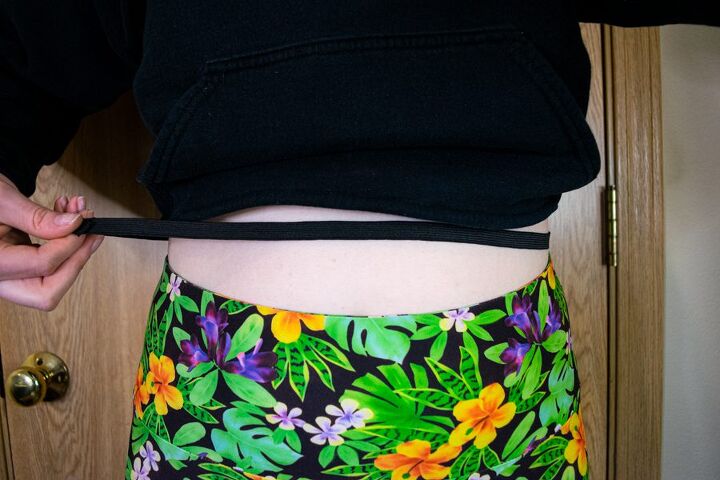
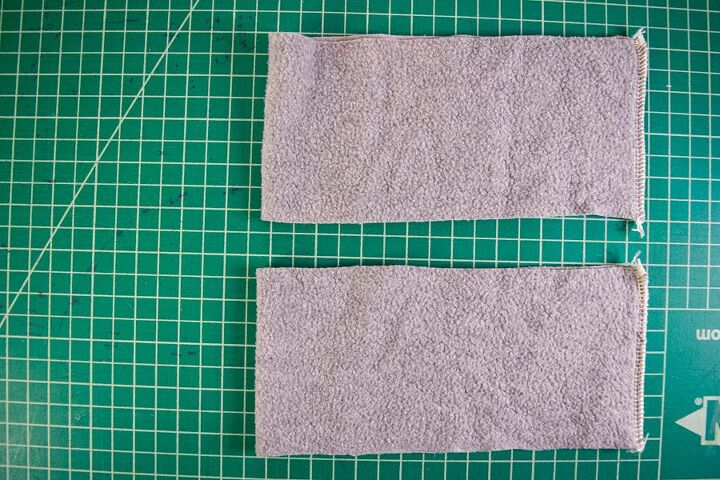
The removed bottom part of the hoodie can be set aside for later – we’ll use it in the ruched sleeves! Next, we need to cut some elastic for the elastic waist detail. To choose the length of elastic, simply hold your ½ inch elastic around your waist and cut it to the length you find comfortable.
For mine, I wanted the elastic waist to be comfortably loose, so I cut it with a couple inches of ease left in it – meaning there were a couple inches of extra elastic around my waist.
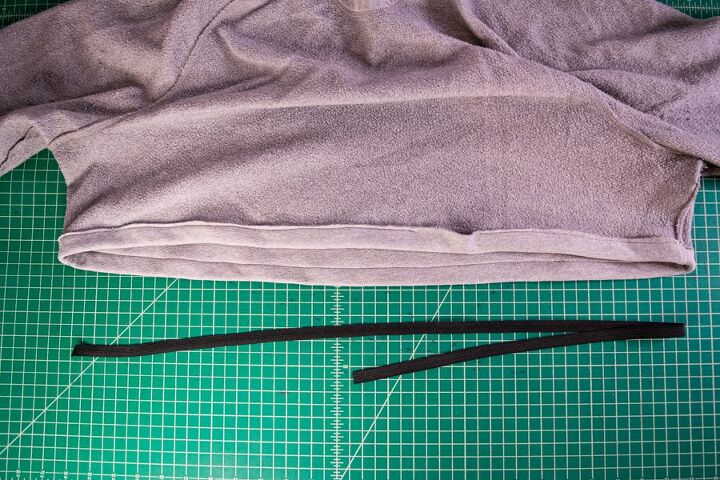
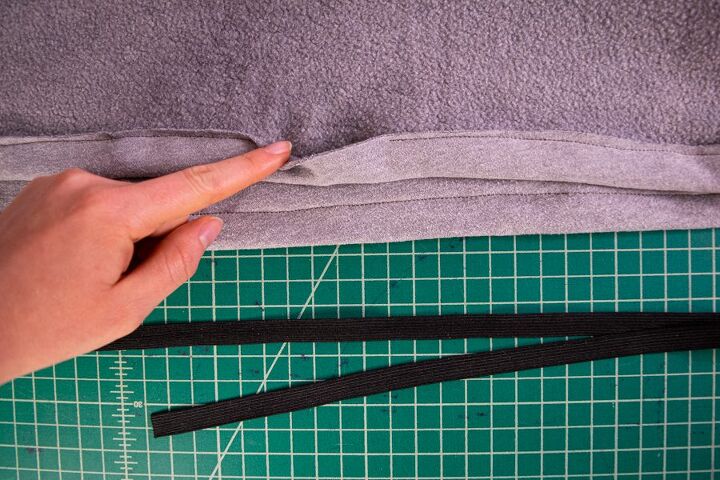
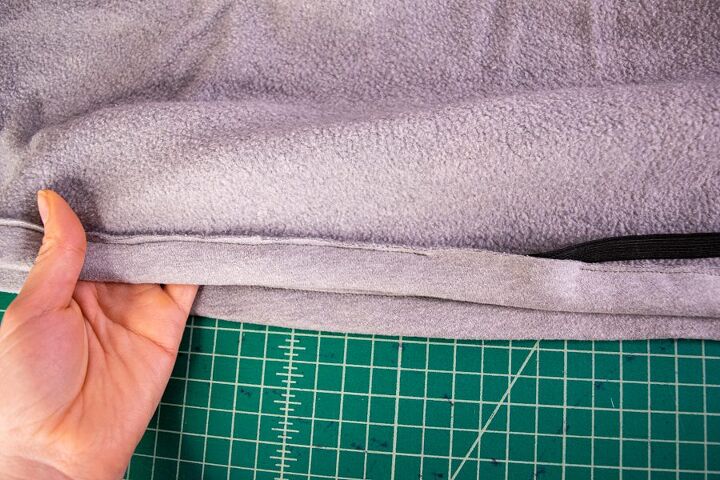
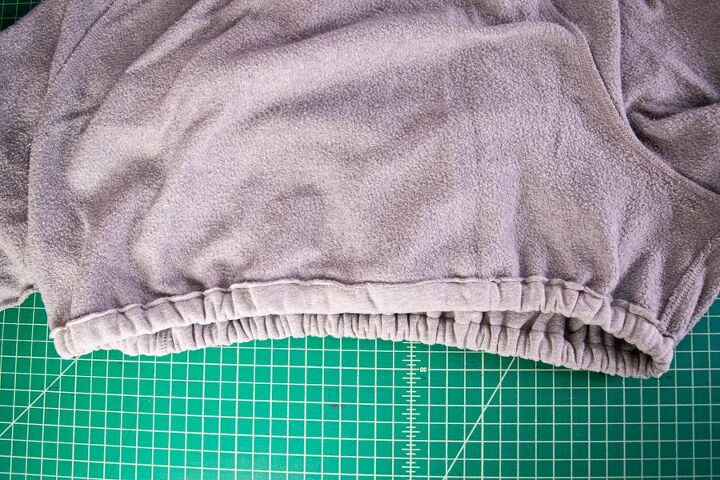
With the elastic cut, we can start hemming! Fold the bottom edge of the hoodie to the inside by 1 inch, iron it flat and pin it in place.
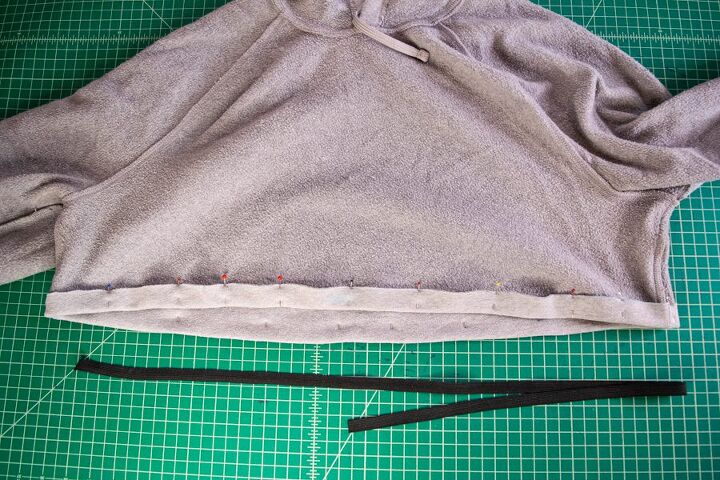
Next, sew your hem ¾ inch away from the folded edge. Sew almost all the way around – you’ll need to leave a 1.5 – 2 inch opening to insert your elastic. I prefer to leave the opening in the back, but it doesn’t really matter where on the hoodie the opening is.
You can use a straight stitch here because the fabric won’t have to stretch – the elastic will be doing that work!
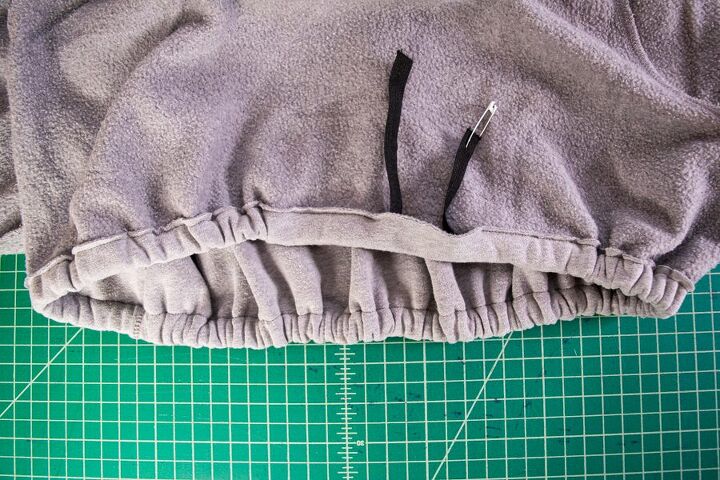
Now let’s insert the elastic! First, put a safety pin through one end of your elastic – this will give you something to hold onto as you thread your elastic through the waist.
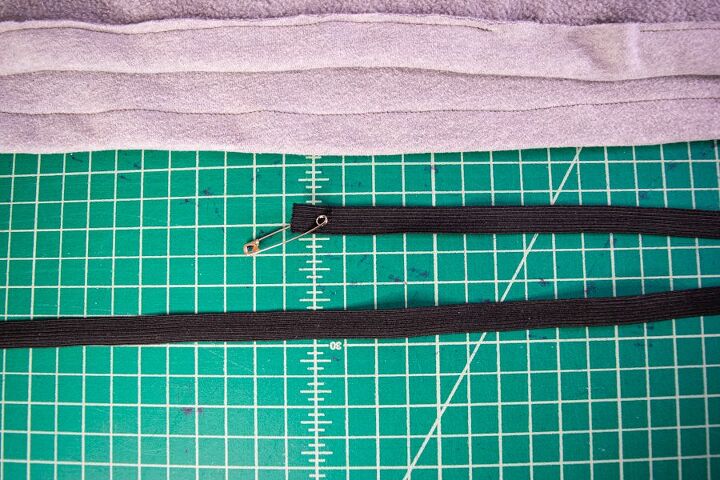
With the safety pin end first, start threading the elastic into to waist opening – it doesn’t matter which direction you thread it, just choose one and go! To pull the elastic further through the waist hem – push the safety pin further into the hem, scrunching the fabric around it, then pull the scrunches out over the elastic.
Continue this pattern to thread the elastic all the way through the waist – just make sure that you don’t let the tail end of the elastic disappear into the opening! You should have both ends of elastic sticking out of the opening at this point.
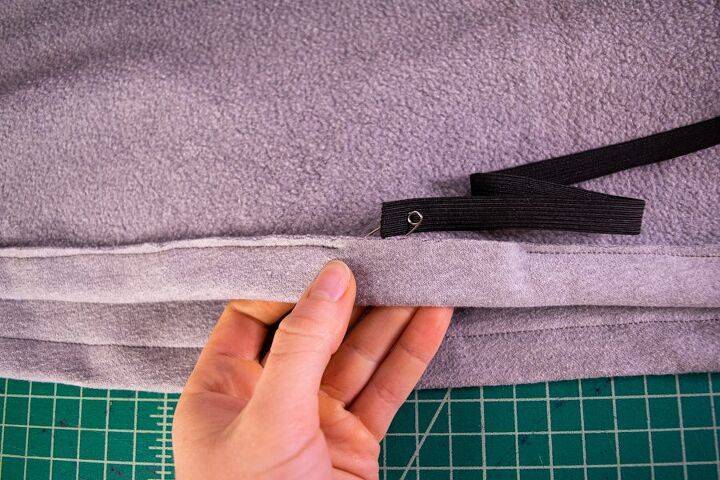
Take the safety pin off the end of the elastic, overlap the ends of the elastic by about ½ inch – making sure there are no twists in the elastic – and pin it in place.
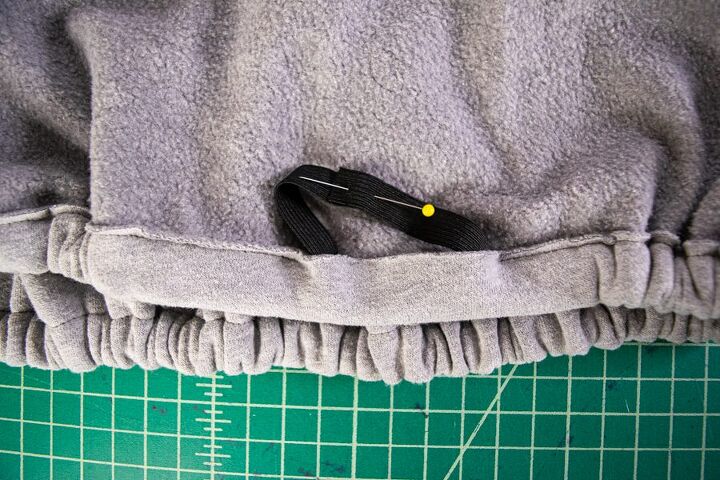
Next, sew the overlapped ends of the elastic together using a couple passes of a zigzag stitch.
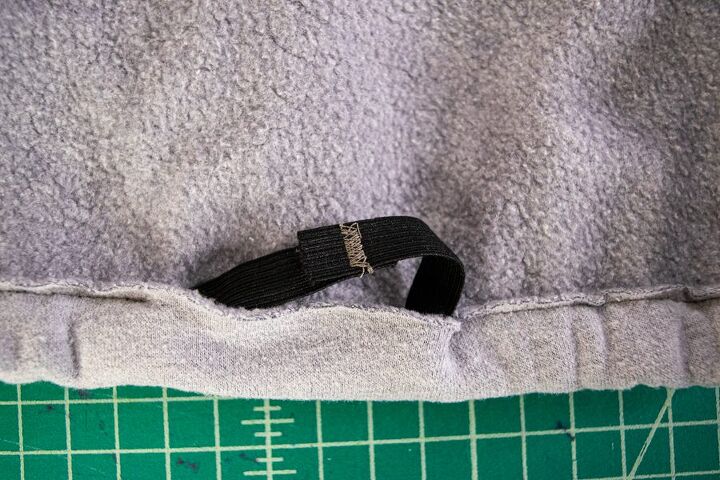
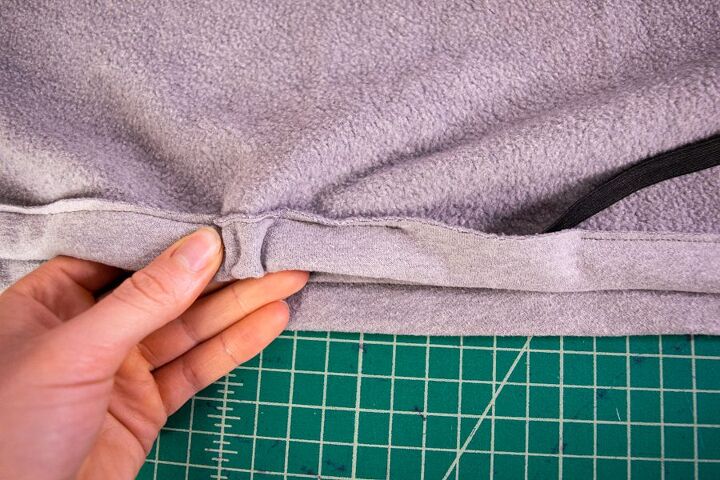
Now our hem is almost done! Stretch the elastic hem of the hoodie out a few times to even out the gathers around the hem, then close the opening in the hem with a straight stitch so that the elastic is fully encased.
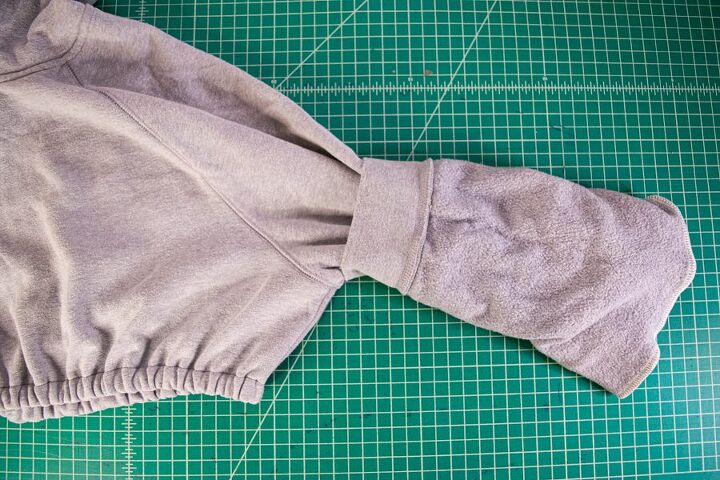
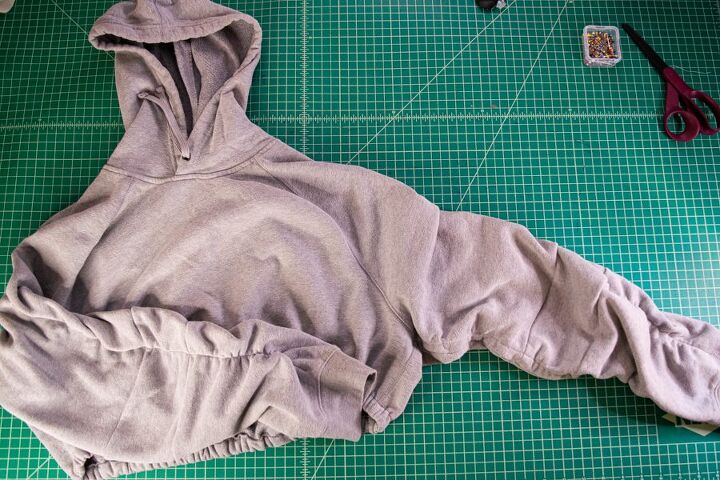
And the hem is done! You can stop here if you don’t want the ruched sleeves on your hoodie – but if you do, read on! We’re tackling the sleeves next.
Step Three: Add Length to the Sleeves
We’re going to need to add some extra length to the sleeves so that there is enough fabric to create a nice ruching effect. If your hoodie is super oversized, or if you just want a very subtle ruching, you can skip adding extra fabric and just move on to sewing in the sleeve elastic.
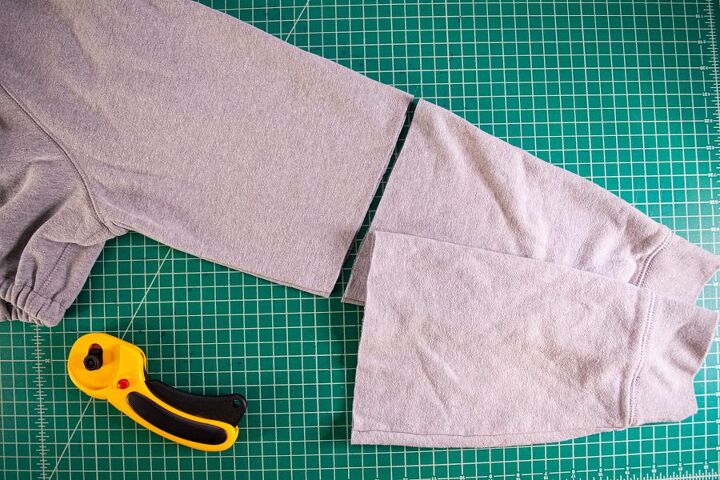
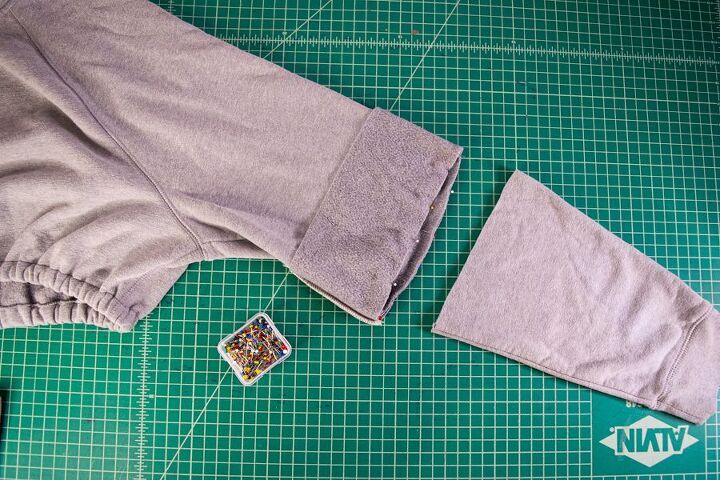
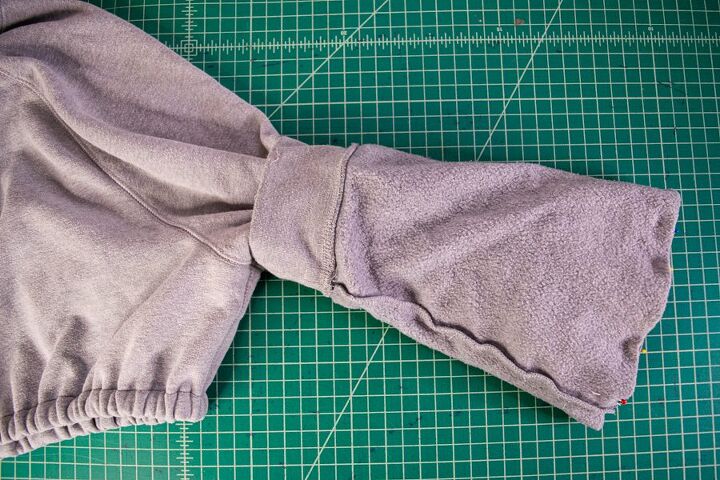
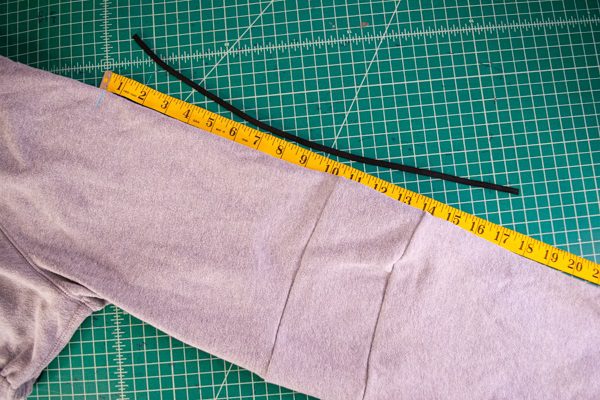
First, flatten out one of the sleeves – make sure that the underarm seam is lined up evenly along the lower edge of the sleeve. Then draw a straight line across the sleeve, somewhere near the bicep area.

Cut along this line to separate the sleeve into two pieces.
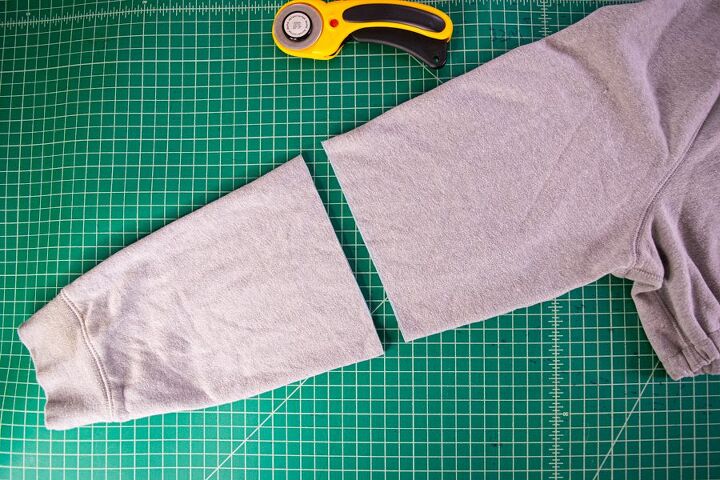
Next, flatten out the other sleeve the same way. Line up the bottom part of the already-cut sleeve on top of the uncut sleeve.
Cut the other sleeve to match, using the lower part of the first sleeve as a guide.
Next, measure the distance across the cut edge of the sleeves – they should both be the same, so you’ll only have to measure one.
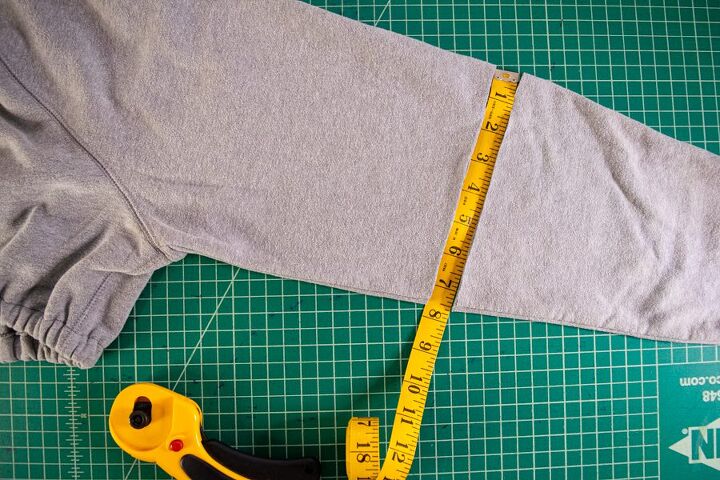
Now let’s do a quick calculation to figure out how long of a strip of fabric we’ll need to add a piece into the sleeve. Because there are two layers to the sleeve, you’ll need to double your original measurement, then add ½ inch for seam allowance.
For example, mine measured 7.5 inches – so I needed to cut pieces of fabric that were 7.5 + 7.5 + 0.5 inches long, or 15.5 inches.
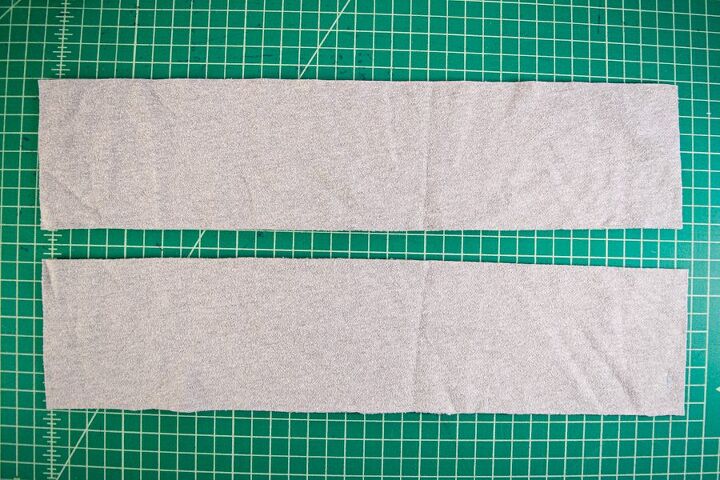
You’ll also need to decide how many inches of length you want to add to your sleeves. I decided to add 3.5 inches of length to mine, but with seam allowances I will need to cut my pieces 4 inches wide. You will also be limited by how much fabric you have left from the bottom part of the hoodie – so remember to take that into account.
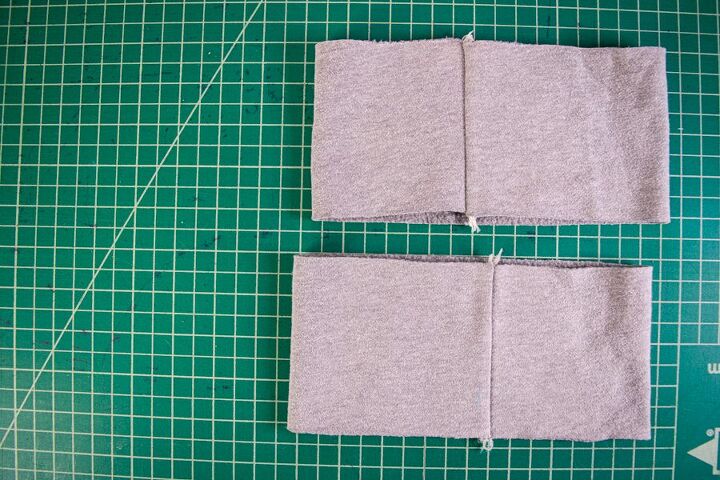
Cut 2 rectangles from the extra fabric that are the length you want to add to the sleeves by the length you calculated above. So, I cut 2 rectangles that were 15.5 inches x 4 inches.
Next, fold each one in half with right sides together, matching up the short ends. Pin in place.
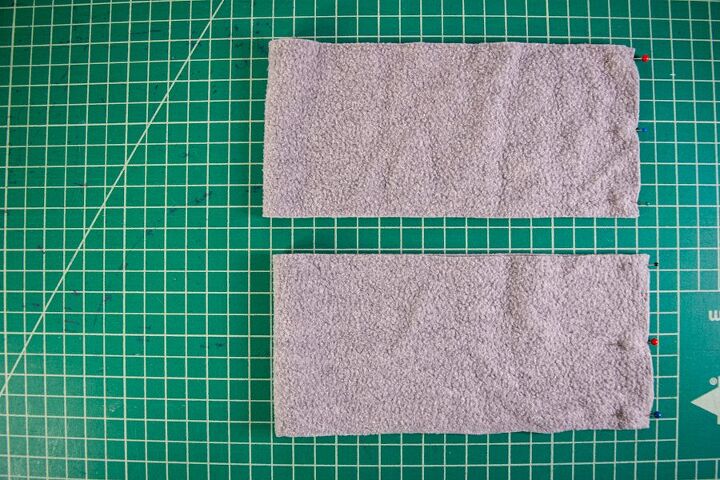
Then sew the short ends together with a ¼ inch seam allowance using either your serger or a zigzag stitch on your sewing machine.
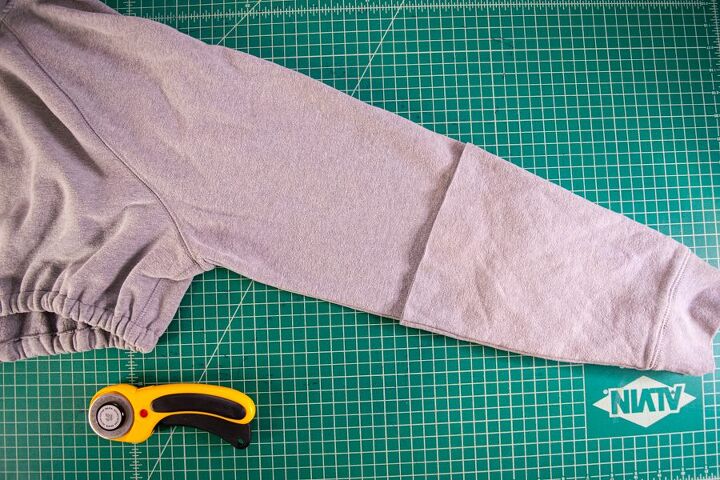
Turn your new fabric loops right sides out and press the seam allowances to one side.
Next, let’s put our sleeves back together! Pin one of your fabric loops to the upper part of one of the sleeves with right sides together, matching the cut edges. You’ll also want to make sure the seam on the loop lines up with the underarm seam of the sleeve.
Sew with a ¼ inch seam allowance, then press the fabric loop down away from the top of the sleeve.

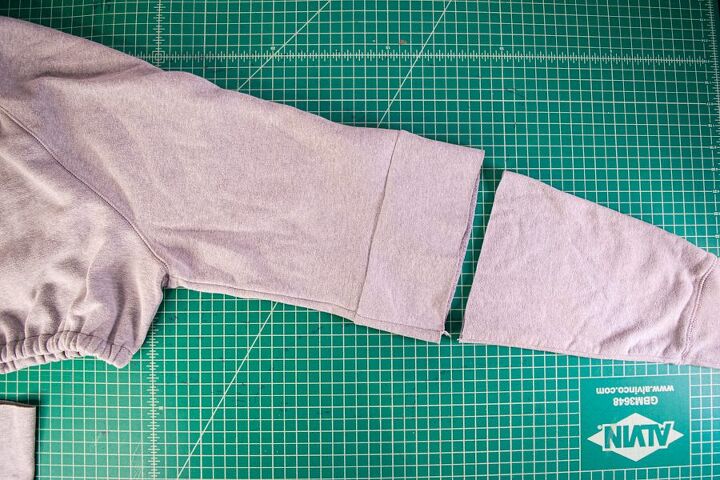
Next, line up the cut edge of the bottom of the sleeve with the cut edge of the newly attached fabric loop with right sides together and pin. You’ll need to push the sleeve through the cuff to achieve this.
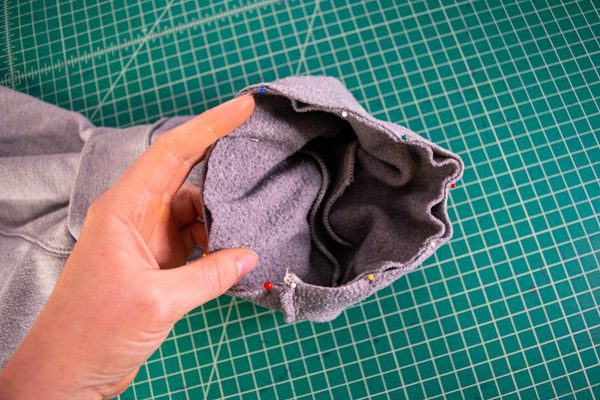
Sew this together with a ¼ inch seam allowance. Then you can pull the bottom edge of the sleeve back down, give it all a nice press, and you have one long sleeve!
Repeat this process with the other sleeve.
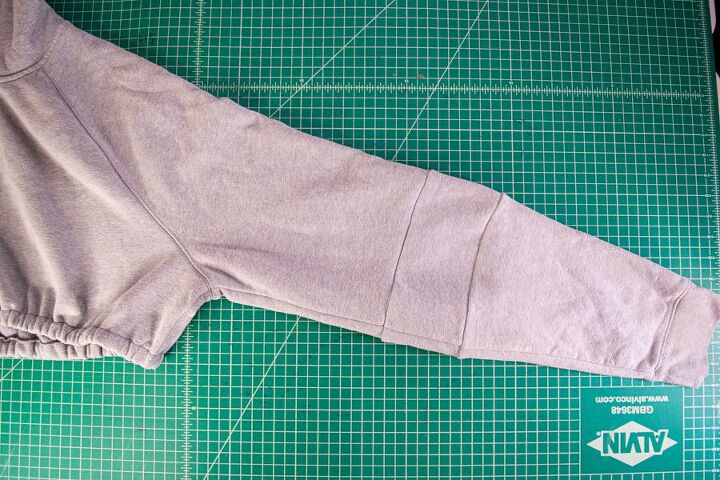
Step Four: Add Elastic to Create Ruched Sleeves
Now this hoodie is looking weird with super long sleeves! It’s time to add in the ruching!
Cut two pieces of elastic that match the length of your arm from the top of your shoulder to your wrist. This is the length you want the elastic to “pull” the sleeve to so it will create a ruched effect and make the sleeves the right length.
Just a note here – in mine, I originally wanted to have the ruching only from my upper bicep to wrist (rather than starting at the shoulder), but I decided later that I liked it better starting higher at the shoulder. Because of that I have two pieces of elastic sewn in – I sewed the longer piece first, then added a smaller piece of elastic at the shoulder.
However, I would recommend doing it all in one piece and cutting your elastic to the length from your shoulder to wrist!
Next, turn your hoodie inside out. Then pin one end of one of your elastic pieces to the top of the shoulder of your hoodie. Pin the other end at the wrist, also on the top side of the sleeve.
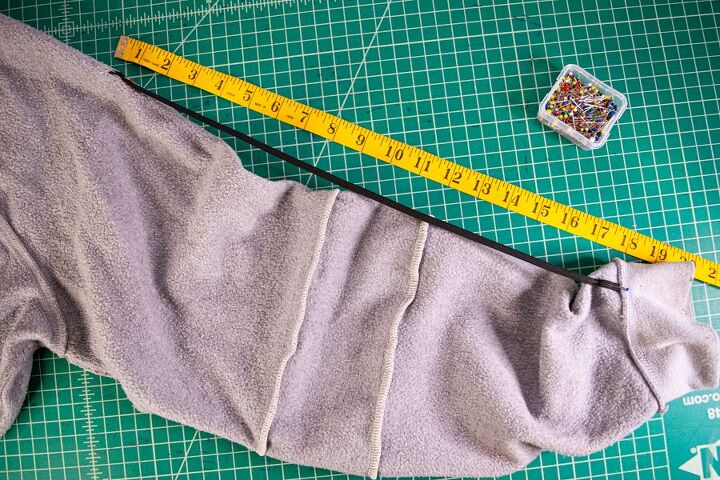
Find the center of the sleeve in between the pins – then pin the center of the elastic to this point. This will help you keep the stretch of the elastic even.
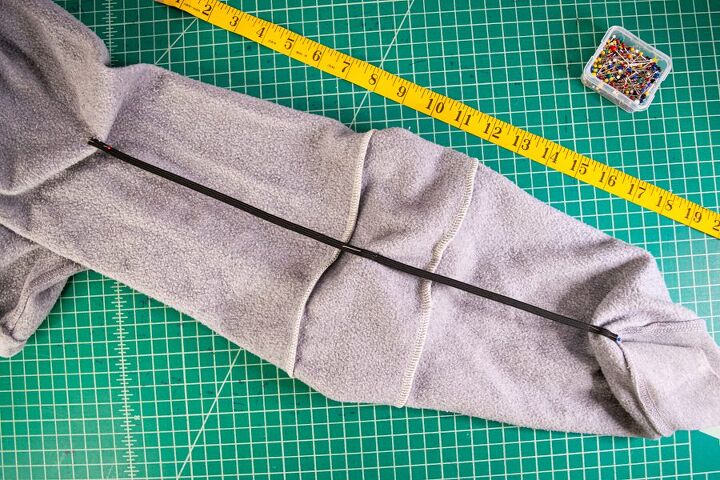
Now it’s time to sew the elastic in! Simply sew the elastic to the sleeve with a straight stitch, stretching the elastic evenly between the pins as you sew. This is challenging to sew, especially as you get closer to the wrist where the sleeve is narrower – because you will have to sew inside of the tube of the sleeve.
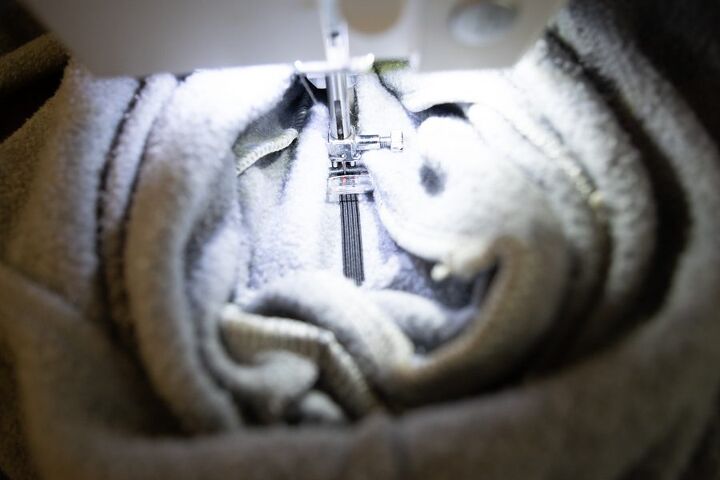
It’s definitely doable, just challenging! Take it slow and you’ll get it! Just keep in mind that you want to always make sure that, there is only one layer of fabric under your presser foot – you don’t want to catch other areas of the sleeve in your stitching.

Next, repeat this process for the other sleeve. Then cut 2 more pieces of elastic that are the length from your armpit to your wrist along the bottom of your arm.
Attach these two pieces of elastic to the underarm of both sleeves of the hoodie using the same technique described above. I sewed mine about an inch in front of the underarm seam.

And that’s it! This is a super fun project that you can complete in 2 hours or less! I hope you enjoyed it and want to incorporate at least one of the aspects of the project – whether it be the elastic waist, the ruched sleeves, or both!

If you have a comment or question, please leave it below. I’d love to hear from you!

The author may collect a small share of sales from the links on this page.


Comments
Join the conversation
Super cute and impressive 💖 👏👏👏