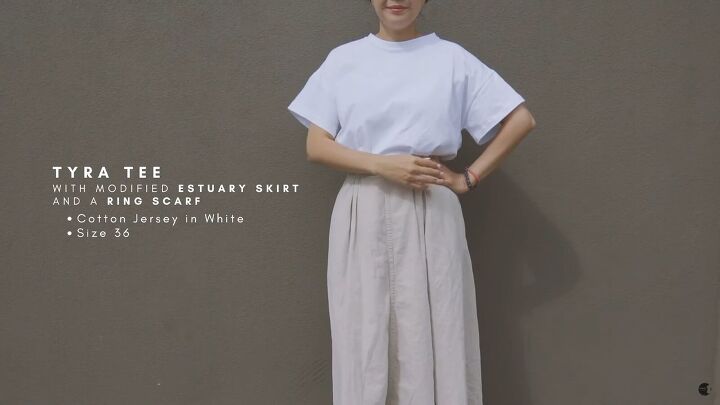
How to Sew a T-shirt: A Detailed Look at Finishing a T-Shirt Neckline

I love an intentionally oversized t-shirt but sewing necklines on t-shirts can be tricky, as they pucker up or lay weirdly. It’s important to get them looking right because they are right by your face!
Here, in this t-shirt sewing tutorial, I’ll show you how to sew the t-shirt and the neckline so it always looks perfect, even if it’s a stretchy fabric like knit or jersey.
You can use these techniques for various necklines and cuffs for different looks and with different fabrics. Let’s get started on how to sew a t-shirt!
Tools and materials:
- Tyra Tee T-shirt sewing pattern from Just Patterns
- Fabric - 2-3 yards
- Sewing machine
- Walking presser foot
- Sewing machine needles: ball point, jersey/stretch, twin/double needle
- Polythread
- Marking pen
- Pattern
- Fabric clips
- Strip of fusible lightweight interfacing
- String
- Clear starch
- Iron
Use ⅜ inch seam allowance for all necklines. Every time you press a seam, use clear starch when pressing.
Tip: It might be tough to determine which side is the right side or wrong side on jersey fabric, so mark the wrong side with a “W” to know which side to sew on. Jersey fabric curls on the selvage towards the wrong side.
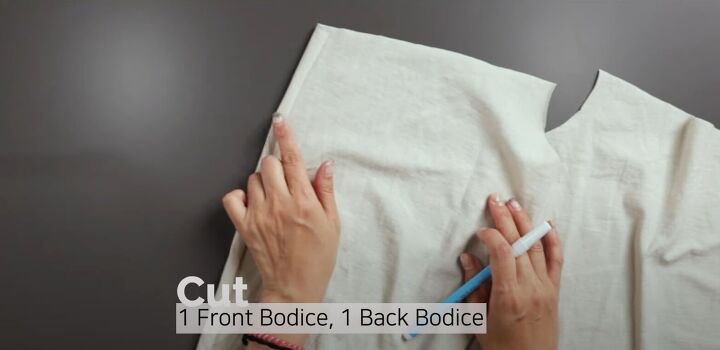
1. Cut the fabric
After printing, cutting, and pinning the t-shirt pattern, cut the pieces from your fabric: front, back, and sleeves.

Cut the neckband strip on the angle that gives the most elastic stretch in the fabric.
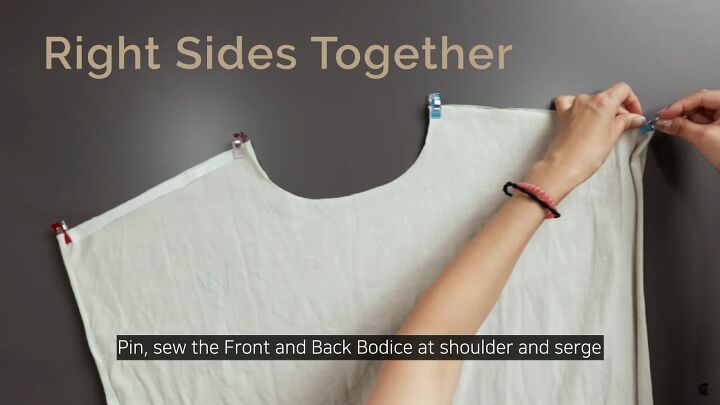
2. Sew the shirt
Clip the shoulder seams.
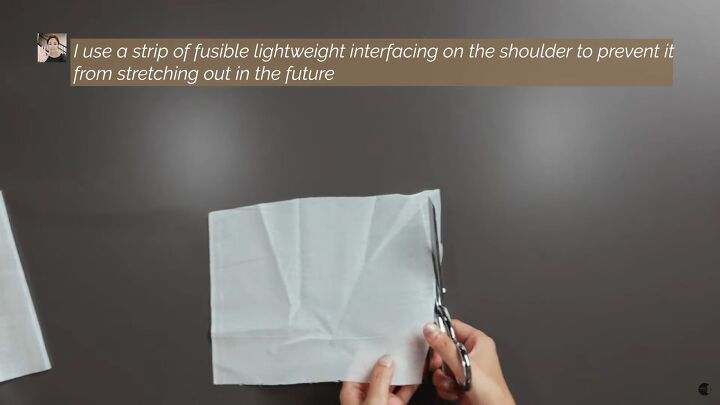
Attach a strip of fusible lightweight interfacing at the shoulder seam to prevent the shirt from stretching out this seam in the future. After sewing, serge the ends.

Open the shirt so the right side is facing up. Press the shoulder seam to the back.

Place the sleeves right sides together and clip in place on both sides.
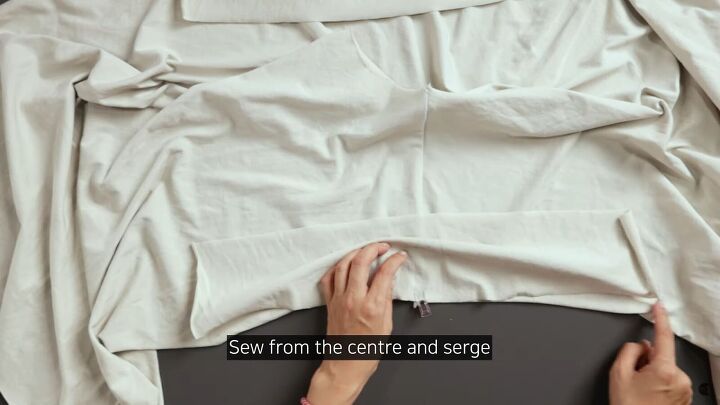
Start sewing in the center, then sew outward on both sides of the sleeve. Serge the raw edges on the seam allowance.
Tip: When you’re clipping or sewing from the center outward, don’t stretch the fabric, as it will pucker.
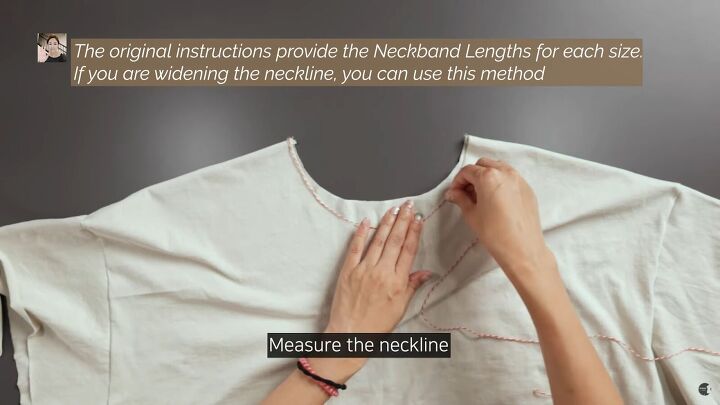
3. Measure the neckline
If you’re sewing as directed on the pattern, follow the pattern. If you want to widen the neckline, use a piece of string for a more accurate measurement.
Lay the string across the top of the neckline starting at one inner shoulder seams. Keep the string taut across the raw neckline to the other inner shoulder seam. Twist the string around and lay it on the back neckline, ending where you started.

The neckband is the length of the neckline multiplied by 0.85 plus 1 inch (neckline X 0.85 +1”). Measure the string and the neckband and make adjustments as needed to trim to the correct length.

4. Sew the neckline
Fold the neckband right sides together and sew the short edges together to create a loop.

Open the seam, spray with clear starch, and press it as flat as possible. Fold it wrong sides together and press it again.

Mark the center of the front and back neckline.
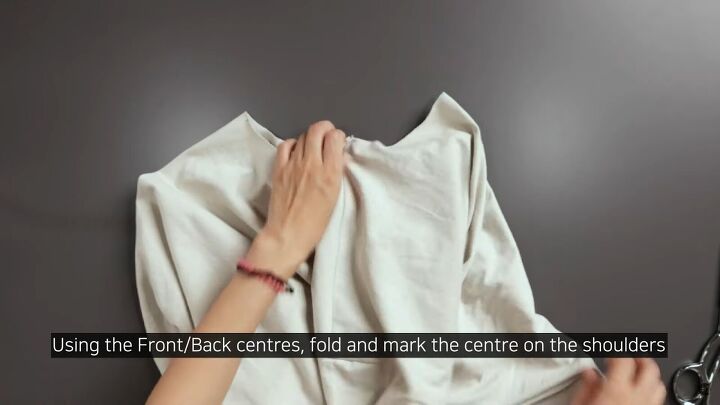
Then pull the shirt so those points are touching to mark the center of the shoulders at the seams, creating 4 points.
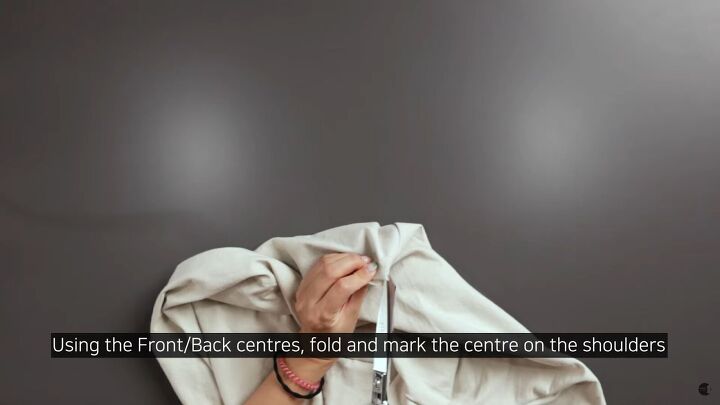
Fold this together to make a tiny notch at the center fold, cutting all 4 layers of fabric.

Mark the points to the raw edge of the neckband by notching to match those 4 points.

Clip the neckband and shirt so their right sides are together.
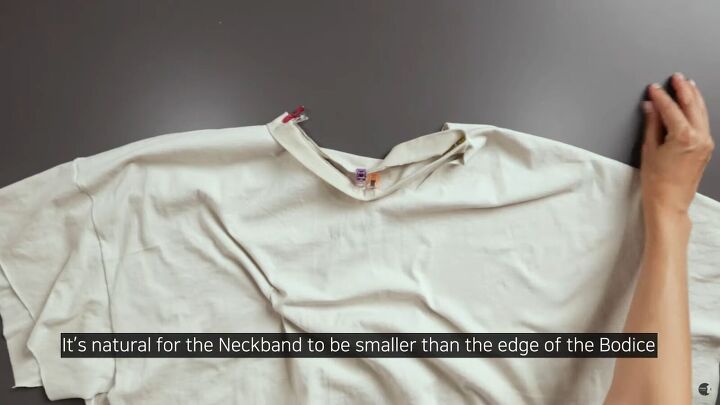
Match all the notches of the bodice and the neckband.

Sew and serge the neckband. The neckband will be a bit smaller than the neckline of the shirt.
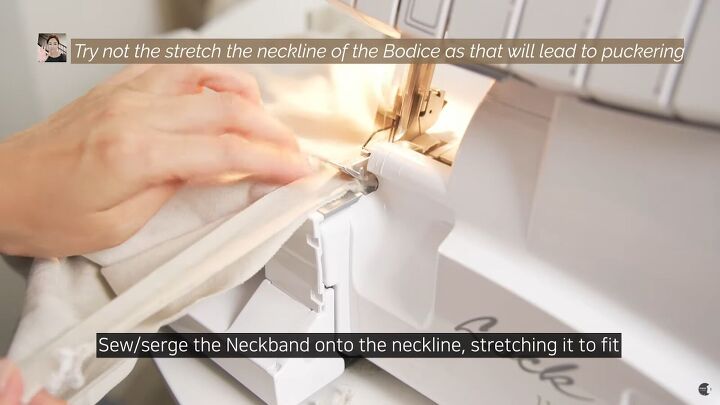
If you need to stretch any fabric, stretch only the neckband and not the bodice to fit. Stretching the bodice leads to puckering. If you’re confident of your sewing skills, you can simply serge without sewing.
Neckline sewing tutorial
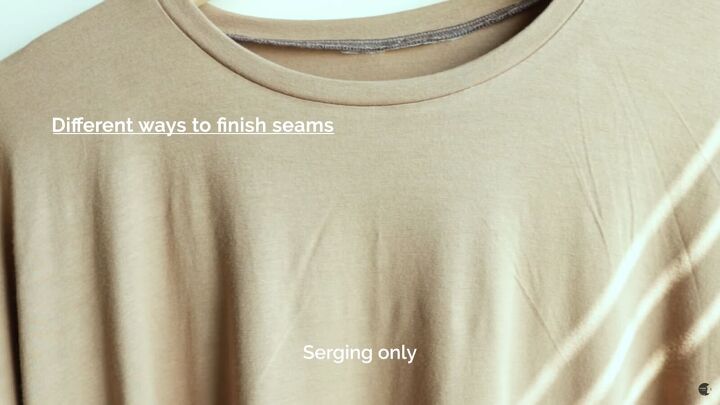
Serging only leaves this super clean finish.
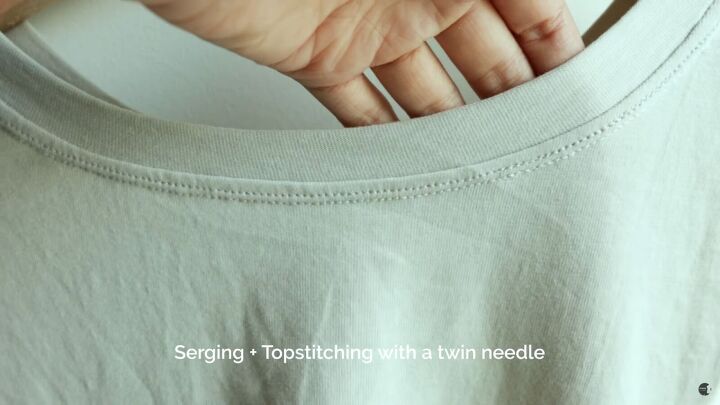
Serging with topstitching with a twin or double needle adds this layer of double stitching just below the neckband.
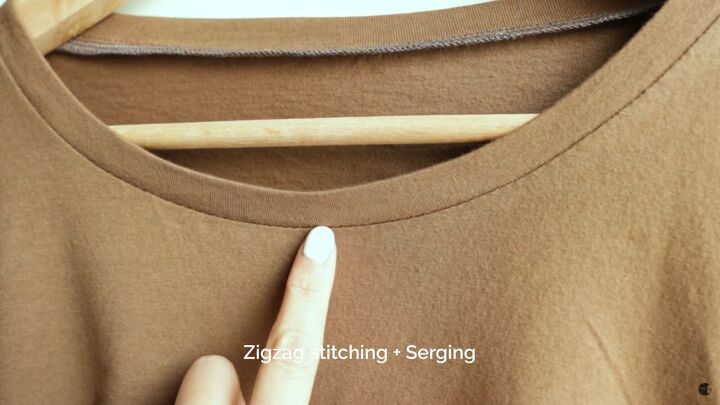
Zigzag stitch and serging leaves this very refined edge.
5. Finish the t-shirt
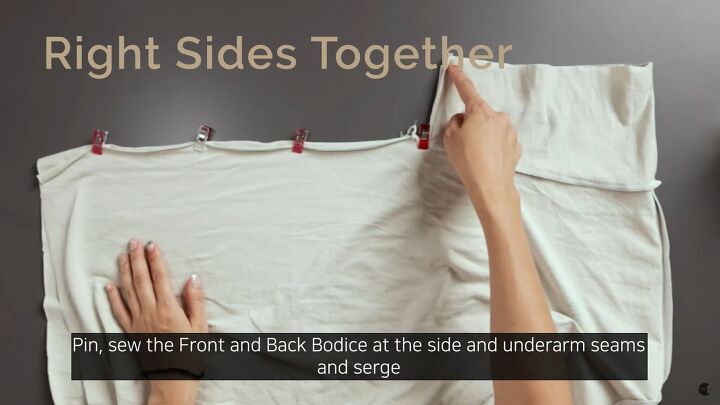
Sew up the side seams with the right sides together. Serge the edges.
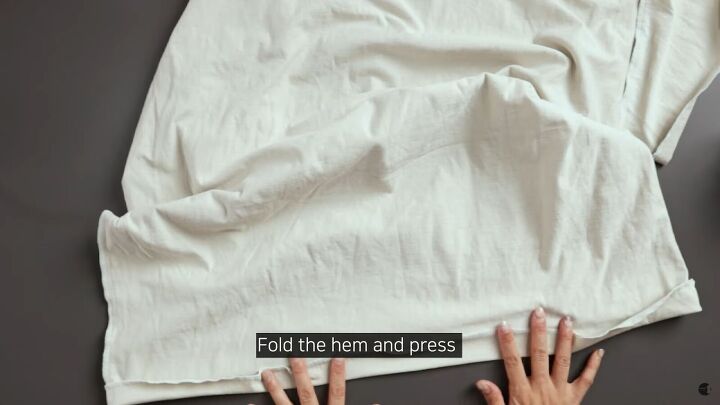
Hem the shirt’s edges by serging the bottom and sleeve ends. Fold the bottom hem and press.
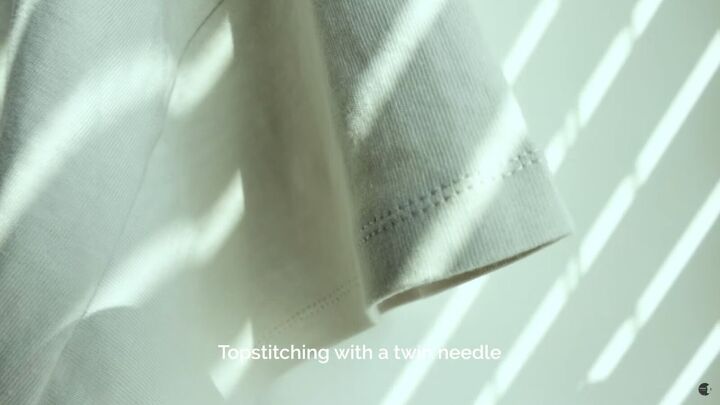
Topstitch or edge stitch the sleeve cuffs either with a zigzag stitch or with a twin or double needle.

You could also leave the hems and cuffs with a raw edge as most jersey and knit fabrics don’t fray when cut.


How to sew a t-shirt tutorial
You can see all the different ways to cut and sew t-shirts! Let me know in the comments which neckline and finishes you chose to make your t-shirt uniquely yours!
The author may collect a small share of sales from the links on this page.


Comments
Join the conversation