Tailored Tunic: Adding Length & French Cuffs
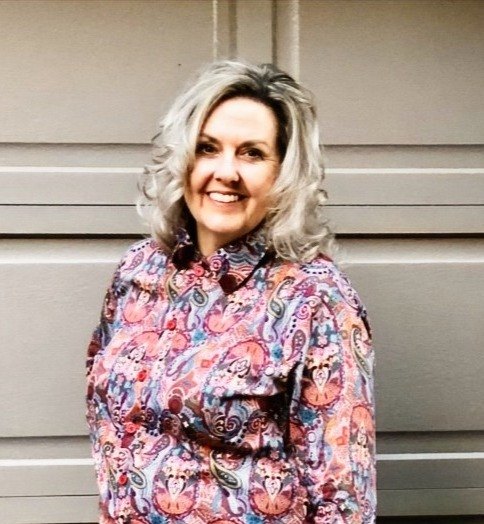
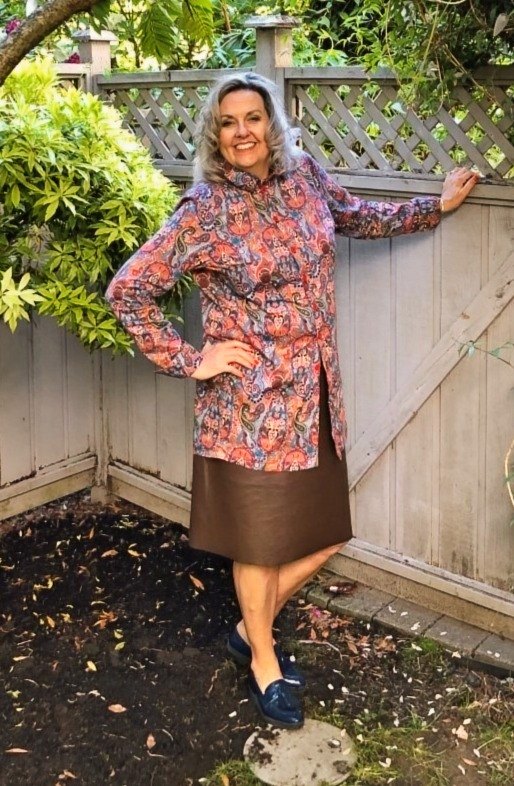
I have wanted to create a custom tunic style oversized shirt pattern for a while now, so when I got this fabric from Minerva I knew it would be perfect. This cotton multi-colored sateen fabric is divine. It's a very soft lighter weight cotton that is a perfect balance of comfort and crispness. It holds its shape really well and has just enough structure to create perfectly styled cuffs and collars. I know that this fabric will get softer and softer with each wash. The paisley is reminiscent of a 60's-70's retro pattern. The muted colours combined with the traditional paisley print offer a chic option for shirts, blouses and dresses.
I would definitely recommend pre-washing & drying this fabric as it is 100% cotton. This guarantees that you won't have to deal with any shrinkage once you have made your garment. The detail of the pattern needs to be the feature of the make. Even though my shirt pattern originally came with a couple of front pocket options, in the end I choose to not include it as it simply blended into the pattern.
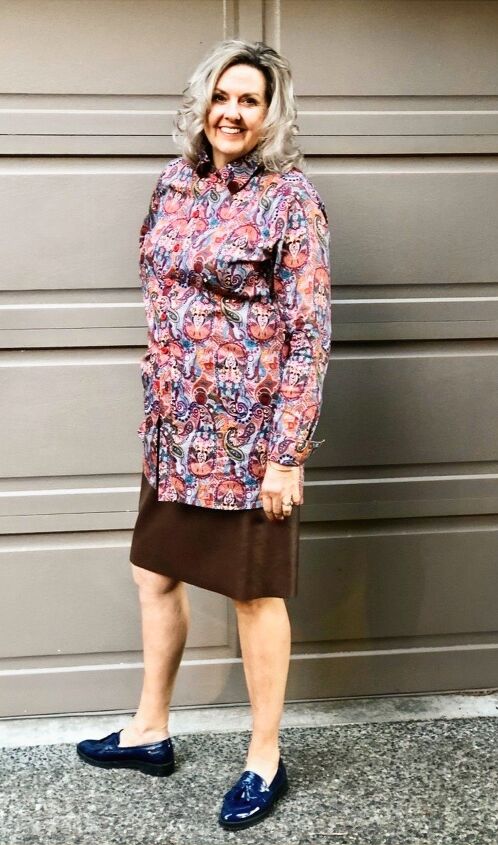
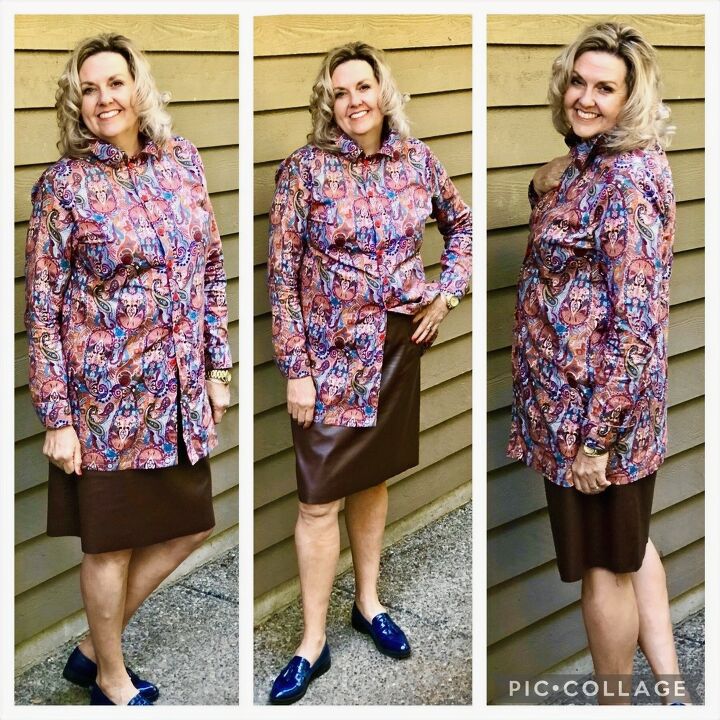
As the pattern is the showstopper I suggest choosing a simple, minimalist styled pattern as any sewing details will be lost in the pattern of the fabric. This fabric does have nice structure to it, so it would also be perfect for a more dramatic puff sleeve. It would also make a lovely cami due to its weight and softness. I am hoping to squeeze an ogden cami out of the scraps that I have left over. I think a matching cami will make another great outfit combination with the shirt left open and worn as a jacket. Stay tuned for that additional post.
As a Seamwork Ambassador I wanted to create my custom shirt pattern using a seamwork pattern. I chose to use the Rachel pattern, No. 3097. The Rachel is a classic dress shirt pattern that comes with a bonus tunic pattern. I really liked the look of the tunic style but I wanted the entire shirt to button up. So I choose to do some pattern hacking and combined the original shirt pattern with the tunic bottom.
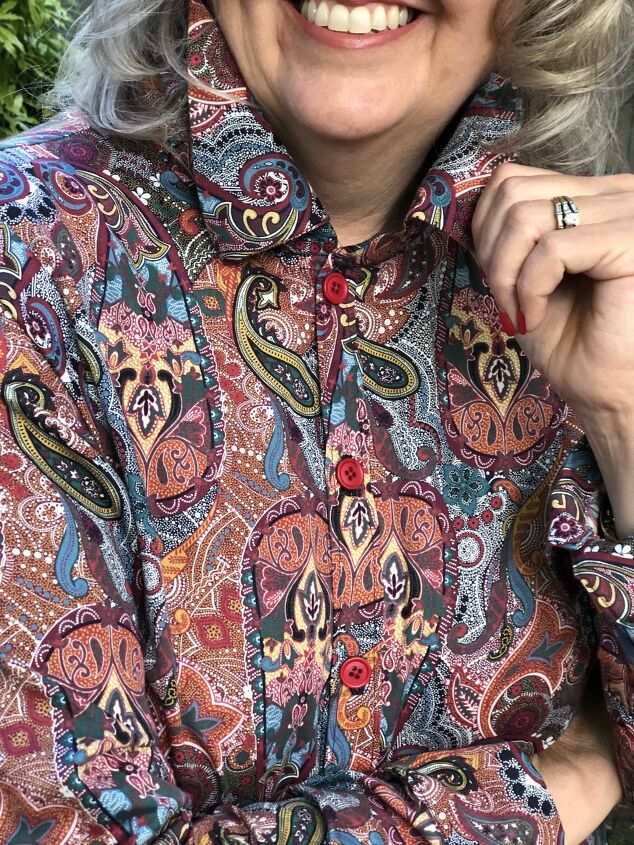
Based on the bust measurement and the amount of ease ( I love Seamwork patterns because they always include ease so that you get perfect sizing) I made a size 12. I lengthened the sleeve length by my regular 2" so I would have a nice long sleeve. The tunic pattern picture shows the cuff just grazing the wrist and this would have felt too short for me, when you are 6 feet tall this length just feels awkwardly short. I also added 1" to the height of the cuff so I could fold it back to create a French Cuff. I like a full collar, which I tend to pop up so I added 1" to the height of the collar as well. When I make this shirt again I will only add 1/2” to the height of the collar.
I used the front bodice from the basic blouse pattern, then laid the tunic skirt pattern overtop using the hemline of the tunic. The overlap hung below the original shirt pattern by 6.25". I cut out the back bodice in the same way. As the front was going to be open all the way down, I added the 6.25" length to the button placket as well. I made button holes all the way down the shirt so that I have the option of wearing it completely closed, but most of the time I will leave the bottom open as in the pictures. If I want to create a shirt dress, I will used this same pattern and add 4-5" to the length of the tunic depending on the fabric and the season.
This was my first time sewing a tailored sleeve placket and I am so pleased with the results. As with all Seamwork patterns, I simply followed the pattern instructions carefully, making sure to read each step and I made sure that my garment was always lying the same way as the illustration. With this kind of scaffolding I was able to sew the sleeve placket really successfully. It is such a nice tailored detail and I feel quite accomplished seeing the end result of the placket and the french cuff.

Once the sleeves were set in I made slight adjustments to the arm syce as my shoulders are quite slim and the seam often isn't high enough on my shoulder and it bunches under the arm. To adjust the shoulder I tried the shirt on inside out and pinned the excess fabric at the shoulder. I drew a line from the seam at the arm hole to the top of the shoulder seam to recreate a narrower arm syce. I usually baste this new seam first to check the fit, then sew it and overlock the edge. It makes for a bespoke fit through the shoulder and adds to the chic, crispness of the tunic. Remember to use a Tailor's Ham when you are pressing your finished sleeve. A tailor's ham is something you think you can do without, but believe me once you have used one you will wonder how the hek you managed without one. It creates a perfectly finished should seam that adds a polished professional finish to your inset sleeve. It is also really handy to get a nice shaped bust dart as well.
The final adjustment I made to the tunic was to run a straight seam from the underarm seam straight down through the hip area to the hem of the tunic. This is also a regular adjustment that I make as I am very slim through the hip and there tends to be too much bulk fabric for me. If you are more hippy or need more ease through the hip and thigh area, the cut of the original pattern will provide this for you and you will be really happy with the fit.
I know that this new custom pattern hack will become a go-to pattern for me. It was worth taking the extra time to create a custom fit for myself and add the adjustments to the pattern as I went. Now I have a bespoke tunic style shirt pattern that will take on many different renditions in a variety of fabrics, after all.... there is Sew Much to Design.
Happy Sewing,
Lou Sheffer
0 views0 commentsPost not marked as liked
The author may collect a small share of sales from the links on this page.


Comments
Join the conversation
Beautiful paisley tunic! Thanks for sharing!