How To Stamp a Silver Spoon Necklace

Have vintage silverware sitting in a drawer taking up space?
Don't let it sit any longer.
Instead?
Why not make it into a piece of jewelry?
This is such a simple project or easy gift for someone special and spoons make the perfect necklace with just a few changes.
Here are the step-by-step instructions to make a stamped silver necklace.
Here are some of the supplies you need to get started:
spoon (at the risk of stating the obvious)
steel stamping block
hammer
silver stamps
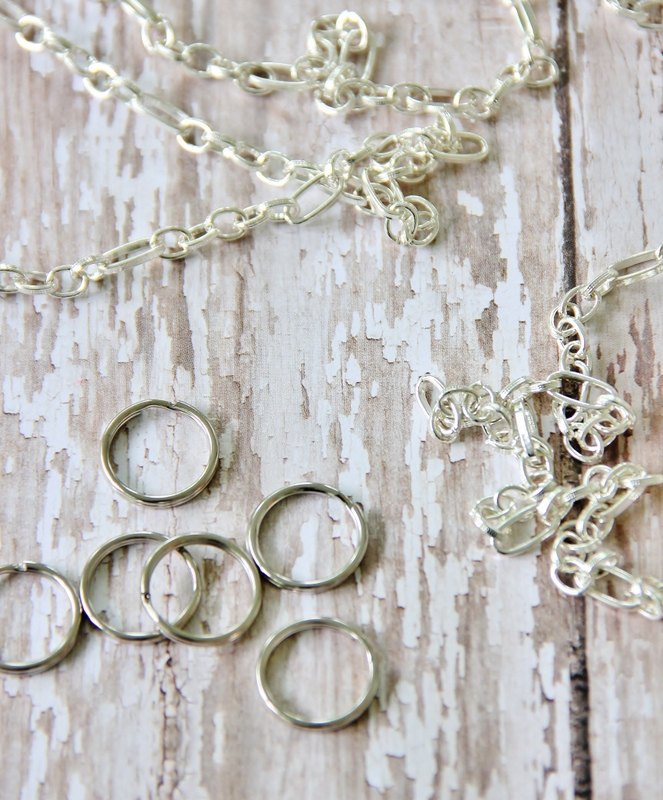
jump ring
chain
Step 1: Remove the handle of the spoon
Put the handle of the spoon in a vice grip and use a hack saw to saw off the handle.
Use a metal file to file down any rough edges.
Step 2: Flatten the spoon with a rubber mallet
Hammer the spoon until flat.
You will still have some bumps when you finish.
It’s okay.
They’re called character.
Step 3: Drill hole for necklace
Clamp flattened spoon down and drill a hole through the silver.
Use a small drill bit.
Don’t drill to close to the edge.
File any sharp edges with a metal file.
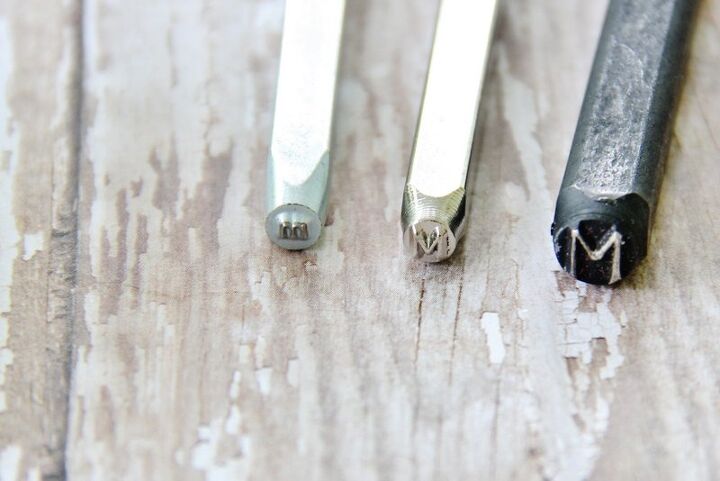
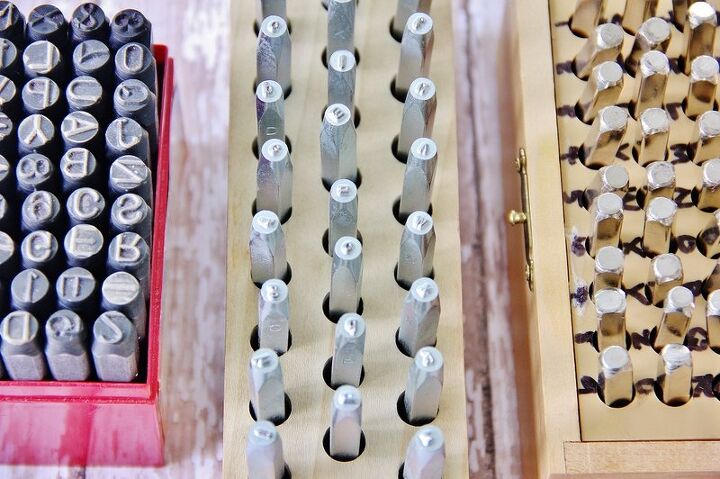
Step 4: Choose the size of stamps you want to use
Here are the three sizes of stamps I have.
1/4 (largest)…..all caps.
5/64 (2mm) (medium)…..all caps.
3/32 (smallest) …..lower case.
I used the 1/4 for the NANA necklace and the 5/64 for the name necklace.
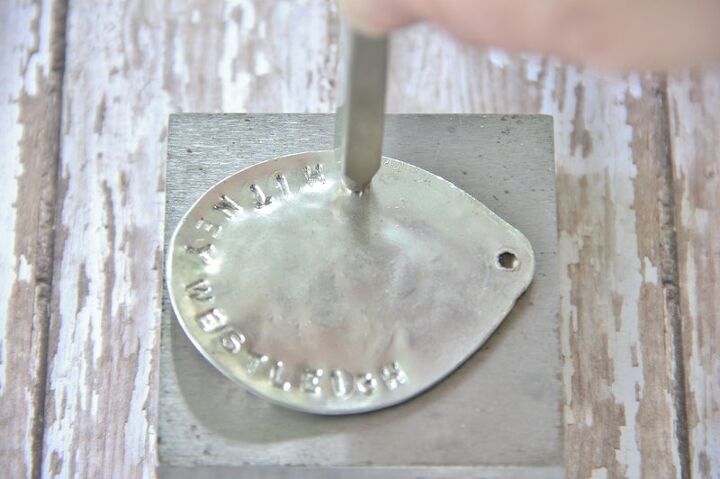
Step 5: Stamp spoon
Place spoon on the stamping block.
Hold the silver stamp where you want the letter to go and hit hard with a hammer several times.
Sometimes you have to flip the spoon over and flatten it again when the edges curl up slightly.
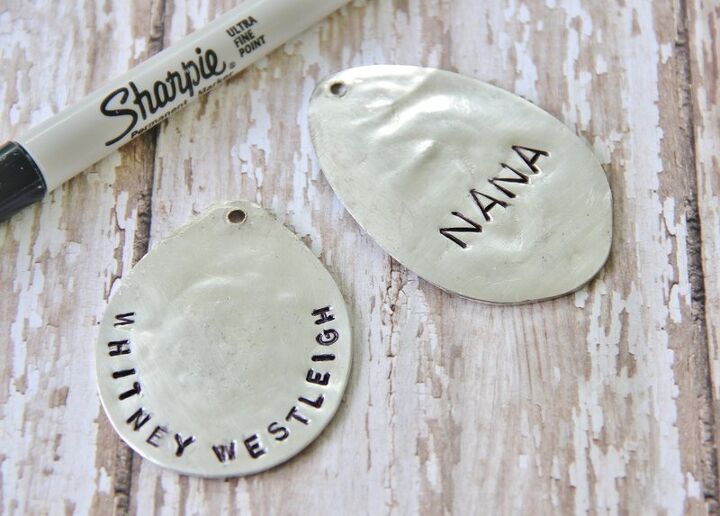
Step 6: Fill in letters with a fine-tipped sharpie
After you finish stamping, you will notic that the letters are a little hard to see.
To add definition, just trace each letter with a fine-tip sharpie.
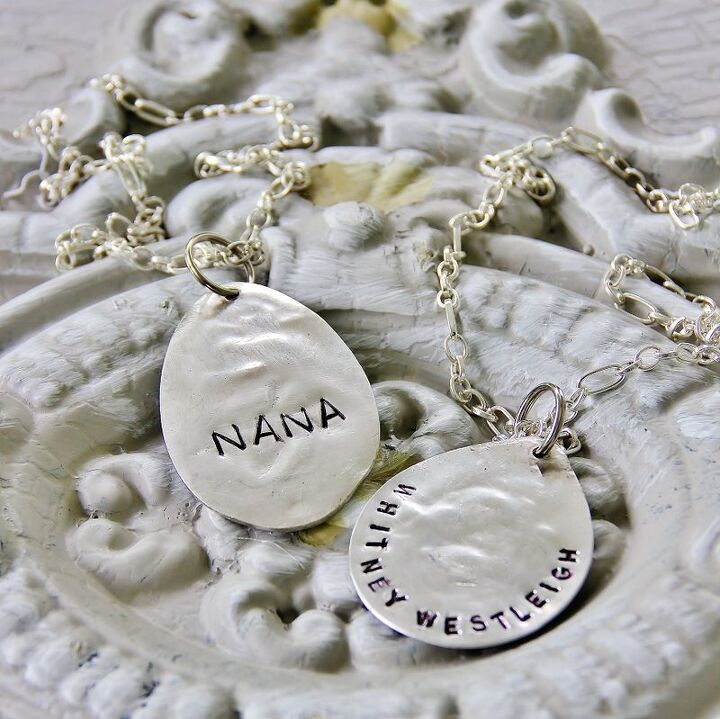
Step 7: Add the jump ring and chain
I really like the jump rings that resemble key chains. They are so much easier to use. I buy the chain in extra long strands from Hobby Lobby and use needle-nose pliers to adjust it to fit.
To turn your stamped spoon into a necklace, simply add the jump ring to the hole in the top of the silver-plated spoon. Next, string the chain through the jump ring.
That's it.
Your necklace is ready to gift or to wear.
It makes a statement all on its own or combined with other pieces of jewelry.
And now?
Your silverware is ready to shine.
If you liked this stamped silver project, here are a few more from my blog:
The author may collect a small share of sales from the links on this page.


Comments
Join the conversation
The handles make beautiful bracelets.
I love them! I have bracelets made from spoons, forks and knives.