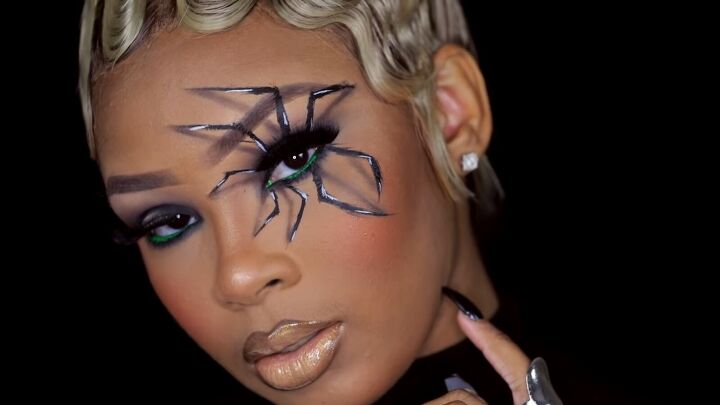
How to Do Realistic 3D Spider Makeup for a Fun Halloween Look

I wanted to try to recreate Aaliyah Jay's 3D spider makeup tutorial. When I saw it, I was mesmerized and thought it looked amazing, so I wanted to try it out for myself. This is a great spooky eye makeup look for Halloween so let's get into it!
Tools and materials:
- Foundation
- Makeup brush
- Eyeshadow
- Gel eyeliner
- Foundation
- Concealer
- Contour
- Eyeliner
- Highlighter
- Lipstick
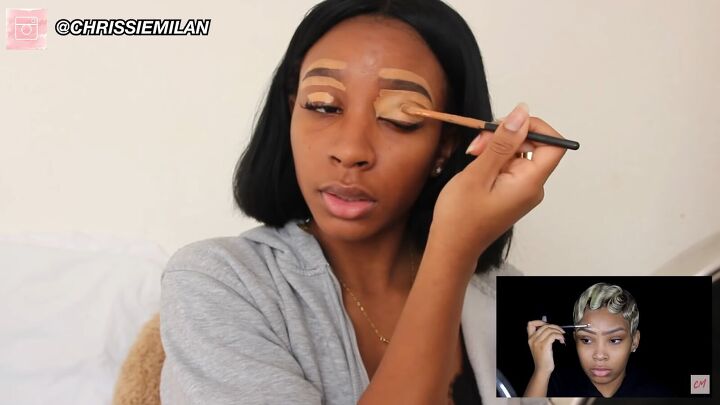
1. Prep your eyes
Place foundation on your eyelid and above and below your eyebrows, and then blend it out. This will work as an eyeshadow primer.

2. Apply eyeshadow
Apply a dark brown shade to your crease and then take a darker contour shade and apply this to your lower crease as well. Blend the two shades together.
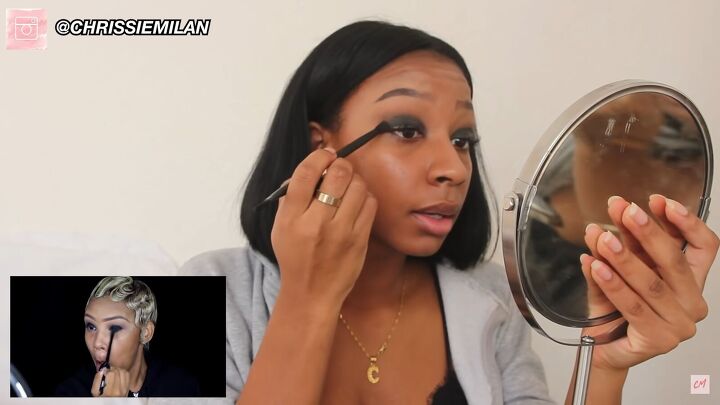
3. Apply eyeliner to the lids
Take a gel eyeliner and use a flat brush to help you apply it to your eyelids. Then use black eyeshadow to set it. Take a blending brush, the same brush you used for the dark brown that you put in your crease, and blend it out to merge the dark brown and the black.
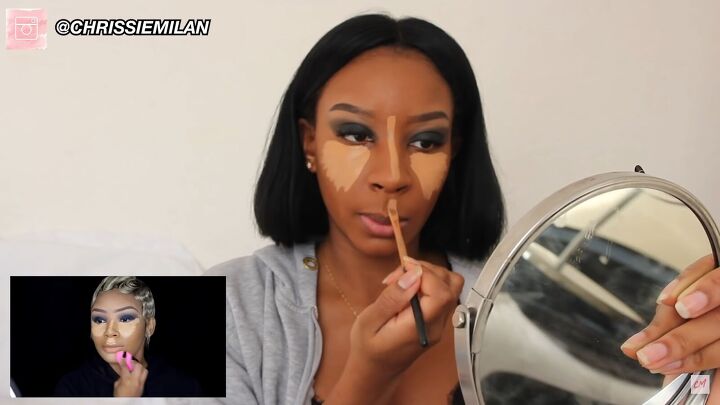
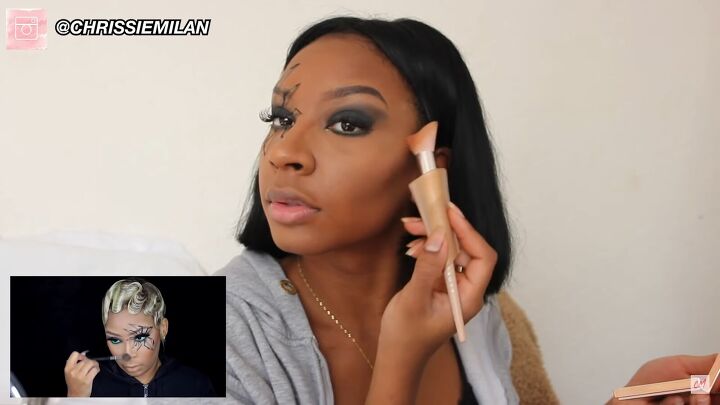
4. Apply foundation and concealer
For foundation, just do your usual foundation routine. Then add concealer to your cheeks, nose, cupid's bow, and chin and blend it out.

5. Apply contour
Next, apply some contour; I'm using a darker concealer shade to do this. Place it on the side of your cheeks and your chin, and use a brush to blend it out.

6. Add setting powder
Next, use some setting powder under where you just put the contour.
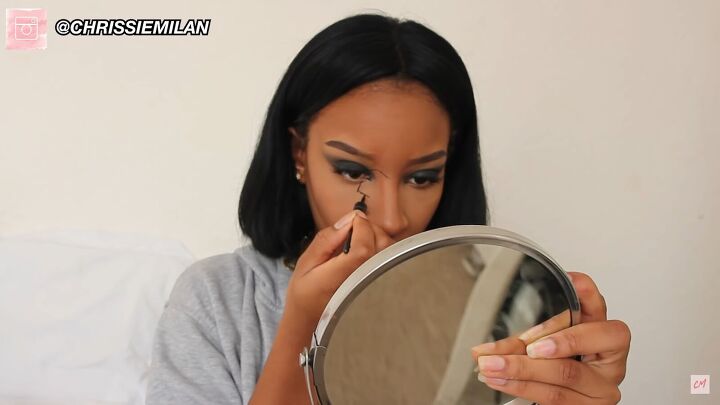
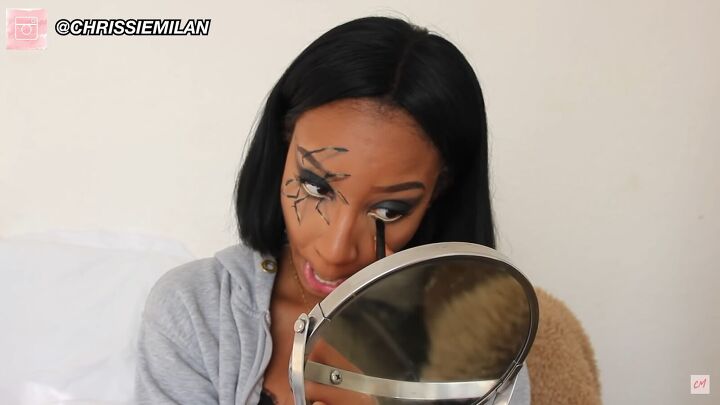
7. Start drawing the spider
To create the spider, take a liquid eyeliner pen and draw the first spider leg coming from the corner of your eye towards your nose. Then, carry on with the second leg, coming from under the eye towards the nose.
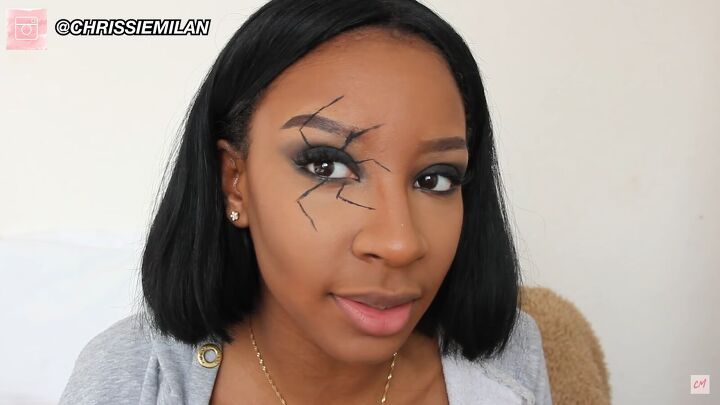
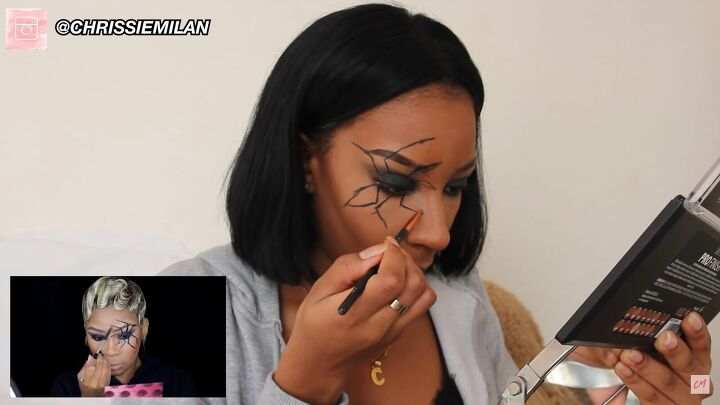
8. Add eyeshadow and draw the rest of the spider
Take some black eyeshadow and put it under your eye. Then, proceed to draw the rest of the spider legs. The ones on the top will go out through your eyebrows.
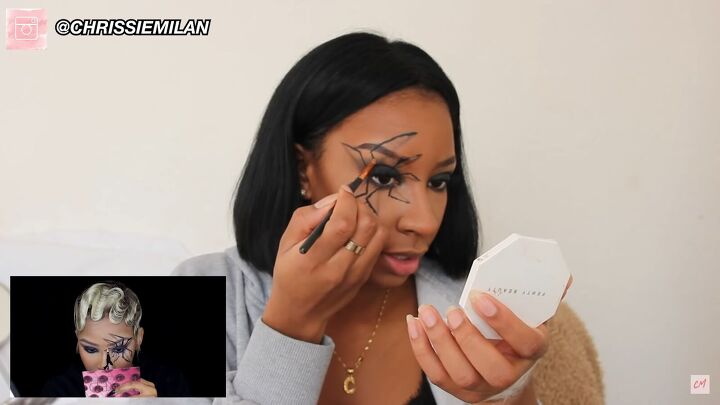
9. Add some shadow
To create the shadow to the legs, use a lip brush and take a brown eyeshadow shade to draw a shadow line next to each leg. You can also use brown eyeliner instead.
10. Apply highlighter
Use a light highlighter pencil (either white or very light brown) to highlight the legs to make them look more 3D, like there's really a spider resting on your face.
11. Add eyeliner
In the tutorial I'm following, she used a bright green eyeliner for her lower lashline; I don't have a green, so I'm going to use a gold eyeshadow instead. It won't be as good as green, but it will still have a good effect.
Once you've added green or gold, go in with some more black eyeshadow under your eyes to make that color stand out a little bit more.
12. Add highlighter
The next step is to highlight your face.
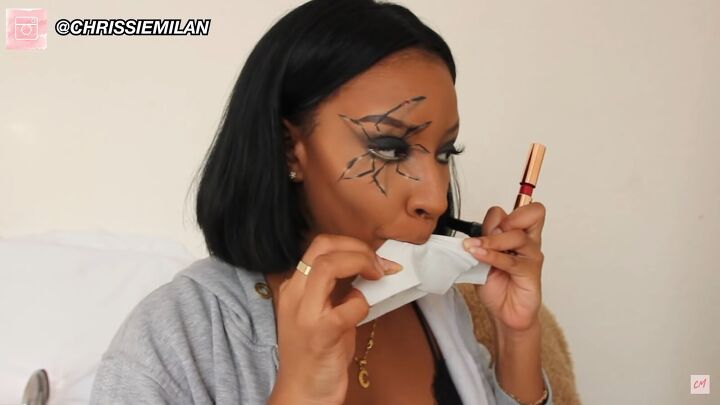
13. Do your lips
Use dark red lipstick around the edges and then a lighter shade of red in the middle for your lips. I use a tissue to blot the lipstick to ensure that I don't get any of it on my teeth.
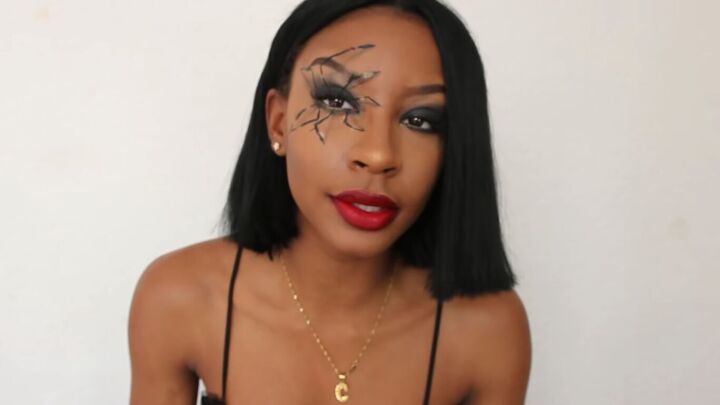
3D spider makeup tutorial
I finished up the look by straightening my hair, and here we have our 3D spider Halloween makeup look. I really enjoyed creating this look as I’ve never created a Halloween look just with makeup before, so this was a lot of fun.
I’m really happy with how realistic it turned out, and I hope you’ll also try creating this 3D spider. Let’s start a trend!
The author may collect a small share of sales from the links on this page.


Comments
Join the conversation