Love in the Time of Corona: How to Sew Matching Valentine's Face Masks

How do you show love to your Valentine? You make matching Valentine's face masks, of course! This easy origami-style mask can be customized for the holiday of love to include a heart design or anything else you desire!
Here’s how to make a Valentine’s Day face mask!
Tools and materials (this makes 2 masks):
- Outer fabric - 2 pieces each 7 X 7½ inches
- Lining fabric - 2 pieces each 7 X 7½ inches
- String or elastic
- Beads
- Chopstick
- Scissors
- Pins
- Ruler
- Pencil or tailor’s chalk
- Sewing machine
- Iron
- Felt
- Sequins/pearls/studs (optional)
You’re going to make two masks because what says I care about you more than masking up? If you’re going out to celebrate Valentine’s Day this would be so cute!
You can make the masks larger or smaller by increasing the fabric sizes by half an inch up to an inch or decreasing by the same amount.

1. Make the mask pattern
Lay the lining and outer fabric with their good or right sides together.
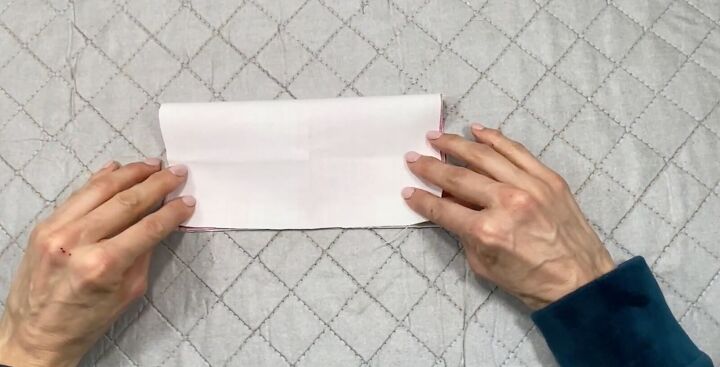
Fold the fabric in half. Press to flatten well. Then fold it in half again and press again. This helps create a crease.

With both folds at the bottom, use the ruler to measure up 1½ inches and mark that spot.
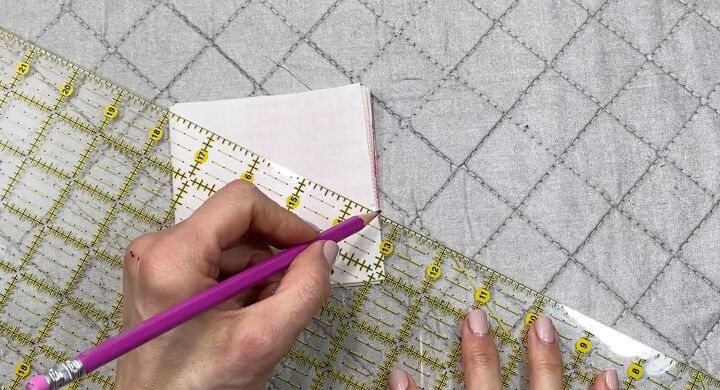
Then place the ruler diagonally and mark the line across.
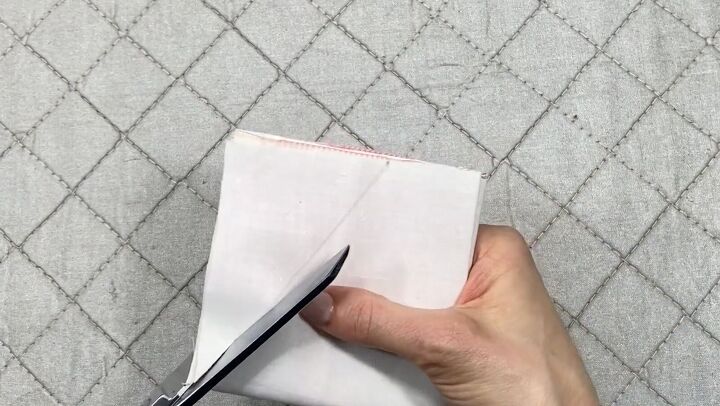
Cut this piece off.
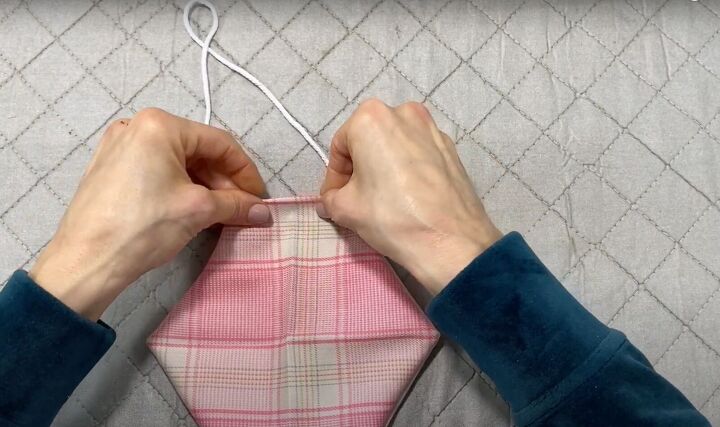
2. Insert the straps
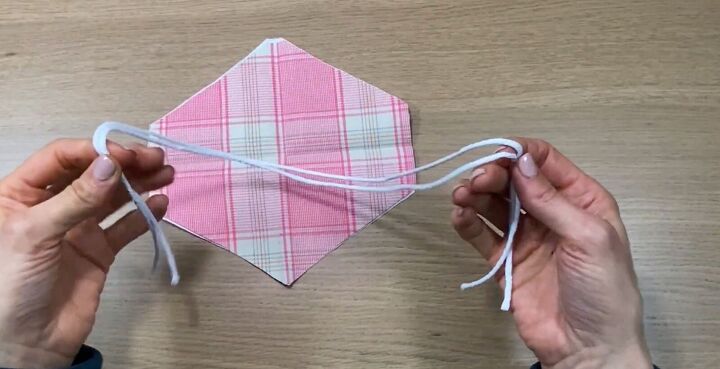
Open up the fabric. You can use elastic or string to keep the mask on your and your loved one’s ears. Cut the elastic or string to about 12 inches.
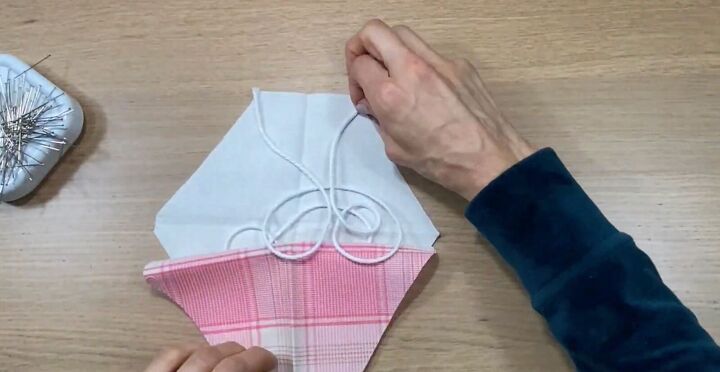
Fold the string or elastic in half. Lay the folded string in between the two pieces of fabric, with the loop inside, sandwiching them in.

Keep the ends of the loops just outside of the mask pattern. Pin at every corner including the elastic or string ends.
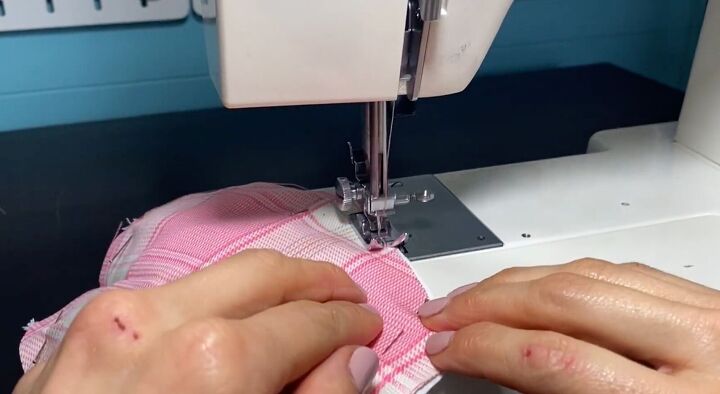
3. Sew the mask
Sew all around the mask leaving a ¼-inch seam allowance. Leave one short side of the mask unsewn so you can turn it right side out. Make sure to backstitch over the strings for extra security.
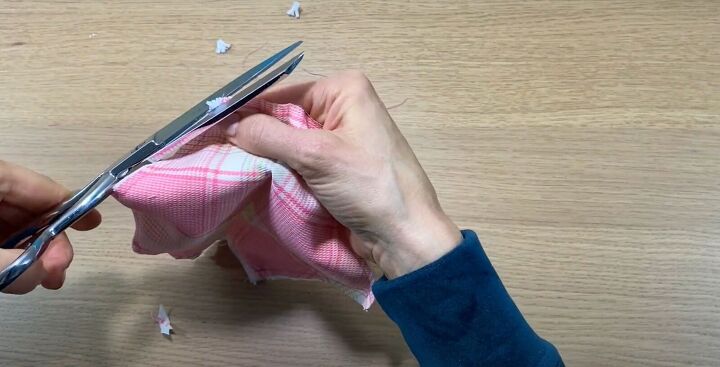
Once the masks are sewn, trim any excess threads. Snip or clip the corners to reduce the bulk so it lays perfectly flat when you turn it inside out.
Turn the mask inside out. Use a chopstick or another implement to sharpen the corners.
4. Add the origami look
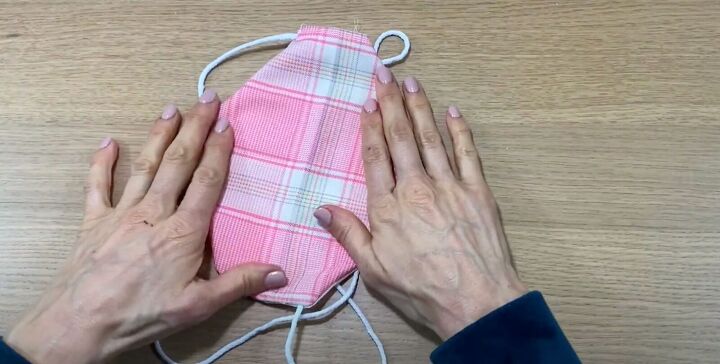
Fold in the unsewn edges. Give the mask a press to flatten.
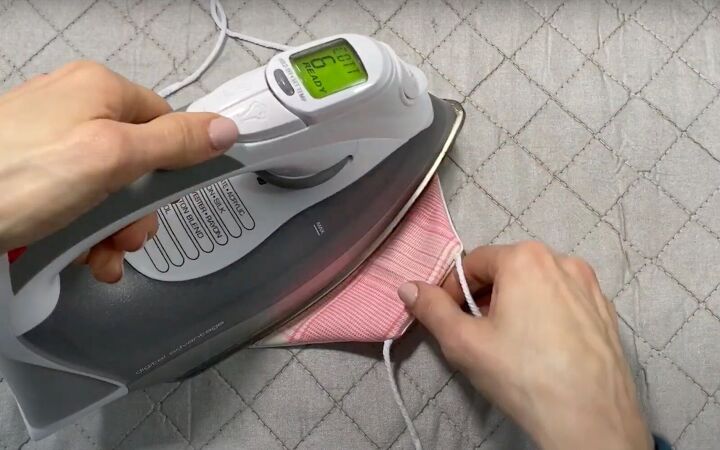
Then, fold the mask in half so the strings or elastic lay on top of each other. Give the mask another press to create a lovely crease in the center.
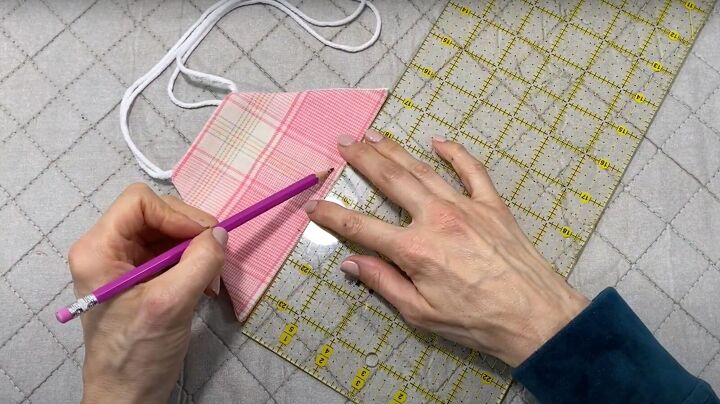
With the mask on its side, mark 2½ inches from the bottom and the top.
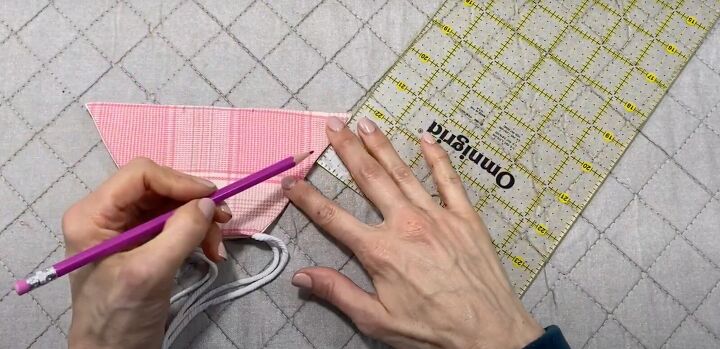
Then use the ruler to mark 1½ inches on the slanted sides.
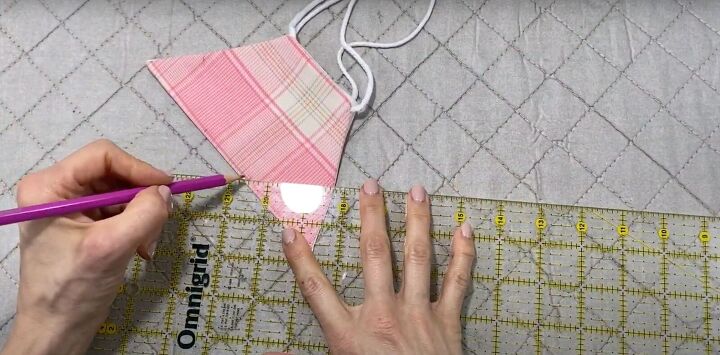
Connect those dots with your marking pencil.
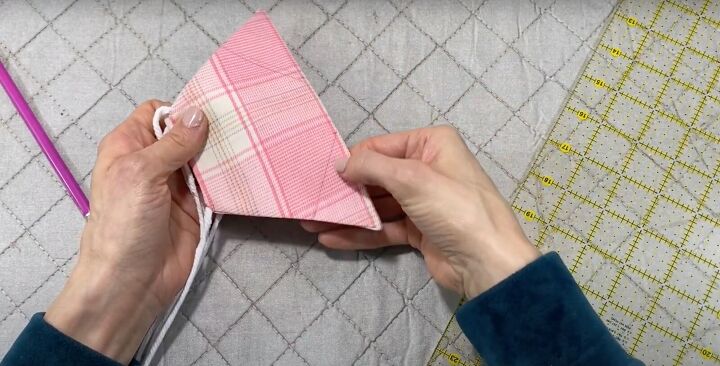
Sew down these guidelines with a straight stitch. Make sure to backstitch the edges.
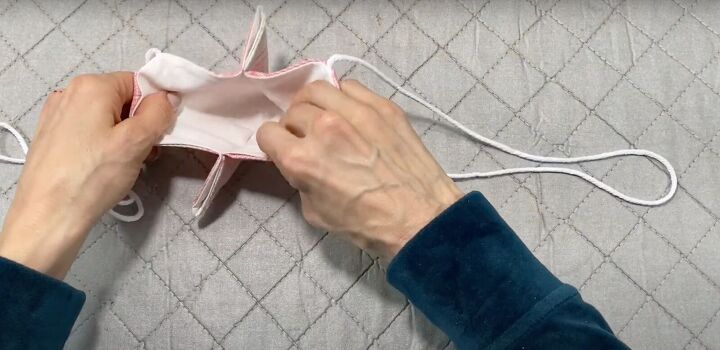
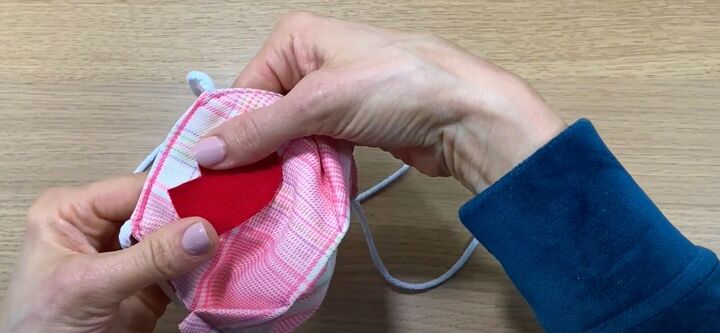
Once these are sewn, this is what it looks like inside.
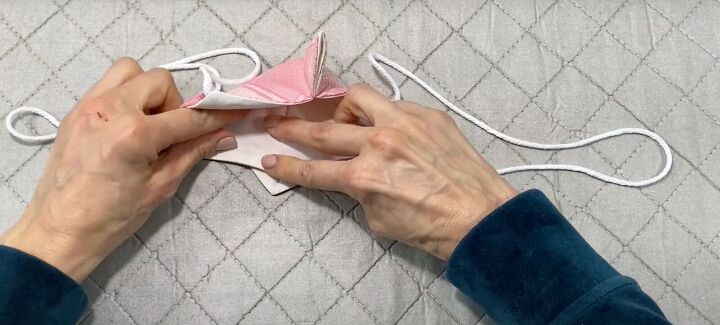
Flatten the bottom and try to line up the center point with the seam. Use the iron to press it in place. Do the same technique for the top of the mask.
You may need to add some extra steam to flatten these points.

Pin both of these in place.
Topstitch the entire mask as close to the edge as possible. Use a coordinating color thread.
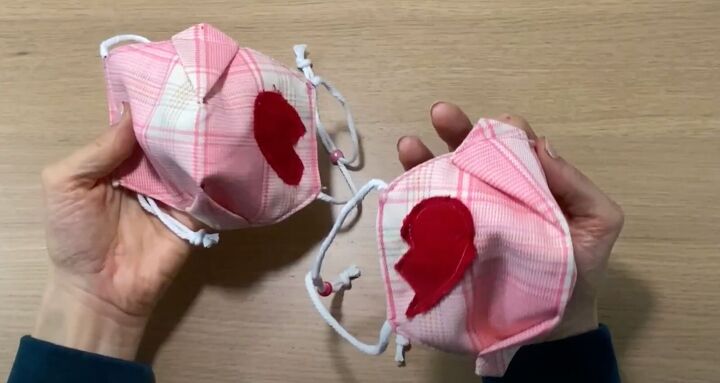
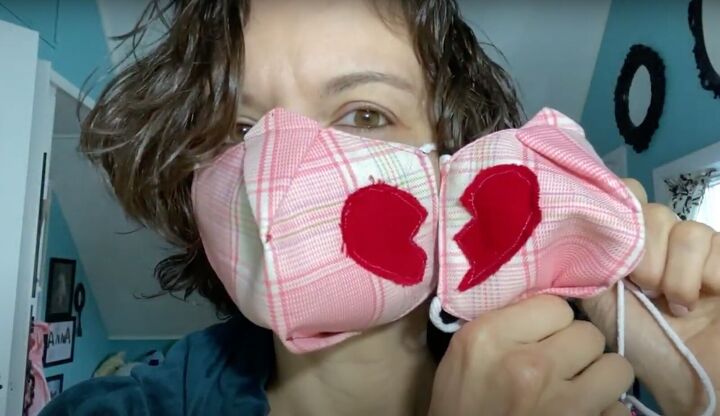
5. Add the Valentine’s Day hearts
In this tutorial, I’m showing a split heart. To make this, cut out a heart from red felt. Cut the heart in half decoratively.
Place each heart half on coordinating sides of either mask. Pin in place. Topstitch the heart.
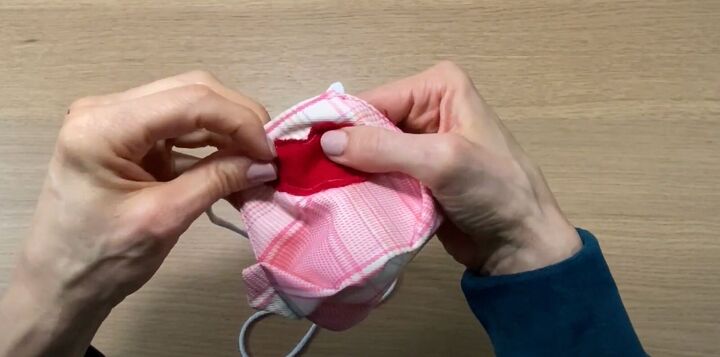
If you want to have the soft, fluffy, fuzzy look of the heart, simply sew the heart without using any interfacing to stiffen it.
Once you’ve topstitched it in place, rub the seam allowance of the felt heart to fray it and fluff it up.
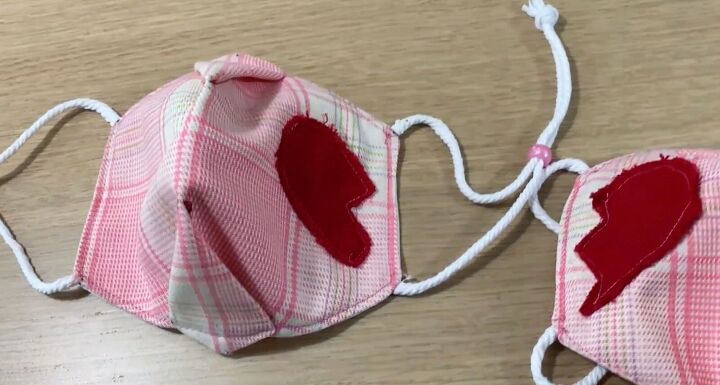
6. Finish the straps
If you’ve used elastic, straps are done. If you’ve used string, place a pony bead on each ear loop. You may need to use a needle or other sharp implement to push it through.
Once it’s at a comfortable place for you and your loved one’s ears, make a tight knot towards the outside of the bead. Pull the string taut and cut off the loop.
DIY Valentine face masks tutorial
You’re done! Please let me know if you made these easy origami Valentine’s Day face masks for you and your loved one. Stay safe and healthy!
The author may collect a small share of sales from the links on this page.


Comments
Join the conversation
👍🏾♥️👍🏾
I'll mention that the best masks consist of different materials. One layer of cotton (600 count thread is the best, but it only comes in expensive sheet sets so I use woven cotton fabric), one layer of stretch chiffon (90% polyester, 10% spandex), and another layer in the middle. I usually use sew-in interfacing.
The stretch chiffon alone has been demonstrated in scientific experiments to physically block 67% of virus containing droplets, so the amount blocked is increased with each additional layer. These materials trap viruses using chemical properties as well as physical size. Three layers are much more effective than two.