2 Easy Hat DIYS: The 'Emily in Paris' Hat & Cute Embellished Beanies

In this DIY, I’m going to show you how to make an Emily in Paris hat with a chain that is super cute for summer and very easy to make. We’ll also be making some embellished beanie hats that are another fun accessory for this season. Let’s get started!
Tools and materials:
- Heavy chain
- 2 lobster clasps
- Beanie hat
- Wide-brim hat
- Measuring tape
- Pliers
- Braided rope
- Pins
- Scissors
- Fabric glue
- Sew-on flat-back rhinestones
- Flat-back pearls
- Needle and thread
- E600

It all started with this one hat. I was watching Emily in Paris, and I saw this hat on Camille and loved it.
Originally, I thought it was one piece; the chain would go across the front, through the holes, and down. Then I realized that they’re actually two different pieces - the piece on top is sewn onto the hat, and the piece on the inside is sewn into the hat.
That’s when I got the idea that I think really takes this to the next level, and it’s even better than the original. I am making my chains detachable.
You can wear them on your hat when you want them on your hat, and you can take them off your hat when you want, so it allows this to be a two-for-one piece!

Also, because the weather is still kind of chilly sometimes, I also thought that it would be fun to do a lightweight beanie DIY. So, we’re going to embellish a couple of really lightweight beanie hats that give it a bit of texture and a little color.
Emily in Paris hat
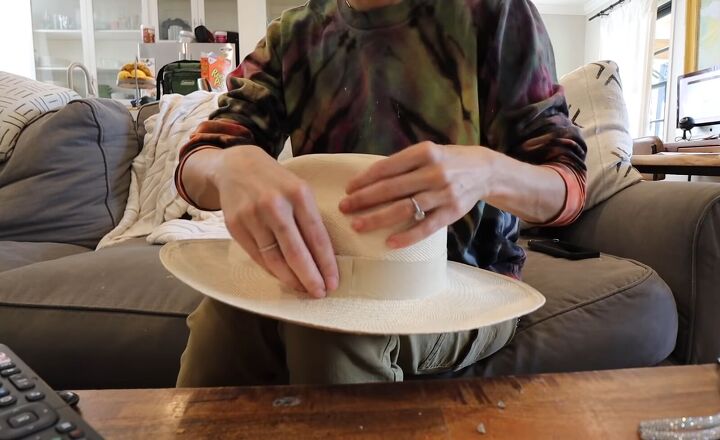
1. Remove ribbon
The first thing you need to do is remove the ribbon on your wide-brim hat (if your hat has one).
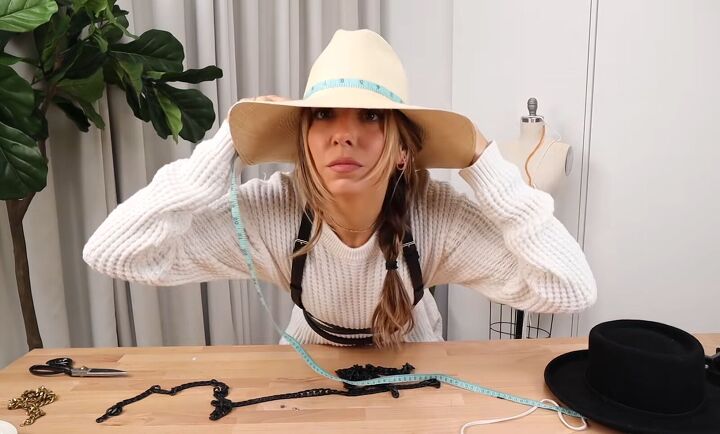
2. Take measurements
Next, you need to figure out where exactly everything needs to go, so you know where to attach them. I figured that right above my ears was the right place because you want the top chain and the bottom chain to look like they are attached.
I sort of measured around my head to see what felt right, and for me, that was 11 inches (28cm). This length brought the chain right about to the top of my ears.
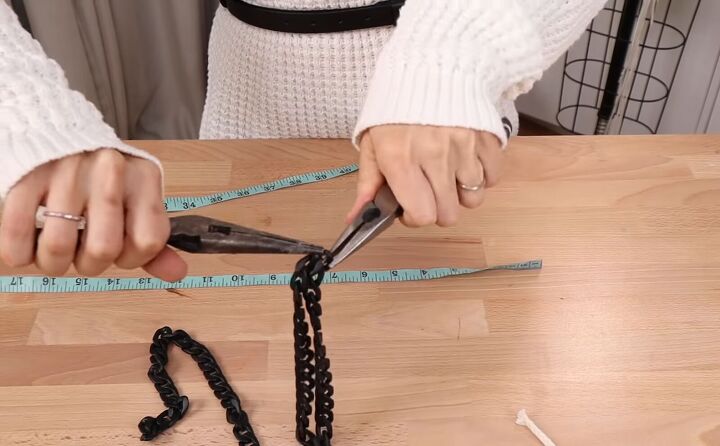
3. Cut chain to size
Now it is time to cut your chain to size by separating the links at your desired place; use pliers to help you do this.
4. Attach the rope
I bought some braided rope, and this was the idea that I had for making the chain detachable. I wanted the rope to match the hat so it would kind of disappear, and all you see is the black chain.
Loop it through either end of the chain and tie a little bow in the back to add some pretty detail. It is also totally detachable, so you can take it off whenever you want.
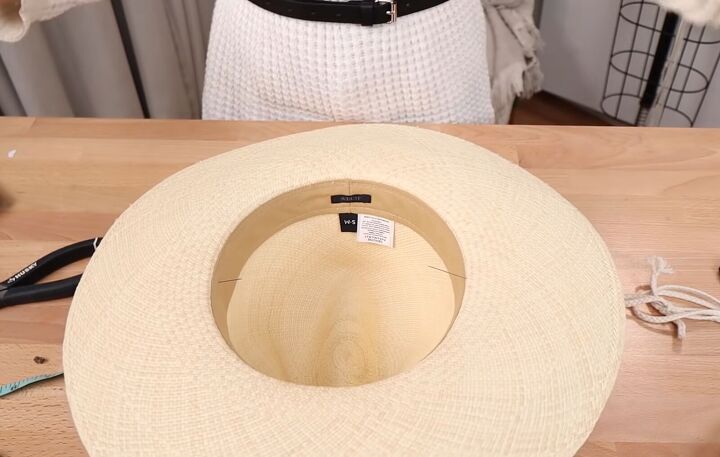
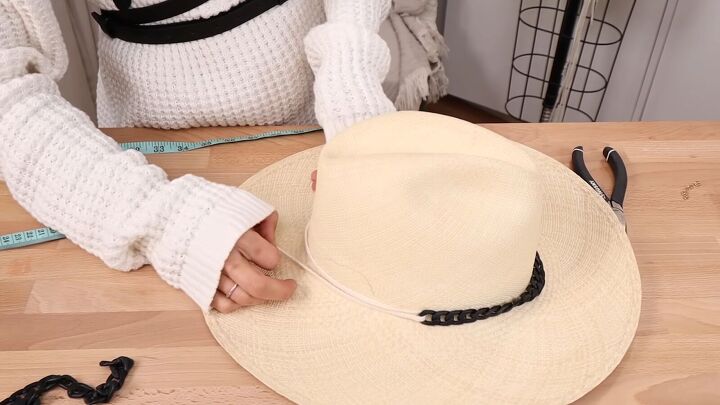
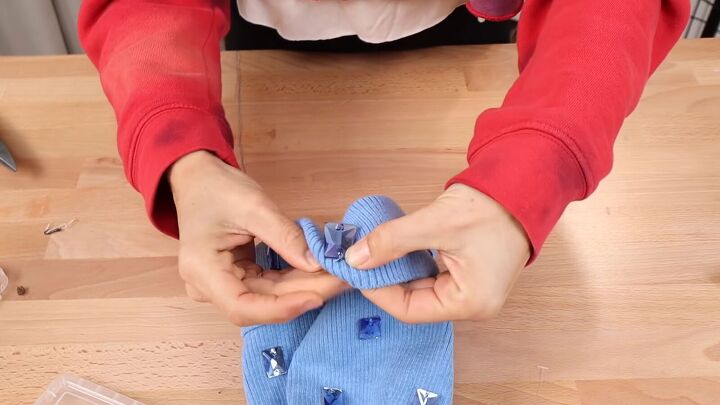
5. Attach the lobster clasps
Now it’s time to figure out where to put the lobster clasps on the inside. Make sure that the chain on the top is centered, and then put a pin right through the very last chain link of your chain.
Do it on both sides, and now you know exactly where you need to put your lobster clasp so that from the outside, it’s going to appear as though it’s one consistent piece.

You’re going to want to attach the clasp to the very top of the binding. That way, when you’re not wearing the chain, it just disappears, and you don’t see it.
Not only are these lobster clasps very flat, so I’m not going to feel it, but my hat is not super tight either, so when I wore this, I did not feel it in there at all.
Grab a needle and thread and double thread it. Tack the lobster clasps right onto the top and then create a double knot at the back. Do the same thing on the other side.
Now you can hook these lobster clasps onto the chain, and you’ll be good to go.
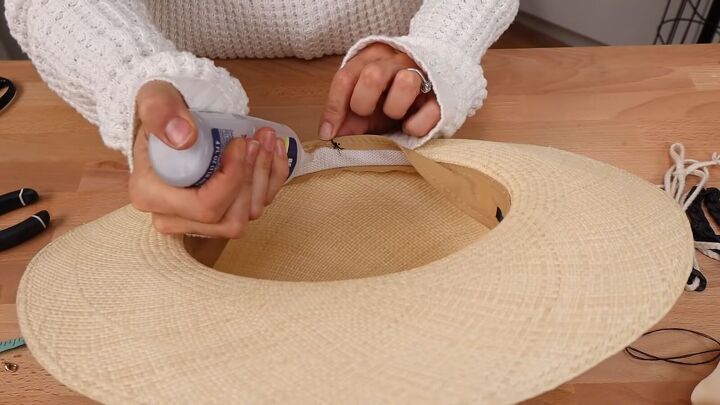
6. Add glue
When I tested the hat, though, I realized that the weight of the chain pulls the binding of the hat down. So I decided to remedy this by doing a light tacking with some fabric glue.
Place a little fabric glue on either side of the clasp, press it down and do it on both sides.
How to reshape a straw hat
Embellished beanies
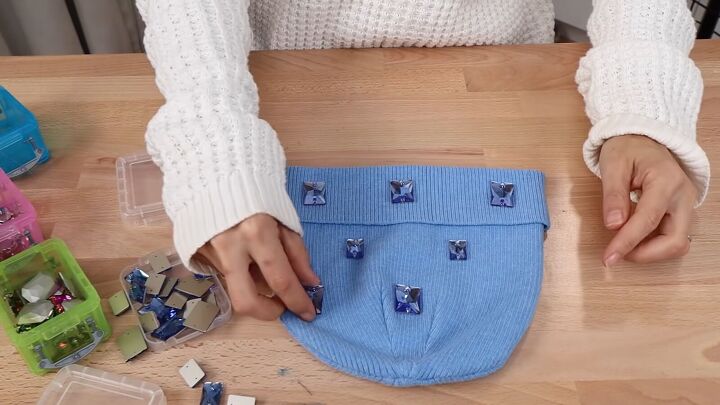
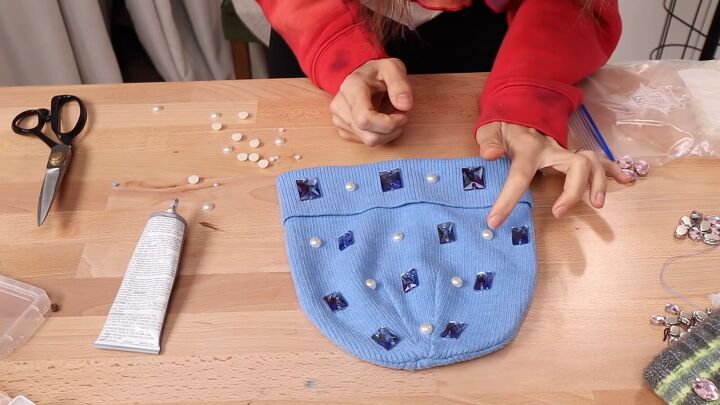
1. Position rhinestones on the hat
For the embellished beanies, I had a bunch of crystals leftover from other projects. I just started placing them on the hat and playing around with different ideas.
You want to create your design first before gluing any pieces on. Once you have laid out your design fully, glue each piece on.
When you’ve done one side, give it a minute to dry, then flip the hat over and do the same thing on the other side. Then give the hat about an hour to dry.
2. Sew
Next, you are going to sew each piece on. This is really important as it ensures that they won't fall off later. You can watch the video from 9:43 to 10:36, where I give you some tips on how to sew with rhinestone pieces.
3. Finish the design
After trying on the hat, I decided that it could do with some more embellishment, so I added some flat-back pearls to the design.

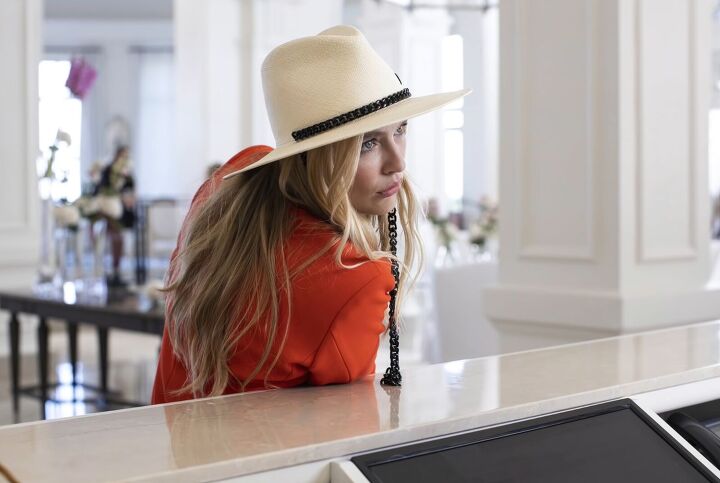
Here is the finished Emily in Paris-inspired hat. I love the long chain hanging down at the front; it is very unique, and it’s also detachable!
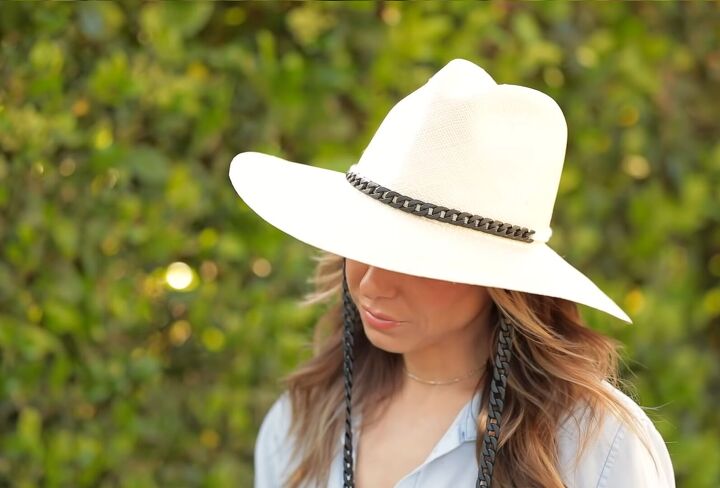
The chain across the top of the hat is also a really nice decorative touch.
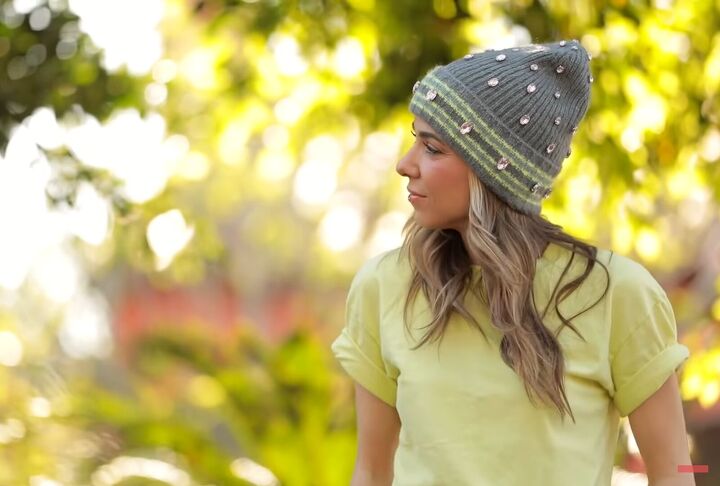
Here is a different beanie hat that I embellished. I love the color combination of the neon stripes on the hat with the pink rhinestone pieces.
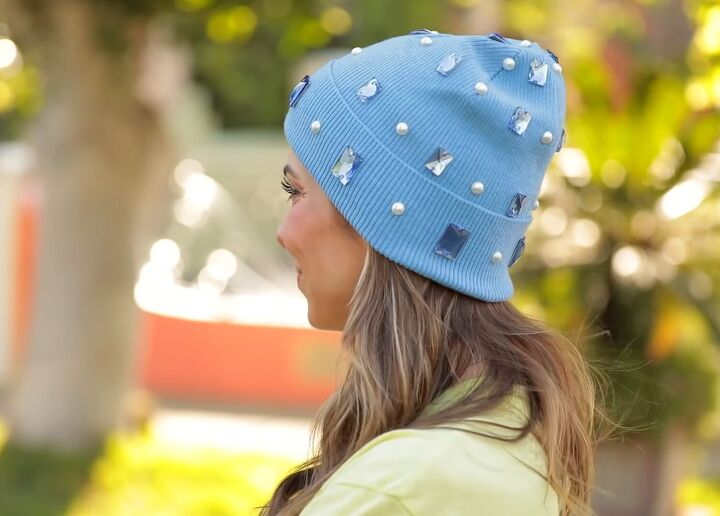
And here is my blue beanie hat.
Easy hat DIYs
These two hats are such fun statement pieces for spring and are totally customizable. So design them according to your own personal style, and enjoy wearing them this season!
The author may collect a small share of sales from the links on this page.


Comments
Join the conversation
Very nice. I have to copy your idea.
Wish you said where you got your hat and the price. If you should answer this thank you for taking the time to do so :)