At-Home Fall Mani Inspiration

When the pandemic struck, my bi-montly trips to the nail salon were the first thing to go. I had been a religious follower of the dip manicure trend and loved the confidence a mani gave me. So, I sat out on a hunt for an at-home replacement. But, the solution needed to last almost as long as a trip to the nail salon and I couldn't afford to spend an arm and a leg.
After much trial and error, I discovered some gems and I don’t think I’ll ever go back to regular salon appointments again. I will share my favorite brands and styles with you all!
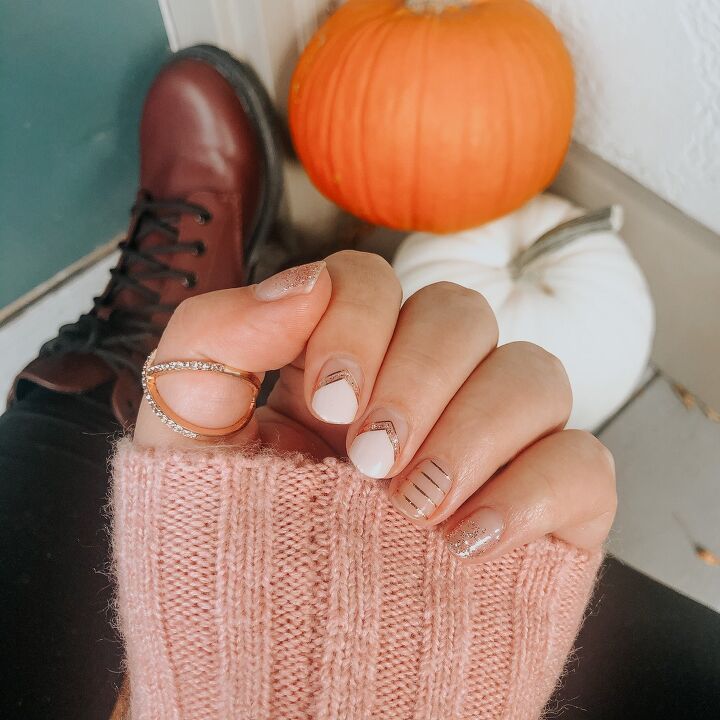
NAIL STICKERS: These are definitely my top option, as they seem to last the longest and are the closest to what I used to get at the salon. They come in so many options, from patterns to neutrals to bright colors, and you can mix and match! Most packs come with a few different styles. The best part is each pack will last for 2-3 manis and costs less than $10.
STEPS:
- Clean and trim nails.
- Choose sticker sizes and design for each nail.
- When nails are clean and dry, peel off sticker and fit to nail, pressing down from the top of the nail to the bottom of the nail and then to the sides.
- There will be excess sticker at the end of the nail. Fold that over and use the file in the package to file off the end of the sticker.
- Press down all over the nail to secure again.
- Repeat steps 3-5 for each nail.
- I prefer to seal with a top coat of clear polish.
Wearing: In The Blush
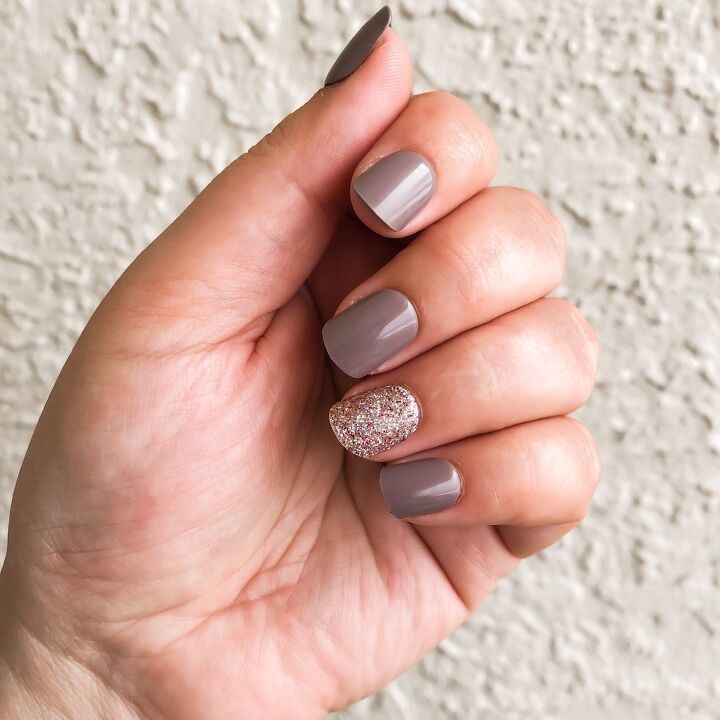
GEL POLISH: If you prefer polish, I like this brand, because it lasts longer than any other I’ve tried (a few days) and doesn’t require one of those pesky UV lights. Here, I’ve mixed a few shades to get a fun, fall mani. A top coat provides the gel-like finish and comes in both a shiny and a matte option.
STEPS:
- Clean and trim nails.
- Apply one thin coat of the gel polish to each nail.
- Once dried, repeat with a second thin coat.
- Finish with one coat of top coat, either in matte or gloss.
Wearing: Leaf Me Be, V-Amplified + Mauve-Olous // Matte Top Coat
PRESS-ONS: Ok, I will be brutally honest, I was so skeptical of any press-on nail. I get torturous flashbacks to the $3 Dollar General sets I used to stick on when I was in middle school, and no one would tell me they looked like garbage. But, these are actually much better! To get the best wear, you will likely need to file them down and take your time fitting the size to each nail, but in the end, the super sticky adhesive lasts a long time, they feel secure, and unless you’re really up close and personal, you can’t tell they’re stick-on. This is a great option to keep on-hand for weddings or other events when you’re in a pinch. I recently wore a pair on vacation and they are still holding on.
STEPS:
- Clean and trim nails.
- Choose sizes and design for each nail.
- When the nails are prepped and dry, start applying the fake nail by peeling off the adhesive and sticking down on top of your real nail.
- Press and hold for a few seconds until secured.
- Repeat steps 3 and 4 for each nail.
- Once they have had time to secure to your nails, you can trim and file down as needed.
Wearing: Flawless
Which manicure is your favorite? I share lots of mani and other beauty inspiration over on my instagram page.
The author may collect a small share of sales from the links on this page.


Comments
Join the conversation