How to Paint Your Toenails: DIY Pedicure Tutorial

Hi everyone. Today, I’m going to show you how to paint your toenails at home with gel polish. Follow along with this step-by-step tutorial.
Tools and materials:
- Nail clippers
- Nail file
- Cuticle oil
- Cuticle pusher
- Cuticle clipper
- Buffing cube
- Hand towel
- Toe separators
- Nail dehydrator
- UV lamp
- Cleansing solution spray
- Cotton round
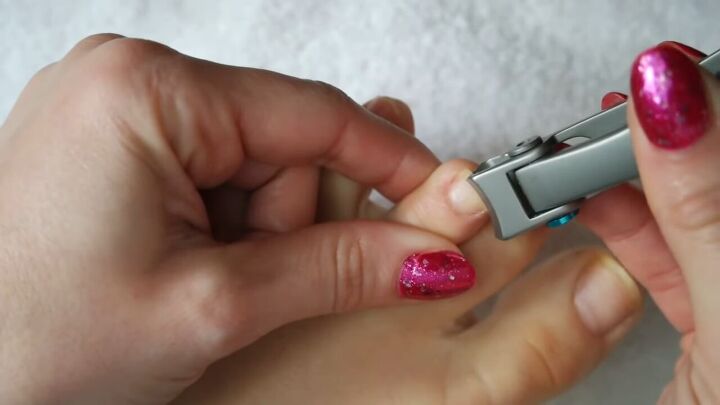
1. Clip your toenails
Use clippers to ensure that your toenails are short for this gel pedicure.
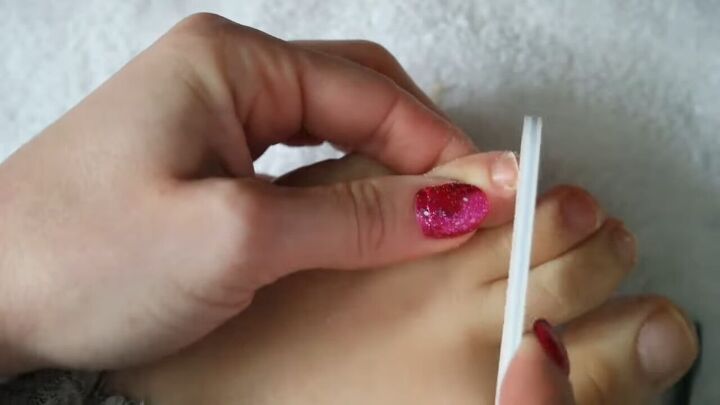
2. File
Next, file the nails to smooth the edges and to create a square shape.
Make sure the edges are slightly rounded so that they don’t snag on anything.
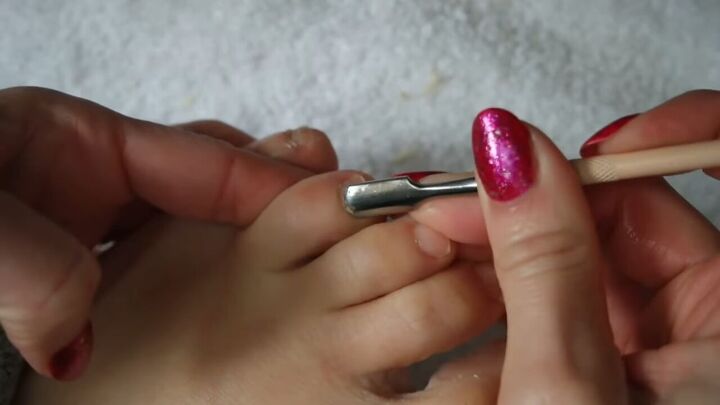
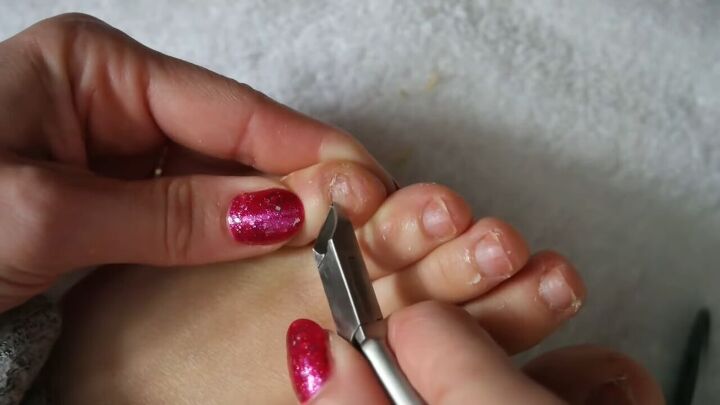
3. Apply cuticle oil, push and clean
Next, apply cuticle oil to each toenail.
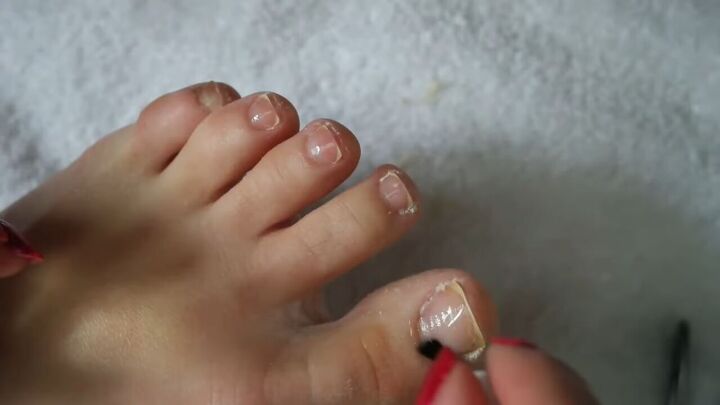
Then, use a cuticle pusher to expose all the new nail growth and get rid of the dead skin lingering at the cuticles.
Then, clean underneath the toenails to remove any dirt.

Next, go over the cuticles again and remove any excess with a cuticle clipper.
4. Smooth your nails and rinse
Once the nails are shaped and clean, take a buffing cube and go over all of them. Then rinse off the dust.
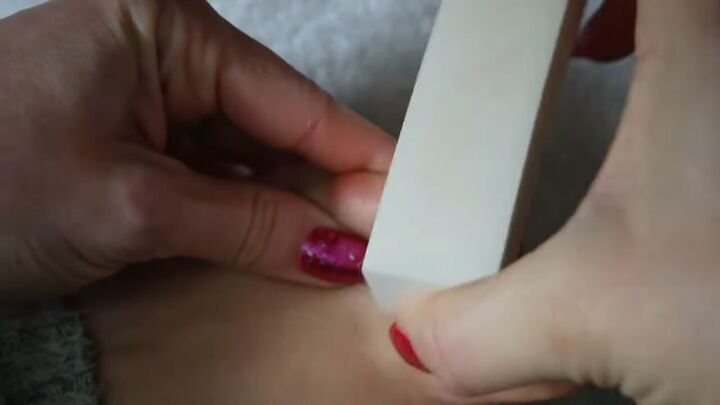
5. Scuff up the nails
Whenever applying gel polish, it’s important to scuff up the nails.
Use a regular rile to scuff the surfaces of the toenails. Then wipe with a towel.
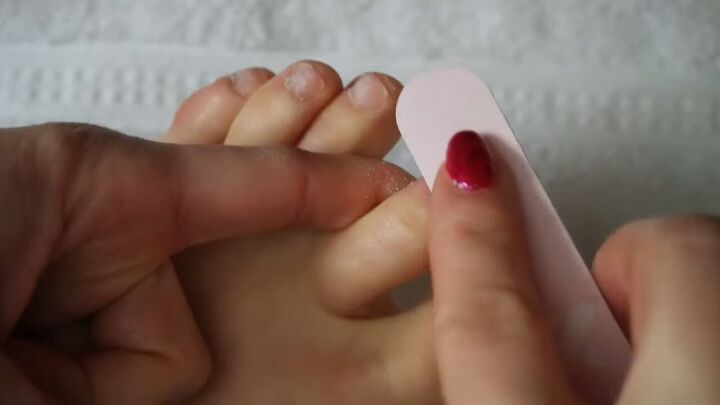
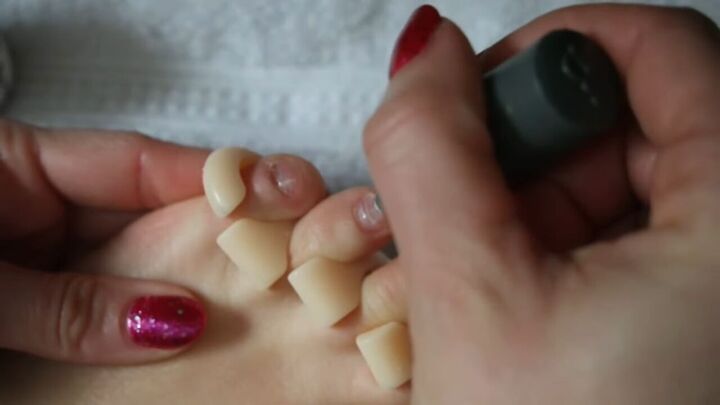
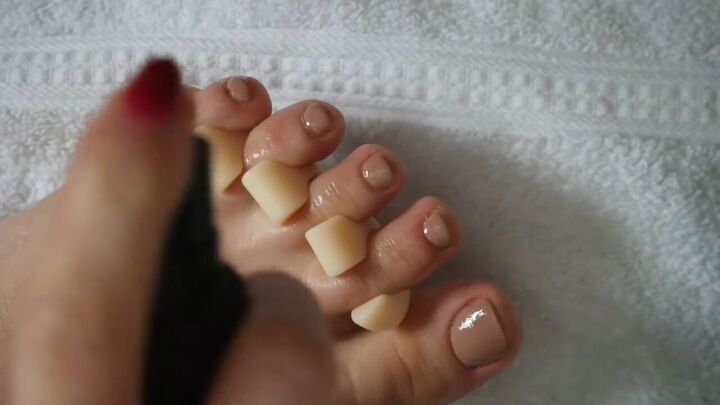
6. Apply nail dehydrator and nail foundation
Place toe separators in between your toes and apply a coat of nail dehydrator.
Next, apply a layer of foundation polish. There’s no need to cap off the nails, just do your best to avoid getting this polish on the cuticles or the skin around the toenails.
Use your finger to remove any polish that may have gotten off the nail.
This will prevent the polish from curing to the skin, which in turn will cause the polish to lift.
After this, pop your foot under the lamp to cure.
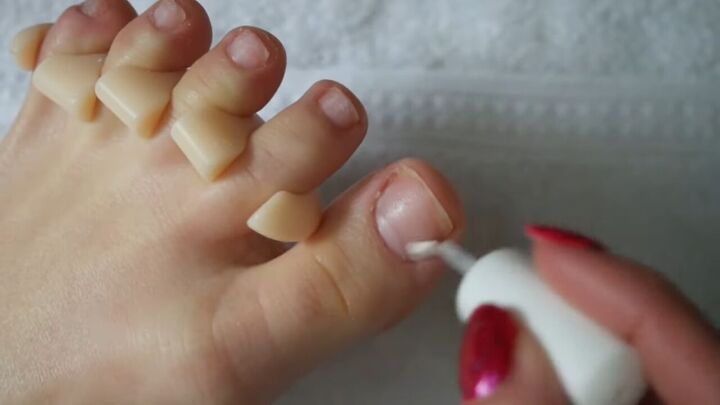
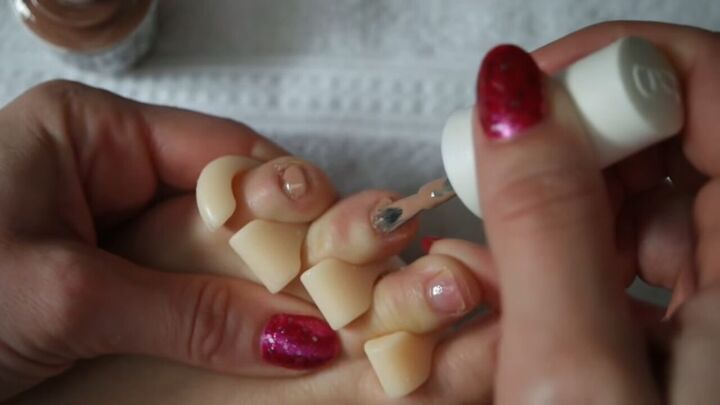
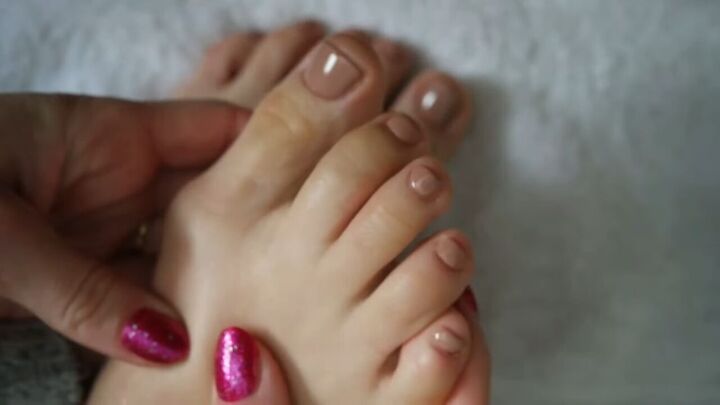
7. Apply color and cure
Once your nails are dry, apply a thin coat of the gel polish of your choice.
Then clean up around the nails, if necessary, before popping the toes under the lamp to cure.
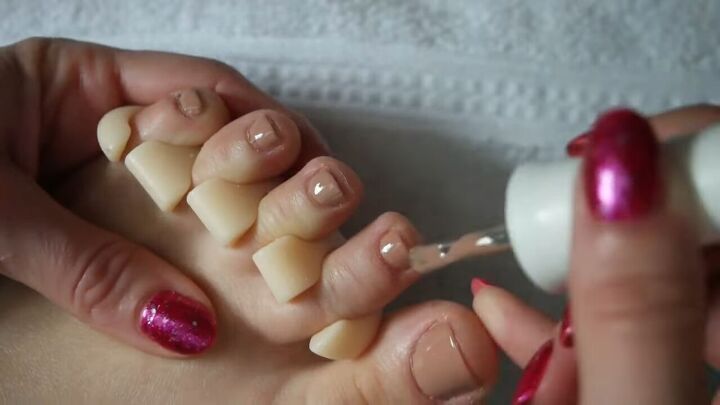
8. Apply a second coat
Once cured, apply a second coat of color and clean up as you go.
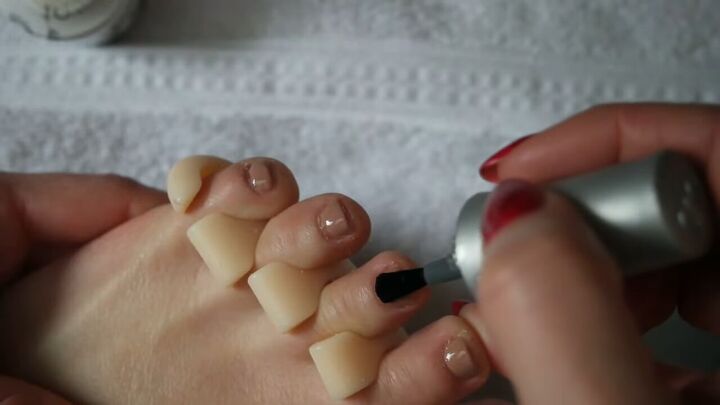
9. Apply a top coat and cure
Now, apply a hardy top coat, capping off the ends now as well to seal the nails. Then cure the nails for the last time.
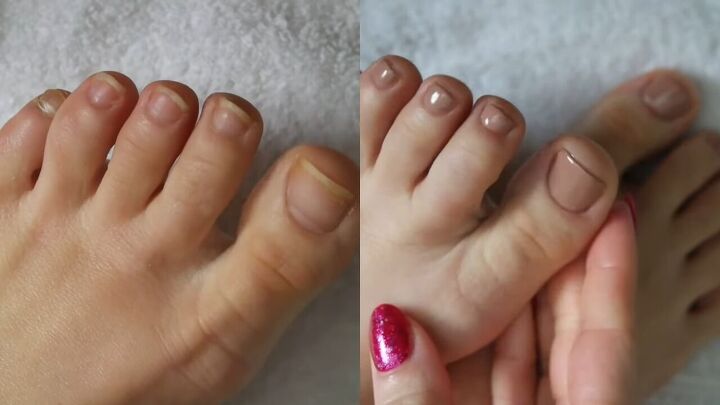
10. Clean and apply more oil
Then squirt some alcohol or cleansing solution over the gel toenail polish.
Follow up by using a cotton round to remove the sticky layer.
Finally, apply more of the cuticle oil and that’s it!
You can see the improvement here, and my toenails feel totally refreshed with this toenail gel polish pedicure!
How to paint your toenails: DIY pedicure
Now that you’ve learned how to paint your toenails with gel polish, will you give this at home experience a try?
Comment below with your favorite shade this season.
Check out my 16 Easy Tips to Make Your At-home Gel Manicure Last.
The author may collect a small share of sales from the links on this page.


Comments
Join the conversation
You did an excellent job describing each step of the process. I’m watching this in early March so it won’t be long before I’ll be polishing my toenails.
Looks like a good way to dry out and suffocate your toenails. It might looks nice, but certainly not healthy.