Get in the Mood for LOVE With This Black & White Valentine's Nail Art

February is the month of love, and what better way to honor the occasion with a set of gorgeous black and white Valentine's nails?
In this quick tutorial, I’ll show you a unique way to create these short Valentine's nails designs in no time! So, get your nail polish and tools out, and let’s fall in love!
Tools and materials:
- Black and white nail polish
- Black and white striper polish
- Rhinestones
- Studs
- Ziplock bag
- Scissors
- Top coat
- Tweezers
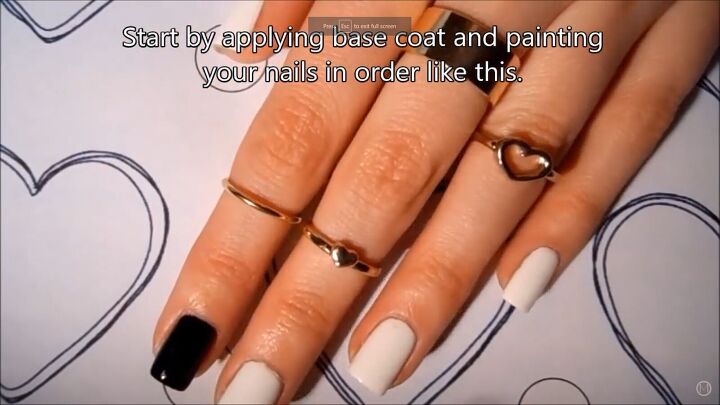
1. Apply nail polish
Start by applying your base coat. Then, apply white nail polish to your nails except for your index finger, which will be black.

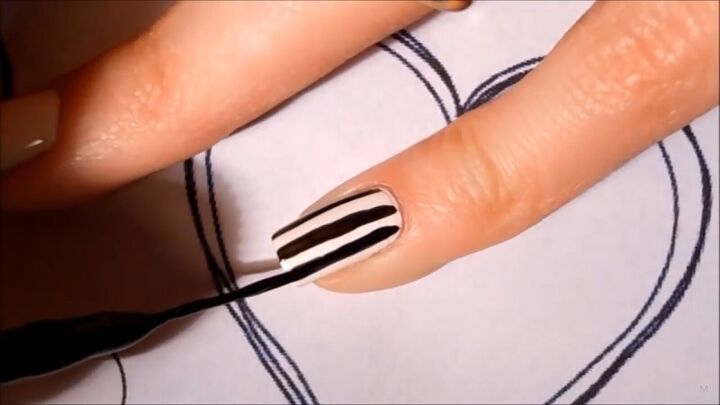
2. Create lines
Using a thin white nail brush or striper polish, apply horizontal and diagonal lines on your index finger. Start by painting the horizontal lines, and starting from the bottom, paint diagonal nails all across.
With a black striper, create horizontal lines on your thumb and pinky fingers.
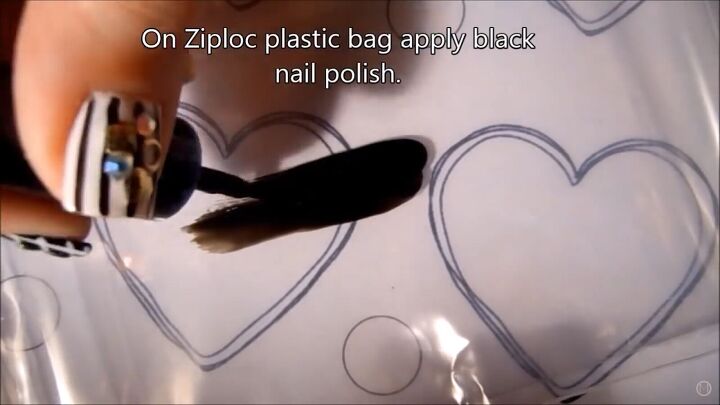
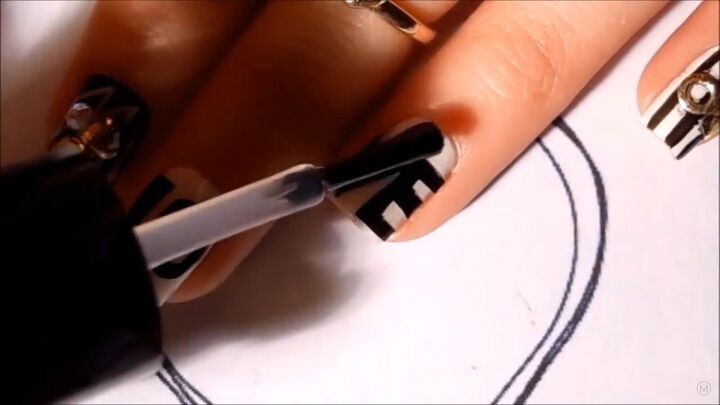
3. Create the letters
Now, it’s time to add some flavor to your Valentine's Day nails! Take a clean Ziplock bag, and apply black nail polish onto it in a block shape. Set it aside and wait for it to dry completely.
Tip: Add a fast drying top coat to cut down on waiting time.
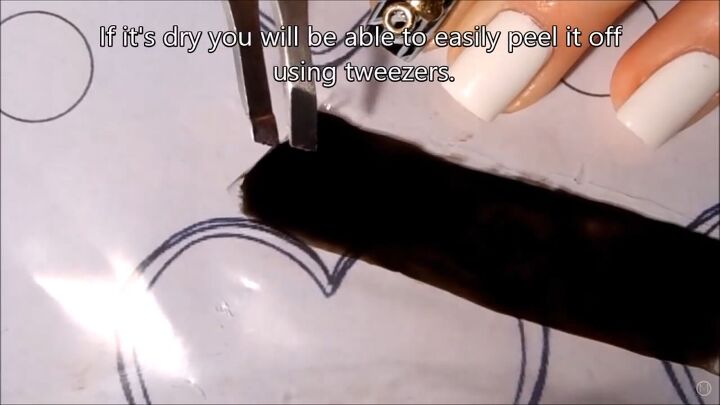
Once the nail polish is dry, go ahead and peel it off. It’s best to use tweezers for this step.
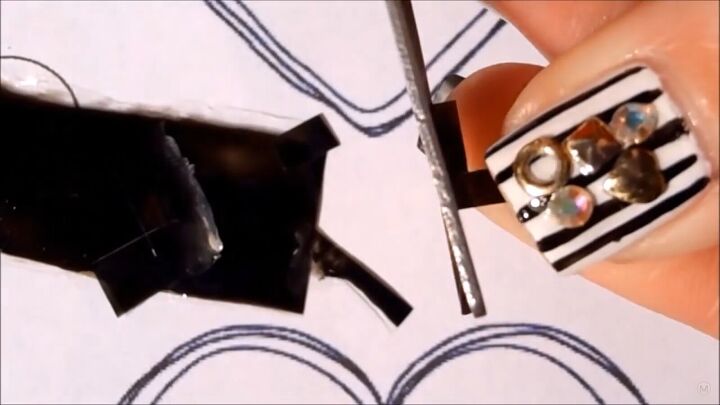
With sharp scissors, cut the letters L O V E and make sure they will fit your nail.
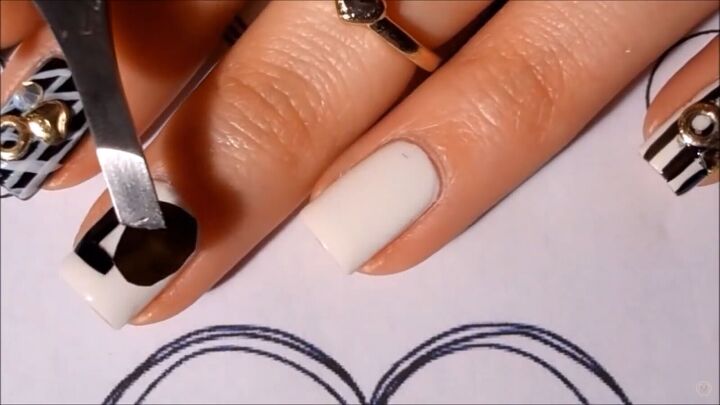
Next, apply a top coat and carefully place the letters using a dotting tool.
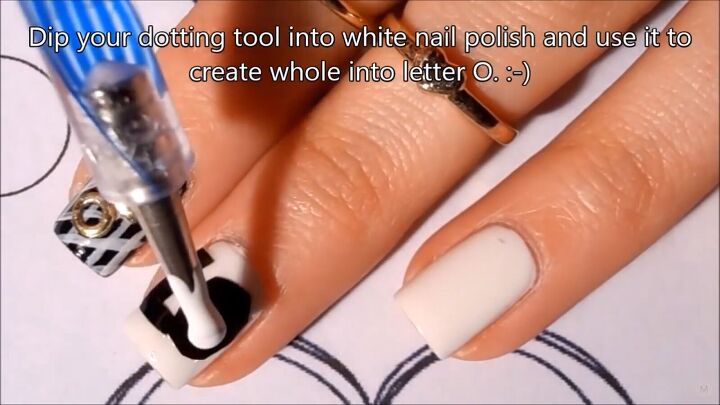
Add white nail polish in the middle of the “O”.
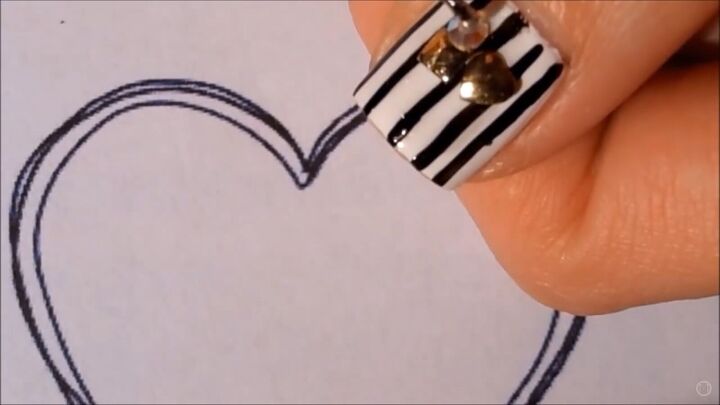
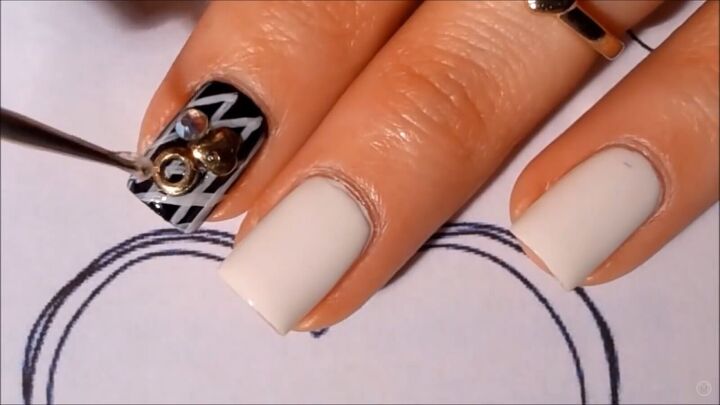
4. Add studs
Another great Valentine's nail idea is to add some sparkle and studs. To take your manicure to the next level, go ahead and add some nail embellishments. Be sure to apply a blob of top coat before applying.
5. Add a top coat
Now, finish off with a top coat and your Valentine’s Day nails are complete!

Black and white Valentine’s nails tutorial
What do you think of these fun black and white Valentine's nails? I love how easy and fun the process is, and the studs really give it an edgier vibe.
This is one of my favorite Valentine's nails designs since it’s not the conventional red or pink color; it’s truly different. I hope you enjoyed my tutorial and Happy Valentine’s Day!
The author may collect a small share of sales from the links on this page.


Comments
Join the conversation
Can this be done with gel polish?
Wonderful!