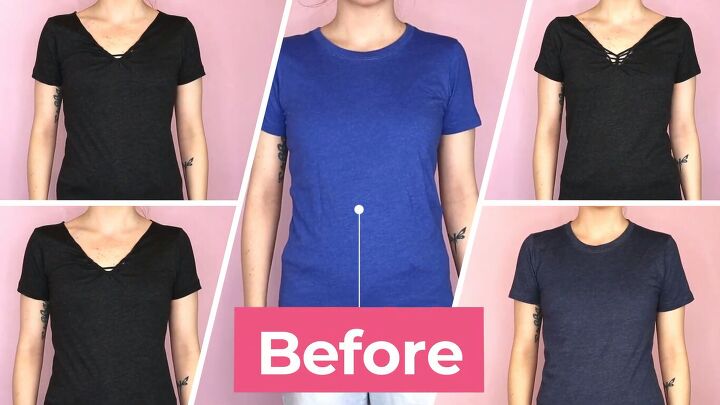
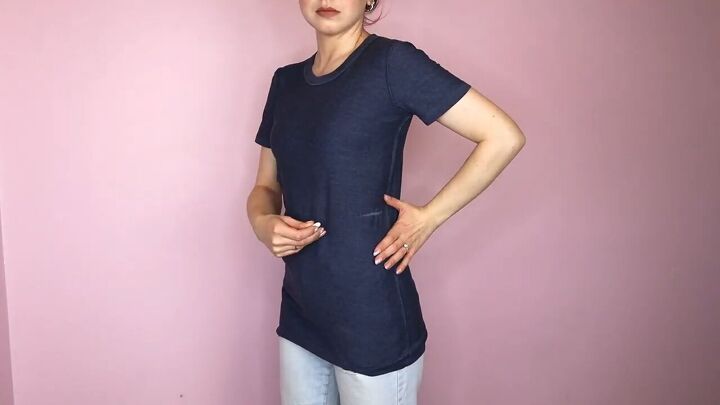
5 Ways to Make a DIY Crop Top From a T-Shirt: Easy No-Sew Tutorial

In this tutorial, I’m going to show you how to make a crop top from a t-shirt in five different ways. These five methods of making a DIY crop top from a t-shirt are all no-sew and super-easy to do. Let's get started!
Tools and materials:
- T-shirts
- Ruler
- Scissors
- Fabric chalk or marker
1. Knotted crop top

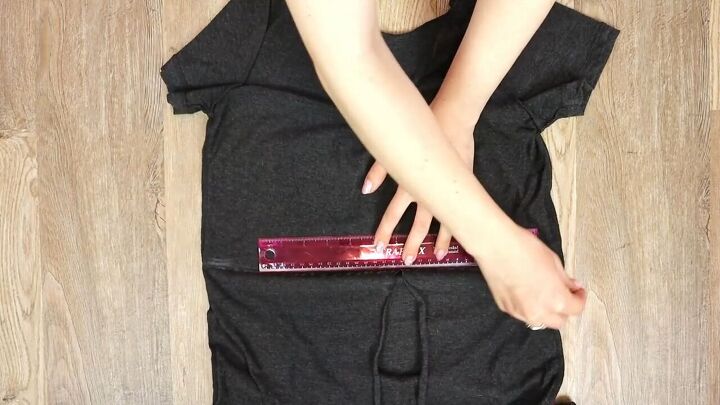
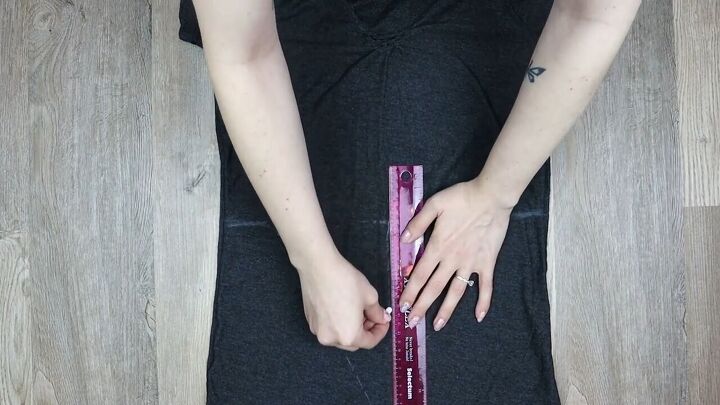
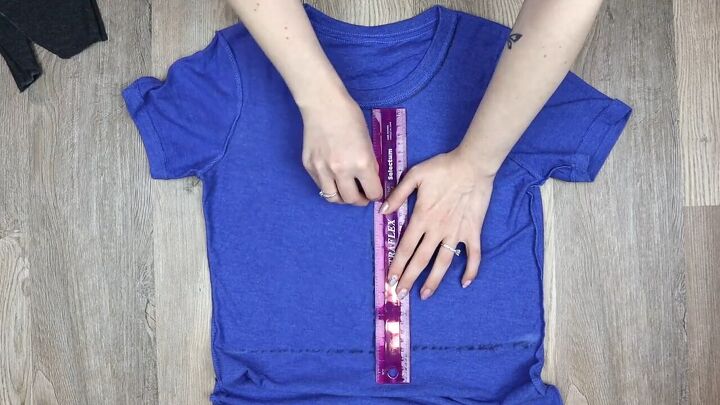
Put your shirt on inside out and mark where you want to crop the shirt on both sides.
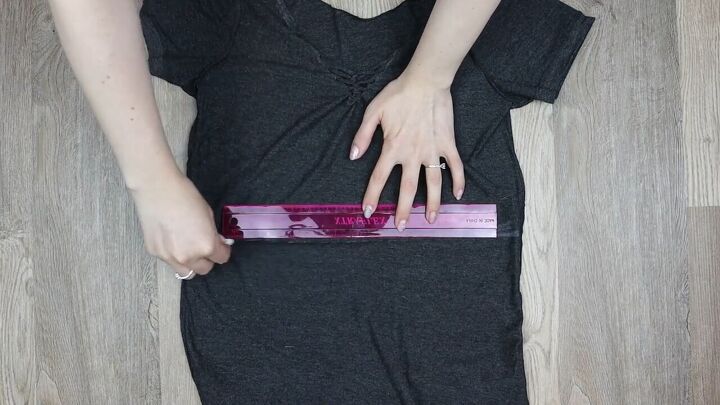
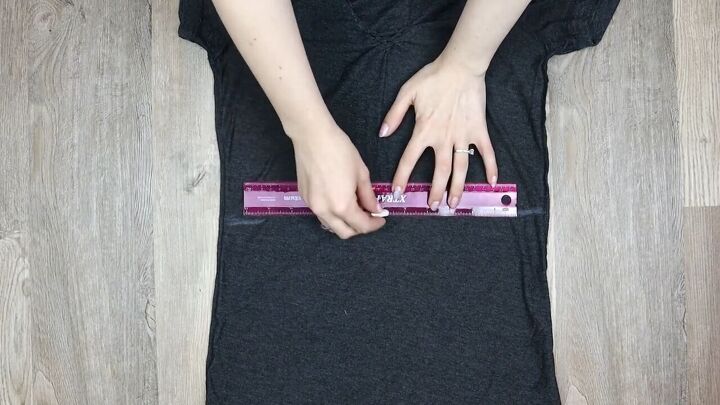
Lay your shirt flat and connect your crop marks in a straight line.
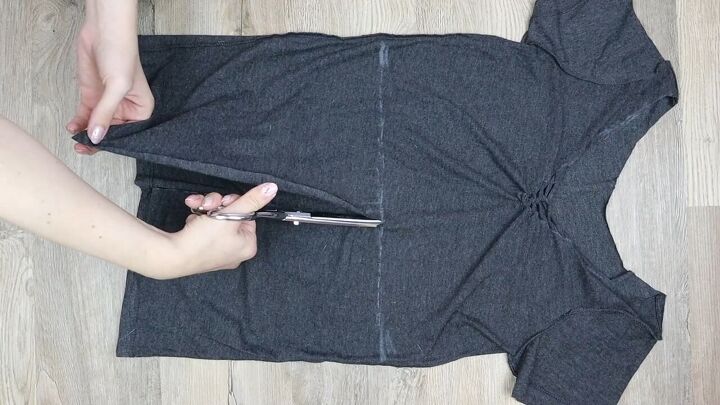
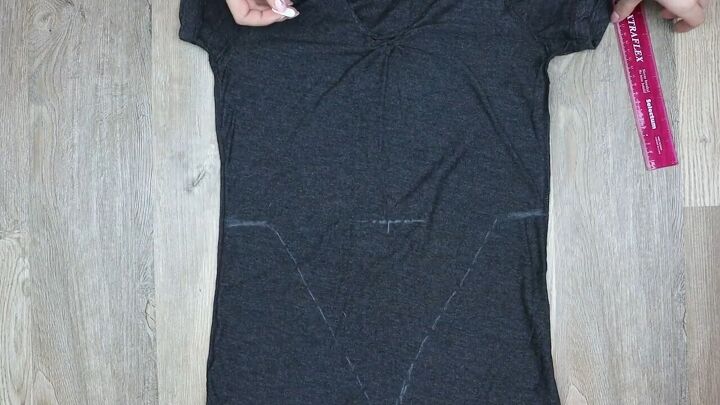
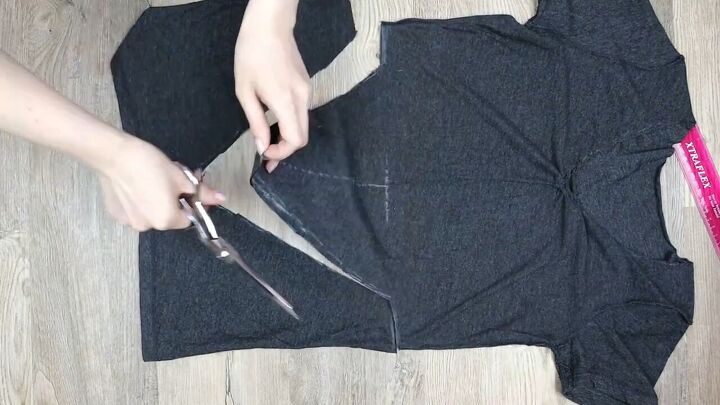
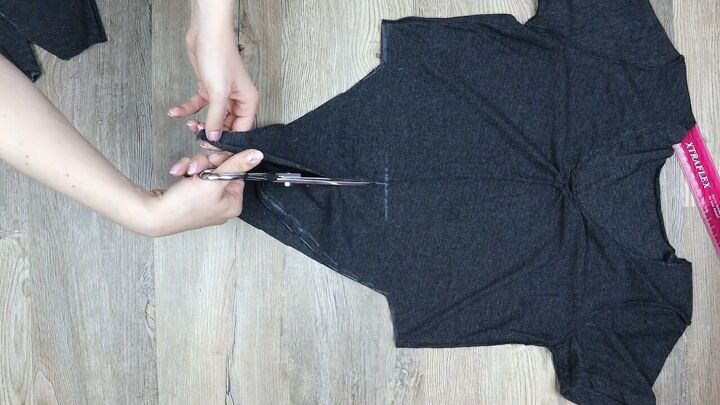
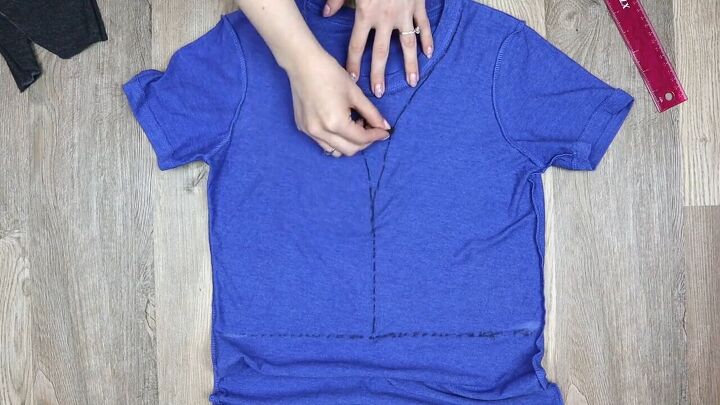
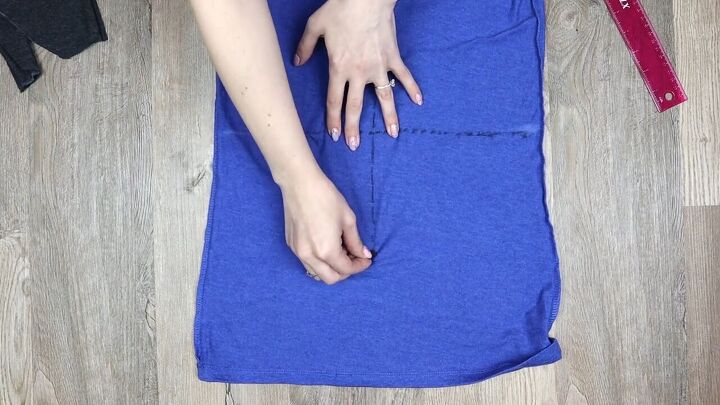
Draw a line from the center of the shirt down to the hem. Then, cut along the line through the front layer of the shirt, stopping at the crop line.
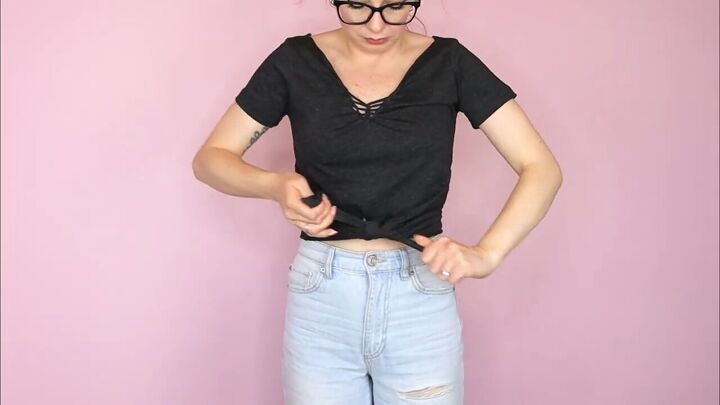
Put your shirt back on and tie the two sides together.
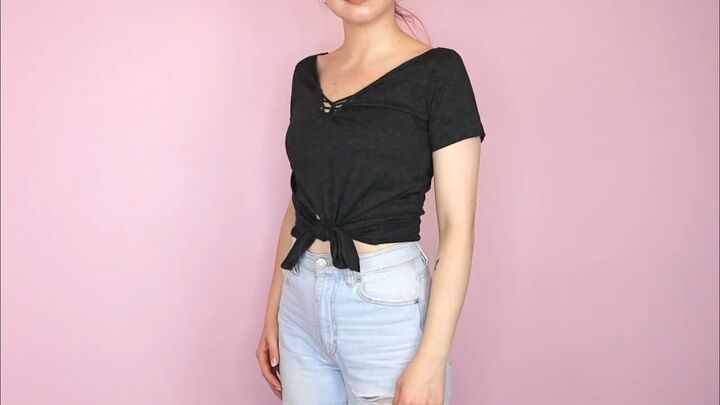
Here’s the finished look.
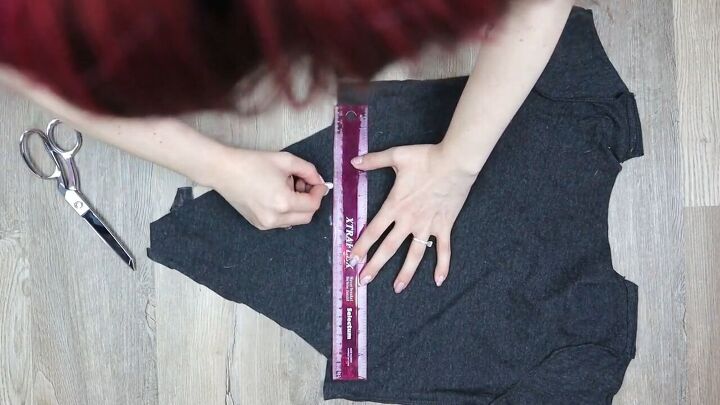
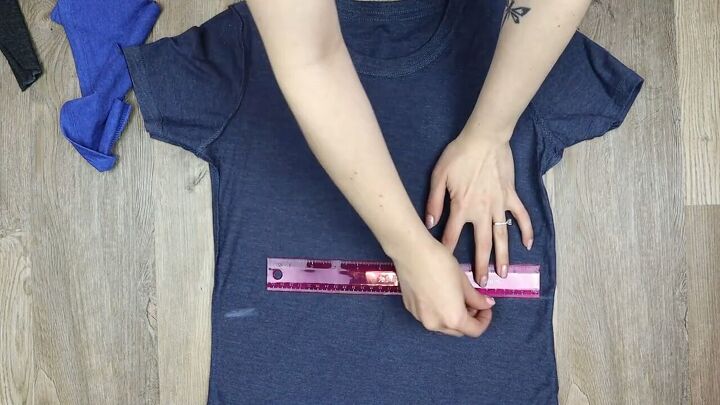
2. Straight crop top

Put your shirt on inside out and mark where you want to crop the shirt on both sides.
Lay your shirt flat and connect your crop marks in a straight line. Then, cut alongside the line through both layers of fabric.
Here’s the finished look.

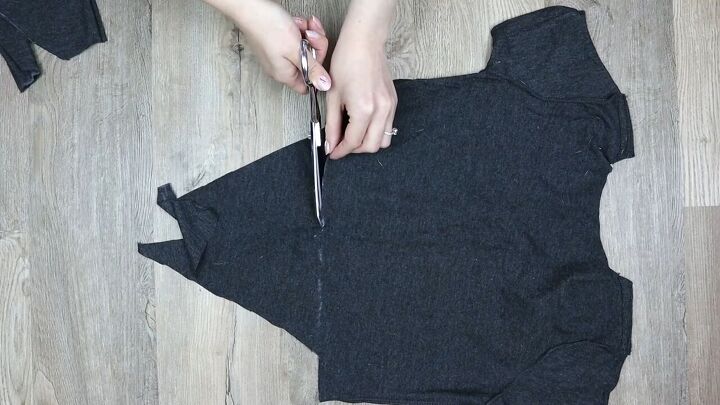
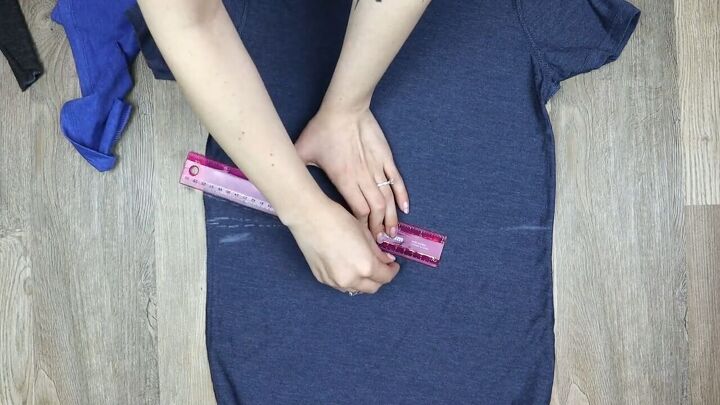
3. Tie-up crop top

Put your shirt on inside out and mark where you want to crop the shirt on both sides.
Lay your shirt flat and connect your crop marks in a straight line.
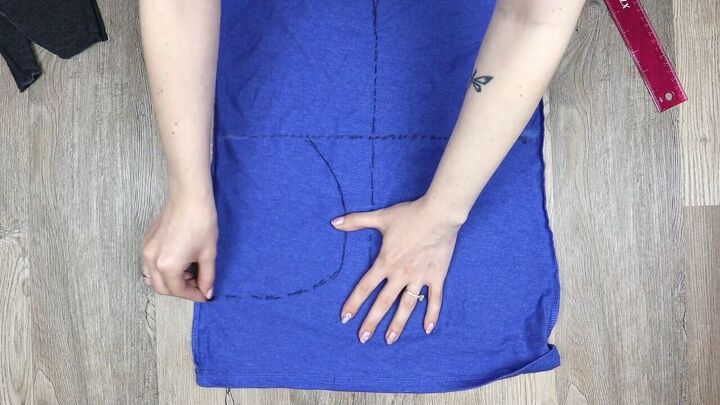
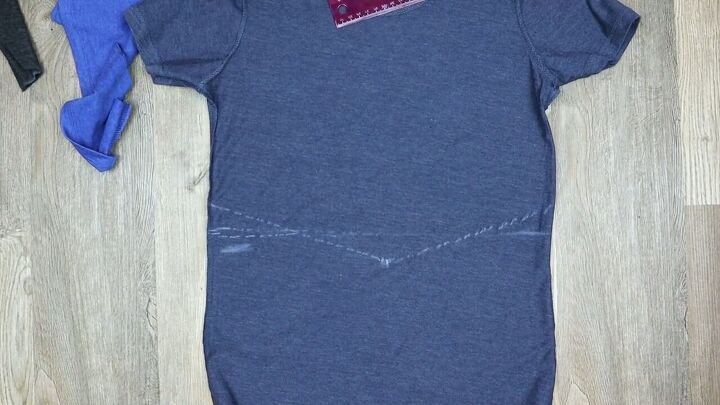
Starting a couple inches in from the side of the shirt, at the crop mark, draw a diagonal line down to the bottom center of the shirt. Repeat on the other side to form a triangle.
Draw a line from the center of the triangle to the bottom of the shirt.
Start cutting in from one side, down the diagonal line, up the other, and out the other side.
Then, cut up the center line and stop at the crop line.
Flip your shirt over, then mark the crop line on the back side.
Cut straight across the back layer only.
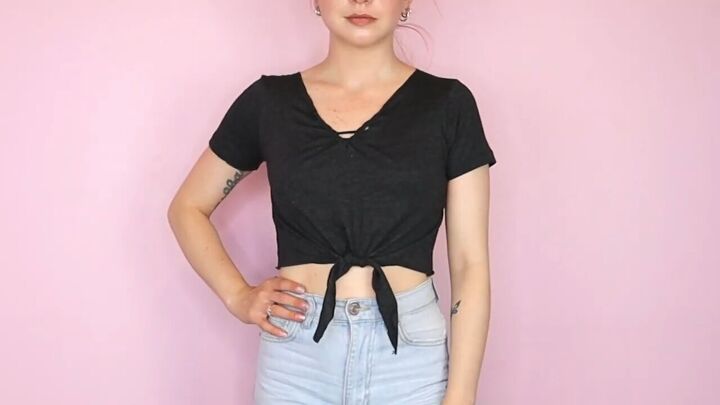
Put your shirt back on and then tie the two pieces together. Here’s the finished look.
4. Wrap crop top

Put your shirt on inside out and mark where you want to crop the shirt on both sides.
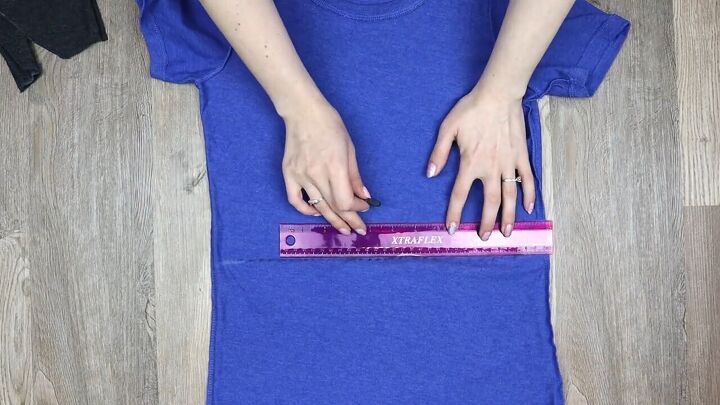
Lay your shirt flat and use a ruler to connect your crop marks in a straight line.
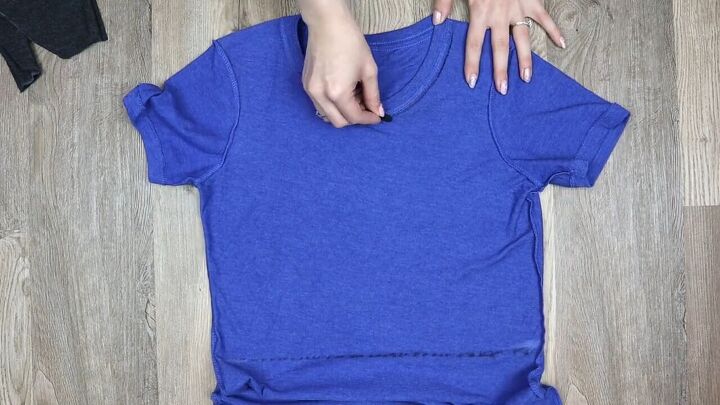
Trace a line around the collar.
From the center, draw a line starting from halfway down the shirt to the crop line.
Draw a curved line from each side of the collar to the center line.
From the bottom of the crop line, continue the straight line from the center of the shirt halfway down.
Starting a couple inches out from the center line, draw a curved L shape down, following an inch away from the center line then curving back to the outer edge of the shirt.
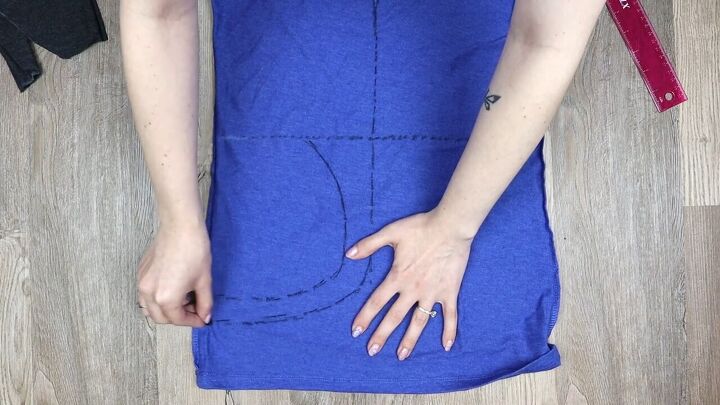
Keeping the inch distance from the center line, curve the center line out to the side of the shirt, following the curve of the first line.

Repeat on the other side.
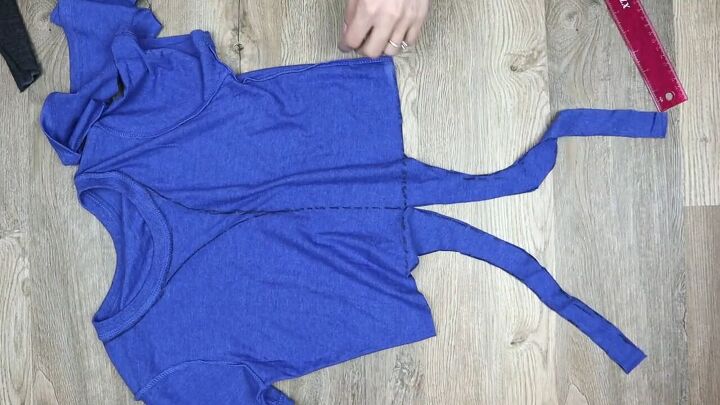
Cut out the straps through both layers of the shirt by following the lines below the crop line. Leave them attached to the top.
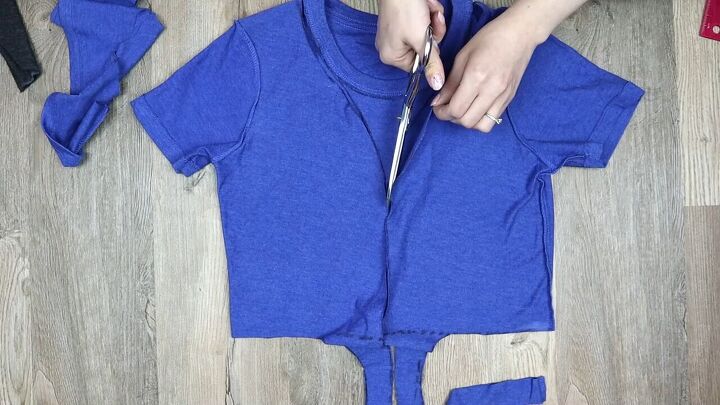
Only cutting through the top layer of the shirt, cut along the lines above the crop line.
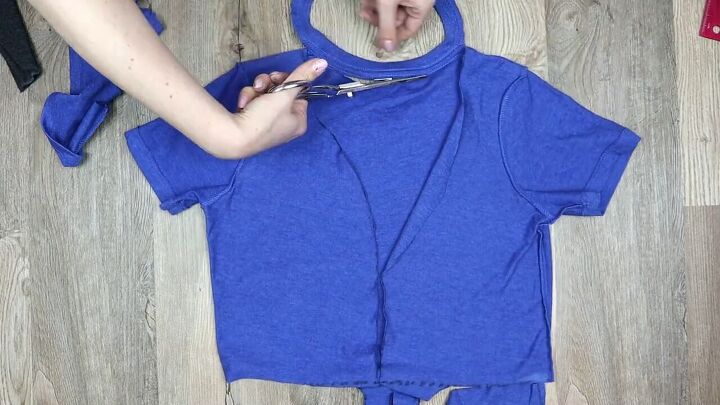
Cut out the collar in the back.
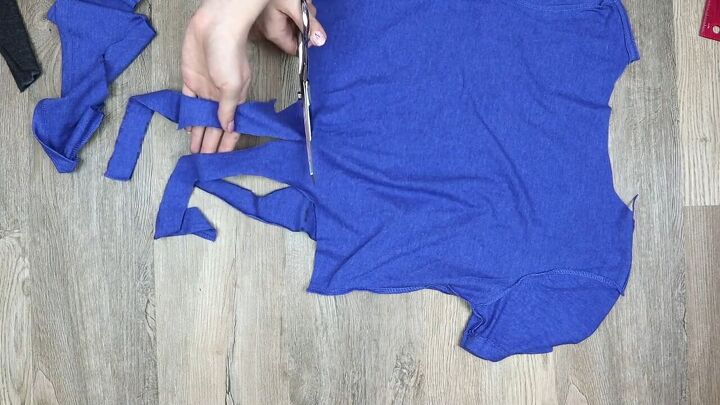
Flip the shirt over, and cut off the straps from the back layer only.
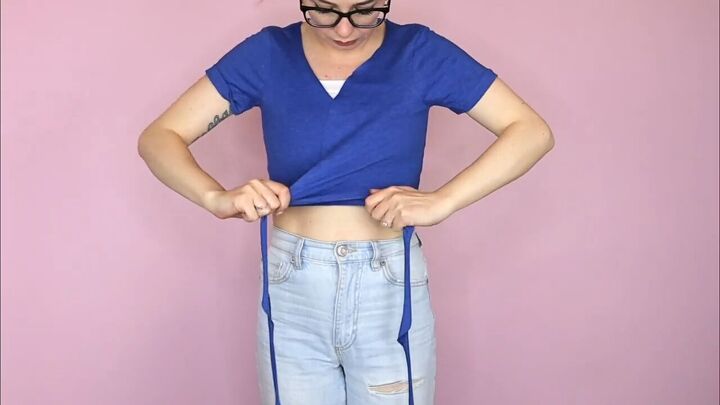
Put your shirt back on and cross each side in the front.
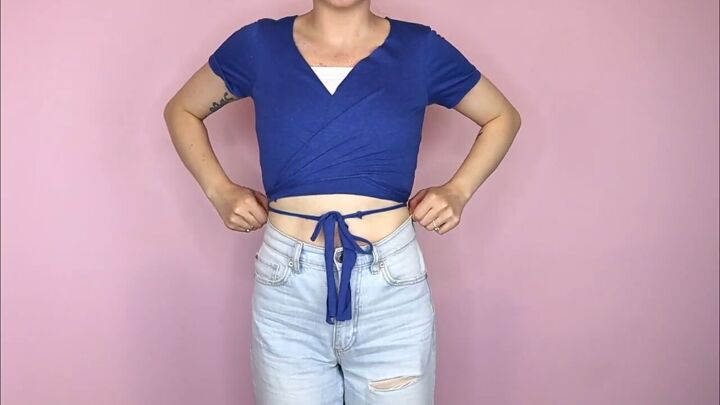
Either tie in the back or wrap it back around to tie it in the front.
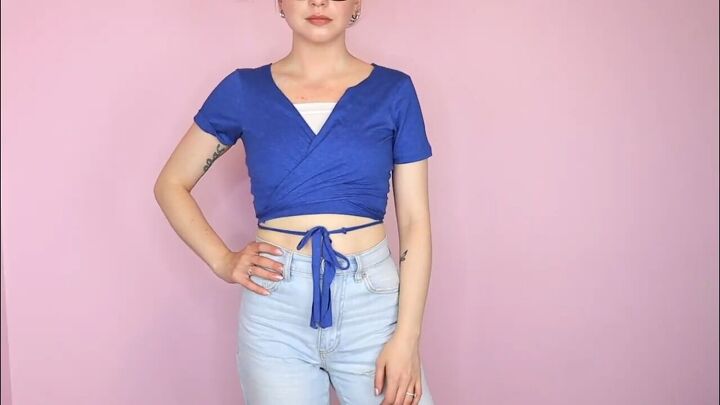
Here’s the finished look.
5. Fringe crop top
Put your shirt on inside out and mark where you want to crop the shirt on both sides.
Lay your shirt flat and connect your crop marks in a straight line.
Make a mark in the center a couple of inches down from the crop line.
Connect that line to the edge of the shirt a couple inches above the crop line on both sides.
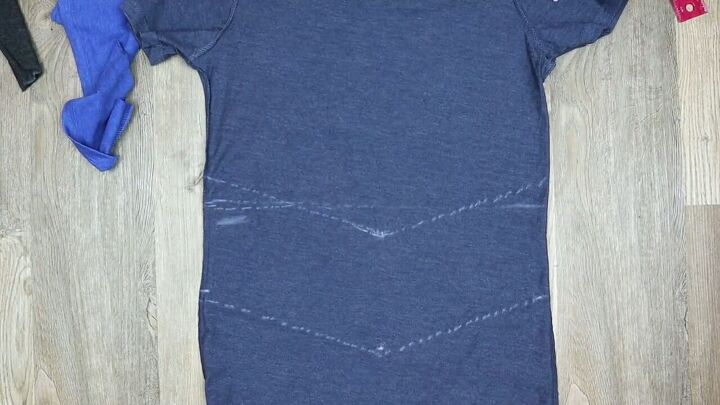
Draw another pointed line parallel to the first but six inches below it.
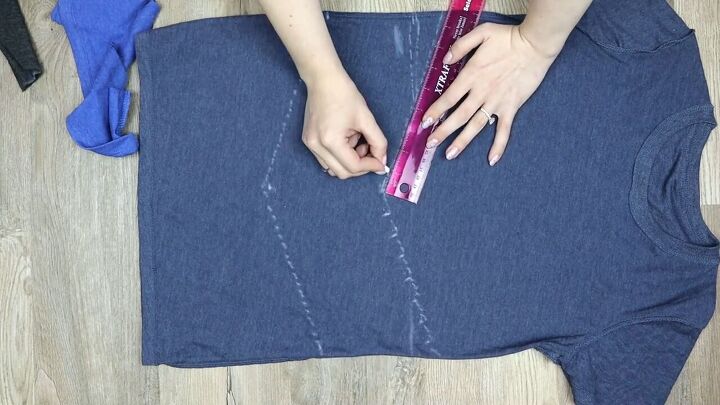
Now measure out inch-wide sections along the top pointed line.
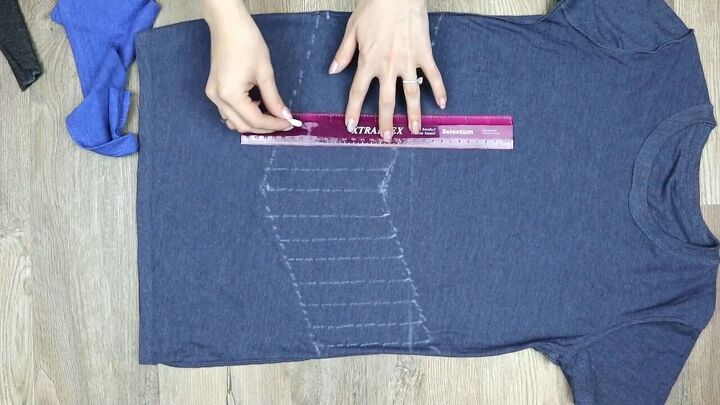
Use the inch marks to draw parallel vertical lines down to the bottom pointed line.
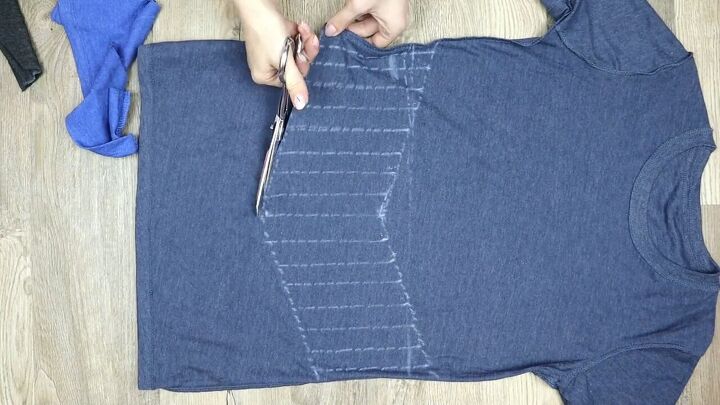
Cut through both layers of fabric along the bottom pointed line.
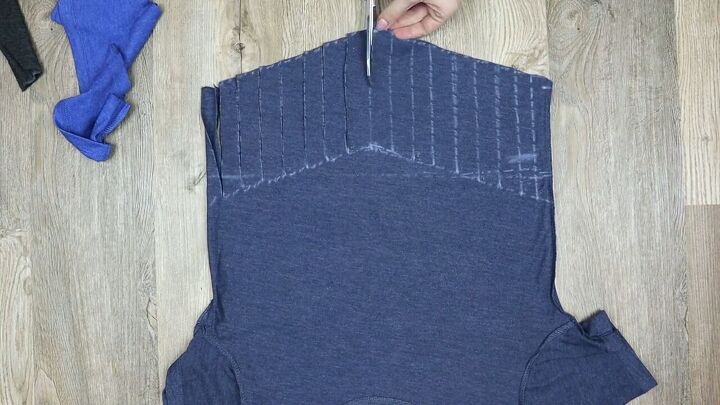
Cut all of the vertical lines, stopping at the top pointed line. Don’t forget to cut the side seams up to the pointed line as well.
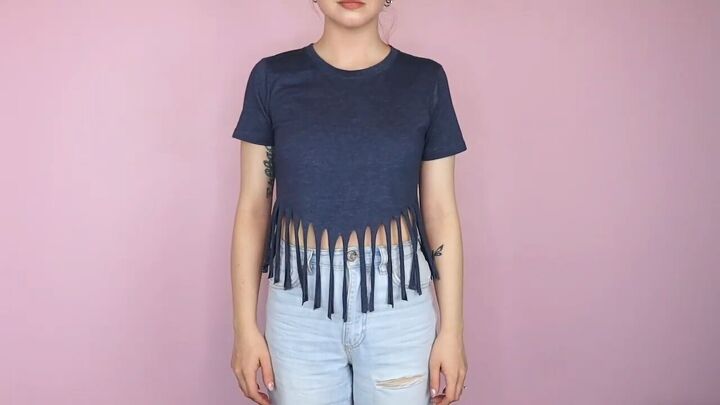
Now stretch all of the pieces to create a fringe.
Here’s the final look.
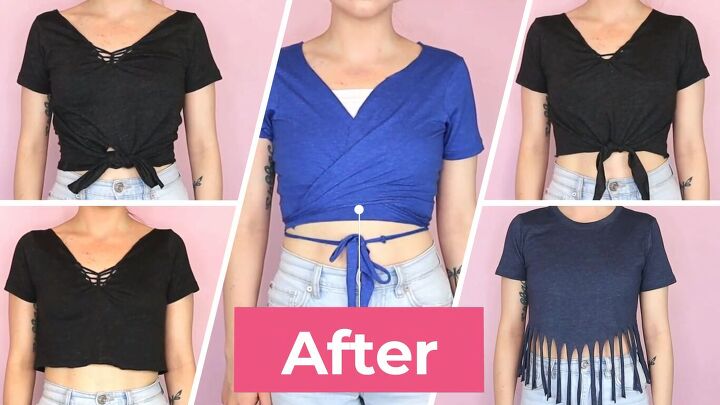
DIY crop tops from t-shirts tutorial
I really hope you enjoyed this DIY t-shirt cutting crop top tutorial. Let me know which one you’ll be trying in the comments below. Thanks for joining!
The author may collect a small share of sales from the links on this page.


Comments
Join the conversation