How to Applique With Sewing Machine (easy Fabulous)
Today we’re talking about how to applique with sewing machine.
Maybe it’s just me, but I always see plain fabric as a blank canvas of possibilities yelling at me to do something interesting to them. (Hence why I ice dye fabric, embroider it, overdye it and all manner of other things).
Well, you can add sewing machine applique to the list of fun things you can do with fabric to make other fabric more interesting!
In this easy applique tutorial, I’ll show you how to applique on knit fabric. You’ll learn where to find great fabrics for appliaue, and we’ll chat about what kind of machine you need for sewing machine applique.
We’ll finish up as I walk you through step by step how to applique with sewing machine.
Let’s get embellishing with appliqué!
elizabethmadethis.com is a participant in the Amazon Services LLC Associates Program, an affiliate advertising program designed to provide a means for sites to earn advertising fees by advertising and linking to Amazon.com.’ As an Amazon Associate, I earn from qualifying purchases. If you purchase a product through one of them, I will receive a commission (at no additional cost to you). I only ever promote products that I use and love and I think you will love too. Thanks for supporting this blog!
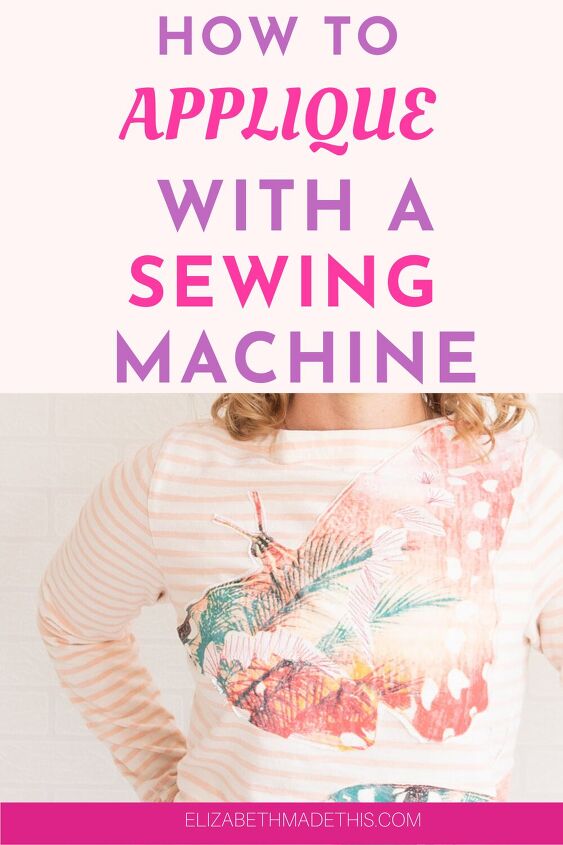
Table of Contents
Sewing machine applique supplies
- T-shirt you want to applique
- printed knit fabric (see below for ideas)
- all-purpose sewing machine thread or machine embroidery thread
- Heat n Bond Soft Stretch fusible web
- glue stick
- fabric scissors (find the best sewing scissors for you)
- pattern weights
- paper scissors
- sewing pins
- 75/11 stretch needle
What is applique?
Applique is any time you sew fabric on top of another fabric. Check out a more full explanation in 101 important sewing terms.
How to find amazing fabric for applique on knit fabric
Quilters love to create applique projects with lots of little bits of fabric. You can think of it like making a fabric collage.
While that is a wonderful way to use up your scraps, it takes time and planning to applique like that.
When I’m thinking about applique on knit fabric, it’s nice to push the easy button and find fabric that’s already kind of pre-done for me. What does that look like?
Look for fabrics that:
- Are lightweight
- Are not too-stretchy (50/50 cotton, 100% cotton, and 95/5 cotton spandex are all good choices).
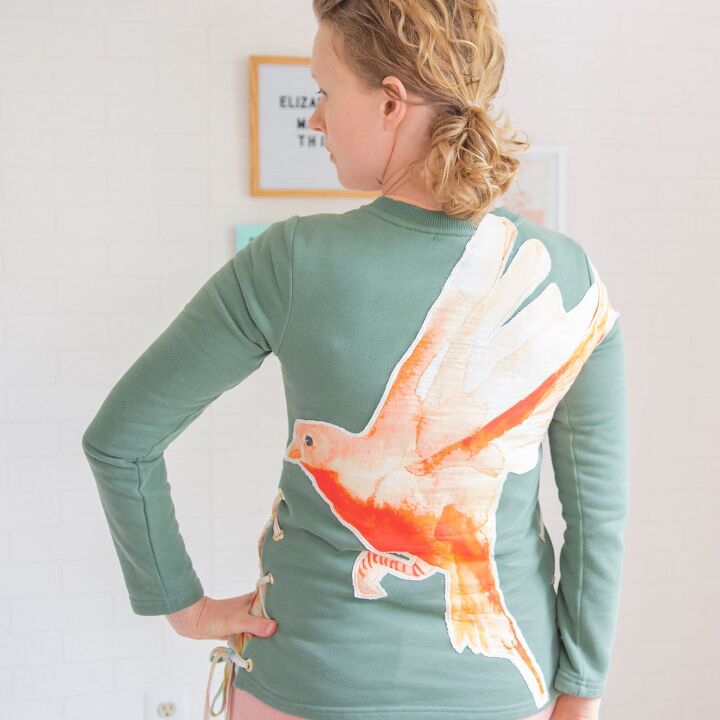
- Have large scale motifs that can be cut out. These make a statement when you pop them on a garment!
- If you choose to applique on a stable knit like you’d find on a sweatshirt or French terry, consider using sheer woven scarves. They often have amazing large scale designs that are spectacular when you applique them onto a garment.
You can use scraps of other knit fabrics. Something like the larger scale prints that Art Gallery makes are excellent choices.
But my favorite weird place to find great knit fabric for applique? The thrift store. You’d be surprised at the cool designs you’ll find on old t-shirts if you’re willing to look.
Do you need an embroidery machine to do sewing machine applique?
Nope, not at all. When you’re thinking about how to applique with sewing machine, the only thing your machine needs to be able to do is either a straight stitch or a zigzag. You can modify a zigzag to create a satin stitch.
When you’re talking about applique on knit fabric, it’s true that you can applique with a coverstitch machine. I’ve done this, it’s a great choice, but you absolutely do not need a coverstitch machine or a fancy pants embroidery machine to make beautiful machine applique.
Say it with me: all you need is a basic sewing machine to applique.
With those preliminaries out of the way, let’s jump into this project properly.
How to applique with sewing machine
Cut out a motif
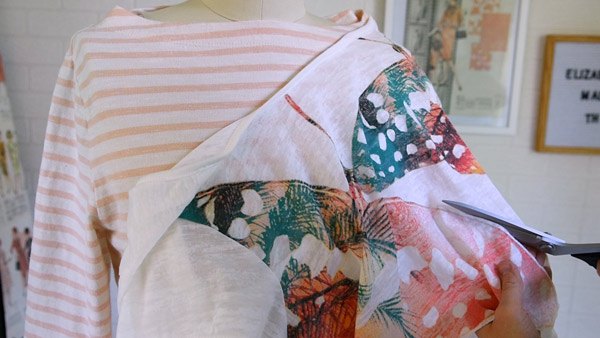
First things first, cut out your fabric motif that you want to applique onto your base t-shirt. Leave about 1/4″ all the way around your design.
Cut out Heat n Bond Soft Stretch
A little note abou t Heat n Bond Soft Stretch: it’s an iron-on adhesive that’s excellent for applique on knit fabrics (sometimes called fusible web or fusible adhesive).
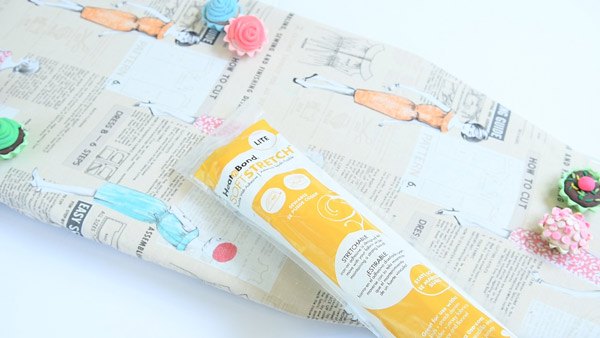
The adhesive is a little lighter than regular Heat n Bond, so it’s not really going to change the feel of your fabric. That’s important for knit fabrics which stretch while we wear them. If the fusible web didn’t stretch along with the fabric, the two fabrics would end up fighting each other and you wouldn’t get as nice of a look in the finished product. You don’t actually have to sew your applique if it’s been fused with the Heat n Bond, but I do think it looks nicer in the end.
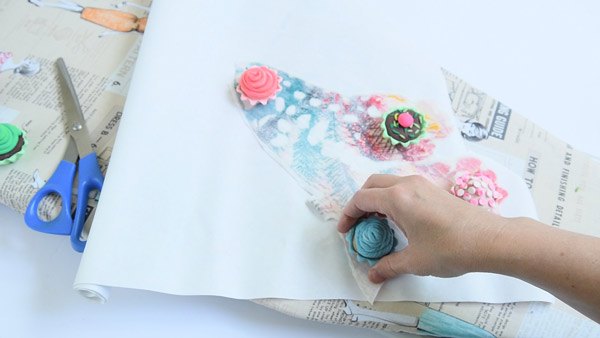
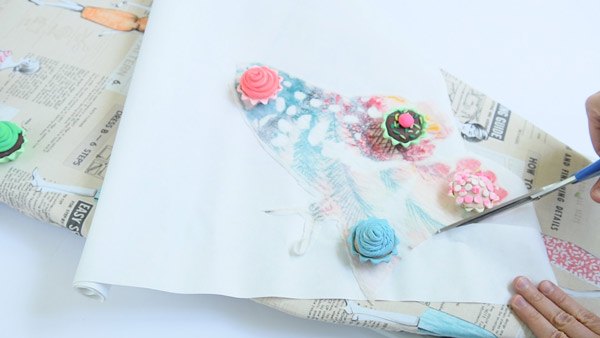
Roll out the Heat n Bond, weighing down the edges with pattern weights. Place your applique piece face down on top of the paper.
Cut through the paper around your applique with paper scissors.
Trim away about 1/8″ all around the edge. This is an optional step, but since we won’t be stitching with a satin stitch that would seal the raw edges in this tutorial, you don’t want the adhesive popping out past the edges.
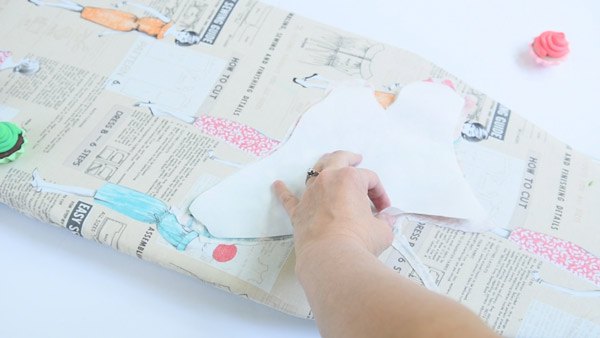
Add the Heat n Bond Soft Stretch to the applique
Lay the sticky side of the cut fusible web down on the wrong side of the applique.
Heat up your iron to the highest setting your fabric can tolerate. Press on top of the paper backing for 5 seconds at a time to activate the fusible adhesive. It’s a good idea to press on the right side of the applique too.
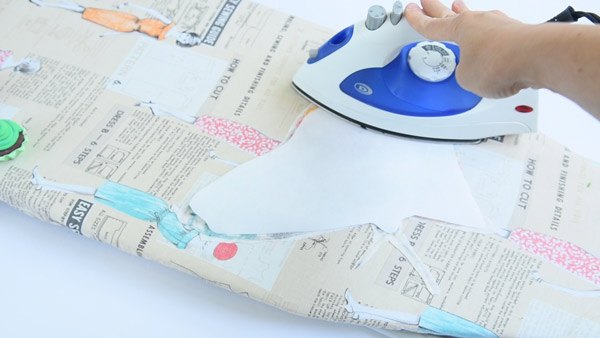
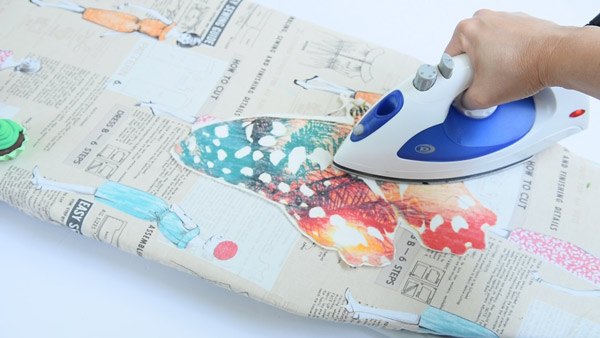
Lift the iron and move it to a different section and repeat the fusing process until you’ve covered the entire applique piece.
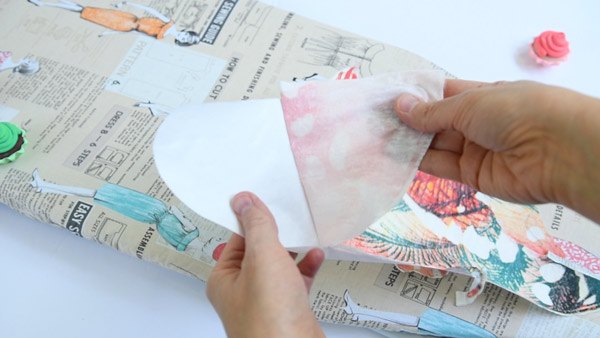
Peel off the backing. See that shiny film? That’s the fusible ready to go.
Lay out your design
From here, figure out where you want to place your applique on your t-shirt.
It’s ok to move it around.

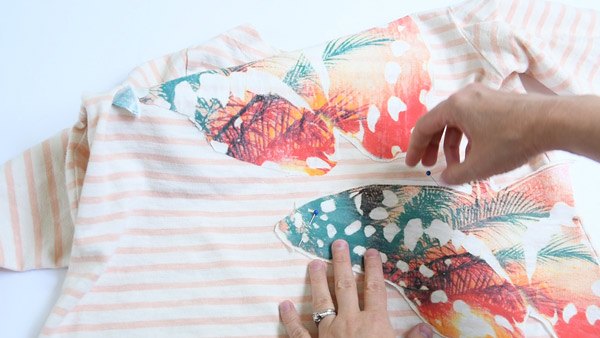
You can pin it in place and step back a little. Squint at it. Do you like it?
If not, play around with it a little more. You could pop the applique on the back of your t-shirt, wrap a side seam with it or just place it at a different angle.
Do note that if you’re working with a huge scale print like my butterfly here, it’s not a bad idea to pin the applique in place. Make sure that the fabric sits smoothly under the applique. This will make fusing turn out nicely. You don’t have to worry about this as much with smaller motifs.
When you’re happy with your applique placement, it’s time to fuse things in place.
Fuse the Heat n Bond Soft Stretch in place
Fuse the applique in place with your iron on the same setting, this time with steam.
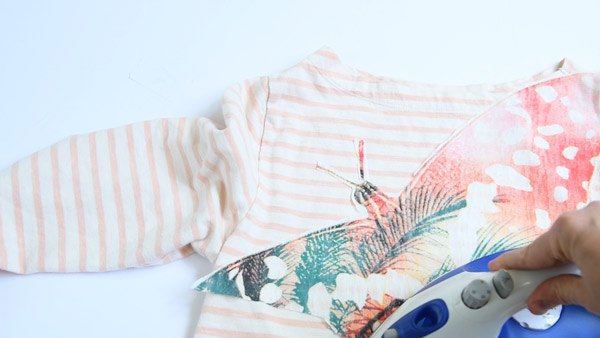
Press the iron in one spot for 20 seconds at a time. Lift and repeat until you’ve fused your whole applique in place.
Stitch out your design
Finally we get to how to applique with sewing machine!
Adjust your machine for a narrow zigzag: 0.5mm width, 2.5mm length. This almost looks like a straight stitch, but it has a little bit of give that’ll stretch with your knit fabric so that your stitches don’t pop.
Stitch around the outside of the design near the edge of the printed fabric.
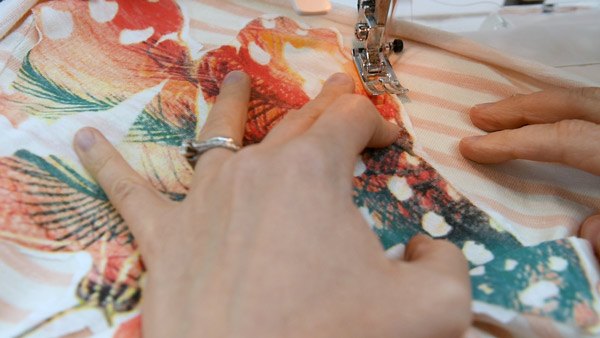
When you get to a corner, lift the presser foot leaving the needle down. Turn the fabric, then put the presser foot down and continue stitching all the way around your applique.
When you get to where you started stitching, stitch over the first few stitches to lock the stitches in place. Cut off your threads.
You can stop here if you’d like, or go on and add a little more stitching interest on the inside of your applique.
Stitch the interior of the applique
Find some details that you want to highlight on your applique. You can outline long straight lines, or smaller sections, stitching much like you did for your outline.
Another way to experiment with your stitching is to do a random fill stitch. This is one of my favorite ways to add visual texture to an applique. Here’s how to do it:
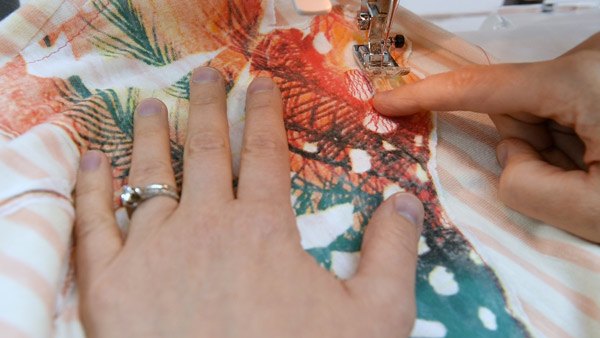
Find an open area on your applique. Stitch forward, then backward. Hover your thumb near your backstitch button so you can stitch and backstitch all while sewing continually. Move the fabric as you stitch so you create many different angles that fill up the empty space with stitching.
Stitch as much as you like on the interior of your applique.
Finishing up your machine applique
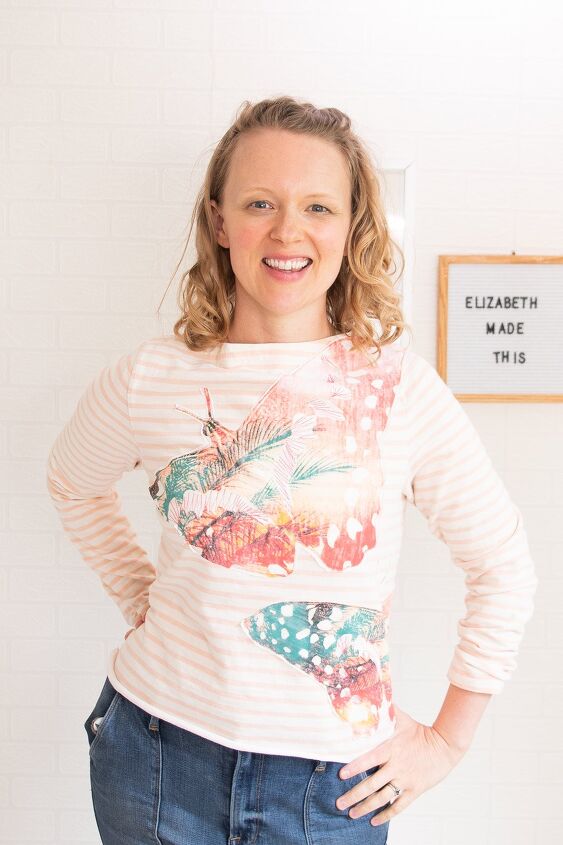
To finish up, turn your t-shirt inside out and press the stitches. Admire your applique!
Conclusion
So that’s the simple way how to applique with sewing machine. You are going to love this technique and you will have so much fun working on this!
Check out the video tutorial:
Elizabeth Farr is the writer behind the Elizabeth Made This blog where she shares helpful sewing tips, step by step sewing tutorials and videos to help you explore your creativity through sewing. She has written sewing Eguides and patterns, been a featured teacher at Rebecca Page’s Sewing Summit and Jennifer Maker’s Holiday Maker Fest and her work has appeared in Seamwork and Altered Couture magazines. She also created a line of refashioned garments for SEWN Denver. When her sewing machine isn’t humming, she’s playing and teaching violin, and hanging around a good strategic board game with her husband and 4 kids.
How to replace a sewing machine needle
The author may collect a small share of sales from the links on this page.


Comments
Join the conversation
Awesome!! ❤️