How to Make a Halter Top Out of a Polo Shirt 2 Different Ways

Are you ready to start thinking about summer? This thrift flip tutorial will get you in the mood for sure! Follow along to learn how to make a collared halter top from an old polo shirt.
You might not even have to go to a thrift store for the polo shirts – just root through some closets! There are two versions of the DIY halter top in this tutorial.
Tools and materials:
- Old polo shirts
- Halter top
- Scissors
- Thread
- Sewing pins
- Ruler
- Sewing machine
DIY halter top 1

1. Disassemble the polo shirt
Seam rip both side seams of the polo shirt to separate the front and back pieces and remove the sleeves as well.
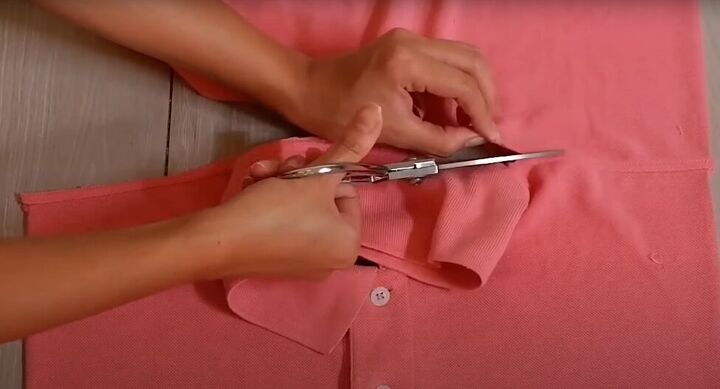
Then, complete the separation of the front and back by cutting along the top of the back to preserve the collar.
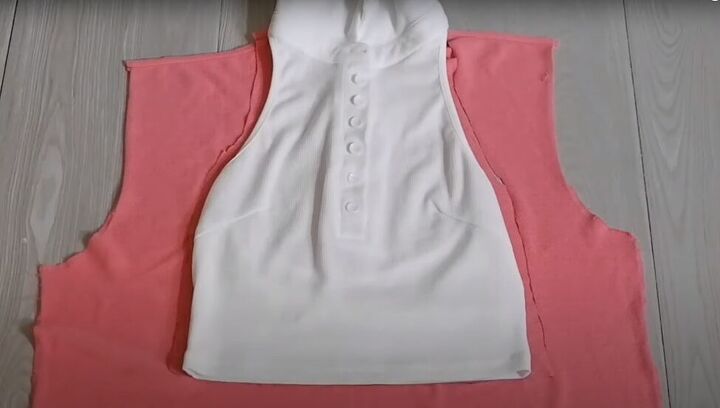
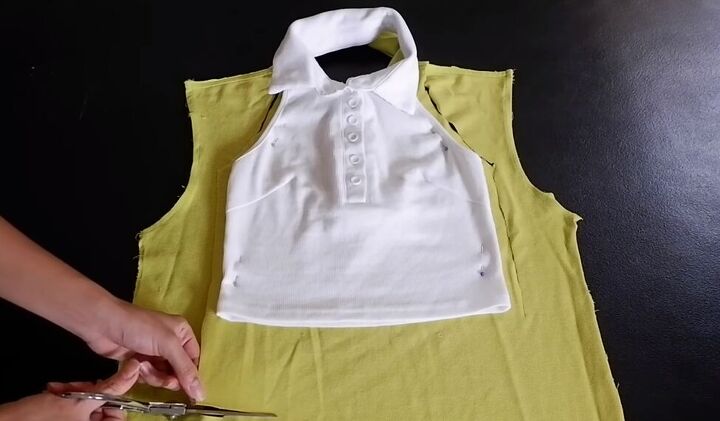
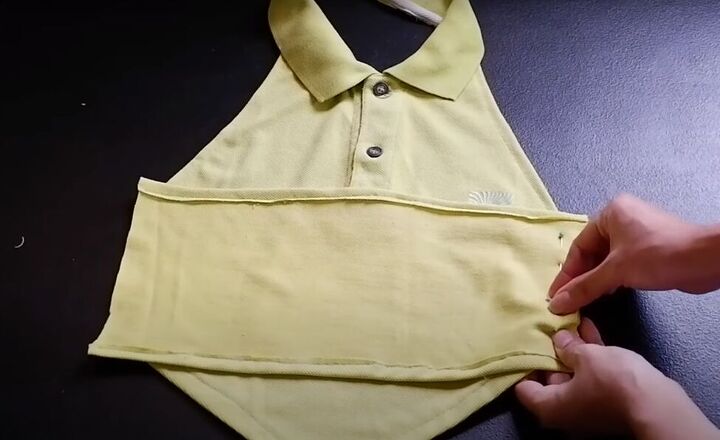
2. Create the halter front
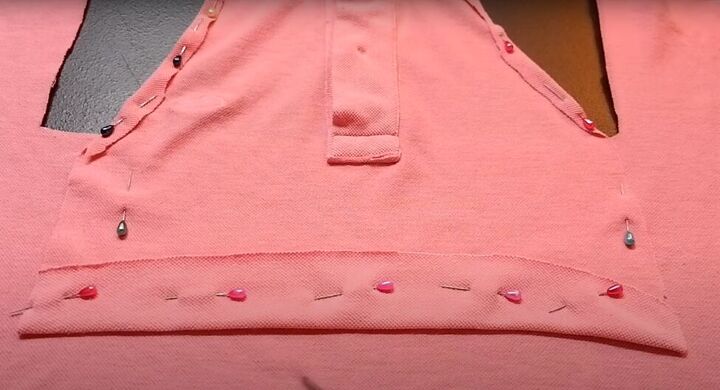
Pin an existing halter on top of the front piece of your fabric (the piece that has the collar still intact). Cut out the outline of the halter including a seam allowance.

Try on the halter and adjust the hem length to wherever you want it to be.
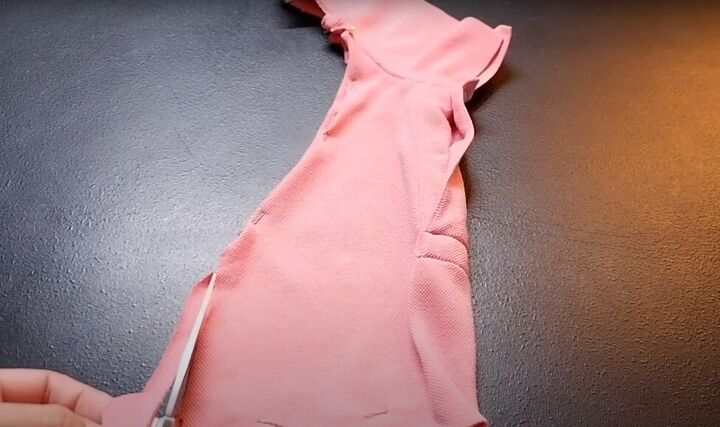
Pin the hem to where you want it. Then, fold in and pin both sides of the halter, ensuring that the two sides are symmetrical.
If the two sides are not symmetrical, trim one side as necessary.
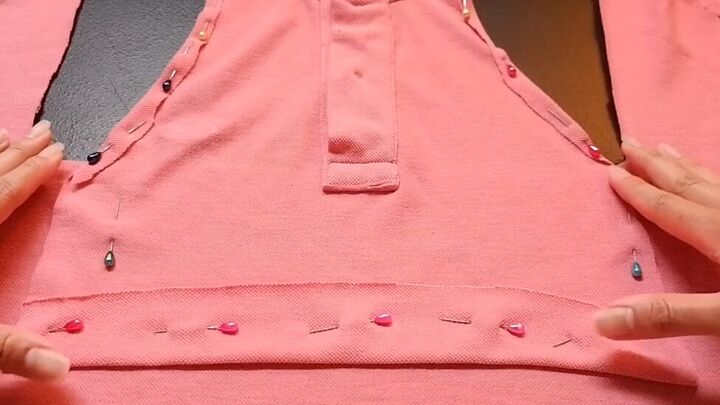
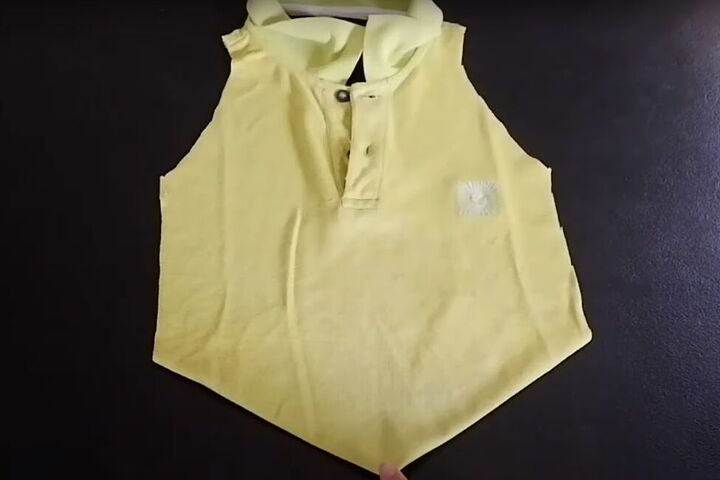
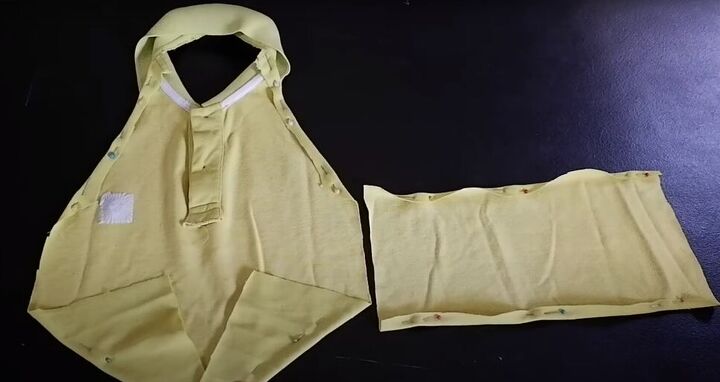
Here is the front piece, ready to sew.
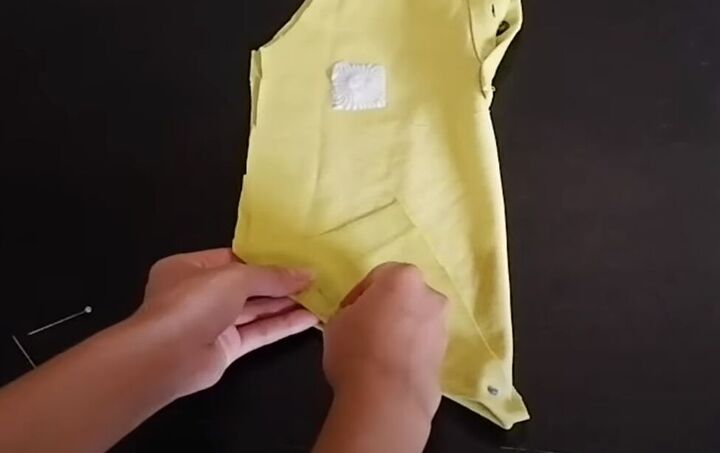
3. Create the halter back
Lay the halter front on your leftover fabric and trace the bottom rectangle of the front piece onto the fabric.
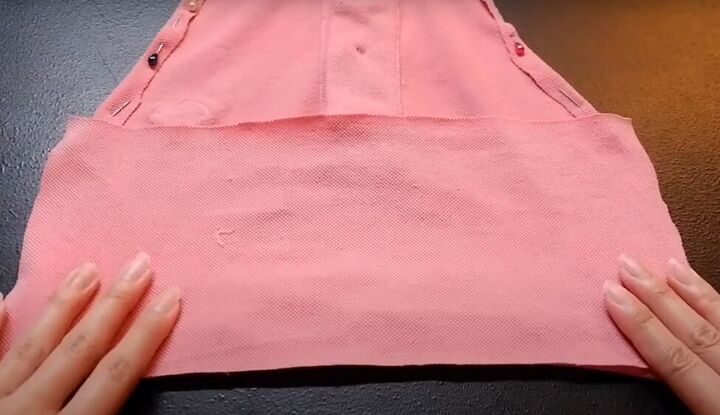
Cut the rectangle from the fabric adding seam allowance. Then, fold in and pin both long edges of the rectangle.
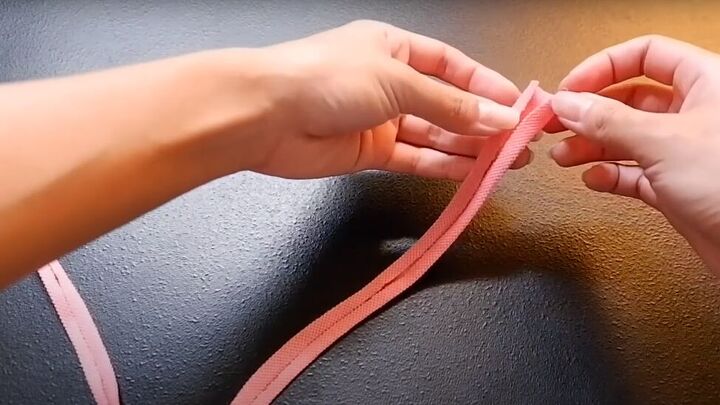
4. Create crisscross straps
From the leftover polo shirt fabric cut 2 rectangular strips measuring 2 x 80 centimeters (0.78 x 31.5 inches.) Iron the straps flat.
For each strap, fold both long edges into the middle.
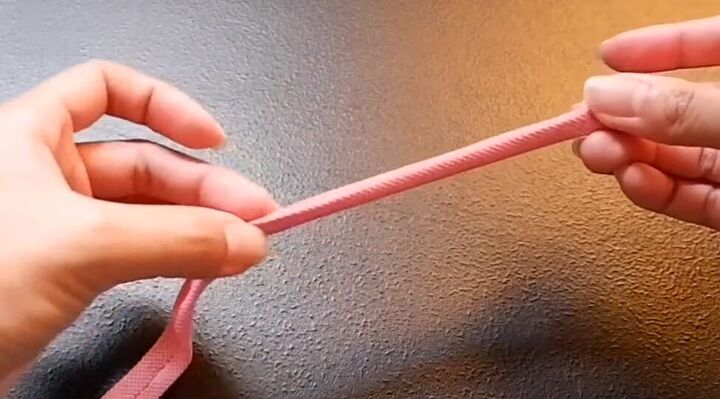
Now, fold the strap in half lengthwise with the inside facing in.

Sew the strap closed along the open long edge.
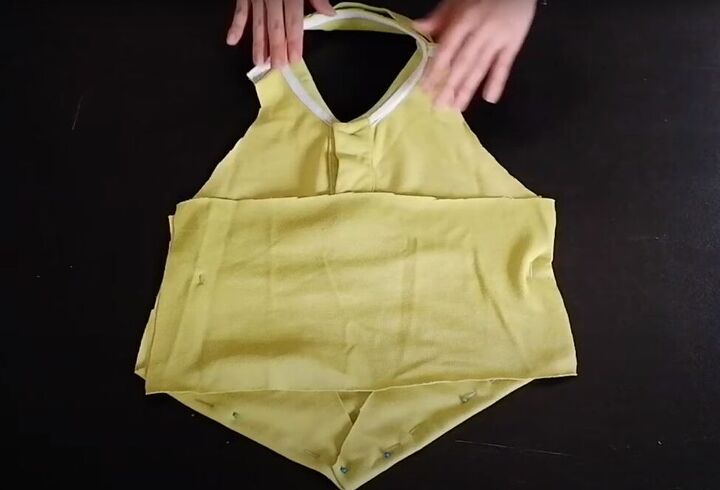
5. Attach all the halter pieces
With right sides facing, place the front and back pieces together lining up the bottom hems.
Insert the straps on each side at the bottom, between the front and back pieces.
Pin and sew the side seams in place.
Finally, sew the front sides and bottom hems of the halter.

Here’s the final look!
DIY halter top 2
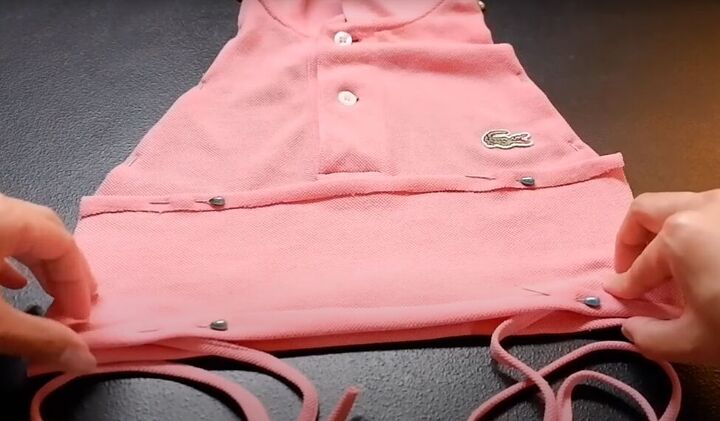
1. Create a V-hem halter
Disassemble and create the pattern for the V-hem halter following the same steps 1 and 2 above. But this time, when you are cutting out the halter front, extend the length to allow for the addition of the V-shape.
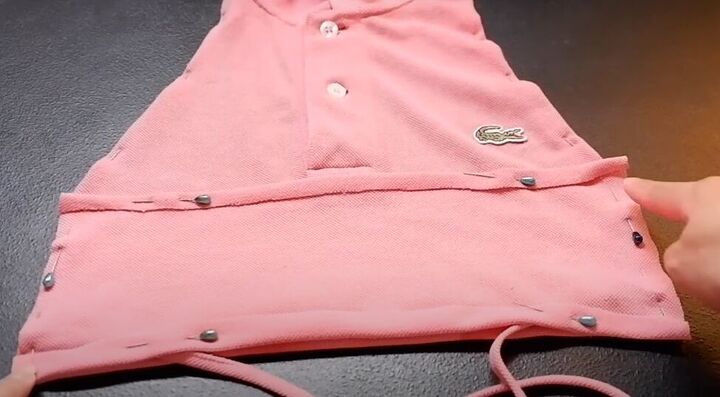
Fold the bottom sides of the fabric into the center to create the triangle.
Fold the front in half lengthwise with the inside facing in and check the triangle for symmetry. Then, pin the triangle in place.
2. Create the halter back
Create the halter back as you did in step 3 above.
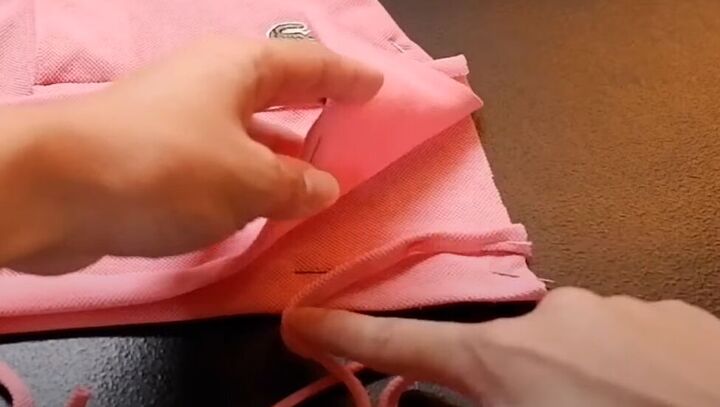
3. Hem
Hem all front and back edges before sewing the front and back together. Use a straight stretch stitch to allow for some give in the fabric if it is stiffer fabric.

When sewing the V-hem, use a single line of stitching for the whole hem, pivoting the fabric at the point of the V.
Trim excess fabric from all hems.
4. Sew the front and back together
Pin and sew the front and back pieces together.

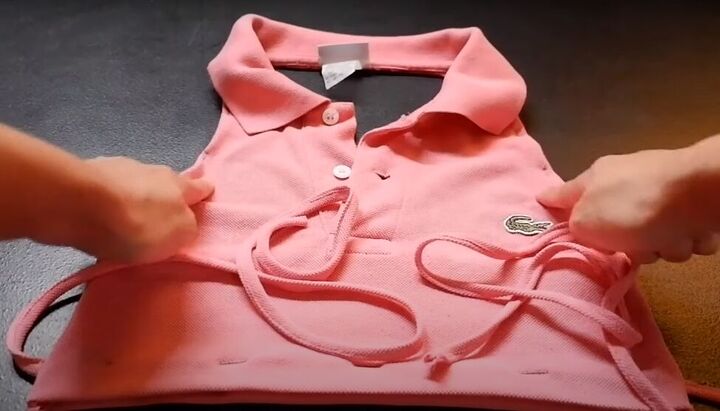
Here’s the final version of the V-hemmed halter.
How to make a halter top
They are both so cute and so summery! But they are also kind of classy looking with the polo collar. Leave a comment to let me know which easy DIY halter top you made and how it turned out.
The author may collect a small share of sales from the links on this page.


Comments
Join the conversation