Shelter-in-Place Sewing: Tea Towel Tunic
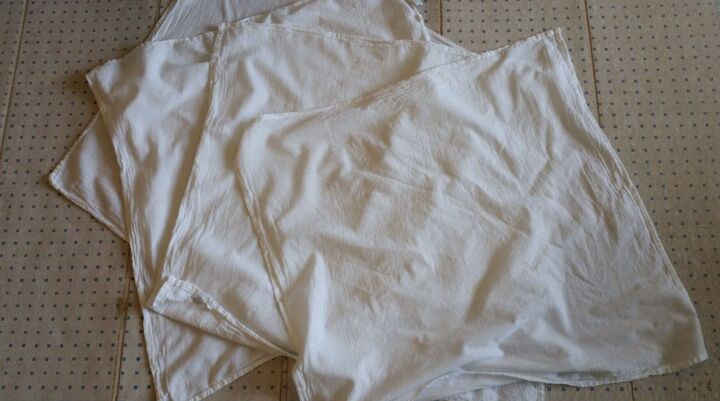
Hi, Crafters! My area has been under shelter-in-place orders for about a week, so non-essential businesses like fabric stores have been closed. Don’t worry- I have a bunch of supplies and projects to work on, but the closures did get me thinking… What sewing projects can I do using unconventional sources of fabric? What could I make from things that I have at home or can buy from essential businesses and/or online? My first inspiration came from a four-pack of tea towels…
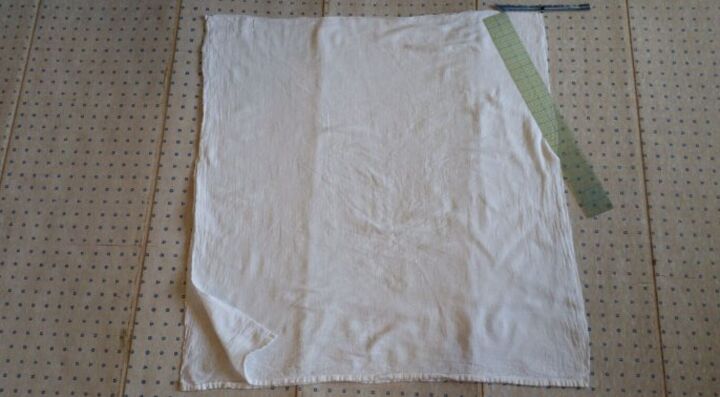
I had purchased these towels for another project, but their fabric just screamed “peasant blouse” to me! I challenged myself to create a simple shirt design using only towels, thread, and standard sewing supplies. I made mine using a sewing machine, but you could sew this by hand too! To get your own towels, check for these at Target or these from Amazon. I first washed and dried the towels, which made them VERY wrinkly. Ironing helped, they didn’t have to be perfect.
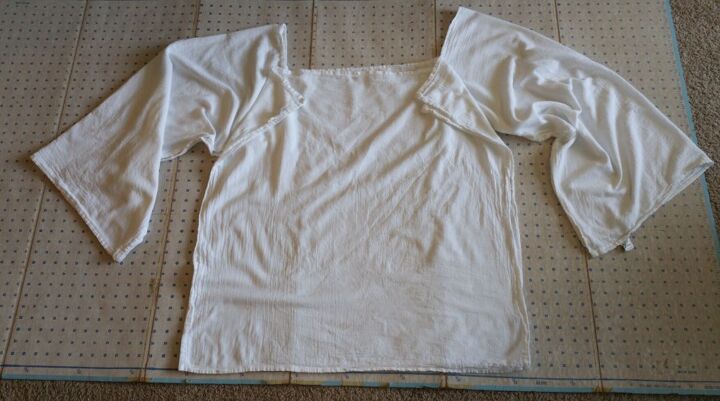
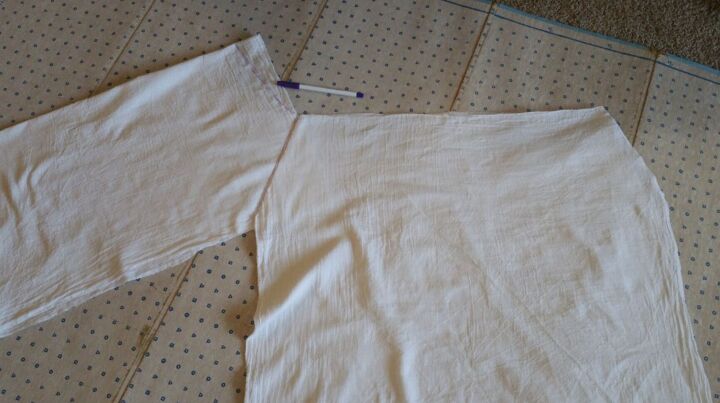
I laid out the towels in roughly the shape of a peasant blouse. Each sleeve was made from one towel, while the body of the shirt was made from two towels stacked on top of each other.
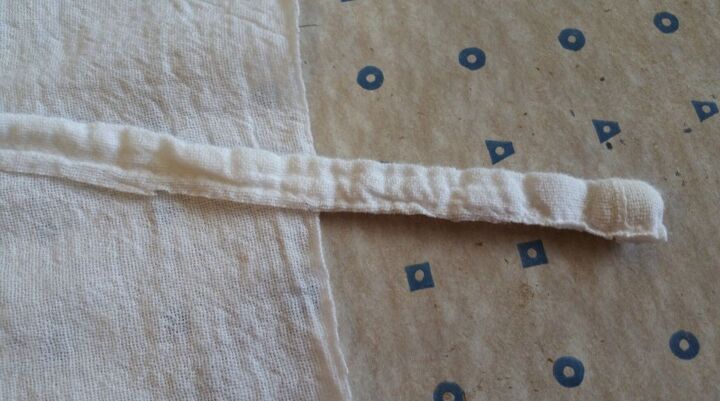
I wanted to create a sort of dolman sleeve, where part of the sleeve would form the shoulder of the shirt. Before I perfected the pattern, however, I needed to cut off the bulky hems that were edging the towels. I DID, however, leave the hems in place in what would become the bottom of the shirt. (Who wants to do extra hemming these days?) When cutting off the hems, I made sure to NOT cut the stitching holding the hem in place. I saved these hem strips for use later…
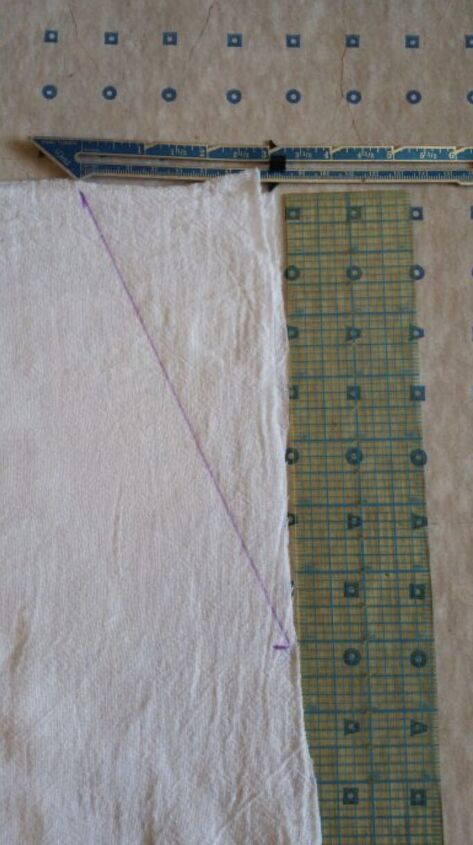
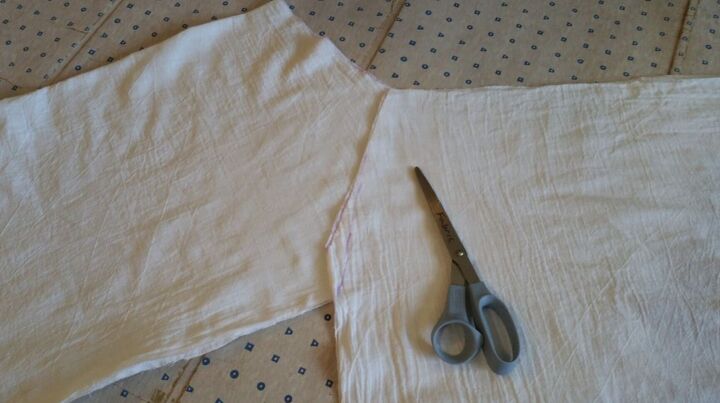
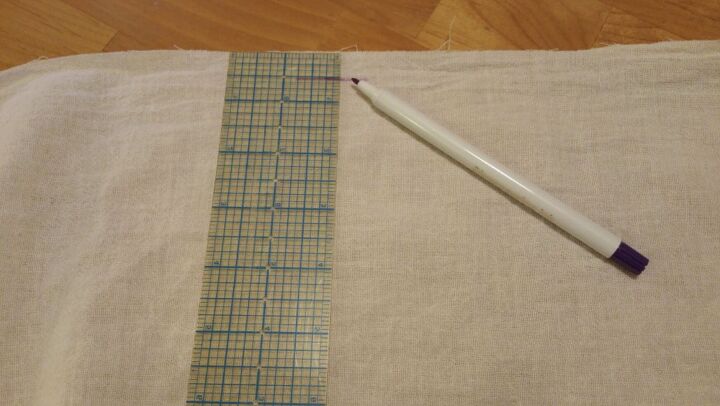
Next, I needed to cut the sides of the two shirt body pieces inward at the top.
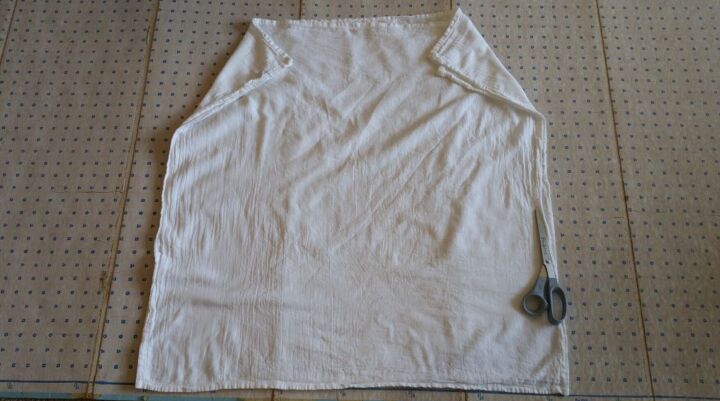
The blue ruler shows that I measured 3 inches in, while the long ruler shows 7 inches down. I later EXTENDED that length to 9 inches total, giving me more room under the arm.

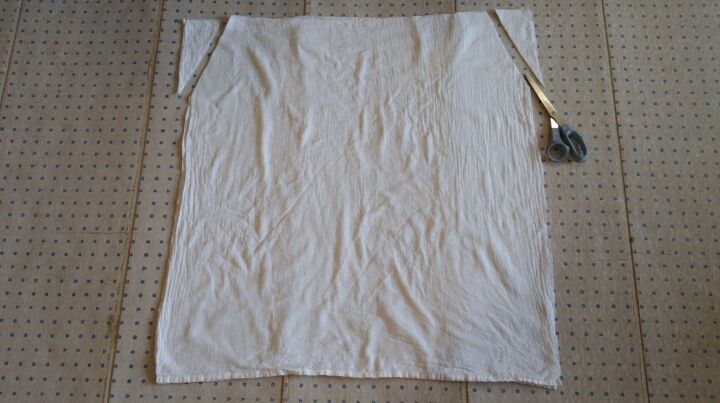
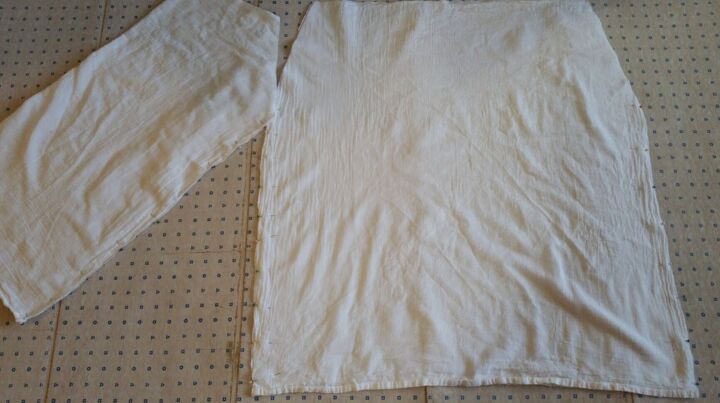
After cutting out matching pieces from both sides, I experimented with sleeve placement.
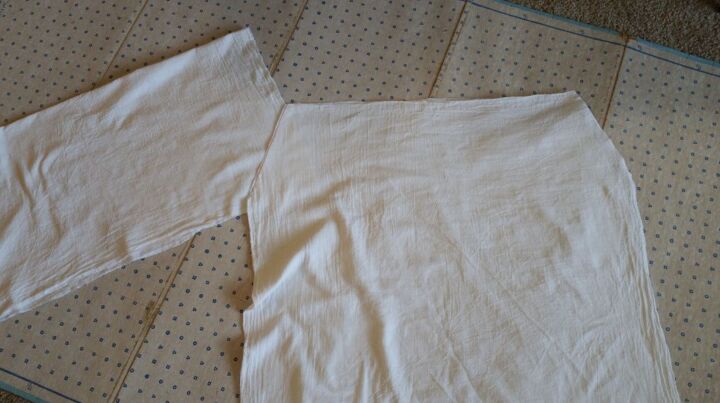
I marked where the sleeve needed to be cut off in order to meet the shirt body. I also rounded off the upper edge of the sleeve to make a smoother neckline shape. The second picture shows where I needed to lengthen the cut in the shirt body to meet the sleeve.
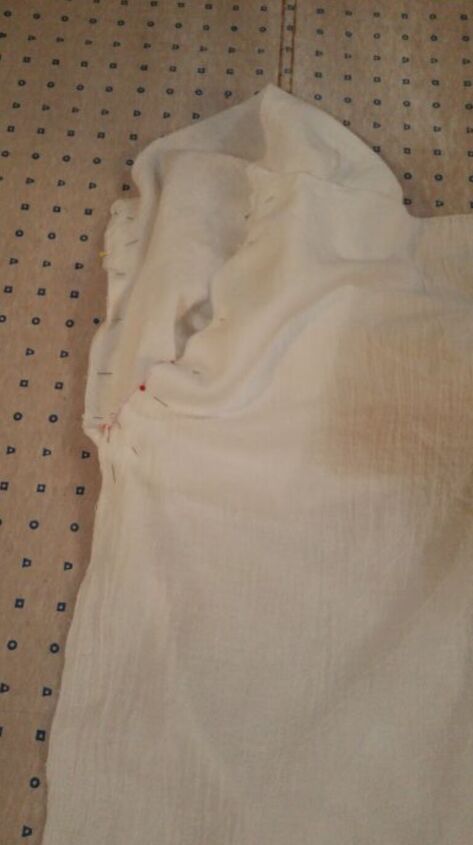
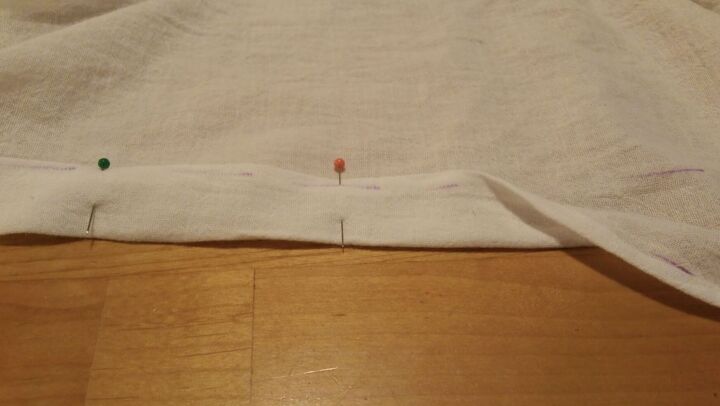
Next, it was time to pin/sew the sleeves closed and stitch the side seams of the body. I did NOT sew any of the cut areas closed. Those will be where the sleeves attach.
Putting “right sides together,” I put the sleeve to the inside and pinned the opening in the sleeve to the opening in the body. You can see how the upper edge of the sleeve extends beyond the top of the body. This will help create the dolman neckline.
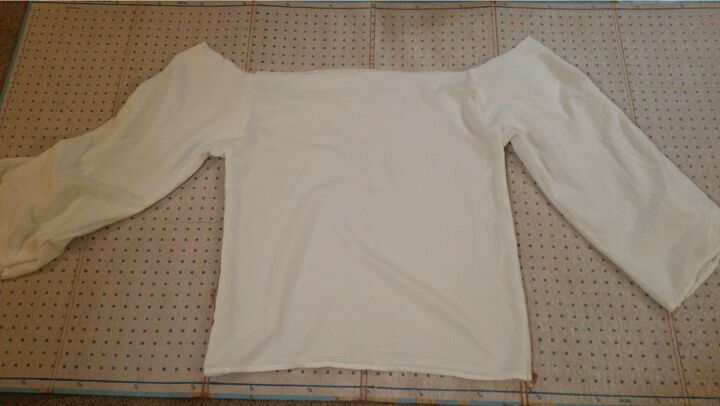
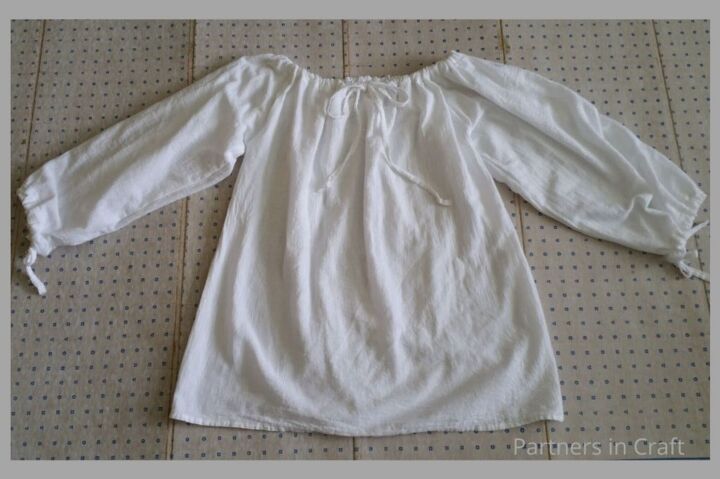
Here is the voluminous resulting shirt!
Next, I created tubes of fabric around the neckline and cuffs to make homes for the drawstrings. To start, I marked a half inch around the whole neckline and the cuffs. I folded the edge of the fabric to this mark and ironed.
With the edge ironed down, I folded the fabric again, this time making a tube big enough to fit the cut-off hem strips, a quarter inch of seam allowance, and a little wiggle room. I pinned this down, ironed, and prepared to sew…
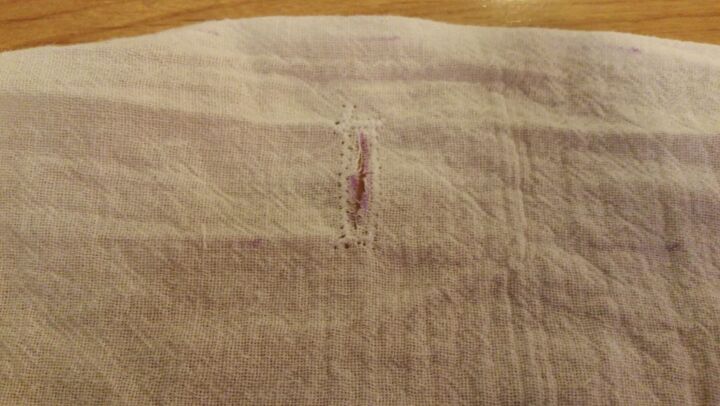
I briefly stopped tube-making to create a hole in the neckline for the drawstring. After finding the center of the front neckline, I cut a small slit in the soon-to-be drawstring tube. I sewed a zig zag stitch around the slit, but you could use a buttonhole foot or edge by hand. I didn’t go to this trouble with the cuffs and simply left about an inch of the cuff tube unsewn for the drawstring to emerge.
After sewing the tubes around the neck and cuffs, I got busy making drawstrings from the cut-off hems. One strip was big enough to make a drawstring for one cuff. I hand-sewed three strips together for the neck drawstring, but later trimmed that shorter. Since I had plenty of extra strips, I also sewed three more together for a belt.
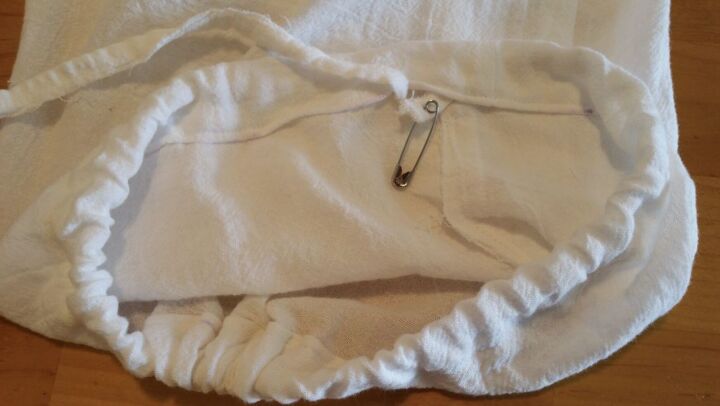
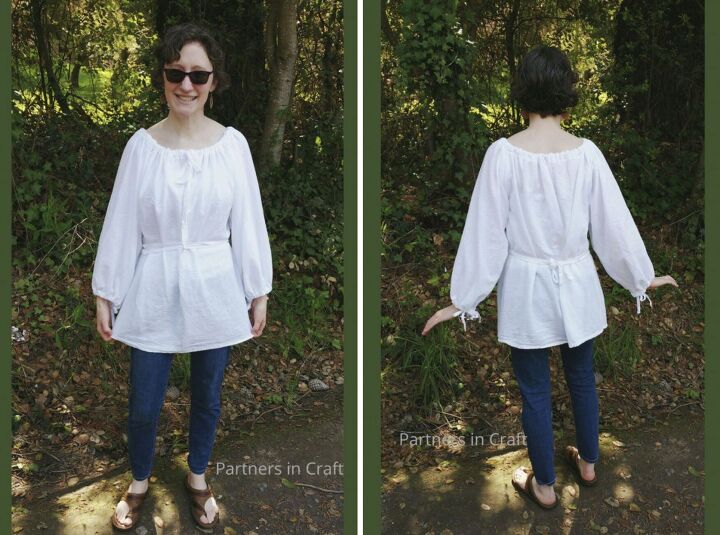
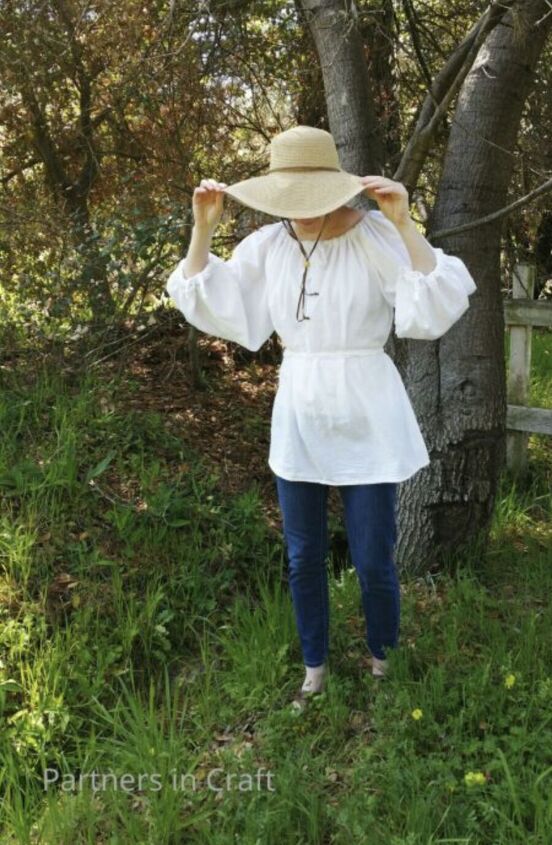
A handy safety pin helped me thread the strips into the neck and cuff tubes. TA-DA! With the drawstrings scrunching the fabric into place, the peasant blouse took shape! I was pleasantly surprised by the result and think the blouse is so cute for spring! I may even be able to use this for a future Renaissance fair look?! WHOA
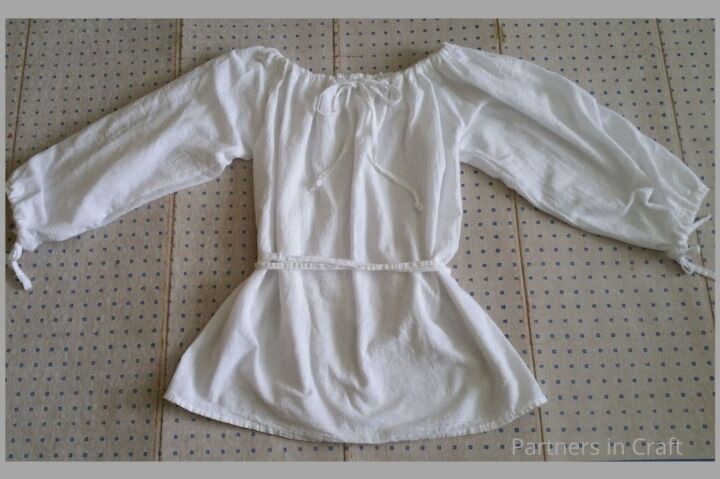
Add a belt to change the look!
The author may collect a small share of sales from the links on this page.


Comments
Join the conversation
What was the size of the tea towels you used?
Oh dear- I can't remember for sure! 😅 I used a large sized towel. I believe they were at least 26x26 inches.