How to Make an Elegant Peplum Blouse From Scratch

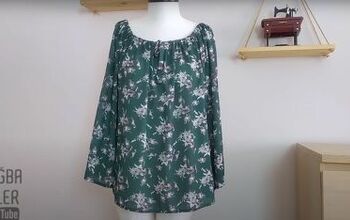
In today’s tutorial, I’m going to show you how to make a peplum blouse without a peplum top sewing pattern. This long-sleeved DIY peplum top has a high-low style, so it’s shorter in the front than the back. The bottom ruffle gives the top that flattering peplum silhouette.
It’s actually pretty simple to make and all you need for the pattern is a loose-fitting top. Let’s get sewing.
Tools and materials:
- Fabric
- Sewing machine
- Scissors
- Fabric marker
- Pins
- Measuring tape
- Elastic
- Loose-fitting top
1. Measure and fold the fabric
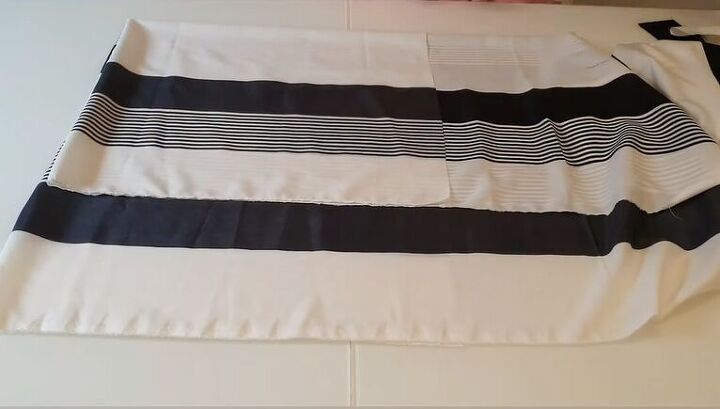
Fold the fabric in half. Measure how long you’d like the top to be on your own body, then fold again to that length. Mine was 20 inches.
2. Trace the bodice pattern
Place a top that fits you loosely onto the fabric and pin in place. Make sure all the edges are sharp, especially around the armhole.
3. Cut out the shape
Carefully cut around the top, leaving a one-inch seam allowance.
Stop at the length of the fabric you measured.
4. Cut the neckline
You should now have two pieces: a back piece and a front piece. For the front piece, extend the neckline by around 3 inches.
5. Cut the high-low shape
As this is a high-low top, I’m making the front shorter than the back. I measured 15 inches down the front center of the top, then cut out on the diagonal towards the corner.
To soften the sharp edge, modify this into a curved line.
The front and back pieces should now look like this.
6. Make the sleeves
To make the sleeves, fold your fabric in half lengthwise twice. Place your top’s sleeve on the fabric to create the pattern. Use pins to hold in place if necessary.
7. Cut out the sleeve pieces
Cut out the sleeves along the marks you made.
Snip the top corner of the sleeves to mark the center.
8. Cut out the ruffle and belt
Next, measure the ruffle pieces for the peplum top. Mine are 9 inches wide and 42 inches long, which is double the width of the top. Cut out two rectangles this size.
Also, cut out a piece of fabric for the belt. Mine was 8 inches x 40 inches.
9. Sew the seams
Now we have all the fabric pieces, we’re ready to start stitching. First, pin and sew the shoulder seams.
Then, carefully position and pin the sleeves to the armholes, starting from the center outwards.
10. Create the gathers
Hem the bottom edges of the ruffles by folding and sewing down. Next, run a basting stitch along the top edge to create the ruffle. Pull on the stitch to create gathers.
11. Pin and sew the peplum bottom
Position the ruffle to the front and back pieces of the peplum top. Pin and sew down.
12. Sew the side seams
Sew all remaining side seams to assemble the peplum blouse.
13. Finish the neckline
To finish the neckline, cut a small piece of fabric 2 inches wide and the length of the peplum blouse neckline. Pin it to the neckline and sew down.
Fold the fabric inwards twice, then add a topstitch.
14. Finish the sleeves
Hem the sleeves. Then, measure your wrist (mine was 7 inches) and cut a piece of elastic to that length. Sew the elastic around the cuffs.
How to make a peplum blouse tutorial
Here’s the final DIY peplum blouse! I love this peplum top with its high-low style. You can see I made several versions of this blouse; one with wider cuffs and one with puffed sleeves. It looks great in different fabrics too.
Accessorize with the fabric belt, or use one from your closet.
Let me know what you think about this tutorial on how to make a peplum blouse and whether you plan to make this peplum top for yourself.
Enjoyed the project?
Suggested materials:
- Fabric
- Sewing machine
- Scissors
- Fabric marker
- Pins
- Measuring tape
- Elastic
- Loose-fitting top
The author may collect a small share of sales from the links on this page.


Comments
Join the conversation