Embroidery for Beginners: 8 Easy Stitches You Need to Know

In this beginner embroidery tutorial, I will show you eight easy hand-embroidery stitches. Once you know how to do these stitches, you will be able to use them to decorate clothes and cover up clothing repairs. You can also get creative and combine these stitches to let your own style shine.
Tools and materials:
- Fabric
- Embroidery hoop
- Embroidery needle and thread
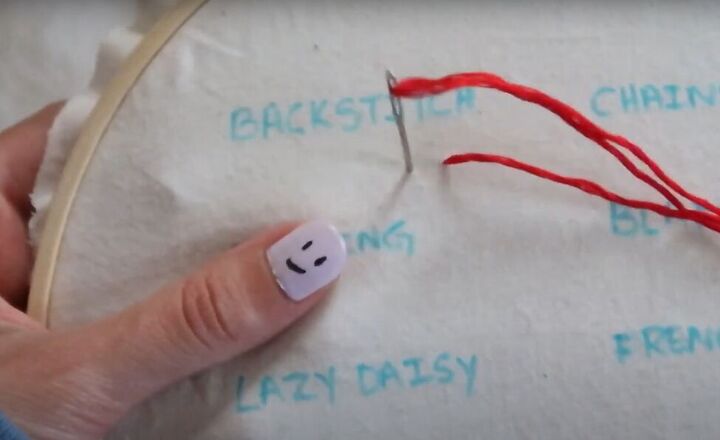
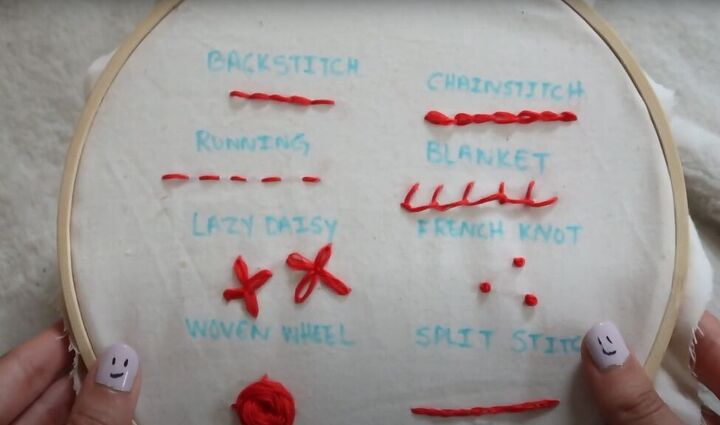
1. Backstitch
The easiest way to embroider is to enclose your fabric in an embroidery hoop. That gives you a nice, taught surface that’s easy to pass your embroidery needle through.
To do the back stitch, bring your embroidery yarn up from the back of your fabric and then back down through your fabric to the left of where it came up. The stitch should be about the size of a rice grain.
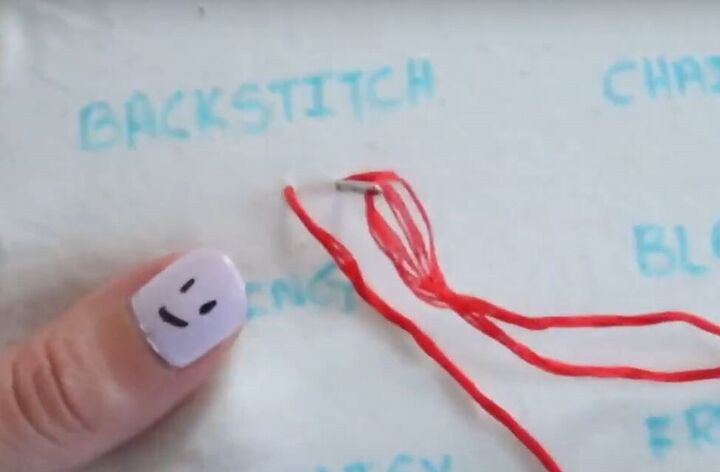
Bring the thread back up a rice-width to the left of the previous stitch, and then go back down at the end of the previous stitch.

Now you have two stitches.
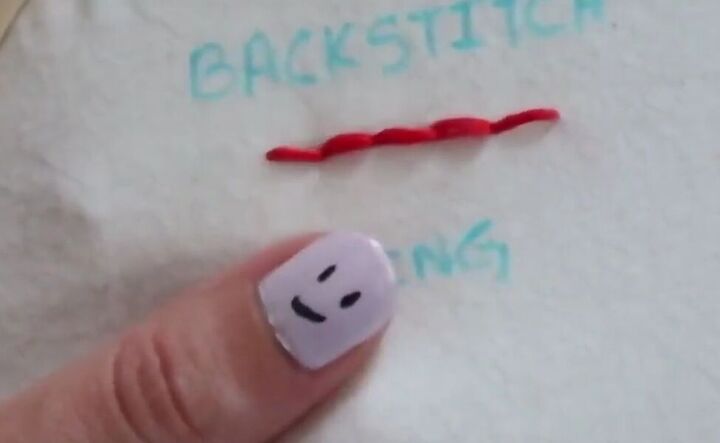
Continue repeating those stitches until your stitches are the length you want.
2. Chain stitch
This stitch is particularly good for embroidering words. Bring the needle from the back to the front of the fabric. Then go back down at the same spot, but don’t tighten the loop.
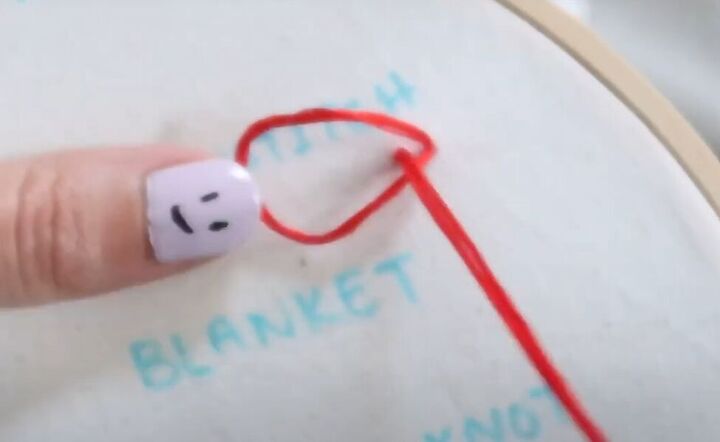
Come back up from the back to the left of your previous stitch, and bring the needle through the middle of the loop from the previous stitch. Tighten the loop.
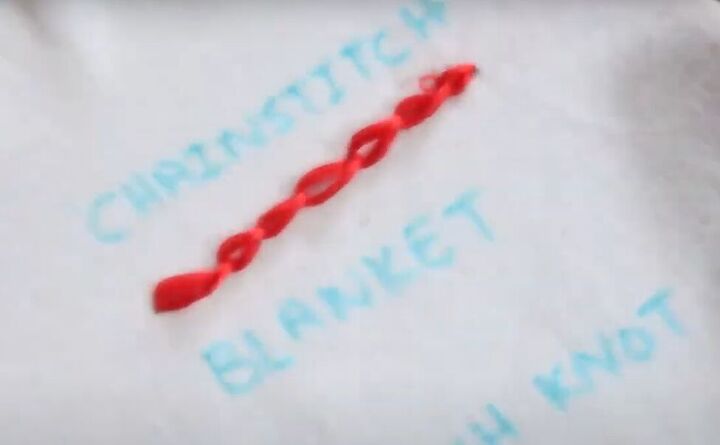
Continue this process, always going back down through the previous loop. That’s what makes the chain. The size of your stitch is determined by how far away from the previous stitch you come up with the next stitch.
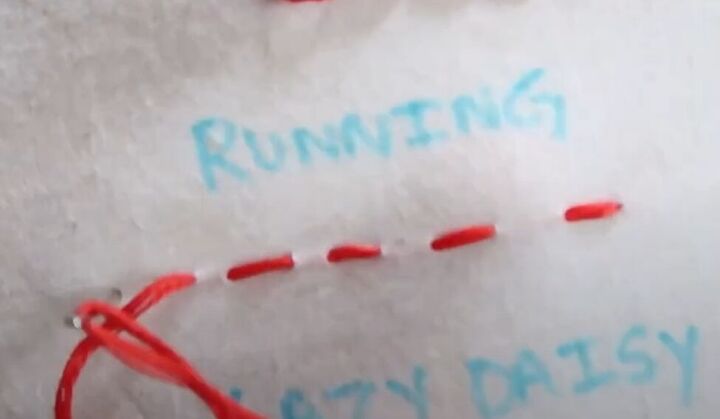
3. Running stitch
This is really a basic sewing basting stitch. Just bring the needle up and down through the fabric leaving a gap between each stitch.
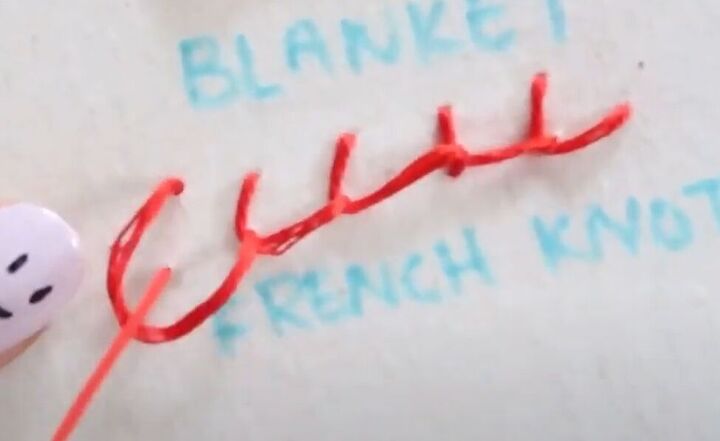
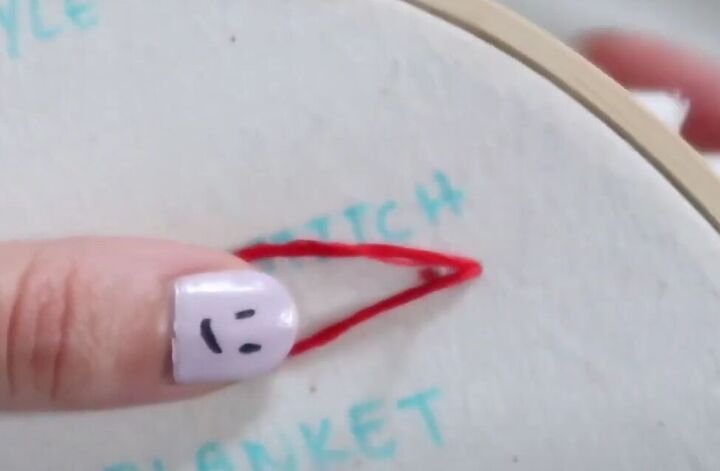
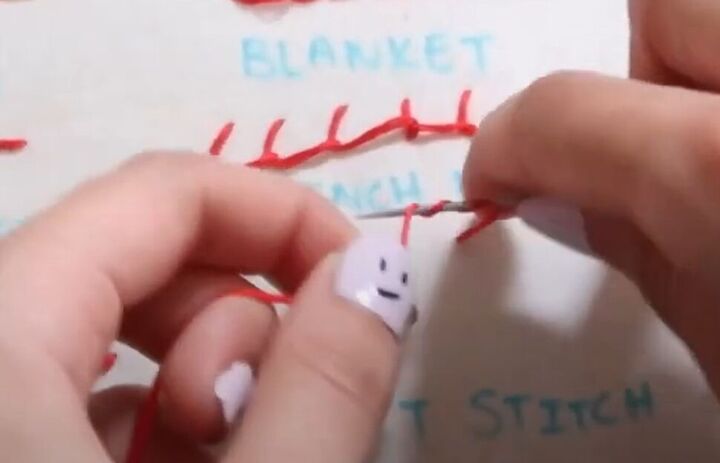
4. Blanket stitch
This stitch is particularly good for finishing edges. Come up through the fabric, and then go back down above it and to the left. Come up again at the same horizontal position as the first stitch and directly below where you went down, passing the needle inside the previous stitch. Those three points form a sort of right-angled triangle.
Continue in the same process, making a series of interlocking triangles with a straight edge along the bottom.
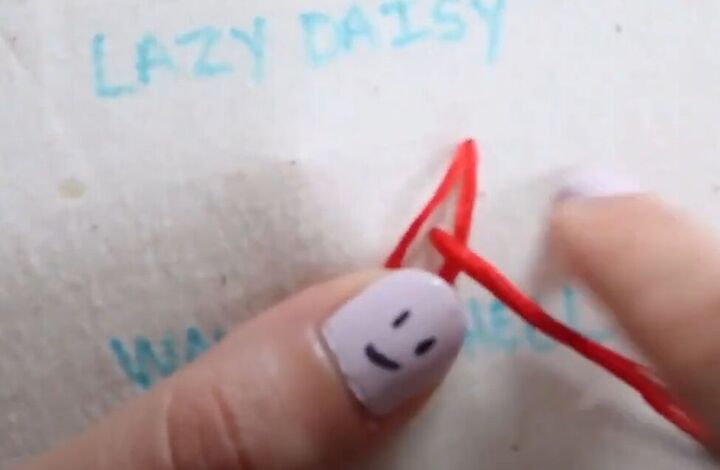
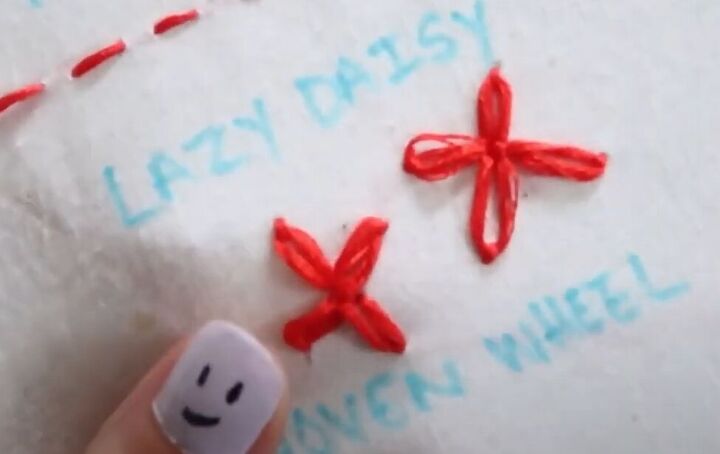
5. Lazy daisy stitch
You will want to use this stitch for embroidering flowers. Pass the needle up and back down through the fabric in the same spot. Do not tighten the loop, but hold onto it at the length you want your embroidered flower petal to be. Now bring your needle back up through the loop and tighten the loop.
Now return your needle back down where you just came up but on the outside of the loop to lock the loop in place. Now come up again at your starting point. Make another petal by repeating the same process. Continue until you have as many petals on your daisy as you want.
6. French knot stitch
Bring the needle up from the back of the fabric and wind the thread around the end of the needle three times. Then return the needle down through the fabric at the same spot.
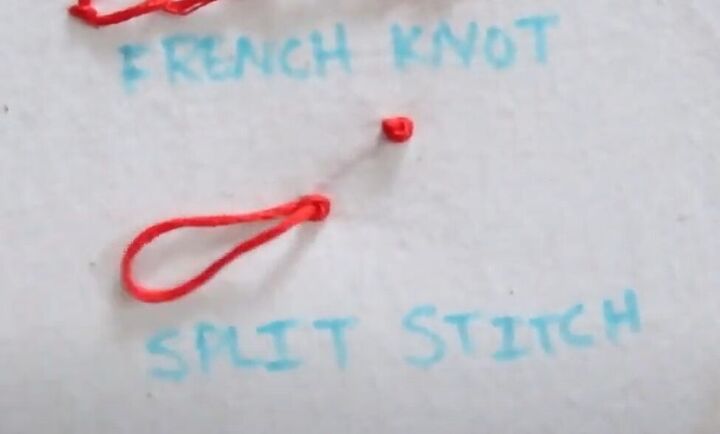
That creates a small coiled knot as a stand-alone little shape.
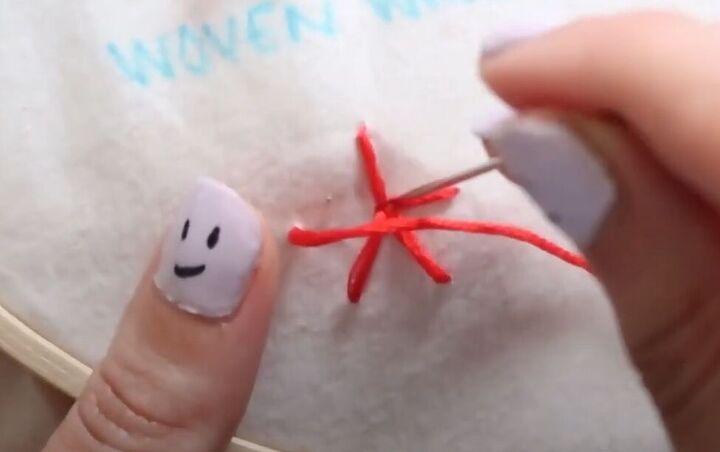
7. Woven wheel stitch
You can use this stitch to embroider roses. Make 5 straight stitches in a wheel formation, finishing by going down through the center point of the wheel.
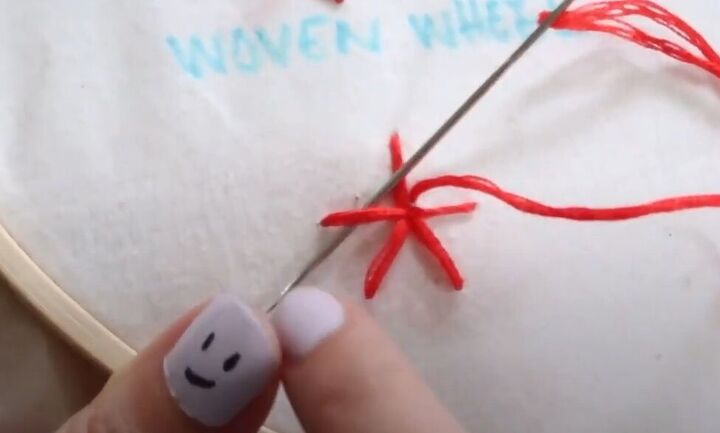
Now bring your needle up in the middle of the wheel to the right of one stitch. Pass your yarn over that stitch, and then under the next stitch as though you are weaving.
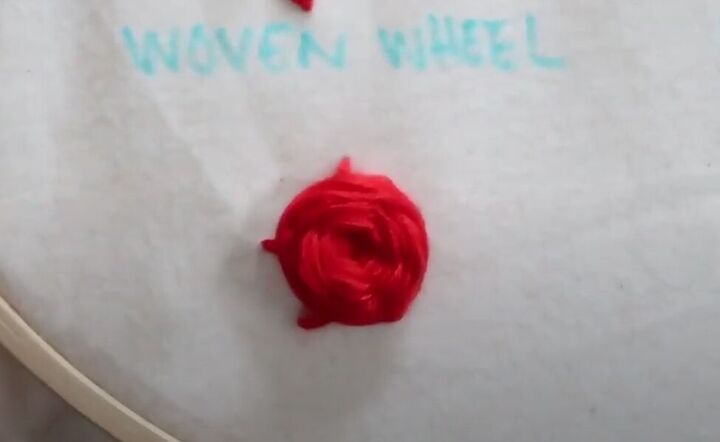
Continue weaving around and around the wheel without passing the needle back down through the fabric. Once you are no longer able to see the spokes of the wheel, pass your needle back down through the fabric and tie it off.
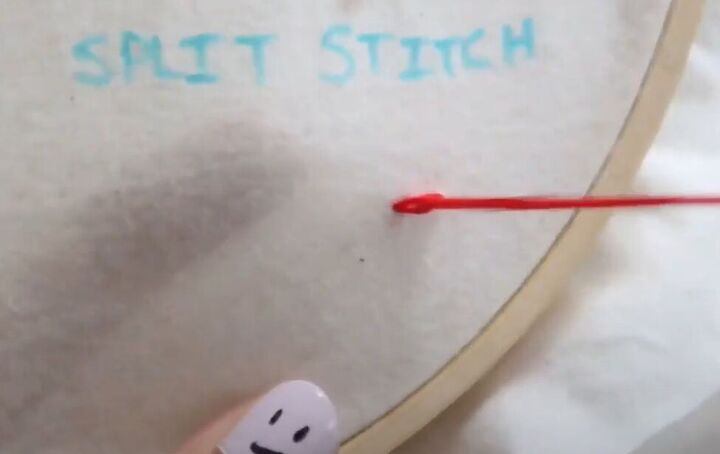
8. Split stitch
This is quite similar to the back stitch. Make the first rice-length stitch, but instead of going all the back, bring your needle up halfway along the previous stitch.
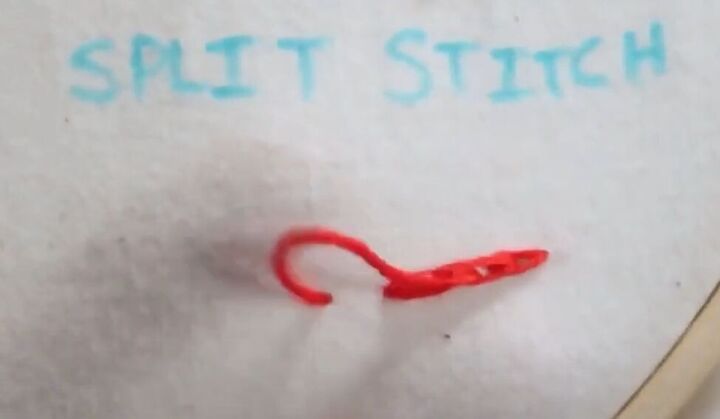
Continue in the same way making sure to keep the stitch length even.
Embroidery for beginners
These are the eight basic embroidery stitches you need to get started on your embroidery projects. Use them to upstyle old clothes and combine them however you want for your own embroidery designs.
If you liked this tutorial, leave me a comment and let me know how you used your new embroidery skills.
The author may collect a small share of sales from the links on this page.


Comments
Join the conversation