3 Trendy Upcycled Blazer Ideas

I got my hands on a couple of old high school blazers.
In this tutorial, I'll be showing how to refashion one of them in three different ways.
In Style 1, I'll quickly demonstrate how to get a simple, easy everyday look. Style 2 is a little bit more fancy. Style 3 is an add-on to Style 2 - so extra fancy!
Best fabric scissors!
Tools and materials:
- Blazer
- Ruler
- Pins
- Scissors
- Tailor’s chalk
- Needle and thread
- Shank style buttons
- Trims (braids, cords, or ribbons)
- Sewing machine

1. Everyday style
1. Remove unwanted parts
First, remove all the unwanted bits, like all the buttons and pockets.
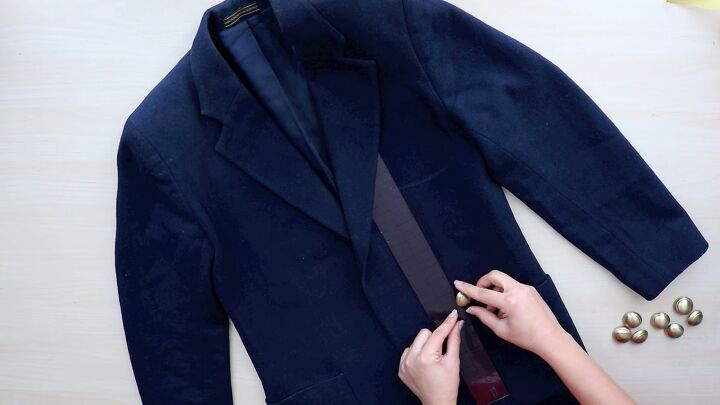
2. Figure out the button placement
Figure out where you want to place the buttons in your new design. I recommend using a ruler for this.
I used the pockets as a marker and placed the ruler alongside them. I then positioned my first button within an inch slot on the ruler.
From there, I measured 3 inches (7.6cm), placed my second button, and so on.
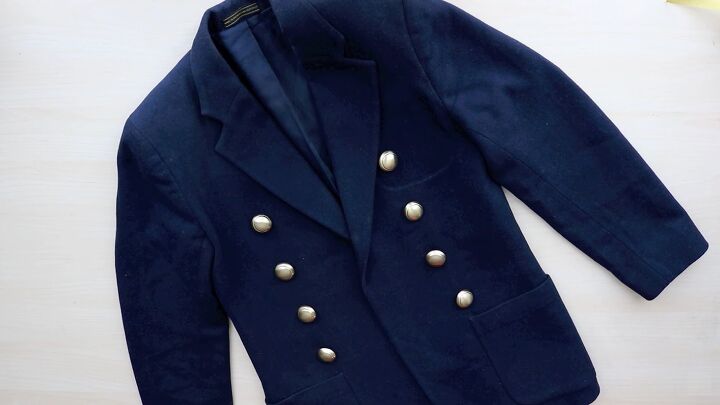
3. Sew on buttons
Once you're happy with the layout, go ahead and mark the position for each button and sew them on.
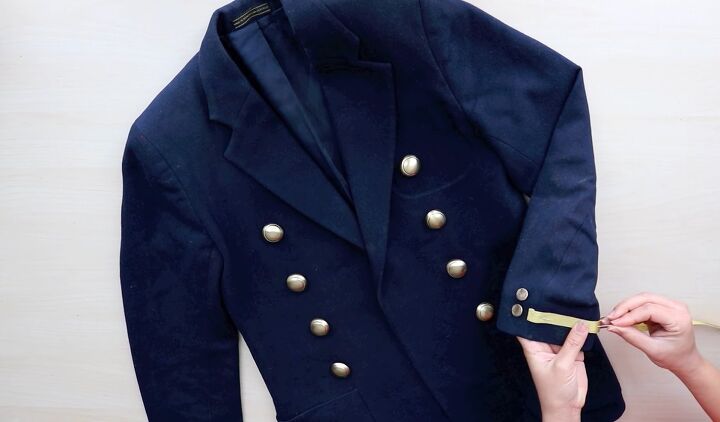
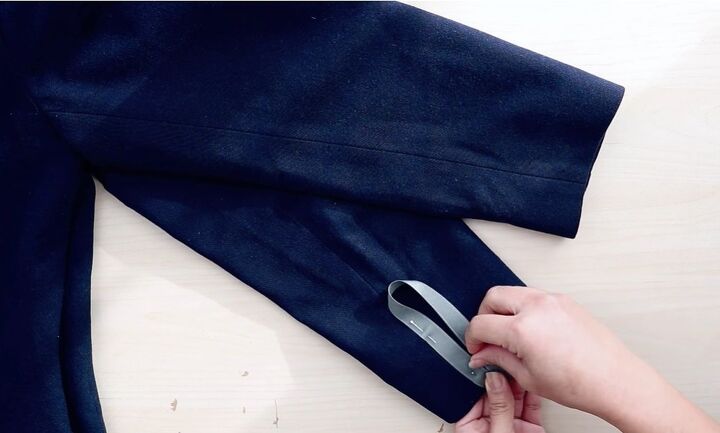
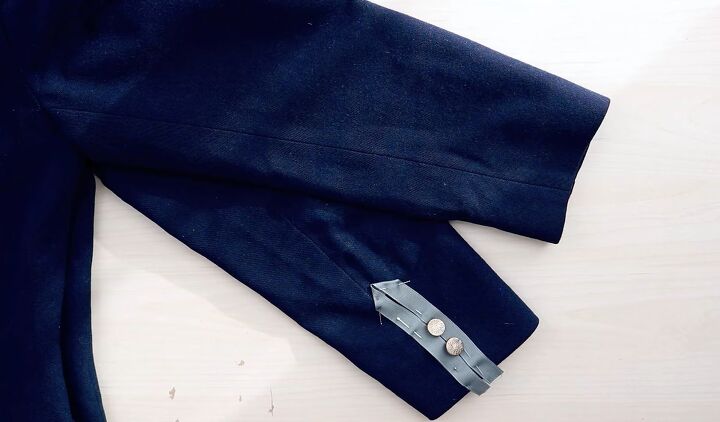
4. Embellish the sleeves
As for the sleeves, you could add smaller buttons if your blazer doesn't already have them.
Then take your trim, fold one end under and pin it alongside the buttons.
Pin around the entire circumference of the sleeve and sew. I did a row for each button.
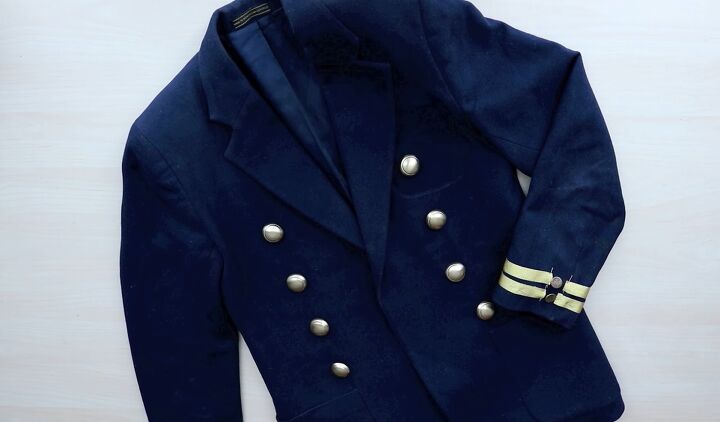
There you have a quick and easy updated blazer in a military-inspired style.
2. Fancy style

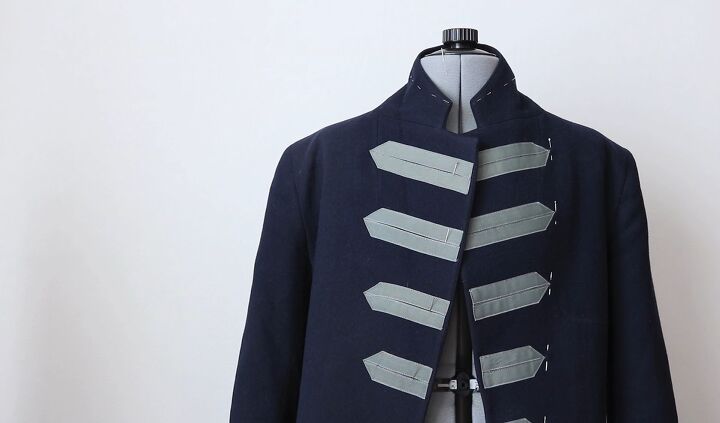
1. Pin the blazer
Using the same blazer, open up the lapels. From the neck seam down to the last buttonhole, make a guide using the ruler and pins.
Place the pins 1.5 inches (3.8cm) apart.
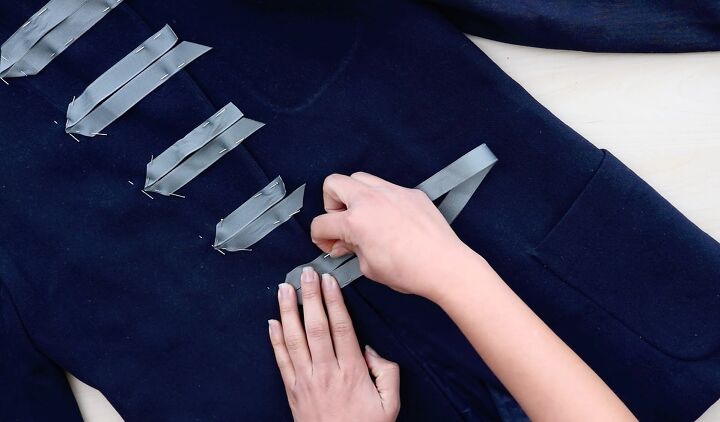
2. Pin the ribbon
Make a loop with your ribbon and then flatten the top to form a point.
Following the guide, pin it onto the blazer with the ends of the ribbon hanging a half-inch (1.3cm) over the edge.
Continue down the guide pinning six of these in total, with the last one stopping at the last buttonhole.
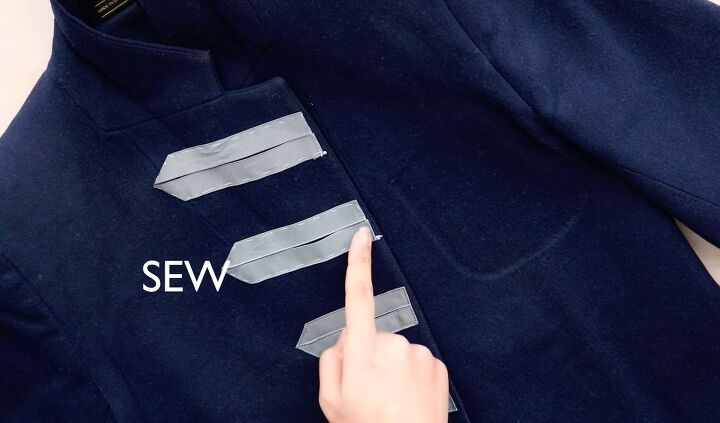
3. Sew the ribbon
Once they are all pinned in place, fold the ends under.
Now sew them in place. If you're meticulous like me, then I'd recommend basting them beforehand.
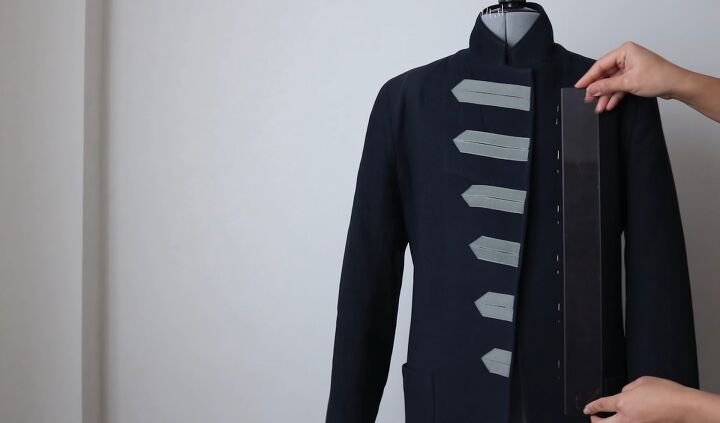
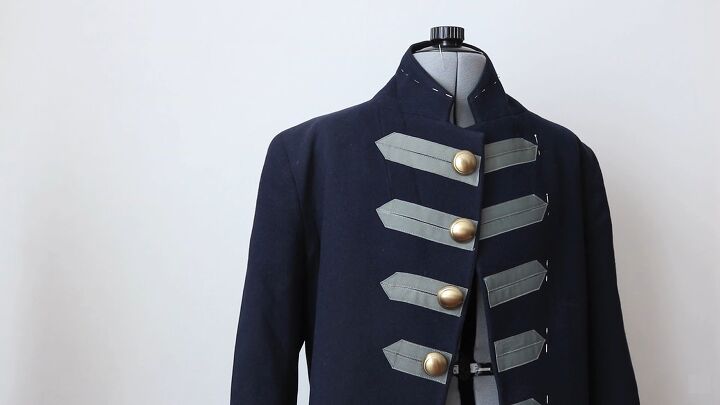
4. Add buttons
To finish off the look, add buttons to the other side. To find the button placements, align a row of pins with the ribbons.
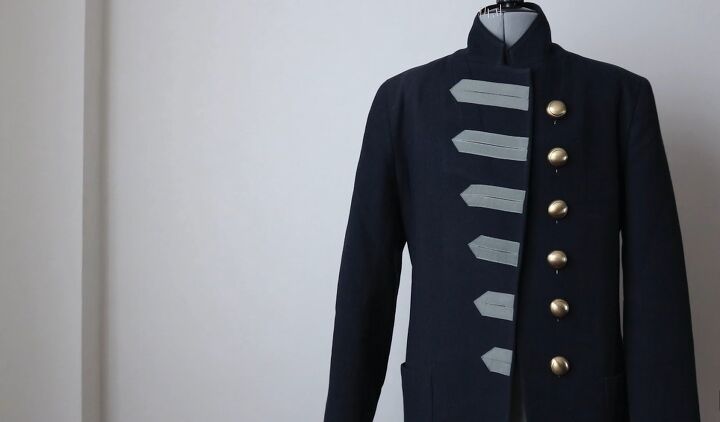
5. Check the button placement
Next, try out the button placement by hooking the buttons onto the pins.
If you’re happy with the placement, mark the location of the pins and sew on the buttons.
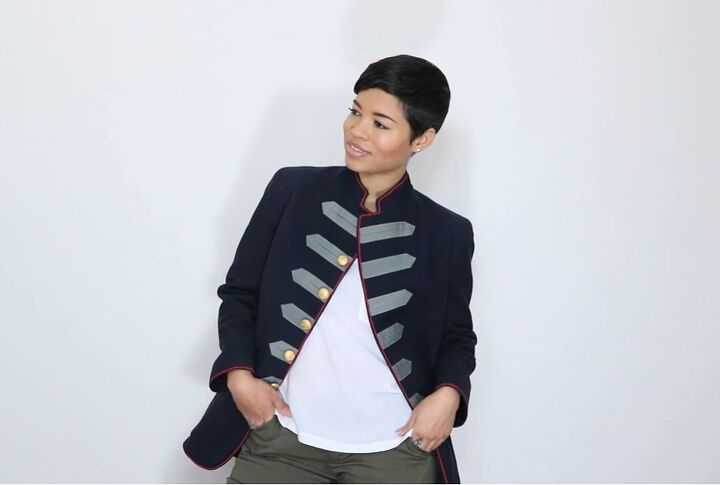
3. Extra fancy style
1. Add ribbons on the other side
If you skip out the final step of the second look, you can finish the other side of the blazer in the same way you did the first.
Make a guide and space the ribbons 1.5 inches (3.8cm) apart.
2. Sew on the pins
As for the buttons, use the same technique as before and place them on the pins to check you’re happy with the placement. Then, sew them in place.
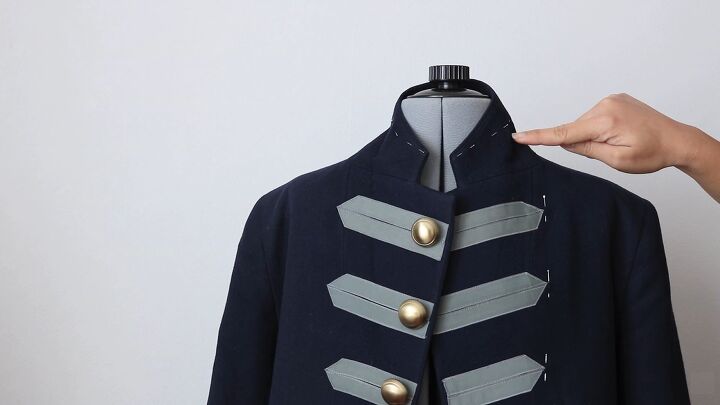
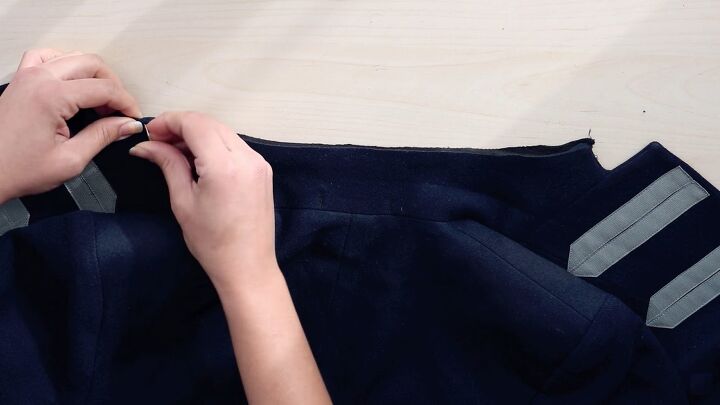
3. Alter the collar
Alter the collar by taking a little off the back, making it a true stand-up collar, also known as the Mandarin or Chinese collar.
Tuck the top under, pinning it to your ideal height, then try it on.
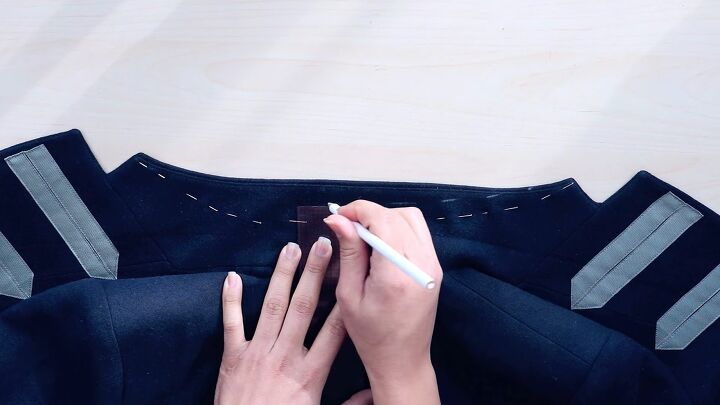
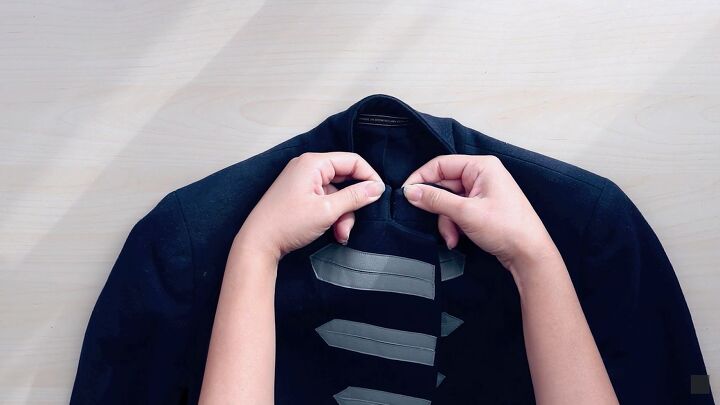
4. Mark the right height
Once you’re happy with the height, mark a half inch (1.3cm) above the pins and cut.
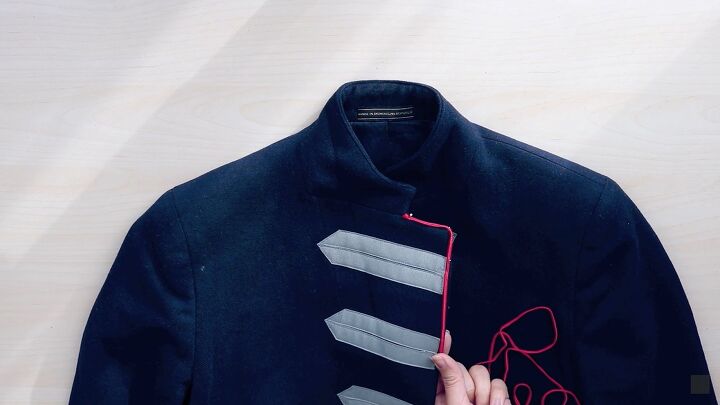
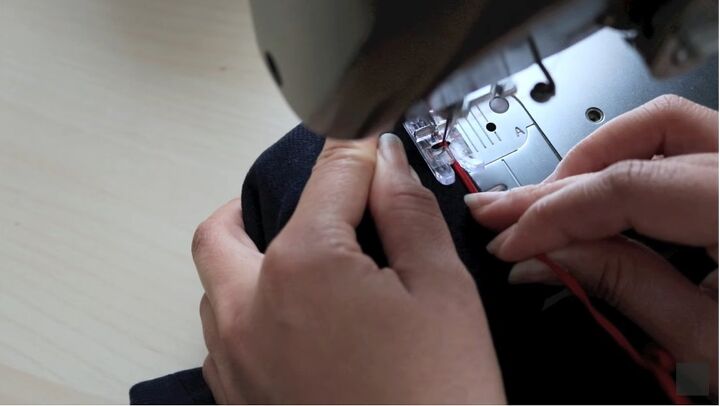
5. Sew the edges
Turn under the raw edges a half inch (1.3cm) inside the collar, then pin and sew.
Before sewing the corners, make sure they are the same length.
6. Add a border
The trim is attached by sewing along the groove in the center. Leave a 1/8-inch gap between the ribbon and the edge.
To hide the ends, start sewing in an area that's unseen, like the underarm seam of the sleeve and hem.
Holding the end of the trim, guide it in place, then carefully sew it within the groove.
Once you get back to the starting point, overlap the ends, then finish them off by whip-stitching them together by hand.
7. Add ribbon to sleeves
Remove any buttons from the sleeves, then add the same ribbon design as the front along the seams.
8. Add buttons
Once the ribbons are attached, add new buttons.
Three upcycled blazers
There we have three different ways you can upcycle a blazer. We started with something simple and gradually got more advanced.
Let me know which upcycled blazer style you like the best in the comments below!
For another fun project, check out my post on How to Reuse Fabric Face Masks!
The author may collect a small share of sales from the links on this page.


Comments
Join the conversation
Very cute..I did simular military jacket by going to Military shop and got Aplets for shoulders.bought.military buttons..navy stripes patch that was for Captsins mate.added two sm. Military buttons at cuffs with thin gold piping around them and up one side of middle that showed after buttoning..Easy hand sewn..no muss no fuss.