No-sew Tutorial: How to DIY a Cozy Shawl Vest

Hey guys! I’m going to show you how to make a shawl vest. The best part of this DIY is there is no sewing involved.
First, I’m going to show you how to make the vest, and then I’m going to show you 8 different ways you can style it.
Each style gives it a whole new look, so no matter what you like, you’re bound to find a look that fits your taste here.
Tools and materials:
- Fabric 104x104 inches
- Chalk
- Scissors
- Broach
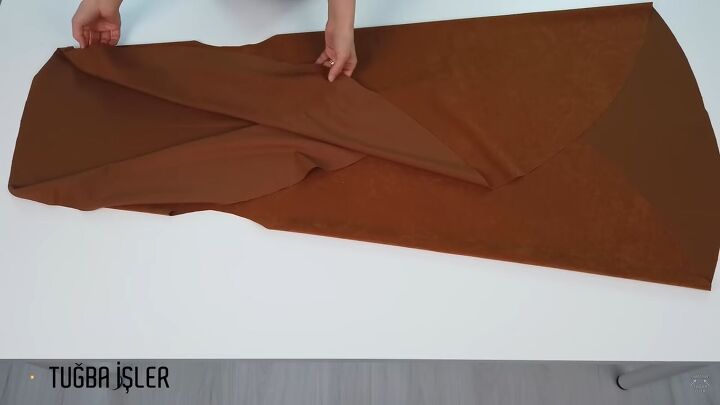
1. Measure, cut and create
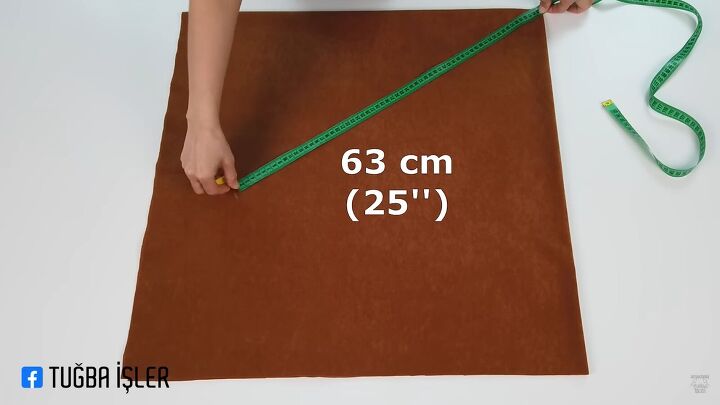
Take a piece of fabric that is 104 by 104 inches and fold it in half twice so you have a 26 by 26 square.
Measure 25 inches out from the corner with the double fold.
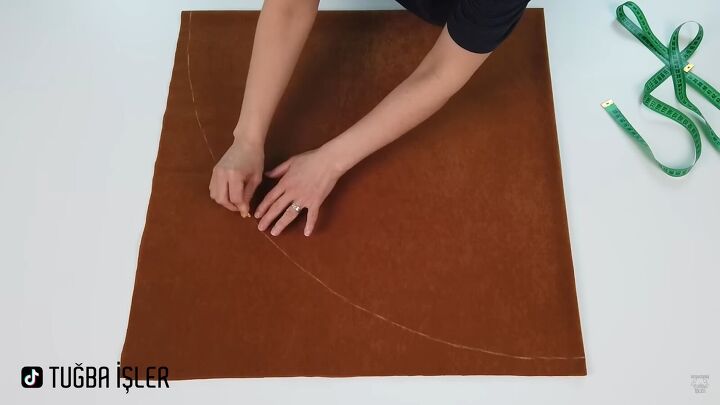
Holding the measuring tape in the corner, mark the far end and rotate it around the fabric to create a curve.
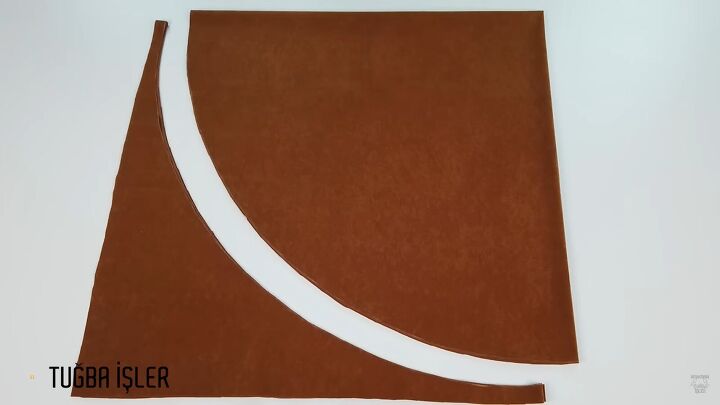
Cut the fabric along the curve. Partially unfold the fabric so you have a semi-circle.
Measure 12 inches from the side along the straight edge. Then mark 7 inches down from the 12 inch mark.
Next, mark 9 inches across from the 7 inch mark.
Make one more measurement to make sure the new mark is also 7 inches from the top edge and then draw a line connecting the two 7 inch marks.
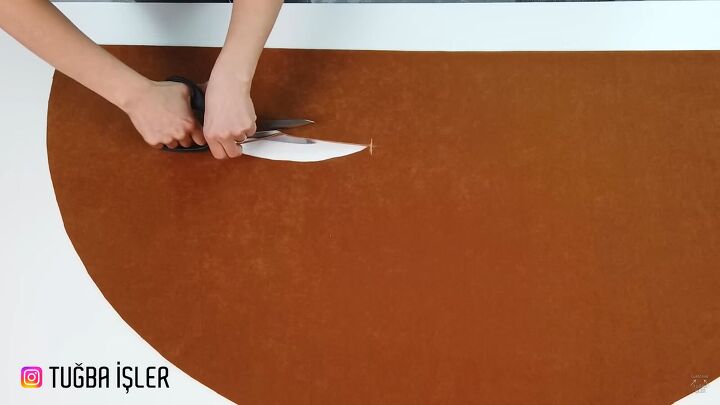
Pinch the fabric to get a small cut started so you can cut along the line.
Then cut a small curve on either side of the cut line to open the slit a bit more. You will want to cut it enough that there is about a two-inch gap. These will be the armholes of your vest.
If you have a sewing machine, secure the edge of the fabric with a zig zag stitch.
Do this around the edges of the entire piece, including the armholes. If you don’t have a sewing machine, you can leave the edges raw.
2. How to wear your DIY shawl vest
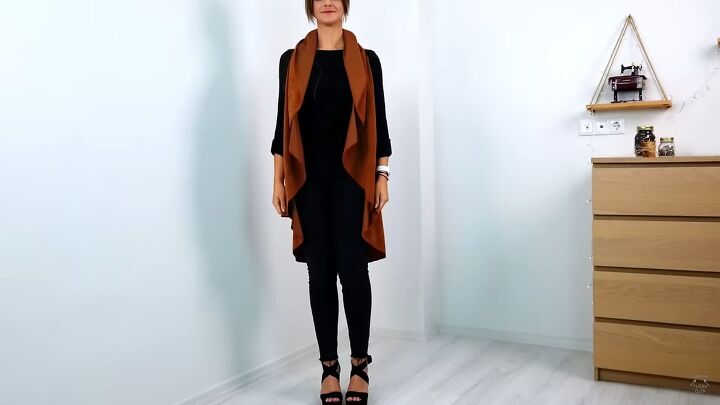
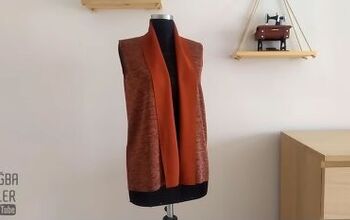
It’s that easy! Now that it’s done, let’s experiment with different ways to wear it. You can wear it loose and open, like a regular vest.

1. Belted vest
Another great option is to cut a matching belt from the fabric to wear it closed with the belt cinching at the waist.

2. Pinned vest
Another really cute look is to use a pretty broach to pin it closed.

3. Cape
If you want to experiment further you can wear it the opposite way so that the extra fabric lays on top instead of coming down.
This creates a look that is closer to a shawl or cape.

4. Pinned cape
If you wear it as a cape, you can also try pinning it closed with a broach. This makes it look very classy and elegant.

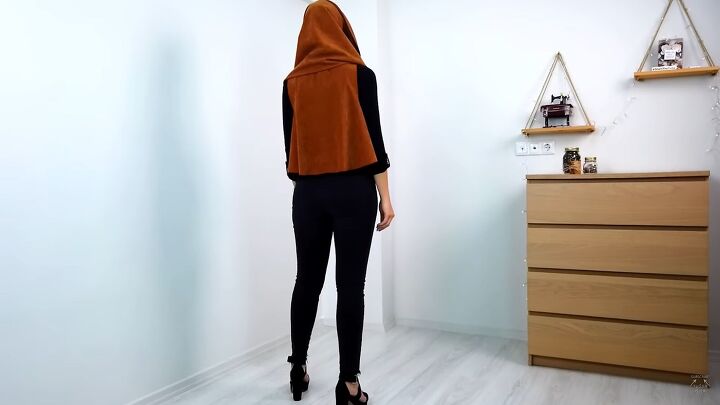
5. Hooded vest
You can take the cape and broach look and make it look even more interesting.
Just gather the top layer of fabric and instead of having it hang on your shoulders, flip it up and wear it as a hood.


6. Strapped, hooded vest
Another great look you can create wearing it as a cape is to add a strap or belt around the waist on the cape.
You can wear it with the fabric down over your shoulders or throw it over your head like a hood.
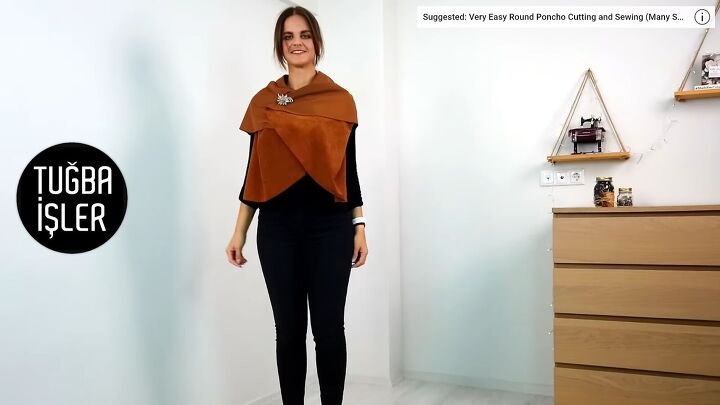
7. Pinned shawl
For the last look, start with it being worn as a cape.
Take the top layer of fabric and fold it up and around the top of your shoulders. Then use a broach to close it.
DIY shawl vest
I love how easy this piece is to make. It’s also great that it is so versatile. You can wear it in so many different ways.
Did you have any luck recreating this piece for yourself? Leave me a comment and let me know.
For more fun, easy patterns, check out my post on How to DIY a Cute Twist Hair Band and follow me on TikTok: https://www.tiktok.com/@tugbaisler.
The author may collect a small share of sales from the links on this page.


Comments
Join the conversation
WOW!!! I’m saving this and trying it!