Quick and Easy Molly Jacket
Hi Guys! Two posts in 1 week, who is this? Well, it’s time for another Fibre Mood Link Party. YAY!! This means that Fibre Mood has now released its 13th edition of their sewing magazine. The Fibre Mood sewing magazines are always full of the most beautiful patterns and this edition is no exception. You can check out the look book HERE and decided if you would like to purchase it. As you might have guessed by my title, I chose to make the Molly Jacket. It really is super quick and easy, considering you’ll be getting two garments out of the one.

Molly
Molly is a comfy fit coat to that you can throw on over your hoodie and head out the door. Molly is designed to be oversized, so keep that in mind when making yours. When I made this coat, I originally cut a size large based on my body measurements. Once I put it together, I thought it was so large so I sized down to a medium. Can I be totally honest? I could have still gone down to a size small. Now, you can size up or down, it’s up to you. Keep in mind that the Molly is a coat and would normally be worn layered. So, having the oversized cut would work well in colder climates because you can wear your sweater underneath it.

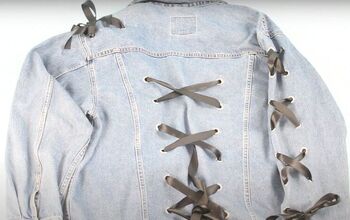
I have a secret. The Molly coat can be made reversible! Think about it, you get two garments and you only sewed one!! That’s a major win in my book. This jacket would look amazing in quilted or padded fabric. Those fabric types usually look great on both sides so it would perfect for a reversible coat. Unfortunately, I didn’t have any of that kind of fabric on hand. What I did have was this awesome stretch denim camo fabric I purchased in the LA Fashion District a few years ago. I’d been holding on to it for a while and I thought it would be great for this project. I decided to just use the underside of this fabric as my reversible side.

DIY Bias Binding
The seams on the Molly are finished with 3/4″ bias tape and I decided to make my own! I’ve had this bias tape maker kit I purchased on Amazon for a while now and never really used it, until now. The main reason why I wanted to make my own bias tape is because the fabric I used is a stretch denim and I didn’t want the woven prepackaged bias tape that you can purchase to affect the way my jacket would look. Plus, it would give me the opportunity to use my bias tape maker, duh! It was super simple. I cut 1 1/2″ strips of fabric and I made sure to cut them on the bias and that was it! You pull the fabric through the bias tape maker and press at the same time for a perfect finish.

Fibre Mood Link Party 17
As I previously mentioned, it’s time for Fibre Mood’s Link Party 17! I’ve participated in their link parties in the past. Here is some previous link party submissions you can read HERE, HERE, and HERE. Do you recognize my hoodie? It’s my Frikka from Fibre Mood which I wear ALL THE TIME. You can catch all the details HERE. Now make sure you hop on over to the Fibre Mood Link Party and check out all the other amazing sewist from around the world sporting their Fibre Mood makes.
Until Next time,
Johanna


The author may collect a small share of sales from the links on this page.


Comments
Join the conversation