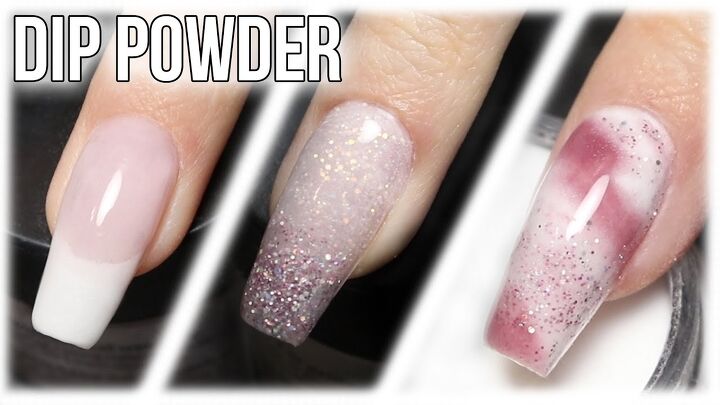
3 Easy Dip Powder Nail Ideas: French, Glitter Ombre & Marble Nails

If you just got your first kit and you’re looking for dip powder nails ideas, look no further. I’m going to show you three easy designs that you can do with a dip powder kit: classic French nails, a glitter ombre, and marble nail art.
Benefits of dip powder nails
Dip powder kits are the future of nail art design! The benefits of dip powder nails are numerous. They’re stronger and last twice as long as their gel counterparts and, with a kit, they’re so easy to do at home.
Tools and materials:
- Dip powder kit
- Nail file
A typical dip powder kit will come with 6 dip powders, 3 liquids (top coat, activator, and a base coat), and brushes.

1. French dip powder nails
Apply a thin layer of the base to your nails.
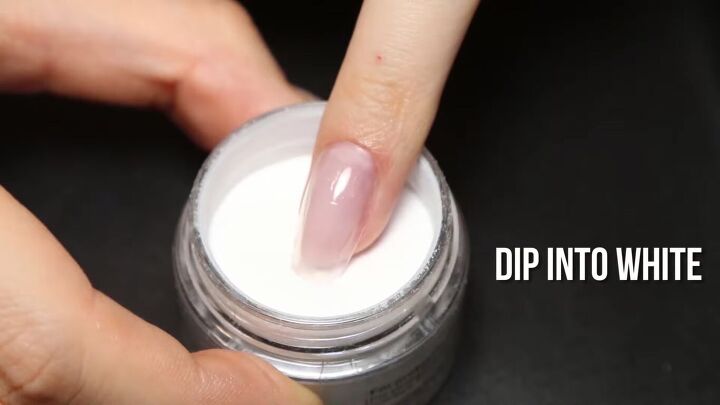
Carefully dip the end of the nail into the white powder to create the classic French tip.
Tip: make sure you mix your powder and that it’s level upon starting, so your design doesn’t come out lopsided.
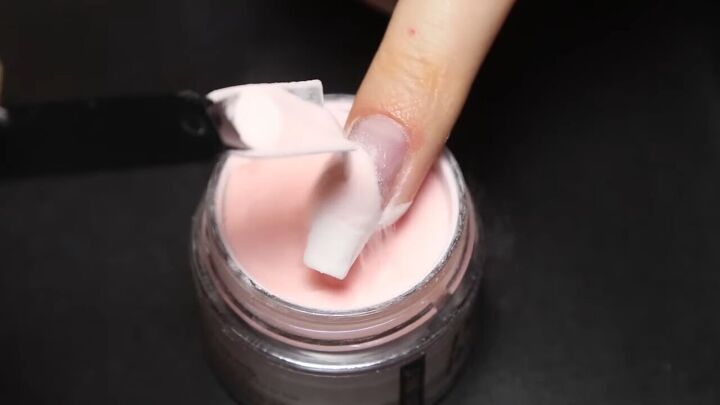
Next, pour the pink powder onto the rest of the nail.
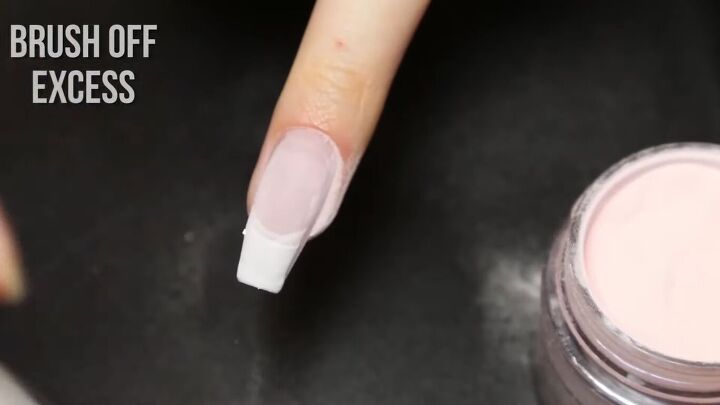
Tap your hand to get rid of any excess powder, then use the brush to gently sweep off any remaining loose powder.
Repeat these steps, starting with the base and then the powders, to apply a second layer.
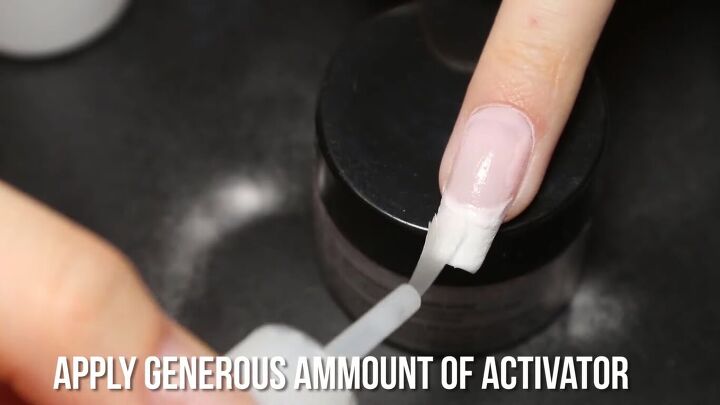
Apply a generous amount of the activator onto your nails.
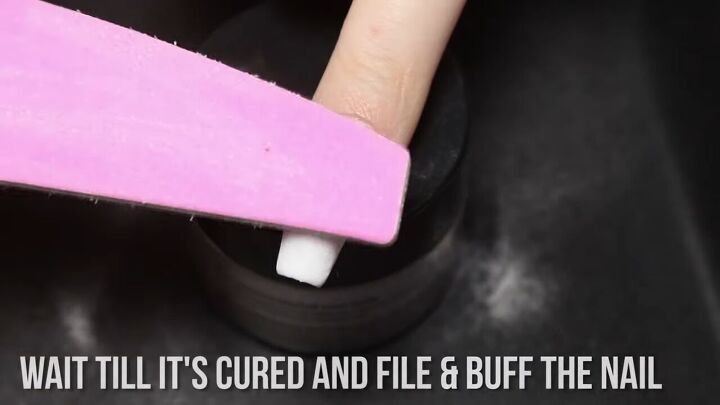
Once cured, file and buff your nail. Brush off any excess product.
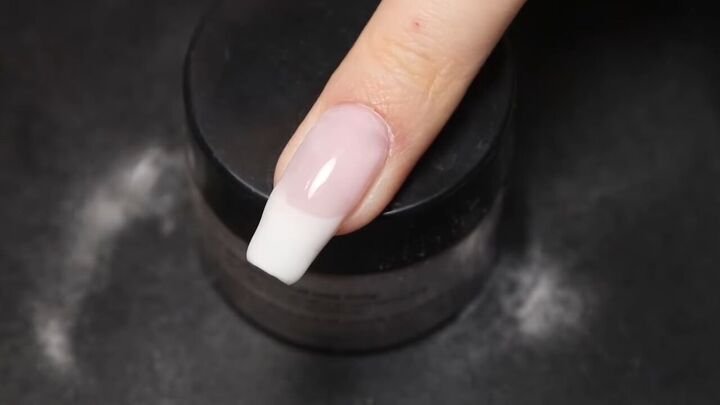
Finally, apply two coats of the gel top coat to your nails.
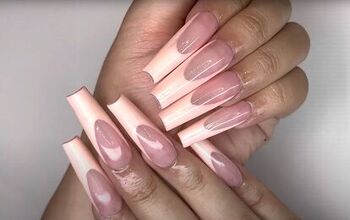
Here's the finished nail. This classic French manicure never goes out of style and the dip powder technique looks so professional.
2. Glitter ombre dip powder nails
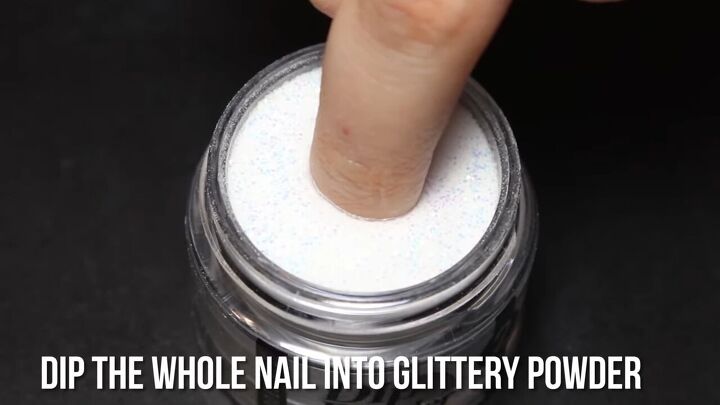
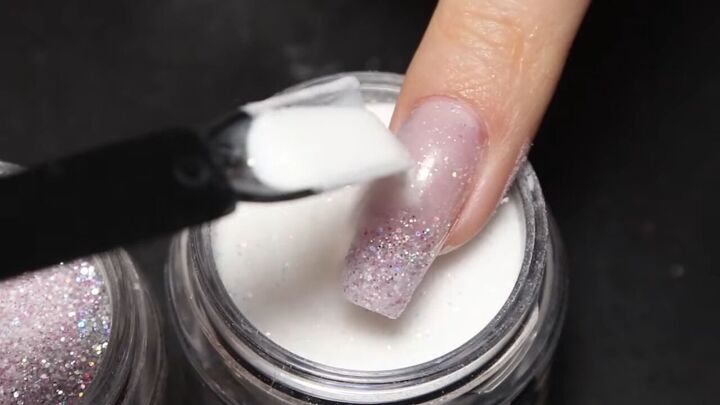
Apply a thin layer of the base to your nails and then dip your entire nail into the white glitter powder. It should be entirely covered in powder.
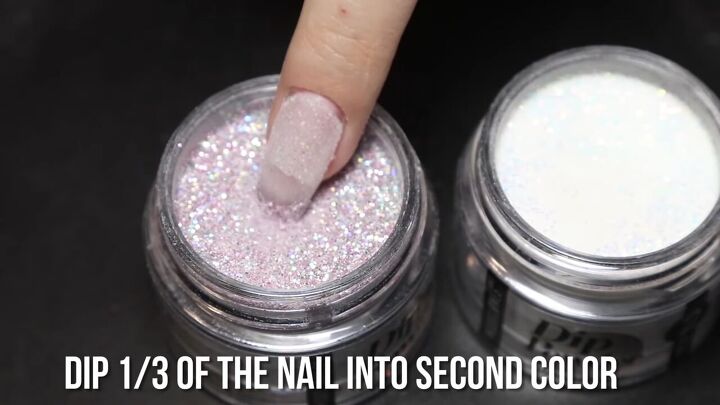
Reapply the base over the end of the nail, then dip half of the nail into pink glittery powder.
Apply the base again over the rest of the nail and slightly overlap the pink glitter powder. Cover the nail with white glittery powder again, and brush off any excess powder.
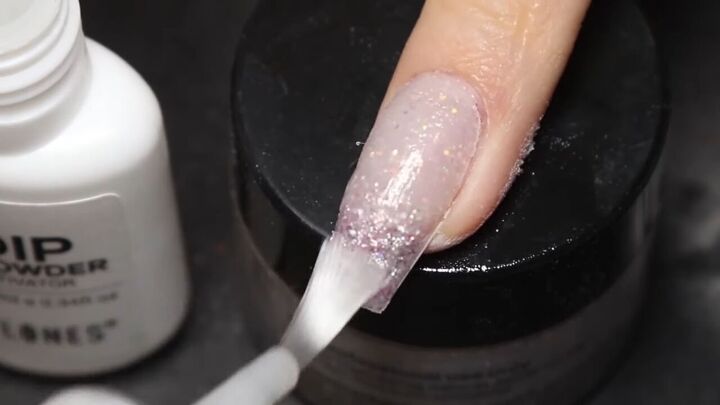
Apply a generous amount of the activator onto your nails. Once cured, file and buff your nails.
As before, brush off any excess product and apply two layers of the top coat.
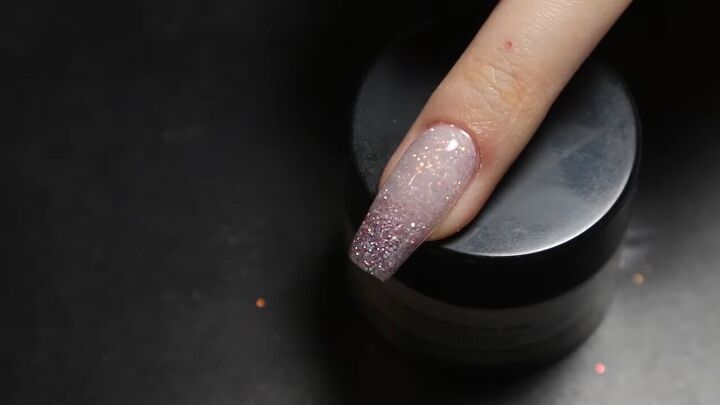
Here's the finished result! These glittery ombre dip powder nails are glamorous and again, look like you had them done at the salon!
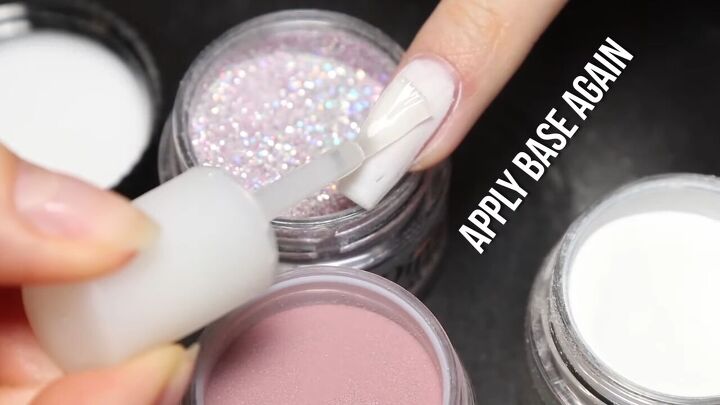
3. Marble dip powder nail art
Apply a thin layer of the base to your nail and then dip your entire nail into the solid white powder. The white will act as a background.
Brush off excess powder and reapply the base for a second coat.
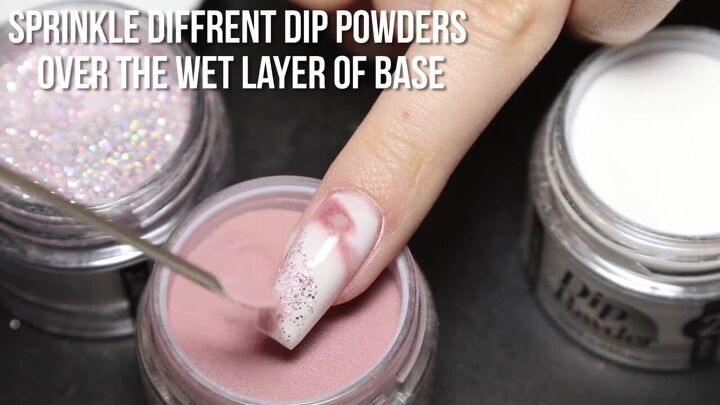
Carefully sprinkle different dip powders over the base to create the marble effect. I’m using pink glittery powder, solid pink powder, and white powder.
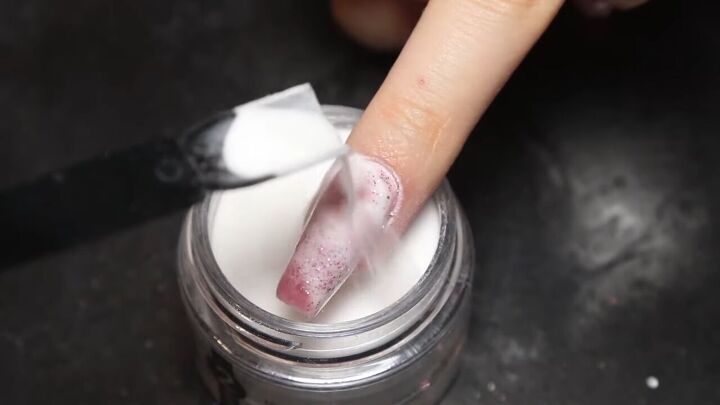
Apply the base one more time and then dip into or pour over the transparent powder.
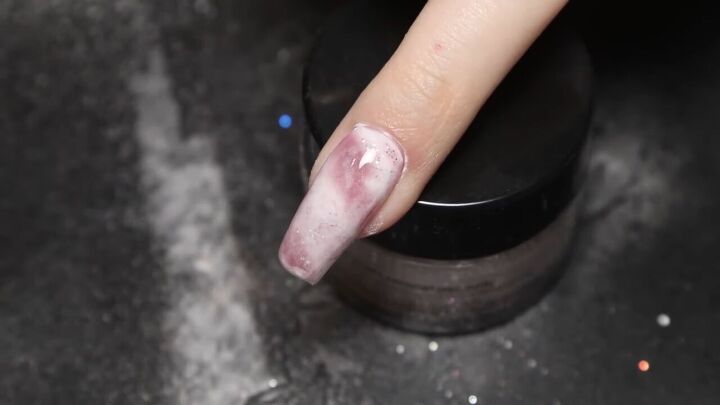
Finally, apply the activator, file and buff your nails, and apply the topcoat.
This marble nail design looks so sophisticated and is so easy to achieve with dip powders.
Dip powder nails ideas
All done! Whether you like the ombre dip powder nails or the glitter dip powder nails, I hope you’re feeling inspired to go off and create your own incredible nail designs after this tutorial.
Let me know what you think about dip powder and what kind of nail designs you’re going to try out!
Easy Nail Polish Hack: How to DIY Swirl Nails
The author may collect a small share of sales from the links on this page.


Comments
Join the conversation
Where do I buy the complete kit?
Naiilboo is an online company that sells the kits as well as additional colors. I can't wait to try mine!