Sewing Tutorial: How DIY a Long Sleeve Satin Shirt Dress

Today, I'm going to show you how I adapted a Simplicity shirt pattern to make a crossover front shirt dress pattern.
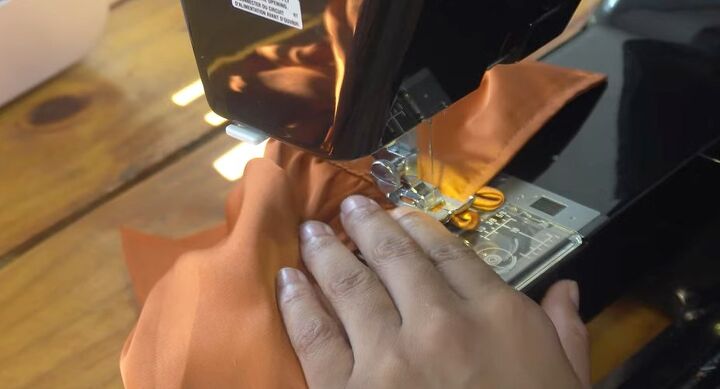
If this is your first time working with satin, take it slowly and use lots of pins to stop the fabric from slipping as you sew. This long sleeve satin shirt dress project is perfect for intermediate to advanced sewers.
Tools and materials:
- Simplicity pattern 1538
- Satin fabric
- Interfacing
- Invisible zipper
- 4 buttons
- Hook and eye fastening
- Paper for pattern
- Pencil/marker
- Tailor's chalk
- Ruler
- Pins
- Fabric clips
- Seam ripper
- Iron
- Sewing machine
- Zipper foot
- Serger (optional)
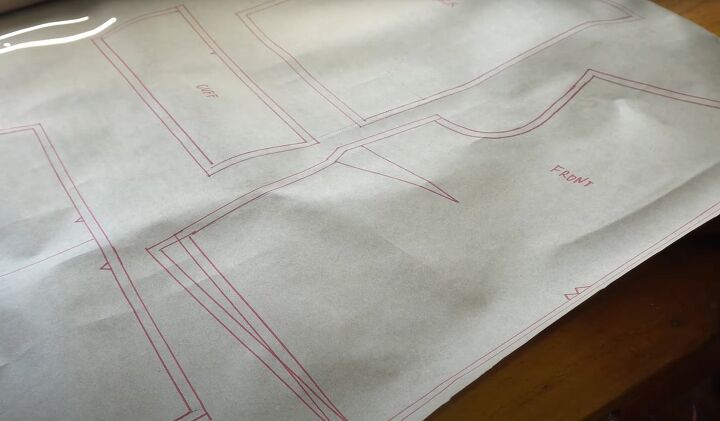
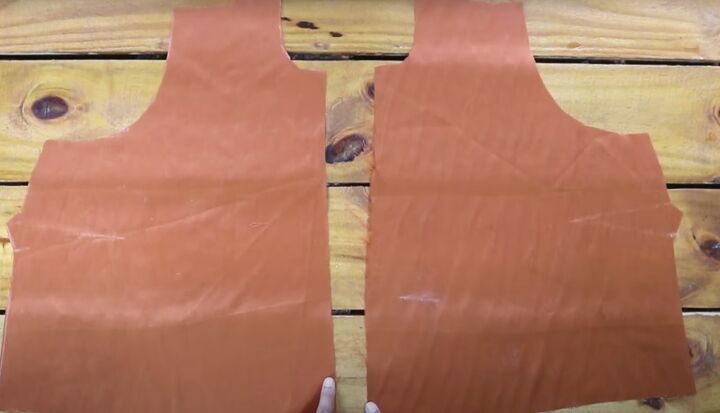
1. Draft top pattern
Trace your size from the original pattern pieces onto your paper.
Shorten the front and back of the shirt to your waist length and add a 1/4 inch allowance to each seam.
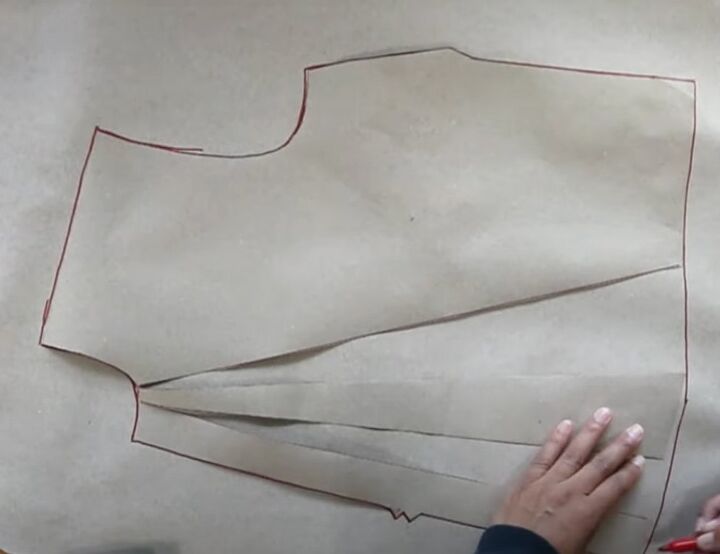
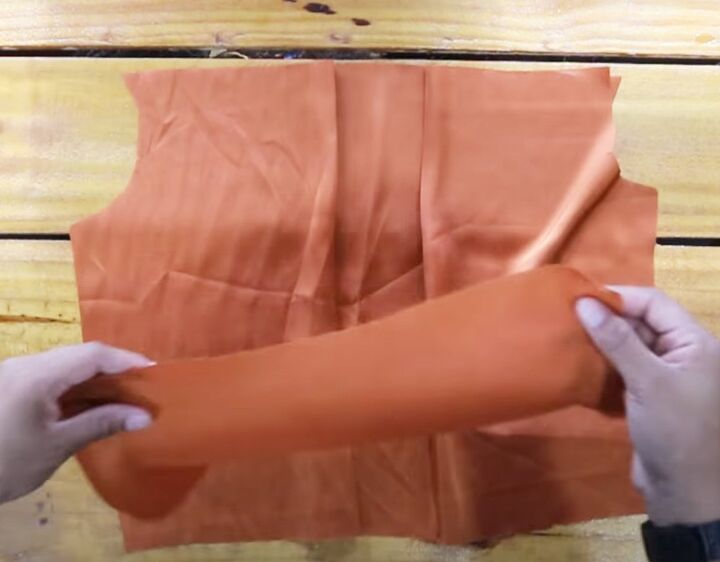
To make the crossover front, see the video at 1:18 for how I used the "slash and spread" method to draft the pattern.
2. Collar
If you're not adding a button closure to the collar, size it down to fit your neckline.
Add interfacing to all the collar pieces.
Sew the two collar pieces together with right sides facing along the side and top edges. Snip into the seam allowance, trim off the corners and turn the collar right side out.
Press up the bottom edge of one of the collar stands by a quarter inch.
Sandwich the collar between the two stands with right sides facing and sew them together.
Snip into the seam allowance before turning the completed collar right side out and pressing it.
3. Top
Sew the front darts and make a double fold hem at the center fronts.
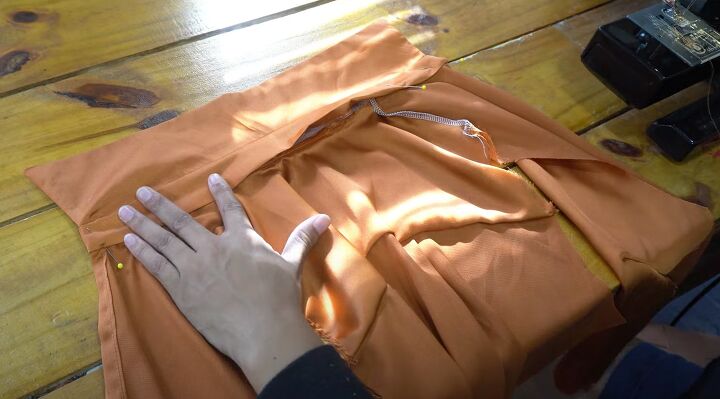
Press the pleats in place on the back. Sandwich the back between the two yokes with right sides facing and sew.
Press the yokes up and baste the two yokes together around the side and top edges.
Sew the fronts to the back at the shoulders.
Pin and sew the unfolded collar stand to the neckline with right sides together.
Hand sew the folded edge of the stand to the inside of the neckline.
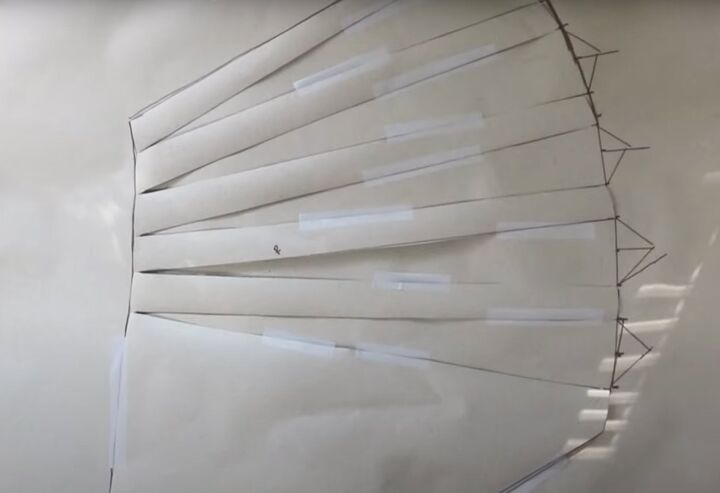
4. Draft the skirt pattern
See the video at 4:36 to see exactly how I drafted the wrap over pleated skirt pattern.
5. Assemble the skirt
Cut out all three skirt pieces.
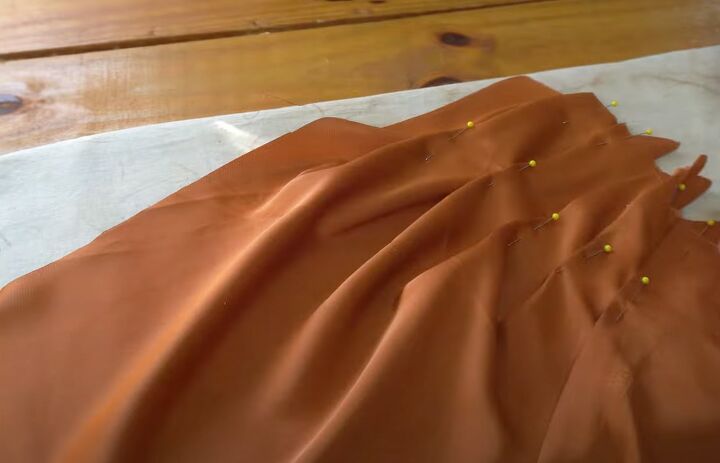
Press, pin and sew the front pleats into place, using the triangles as a guide. Cut off the excess fabric.
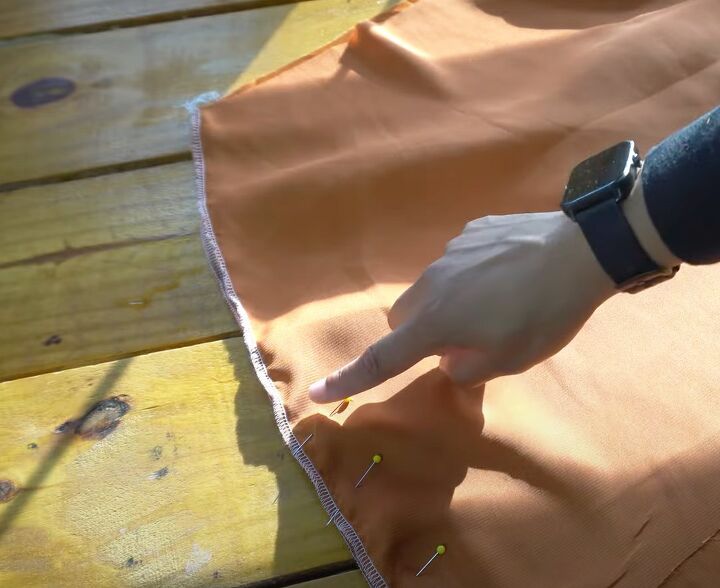
Finish the front edge opposite the pleats and the matching back edge.
Join the side seam, using a basting stitch for the zipper section and a normal stitch below it.
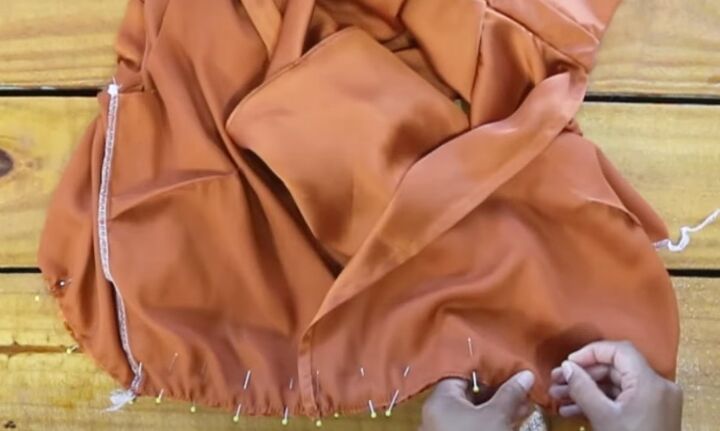
Sew a rolled hem at the bottom of all the skirt pieces.
Sew the third skirt section to the pleated side of the front and back pieces.
Open the basted section of the opposite seam and sew the back skirt darts.
6. Attach the skirt
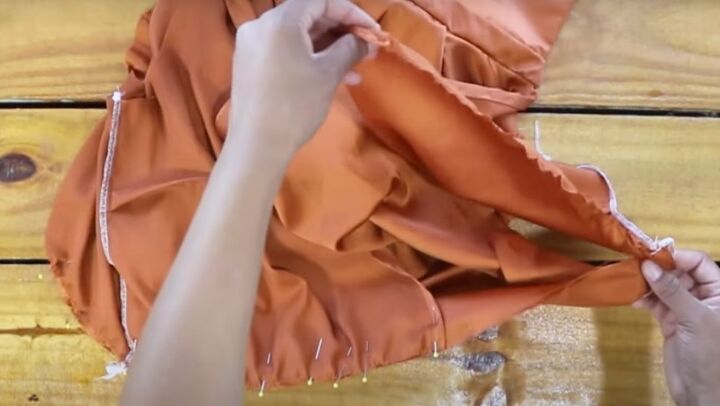
Join the side seam of the top opposite the zipper opening. Finish the other side edges without joining them.
Gather the lower edge of the top and pin it to the skirt, right sides facing.
Pin the outer part of the top from the side seam to 3/4 of the front skirt first.
Pin the inner half of the top to the other 1/4 of the skirt and overlap the front edge of the outer wrap.
Sew the top and skirt together. Hand stitch a hook and eye fastening to the top of the wrapover front.
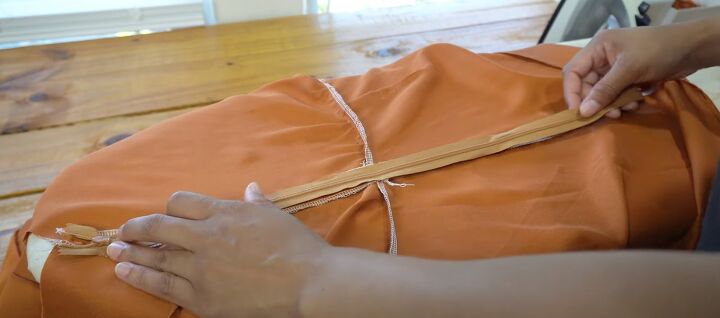
7. Insert zipper
Baste the zipper seam closed and press the seam open.
Pin the invisible zipper over the center of the seam. Sew in place on the right side of the fabric using your zipper foot.
Seam rip open the basting stitches.
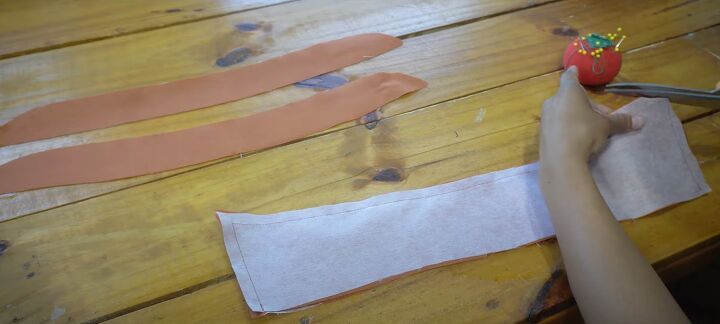
8. Sleeves and cuffs
Make bias tape from the fabric and sew to the lower edge of the sleeves for the keyhole.
Join the sleeve seam and sew across the top edge of the bias tape.
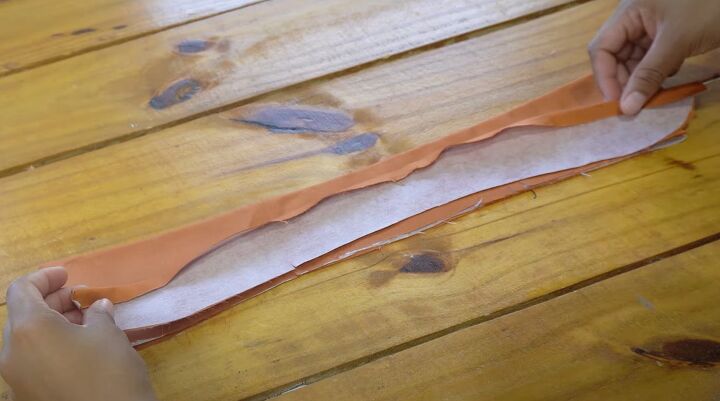
To make a long cuff like mine, cut the pieces 4 inches longer than the original pattern and back them with interfacing.
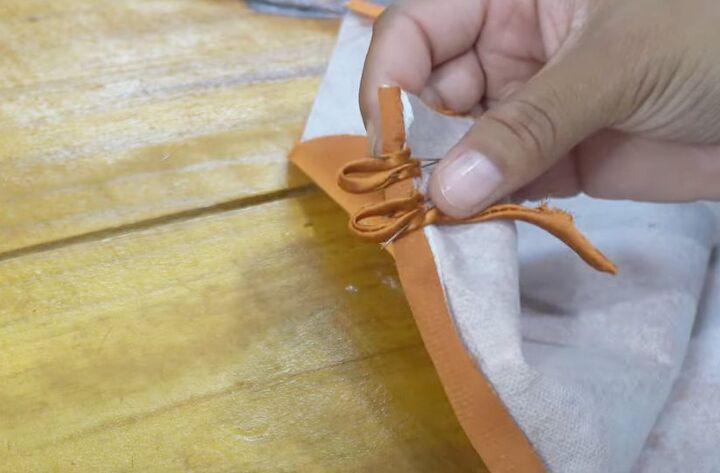
Make long loops for the buttons and attach them to the edge of the cuff.
Follow the pattern instructions to attach the cuffs to the sleeves and insert the sleeves.
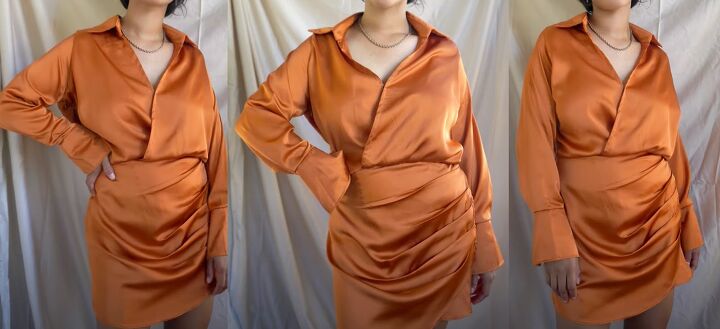
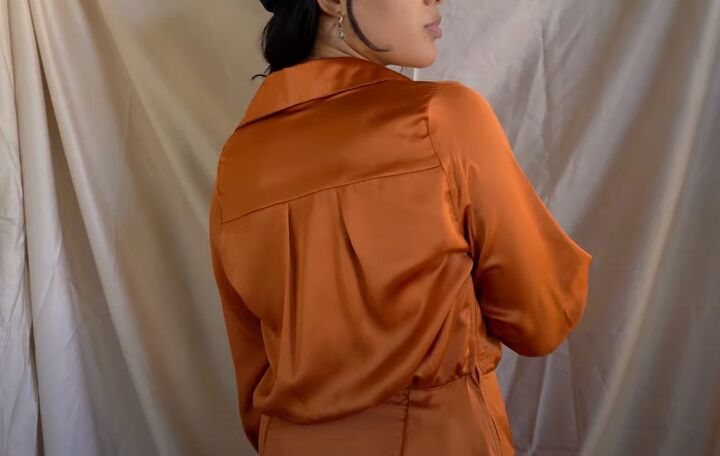
DIY long sleeve satin shirt dress
This long sleeve satin shirt dress is perfect for all kinds of parties and events where you want to look a little more dressed-up than usual.
The pattern drafting techniques I use are fairly advanced but my instructions for them are detailed and should be easy to follow.
If you like this type of tutorial and would like to see more of them, please let me know in the comments below.
Check out my post on How to Make a Flannel Shirt Dress Out of 4 Old Men's Shirts.
The author may collect a small share of sales from the links on this page.


Comments
Join the conversation