How to Sew a Stylish Turtleneck Dress That's Perfect For Winter

In this tutorial, I'll show you how to sew a turtleneck dress. It's winter, so it's time to be cozy and comfortable, but without sacrificing style or spending hours stitching a garment!
That's why I was inspired to make my new January dress pattern, which is a sweater-style dress with a turtleneck. It's a simple, quick-sew dress, and today, I'm going to walk you through exactly how to make it, step by step.
Tools and materials:
- January dress pattern
- 2 yards medium to heavy-weight knit fabric
- Sewing machine
- Jersey ballpoint needle in size 12 for most fabrics or 14 if your fabric is really heavy
- Scissors
- Paper
- Pins
- Serger (optional)
- Double-needle (optional)
- Iron
Winter dress sewing tips
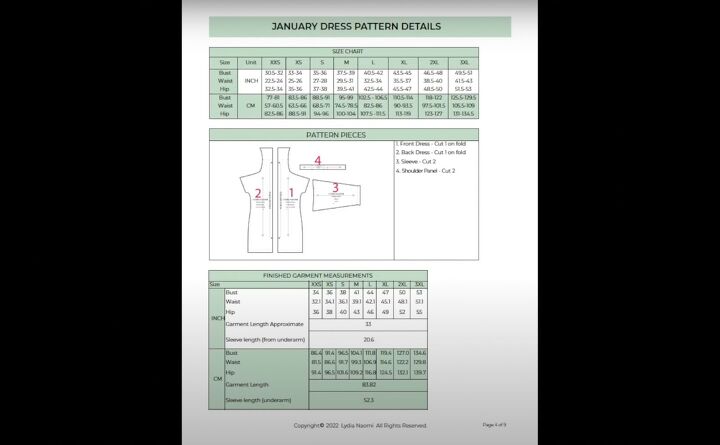
Before we get into it, here's some quick info on how to sew this dress and use this pattern. First, this pattern has a ⅜-inch seam allowance with hem allowances at 1 inch.
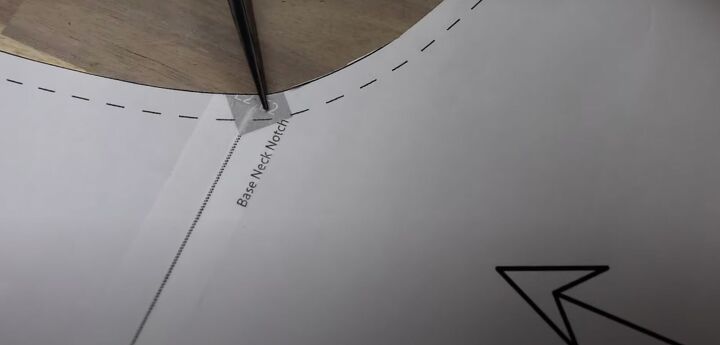
Cutting: make sure you cut all the notches.

There’s a double notch in the back at the armhole to differentiate the back from the front.
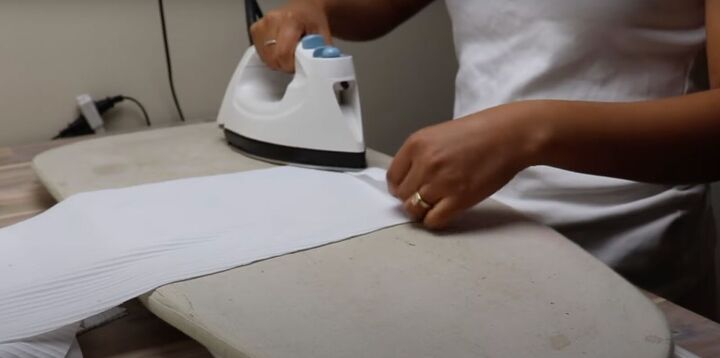
Pressing: once you’ve cut everything, fold in 1 inch so the wrong sides are touching, and press the sleeve hems and bottom hem. Fold the top neck notch down to the base notch and press.
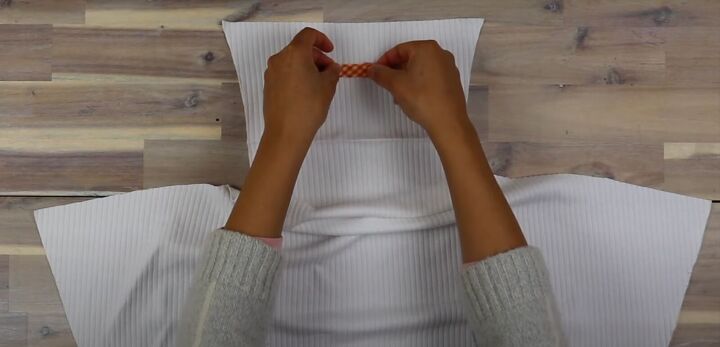
Marking: Label the back neck on the inner flap. You can use a piece of bias tape. This helps orient to you which side is which.
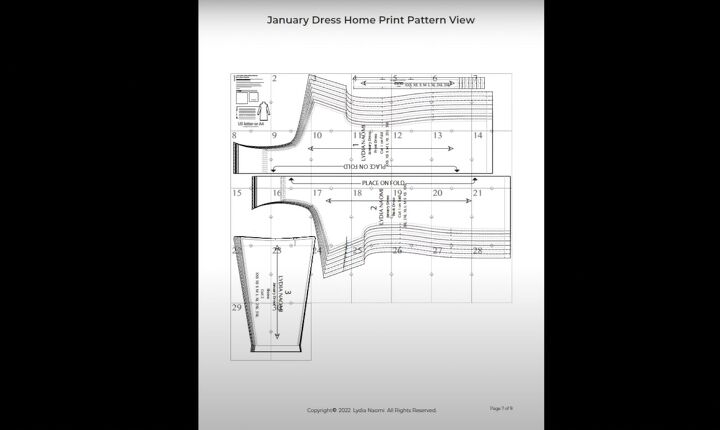
Read the pattern first to know how much fabric you’ll need, how to lay out the pattern, cut the pieces, and put them together. If you're new to this, watch my video on how to print out PDF patterns.
1. Cut the fabric
Follow the pattern instructions.
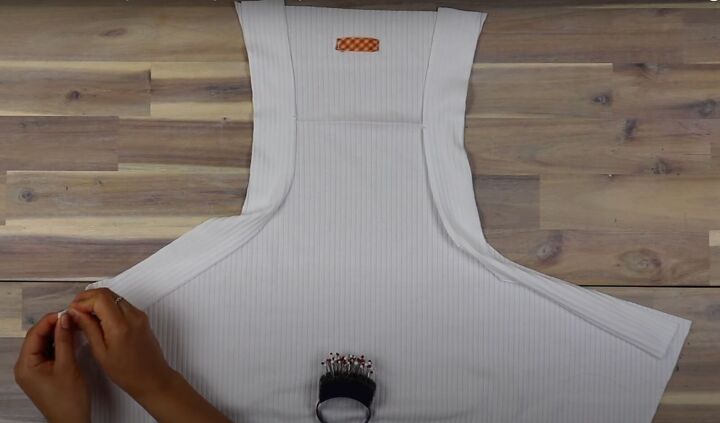
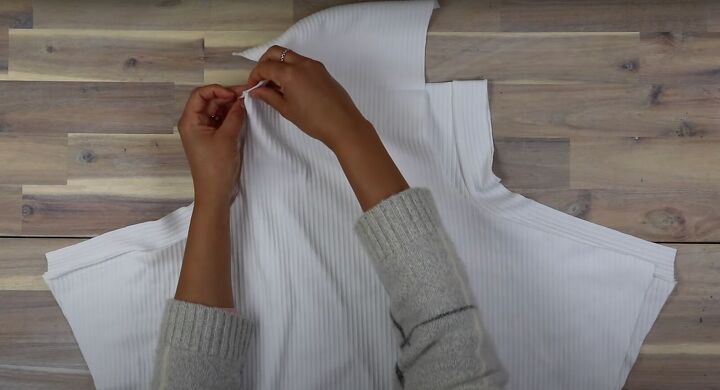
2. Attach the shoulder strips
Locate the notches as these line up on the shoulders. Lay each strip right sides to the back of the dress. Match the notches and pin them in place.
Pin at the ends first and then match the notches in the middle. You may have to stretch it a little at the shoulder.
Fold back at the crease of the neck and pin to the sides lining up the raw edges with the lower notch.
Pin all 4 layers together, making sure the edges are flush.
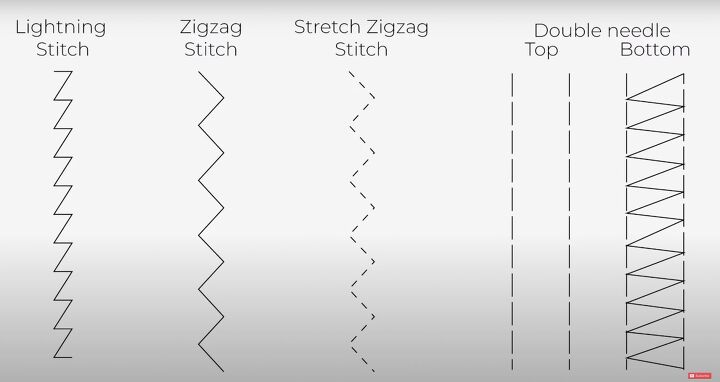
Sew with a ⅜-inch seam allowance. Use any of these stitches. If you’re using a 4-thread serger, you’ll be cutting off ⅛ inch as you sew.
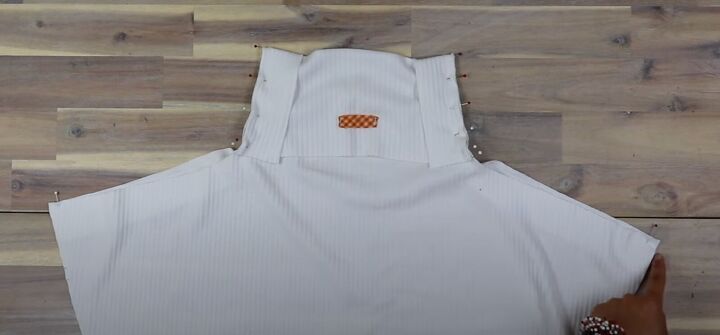
Lay your piece right side up and the shoulder strips turned out. Place your front dress piece right side facing down to the assembled back piece.
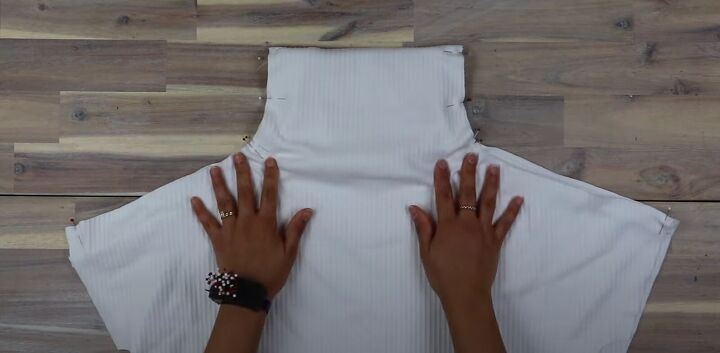
Line up the neck fold notch with the neck strip and pin down from there along the neck strip on both sides. Fold the top over so it lines up with the inside. Sew them together. Press.

3. Make the sleeves
Have your dress facing up. Match the sleeve to the armhole. The sleeve will be slightly smaller so line up the back double notches and the center notch at each end.
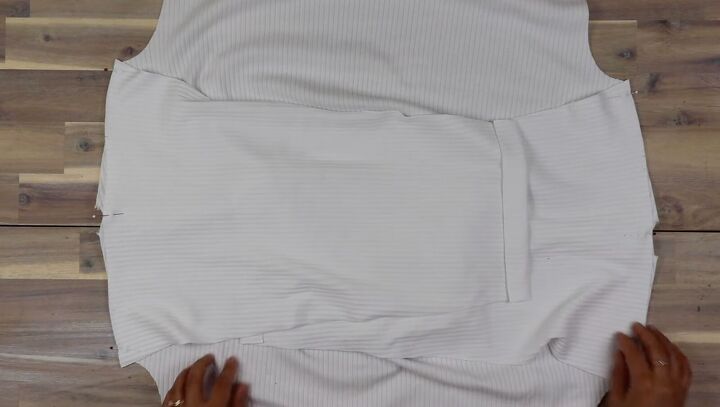
Stretch the sleeves slightly to match the armhole as you sew.

Press the sleeves seam allowance towards the sleeve.
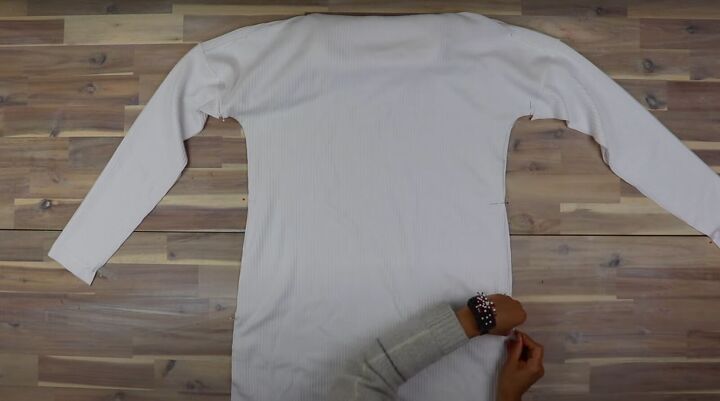
4. Sew the dress
Lay the dress right sides together and line up all the notches on the side seams, pinning them in place.
It is crucial to match up the notches along the length of the body. If you don’t, you may find that one side will be longer than the other as you sew. To avoid a lopsided dress, make sure you match them up.
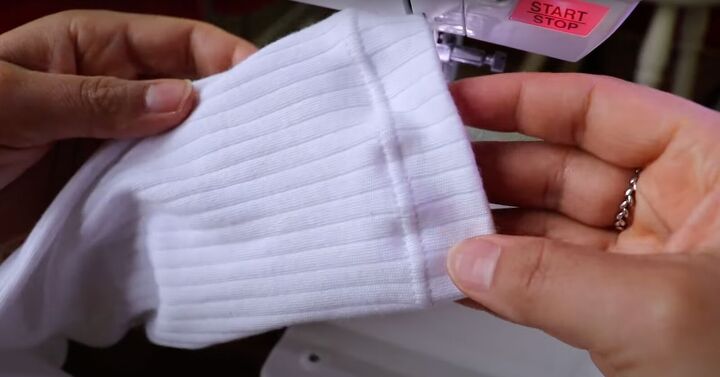
Once everything is sewn, it’s time to hem.
Tip: In this tutorial, I’m using a double needle. If you do this, you’ll sew on the right side of the dress. If you don’t use a double needle, use a zigzag stitch on the wrong side.
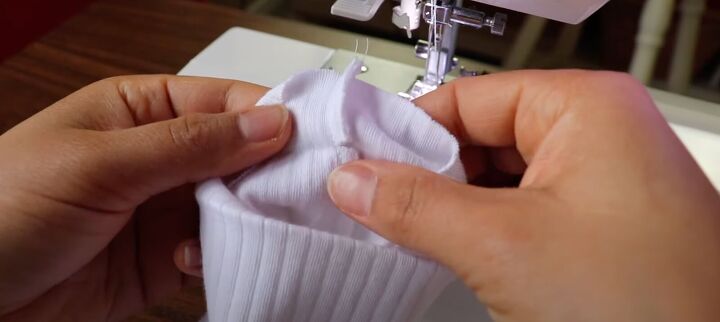
Snip the hem notch closer to the stitch line so you can alter the orientation of the seam allowance to lay flatter.
This is what it will look like.
Hem the sleeve cuffs and bottom of the dress. Press the hems. You’re done!
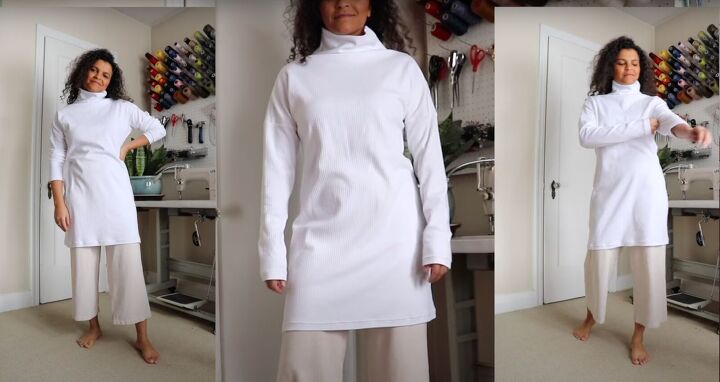
The DIY winter dress in white.
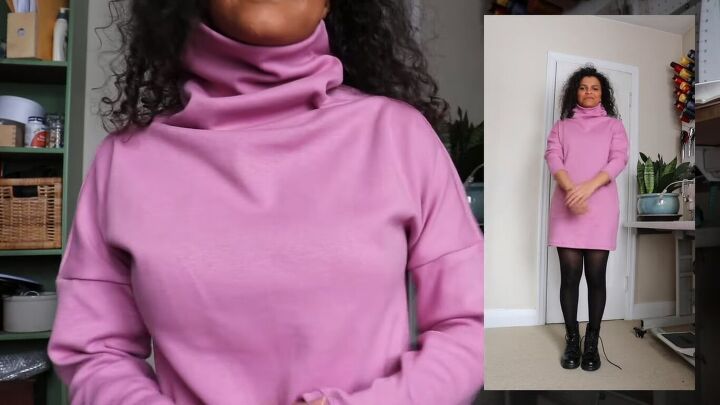
The DIY turtleneck dress in pink.
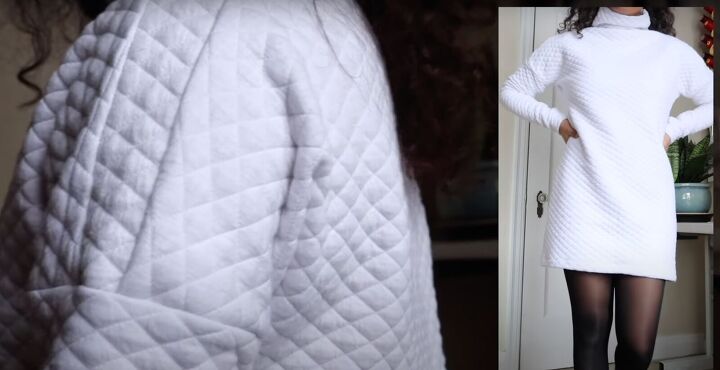
The DIY winter dress in a quilted fabric.
How to sew a turtleneck dress
I hoped this winter dress sewing tutorial and the turtleneck dress sewing pattern helped you sew and make a winter dress! You can see how versatile the dress is to wear on its own or with leggings.
I love hearing from you so please comment below and let me know if you made this dress! Please use and tag me @lydianaomistudio!
The author may collect a small share of sales from the links on this page.


Comments
Join the conversation
so cute 👍️
Well done! Just don't trip over your untied boots. Don't I sound just like a Mom lol.