Learn How to Sew a Mesmerizing Kaftan Dress

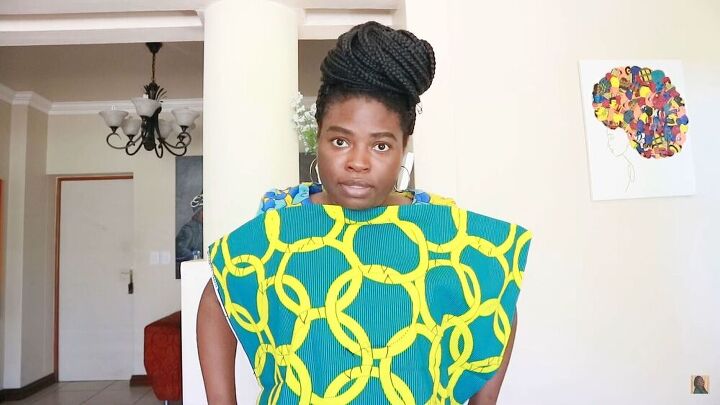
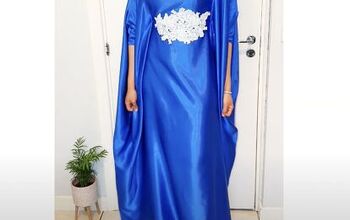
Today we are going to make a shirred kaftan dress. It’s a simple, easy-to-wear dress. I made this for my sister, but I loved its simplicity so much, I decided to make one for myself. The style is stunning and is an easy go-to outfit. It’s the perfect solution during those hot days, you know, those types of days where all you want to do is sit in a fridge to keep cool.
Tools and materials:
- Pins
- Chalk
- Thread
- Elastic thread
- Scissors
- 2 yards of fabric
- Bias tape
Take your measurements
Before you start with the exciting part, take your measurements. These include your hips, waist, and chest circumference. Also, don’t forget to measure the length that you'd like; this differs from person to person owing to our unique height. Once you've got the measurements out the way, the fun part begins! Fold your fabric lengthwise. Next, divide your hip circumference by 2 and add 10 inches to that. The reason why we are adding more inches to the waist area is that your waist is the widest part of your body, and since the waist will already be shirred, you can have more fabric around your waist. Your fabric should wrap around you at the waist. Next, fold it again in half, so you are working at a quarter of your body’s measurement.
Make your pattern
Mark 40 inches plus hem allowance of an extra 2 inches and measure that length on your folded fabric.
Measure your neck circumference. Measure 3.5 down by 6 inches and draw your neck opening on the corner of your folded fabric.
Next, mark your armhole, which is usually 8 inches. Add another 2 inches so it’s loose and flowy.
Mark 16 inches for your waistline, and the distance from your waist to your hip, in this case, mine is 9.
Mark your circumferences, starting with the bust. Mine is 38 and a quarter of that ( remember, we folded the fabric in 4) is 9.5 inches. Instead of 9.5, I’m making it 11 inches, since it is a flowy dress. Make a mark on the top line and move down to the hip line, where you will measure a 1-inch allowance and join it to the bust mark at the top.
Place pins on the critical points so that it’s easier for you to measure the other side of the folded fabric.
Finally, measure your shirring lines. Decide how big you want your shirring band to be and run lines across your waistline, giving you a clear indication of where to gather the dress. I measured 1.5 inches on either side of my waistline. Measure even lines between these markings and draw across from side to side.
Stitch your waistline
Before you start shirring your main fabric piece, test out the tension of your sewing machine on a scrap fabric piece. On my machine, the tension is set to 8 and the stitch line is set to 4. Remember to use your elastic thread for this part.
Once you’re satisfied with the shirred stitch line, go ahead and do your waistline on your dress; following the lines you just drew. Also, be sure to backstitch when you're done.
This is what it looks like when done.
Finish the neckline
On the right side, place your bias tape and align the edges. Then sew all around the edge of the tape, not too much on the center, a little off-center where the fabric’s first fold line is placed.
Now, fold your tape inside and sew it on the right side.
Hem the dress
Fold your dress twice, each time by an inch, and hem the dress.
Sew the sides
Sew the sides of your dress with a one-inch seam allowance, going a little deeper when reaching the shirred waistline, and stopping right at the opening of the armhole.
Optional- add ruffles
Your dress, up to this point will most probably look great, and wearable. But you can take your dress style up a notch by adding ruffles to the sides. This step is totally optional, and it does take time. I’m leaving this choice up to you! Take your leftover fabric that should be the length of your dress. Divide it into 4 panels, lengthways. This is to have a longer length so that you can successfully create the ruffle look. Each panel should be around 4 inches wide.
Cut your folded fabric so that you have 4 panels.
Next, sew one panel on the side with a slight seam allowance and gather the fabric so it ruffles out. Pin the other side of the panel to the side of your dress and sew it on. Take note, this can be a long step but don’t give in too soon, the result it’s totally worth it! Repeat the step so that you have two, ruffled panels per side.
Next, fold your top ruffle panel to one side, and do a french stitch over both the panels so that the raw edges are not visible.
Here it is! Isn’t it unique? I love the shirred part, and of course, the way the ruffles drape down the sides of the dress is surely special. I hope you enjoyed this tutorial and that your kaftan dress looks as stylish and mesmerizing as ever!
Enjoyed the project?
The author may collect a small share of sales from the links on this page.


Comments
Join the conversation
Love the dress. Fun girl. Love your take on this kaftan.
Love it, and the ruffles look really cute on you. ( I have built-in "fluff" so no need for ruffles, ha ha!) But love your dress, and the fun pattern you chose suits your personality. Great detailed instructions are helpful, too. I know you and your sister will enjoy these lovely dresses. I look forward to seeing more of your creations.