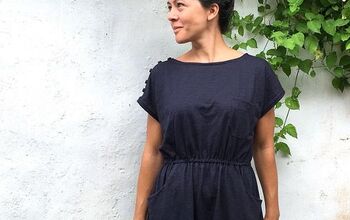
Lou Box Dress: Best Name for a Dress Ever!
Sew DIY Patterns is one of the generous prize sponsors for the Sewing Challenge that I host on Instagram. Its a fun challenge were sewists can share their makes at the end of each month and connect with the sewing community. To show my support for Sew DIY Patterns I decided to make the Lou Box Dress.
The first thing I have to say is that this dress has the best name ever! The second thing you need to know is it is a fantastic dress to make and it will be a great addition to your capsule wardrobe choices. The dress is a nice weekend sew and it is a great pattern if you are a beginner sewer. As an advanced sewer, I appreciated the simplicity of the pattern as well as the subtle details and the versatility of choice that the different pattern options offer.
I choose to make the dress in a woven chambray but there are instructions for creating the dress in a knit fabric as well( Lou Box Dress 2). The main bodice is the same but the pattern pieces for the neck binding and sleeve binding are different depending on your fabric choice and there is a really nice ribbing option for the hem on the knit dress.

The finished dress has a lot of ease (10 inches) so I chose to size down from my regular size 16 based on the bust measurements to a size 14- this still allowed for several inches of ease through out the arm and shoulder area. Since the dress is designed to be very roomy and I am not large through the hip I graded down from a 14 to a size 8 through the hip otherwise there was simply too much material and the curve of the hip design in the pattern didn't work for my shape, or lack there of. I simply drew a straight line from the under arm down to the hem, eliminating all of the hip curve.
I really liked the neck binding on this dress and how easy it was to attach. The binding strip pattern piece is cut on the bias ( placed at a 45degree angle to the grain of the fabric) to allow for stretch as you sew it to the neckline. As my fabric has a subtle stripe in the chambray the angle of the bias binding offered a nice diagonal stripe on the bias which is adds a nice contrast to the neck line. I placed the seam that joins the two bias strips right at the center so the reversal of the stripes became ornamental.
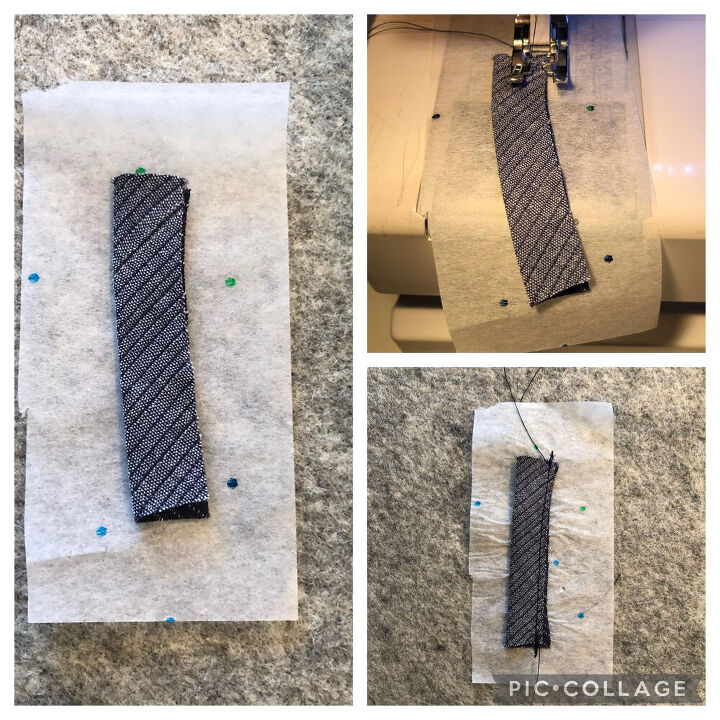
There is an option to create a button loop at the back of the dress. If you have never created a button loop before this is a great way to learn. When you are sewing a small piece of fabric like a loop it is a great idea to use a bit of tissue paper underneath the loop as you sew. The tissue adds just enough structure to prevent the loop ends from being pulled down into the feed dogs and getting tangled or torn. Simply pin the loop to the tissue, stitch the edge, then tear the tissue away when you are done. Its a quick, easy solution to creating a perfect loop. If you have a certain button in mind, make sure the loop is big enough for the button to pass through, if you need a bigger loop simply lengthen the pattern piece.
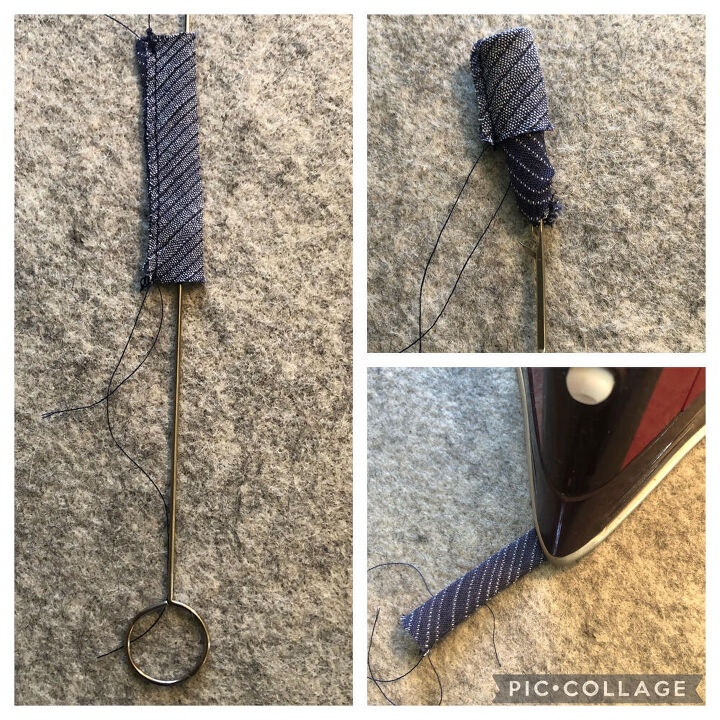
Once you have the loop created you will need to turn it right-side out. I suggest using a loop turner to do this. Loop turners are especially handy with small loops but they can be really useful for turning straps and belts as well. There is a small hook on the end that you simply hook into the stitching then pull the loop turner down so the loop turns into itself.
Sometimes getting the loop started can take a bit of fiddling but once it starts you will pull it through quite quickly.
For the pockets I choose the front patch pockets instead of the invisible side pockets. I cut the pocket pattern pieces out with the stripes going horizontally for contrast. These particular pockets are actually sewn into the side seam. Pin your pocket into place and top
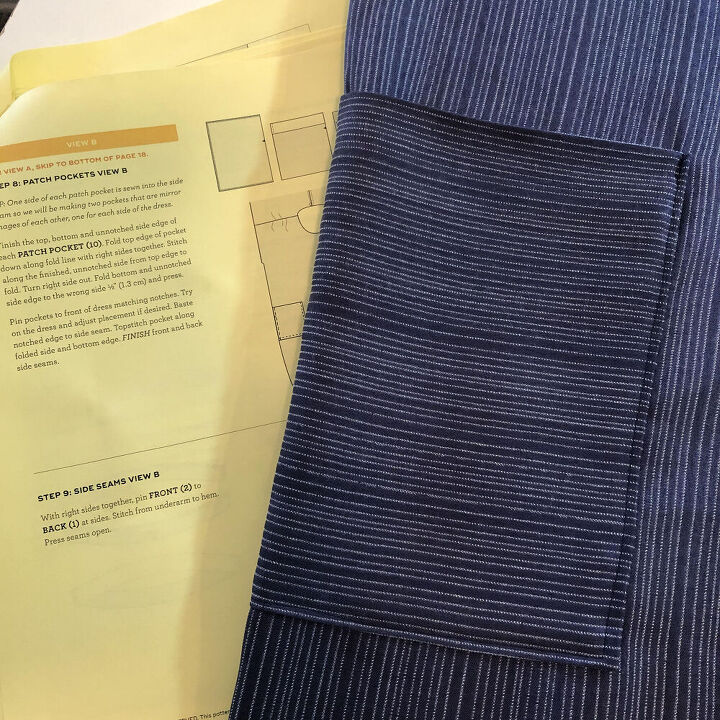
stitch around the edges, I also stitched along the side of the pocket that is sewn into the seam to keep the pocket in place when you sew the side seams together.
The sleeve cuff offered another option for a contrast in striping. I cut the cuff out so that the stripe ran perpendicular to the dress stripe. Again, a subtle design change for this dress but a fun way to define the elements of the pattern.
You final step to finishing the dress is to add the hem interfacing. The hemline of the Lou Box Dress offers a wonderful curved front edge that is slightly shorter then the back hemline. This is one of the first dressed that I have not had to lengthen at all. It is definitely a patter for a tall person which is such a treat. If you do need to lengthen or shorten the dress, use the marks on the pattern piece half way down the bodice so that you preserve the design of the hemline. I had trouble getting the facing to lie flat when I turned up the hem, if this is the case for your fabric, simply clip the center of the front facing curve and it will lay flat.
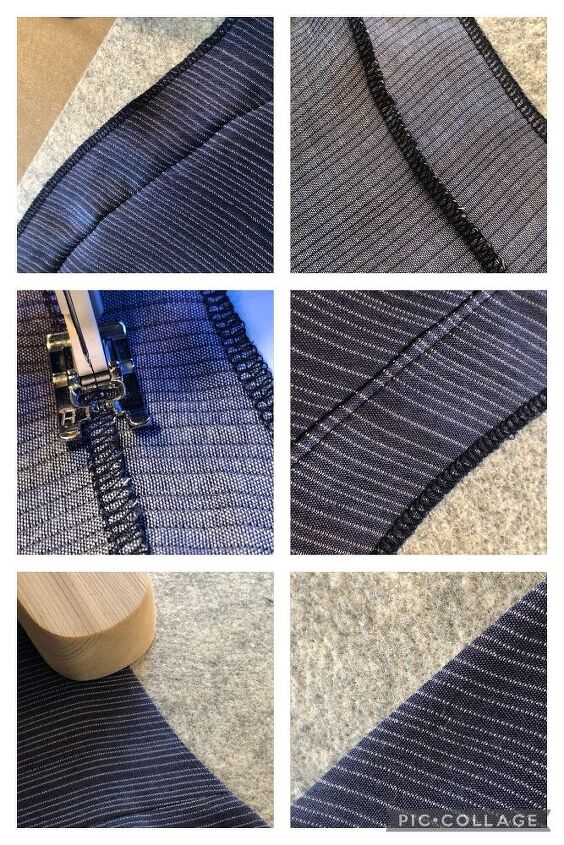
This picture shows the interfacing attached, the under side pressed and ready for under stitching, understitching during and after, then pressing with a tailor's clapper and a wool mat for a perfect finish.
I highly recommend the Lou Box Dress pattern. Not only does this dress have the best name ever, it is a fun versatile pattern to sew. It is a comfortable, classic addition to your wardrobe. I know that I will be making another Lou Box Dress for the fall in a heavier fabric after all.... there is Sew Much To Design.

The author may collect a small share of sales from the links on this page.


Comments
Join the conversation