Elegant and Modest Puff Sleeve Dress DIY

Today, I will be taking you step-by-step through the process of creating an easy puff sleeve dress. This dress is a great beginner project, and the lengths of the hem and sleeves can be altered to your liking. Let’s get started!
Tools and materials:
- Fabric
- Loose shirt (to trace)
- Scissors
- Pins
- Measuring tape
- Sewing machine
Cut
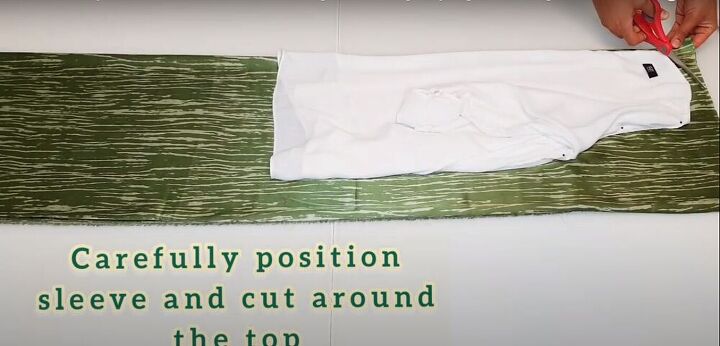
Begin by folding your fabric in half, and then in half again. Use a loose-fitting top as your pattern. Fold the top in half lengthwise and pin it to the fabric on the fold. Do not include the sleeve as part of your pattern. Once everything is pinned down properly, cut around the neck and side of the top, leaving a 1-inch seam allowance.
Measure and cut
Measure how long you want your dress to be, and add 1 inch for the hem. Then cut the fabric at that point.
Continue cutting along the side of the dress, all the way to the bottom.
Cut the neckline
On the front bodice piece, extend the neckline by 3 inches.
Pin
Pin the front and back bodice pieces at the shoulders, right sides together.
Create sleeves
Fold your fabric in half, and then fold one side into a triangle.
Measure 16 inches from the bottom of the fold.
Mark your fabric at this measurement, and make a straight cut.
Measure the 16 inches again from the cut edge of the fabric, and mark it with pins or a fabric marker. Then cut along the marks.
Open the fabric, and cut the pattern piece in two at the folded edge to create two sleeves.
Fold one of the sleeve pieces in half, and cut a curved line as shown in the picture, starting on the non-folded edge. Use the first sleeve as a template to cut a symmetrical curve on the second sleeve.
Notch
Notch the corner of the sleeve to mark the center.
Sew
Sew the shoulder seams together.
Gather
Run a basting stitch along the curved edges of the sleeves, and then pull the thread to gather the edges of the sleeve.
Pin and sew
Lay the dress so the front and back bodices are both right sides facing up, and the shoulder seams are in the center. Pin the sleeves in place, making sure to match the notch the center of the sleeve with the shoulder seam. Then sew it down.
Measure
For the cuffs, measure your arm just below your elbow.
Cut and fold
Cut two 5-inch wide rectangles with a length equal to your arm measurement. Fold each rectangle in half lengthwise.
Gather
Create gathers at the bottom of the sleeves. The length of the gathered edge should be equal to the length of your cuff.
Pin and sew
Pin the cuff to the bottom edge of the sleeve, and sew it down.
Pin the sleeves and the sides of the dress together, right sides facing each other, and sew everything down.
Cut and pin
Cut a 1-inch wide strip of fabric, and pin it all along the neckline of the dress, right sides together.
Sew
Stitch the strip in place, close to the edge of the neckline.
Fold and sew
Fold the strip along the neckline inwards, and topstitch it down.
Hem
To finish, fold the hem of the dress twice to hide the raw edge and sew it down.
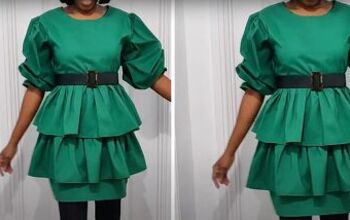
And here’s the final look! As you can see, I made a belt to go with it.
I love how elegant and stylish this dress turned out. I’m so happy with this result. I hope you found this puff sleeve dress tutorial helpful. If you sew a puff sleeve dress of your own, what kind of fabric will you use?
Enjoyed the project?
Suggested materials:
- Fabric
- Loose shirt
- Scissors
- Pins
- Measuring tape
- Sewing machine
The author may collect a small share of sales from the links on this page.


Comments
Join the conversation
I can’t wait to try this! This will be the first thing I ever sew. I am beginning to sew because I rarely find clothes that are both modest and elegant while also being fashionable. This is easy to follow and it is exactly my style! I am going to use a 70’s-inspired pink swirly cotton print to create mine. Thank you so much for sharing your skills!
Beautiful fabric.♥️ The style of the dress is not mine but you did a very nice job on it. :)