How to Sew a Ruffle Tiered Maxi Dress in 10 Easy Steps

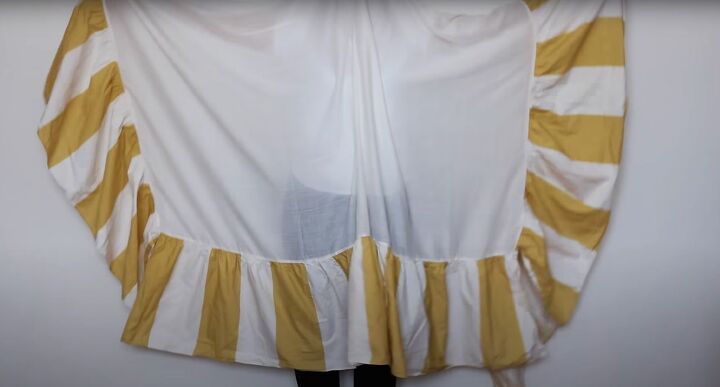
I made this tiered ruffle dress from something that you can often find in thrift stores.
Best fabric scissors!
My dress was made entirely from a bed skirt, sometimes called a dust ruffle or valance. The ruffles were the inspiration for my design.
Tools and materials:
- Bed skirt or any lightweight fabric
- Scissors
- Seam ripper
- Marking tool
- Measuring tape
- Sewing pins
- Safety pin
- Ruler
- 1/2 yard each of 1/4 inch and 1/2 inch elastic
1. Take your measurements
Measure yourself around your hips.
You'll also need to know the total dress length from just above your bust to your ankles and the center length from above your bust to your waist.
I cut the ruffles off the bed skirt, leaving 1 inch of fabric at the top.
2. Make the pattern
My total dress length was 50 inches and the length of the ruffle was 15 inches, so that made my base dress 35 inches (50 - 15).
I made the width at the top my hip measurement plus 2 inches and the hem width was my hip measurement plus 8 inches.
See the video at 1:55 for how to calculate the yardage you'll need.
I needed a total of 5 yards of 45 inch width fabric.
3. Make the base dress
I transferred my measurements to the main fabric and cut 2 pieces on the fold, then joined the side seams.
4. Attach the bottom tier
I started with the lowest tier that attaches to the bottom edge of the base dress.
I cut off the 1 inch allowance at the top and left 1/2 inch free at the side seam, pinned it 1/2 inch from the bottom of the dress.
When the tier was pinned all the way around, I cut off the excess and pinned the side seam.
Then I sewed the ruffle to the dress and sewed up the side seam.
My center length was 11 inches, so I deducted that from the base dress length of 35 inches, leaving 24 inches for the ruffles.
I decided to place 2 ruffles 12 inches apart, so they would overlap.
5. Attach the skirt and waist tiers
I measured and marked 12 inches up from the top of the last tier. I folded the 1 inch strip at the top in half and pressed it.
I pinned the strip around the dress, then sewed the tier to the dress and stitched the side seam as before.
I repeated this for the waist tier, but I attached the ruffle with a row of stitching at the top and bottom of the strip, creating a channel for the elastic.
I left that section of the side seam open so I could insert the elastic later.
6. Attach the top tier
I turned the dress wrong side out and pinned the right side of the top ruffle to the top edge of the dress.
7. Make the straps
I removed the strip from the rest of the ruffle material, pressed it flat and cut it 30 inches wide.
I cut 4 strips from the fabric, each 2.5 inches in length.
I folded each strip in half lengthways, right sides together, and stitched the long edge.
I attached a safety pin to the open end and pushed it inside the tube to turn the strap right side out.
I pressed the straps and closed one end of each.
8. Attach the straps
I decided where to place the straps and sandwiched them between the dress and the top ruffle on the front and back. I then stitched around the top edge.
9. Insert the elastics
I created a channel for the top elastic by sewing another row of stitches 5/8 inch from the top, leaving a small opening to insert the elastic.
I used a safety pin to feed the wider elastic through the channel, sewed the ends together and closed the opening.
I inserted the 1/4 inch wide elastic through the channel at the waist, pinned the ends together and tried it on before finishing it in the same way.
10. Shorten the top tier
The top tier was covering the waistline, so I made the ruffle shorter after fitting and pinning it.
Ruffle tiered maxi dress
I was delighted with the way this ruffle tiered maxi dress came out.
The defined waist makes it look elegant and you can get different looks by varying the way you tie the straps. Try crossing them in the front or tying them a halter style.
If you’ve ever done anything like this, or would like to see more DIY bed skirt ideas, please leave me a comment below.
And, for more upcycling ideas, check out my post on How to Reuse Fabric Face Masks.
Enjoyed the project?
Suggested materials:
- Bed skirt or any lightweight fabric
- Scissors
- Seam ripper
- Marking tool
- Measuring tape
- Sewing pins
- Safety pin
- Ruler
- 1/2 yard each of 1/4 inch and 1/2 inch elastic
The author may collect a small share of sales from the links on this page.


Comments
Join the conversation
I love this, well done!
Looks great and ruffles are so fire now! I think I will look through my linens and hopefully find a bed skirt!