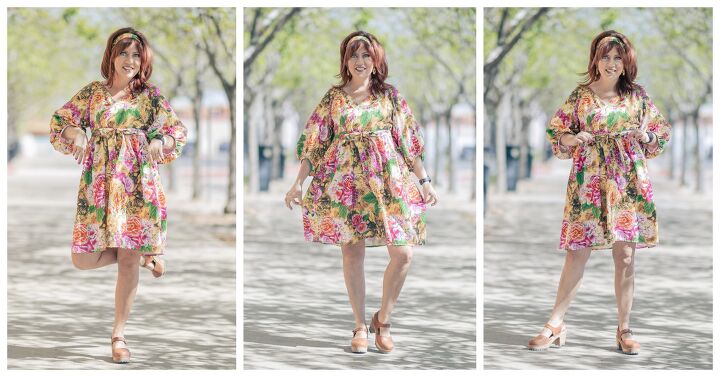
Some Easy Tips and Tricks to Help You Make the Perfect Spring Dress!

Sometimes a sewing pattern comes along and immediately wins the hearts of all those who see it. McCall’s 7969 just happens to be that pattern. It’s what some would call “the Darling” of the sewing community. At first glance it seems like a very simple dress pattern. Nothing too extravagant and very easy to sew. I think that’s what makes it so special. It is very simple so you can choose a bright, fun fabric to set it apart from the hundreds of others out there in the sewing world. Or you can modify it a bit and add some details. It’s those details I wanted to share with you today.

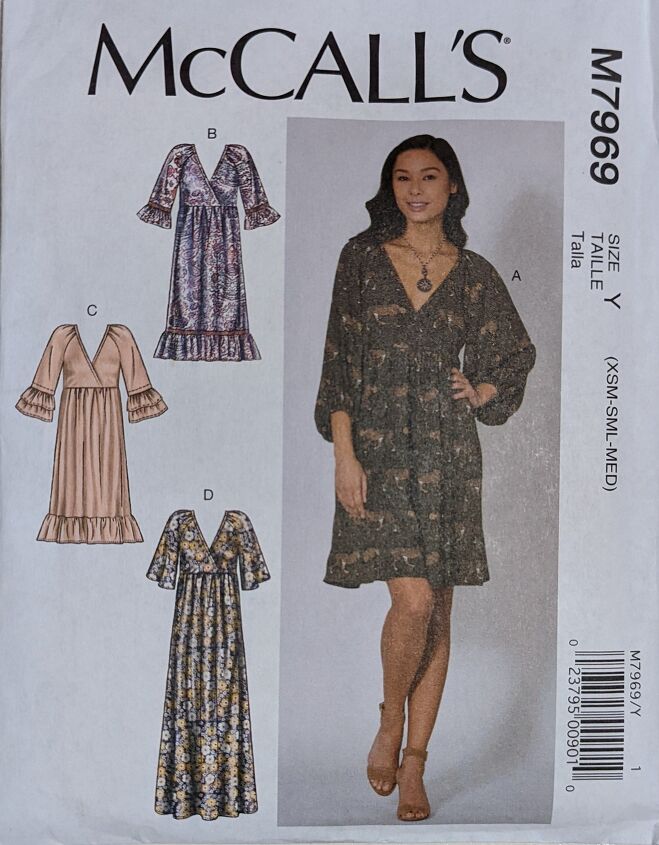
I’ll be honest. I wasn’t intrigued enough to purchase McCall’s 7969 when it first came on to the scene. However, the more pictures I saw of it the more I got to thinking about it. So I went for it and purchased it at the next McCall’s pattern sale I saw.

Now, I have to tell you I’m not a big believer in commercial patterns. I don’t buy them very often. I find the fit to be off and the instructions are just the worst. I often find myself baffled by commercial patterns and less than satisfied with the results after I make something. For this reason I did my research and stalked the m7969 hashtag on Instagram. I read everything that people had to say about this pattern. I read blog posts and studied pictures. I even messaged people questions I had. By the time I was ready to sew this pattern I felt thoroughly prepared and confident I could achieve the results I wanted.
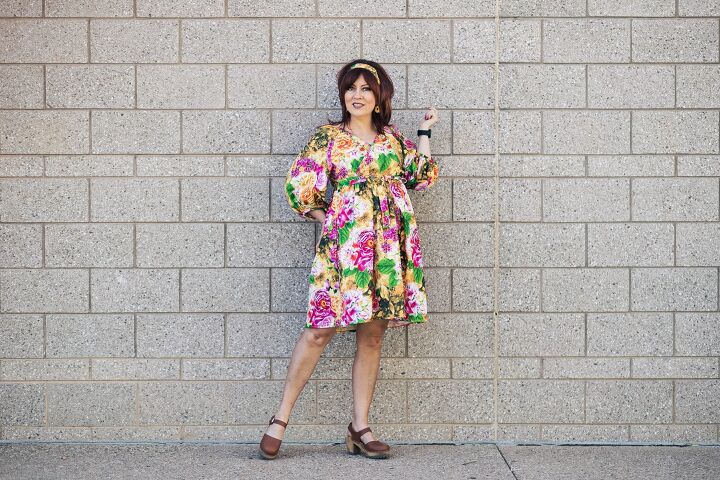
First I needed to decide what size to make. I found that more sewists than not wished they would have sized down for this pattern. My measurements put me in a size medium for bust but large for my waist and hips. Rather than going with the large, I decided the medium would be best.
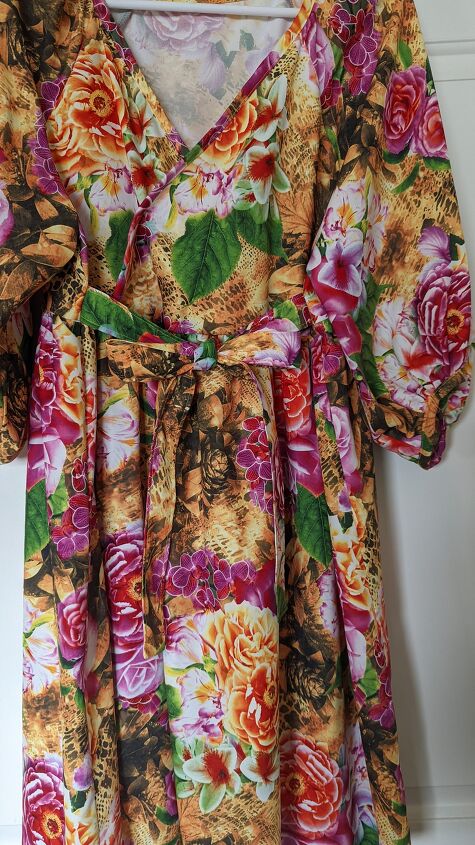
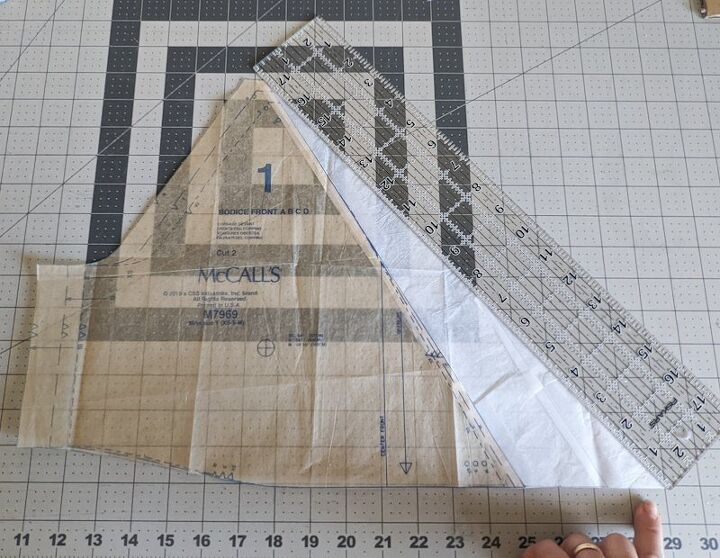
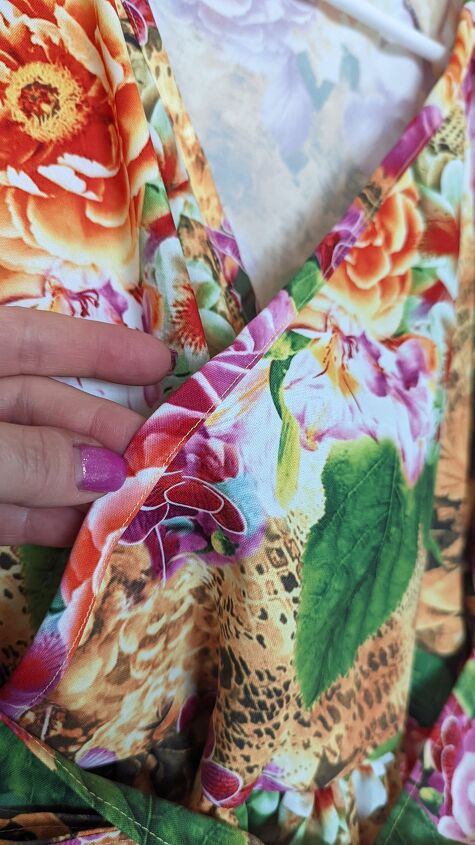
Next I needed to make an adjustment to the front bodice. In doing my research I found that a few people felt the wrap front of the bodice came down too low. From looking at the picture on the front of the pattern, I had that impression too. When others shared that it was too low for them I knew I would need to adjust it. I found some sewists that appeared to have adjusted theirs so I read what they had to say in their posts on instagram. I messaged one of them and she explained how she did adjusted the front bodice.
This is what I did. I taped some tracing paper on the front, slanted part of the bodice pattern piece. Then using my clear ruler I measured over 4 inches on the bottom. Then I made a line connecting the shoulder, out to the 4 inch mark. Pictured below is what the pattern piece looked like afterward. I kept all markings and notches the same.
Another thing I changed was the bias binding for the bodice around the neck and front. The pattern instructions tell you to use fusible interfacing, but that made it so it couldn’t stretch like bias binding needs to. So I recut that piece and didn’t interface it and it worked perfectly. So I would suggest not interfacing it. Unless you are using really lightweight, delicate fabric.
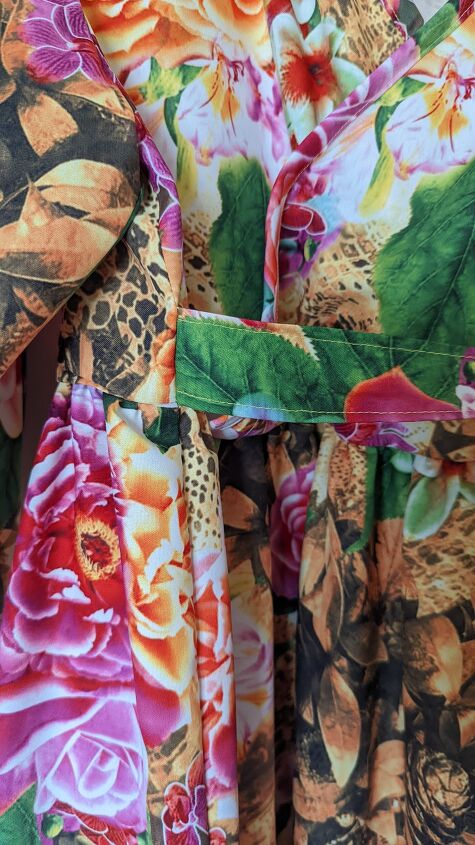
I always love adding a belt to the dresses I sew. This dress was no different. To make this belt I cut 2 x 36 inch strips of fabric. I interfaced the long ways, half of each of the two pieces.

Then I folded it in half, right sides together, sewed one end and down the side. I flipped it right side out, ironed it and did some top stitching to help keep its shape. Then I simply attached it to the waist at the side seams. I was such a simple and cute addition.
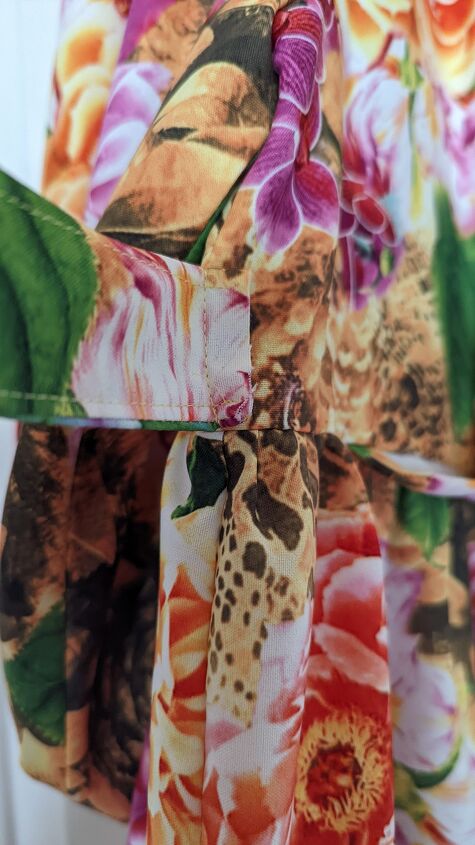
You can see it attached here. You coud also attach the belt before you sew down the sides of the bodice too. I decided to make this belt after I had already sewn the sides so this is how I attached it. This fabric I used doesn't fray hardly at all so I this was fine for me.
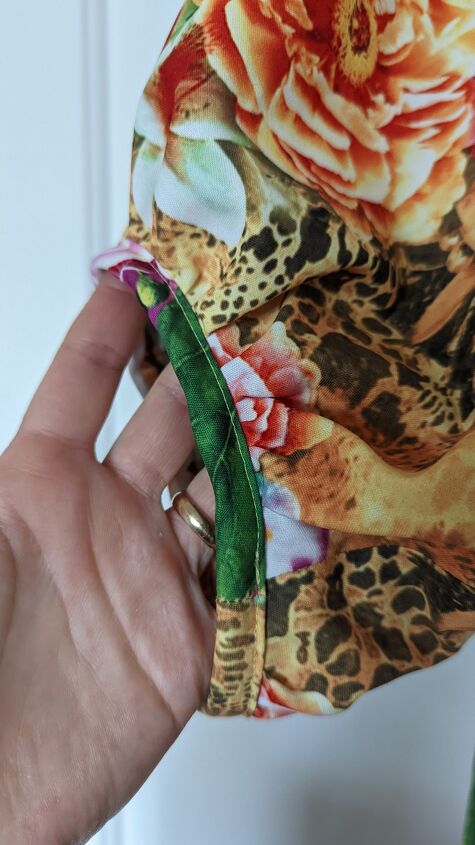
The pattern instructions tell you to hand stitch the binding onto the sleeves so that the seam doesn’t show. I felt no need to spend time doing that. I simply used my machine and stitched the binding to the sleeve in minutes. Hand stitching would have taken forever. Plus, no one will be close enough to notice or even care. It’s all preference. So if you want to hand stitch, go right ahead and do it. If you are like me and would rather machine stitch, no one will care.
This pattern is an absolute gem and I highly recommend it to sewists of all levels. Wait for a pattern sale and then snag this pattern! Hope this was useful for you!
Do you prefer sewing with Commercial or Indie patterns? Let me know in the comments.
Happy Sewing,
Koe
The author may collect a small share of sales from the links on this page.


Comments
Join the conversation