Water Marble Nail Art

I've tried the water marble nail art technique before, and each time I've created a huge mess and wasted a lot of nail polish in the process. Recently, however, I've found a hack that helps me achieve a similar look and avoids creating a mess! What could be better? I'm so excited to share this hack with you; let's get started.
Tools and materials:
- Container
- At least two different colors of nail polish
- Tissue paper
- Nail polish remover
- Scissors
- Needle
- Nail art brush

Drop the nail polish into the water
Start by filling the container with room temperature water. Then place a drop of nail polish inside and keep on doing this, alternating the colors. Here I've gone for two colors, but you can experiment with several colors and even make a rainbow effect. Make sure that you opt for new or good quality nail polish, as old ones seem to get sticky and might not spread evenly.
Tip:
If your nail polish doesn't spread, shake the container a bit to create a ripple effect.
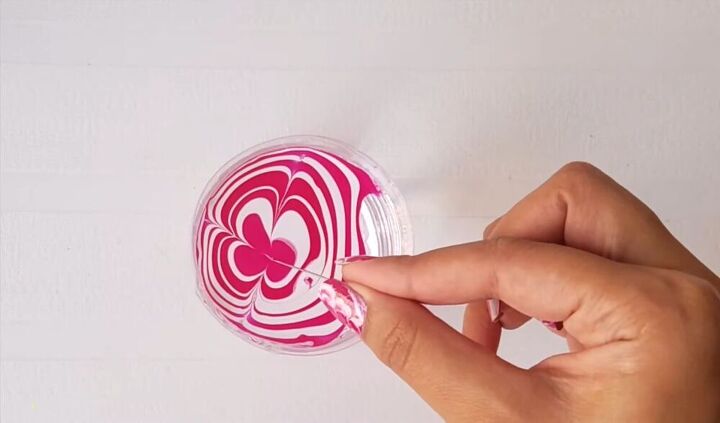
Drag the polish with a needle
Now take a needle and gently drag the nail polish from each side into the center of the design. You want to create a symmetrical look. Make sure you wipe the needle clean each time after dragging each line inward.
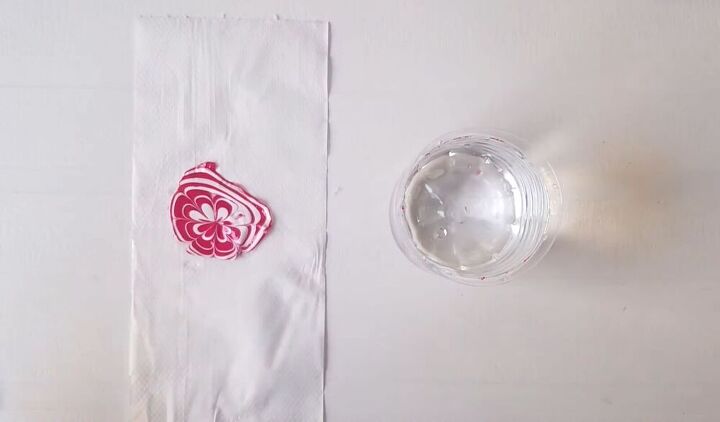
Leave to dry
Once the nail polish dries, detach it from the corner of the container. Remove it from the water and let it dry on a piece of tissue paper.
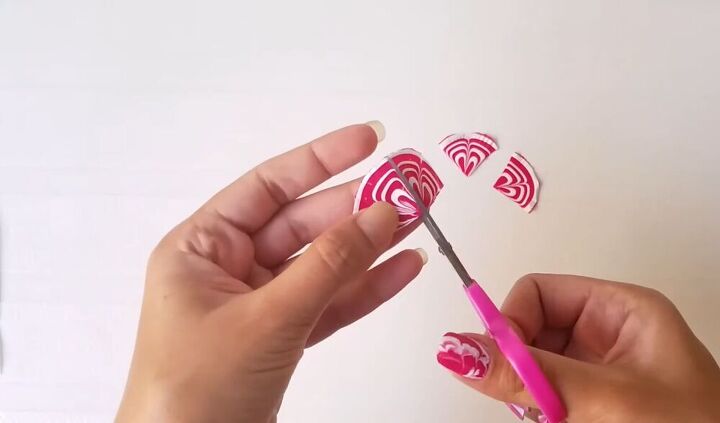
Cut
Once it's dry, cut the design into several pieces.
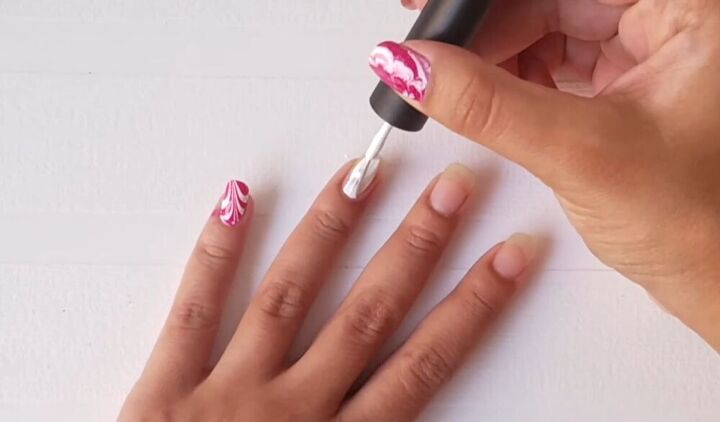
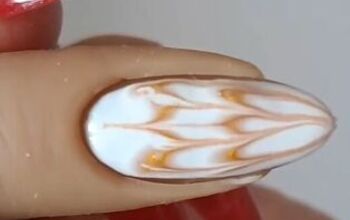
Apply nail polish
Now paint some white nail polish on your nails and stick the design on them while the polish is still wet. Once done, apply a little pressure on the nail but be careful as you don't want to rip the design up. Proceed to paint a coat of clear nail polish on top.
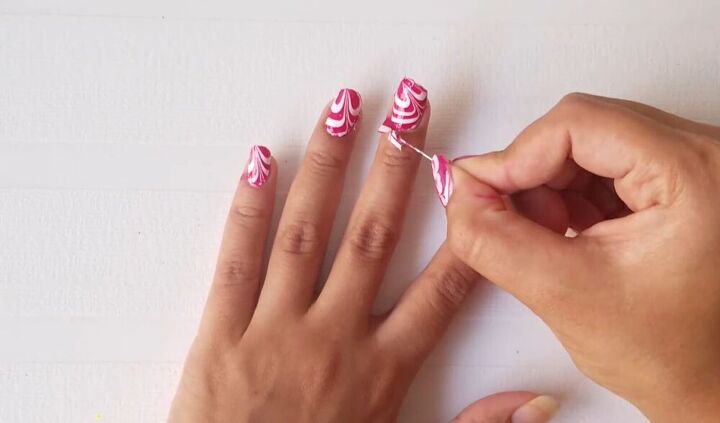
Remove any excess
Take the needle and remove the nail polish from the side of your nail; it will melt right off. Repeat the same steps on all your nails. Now dip the brush in some nail polish remover and wipe away any polish from around your fingers. Once the entire process is done, you can apply another layer of top coat for a clean finish.
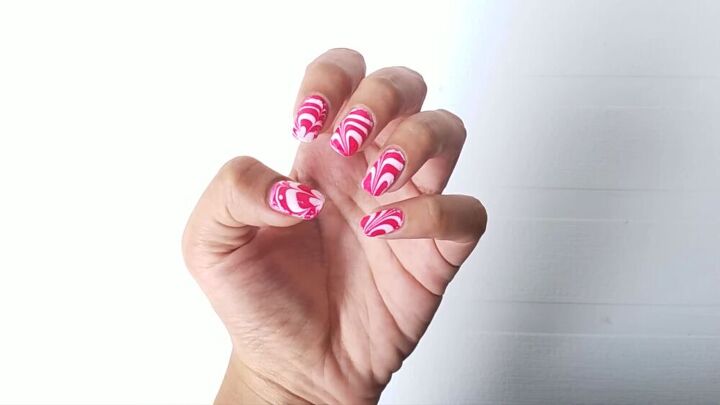
Voila! You're done with the super easy water marble nail art. The marble effect looks so stunning, and this is such an easy way to achieve it. I hope you guys give this nail art a try, and don't be afraid if you make a few mistakes - practice makes perfect!
The author may collect a small share of sales from the links on this page.


Comments
Join the conversation
Great job! This is really cool! This is on Snapchat and also one that you dip your nail into and swirl. A lot of nail ideas on there.
That’s amazing! I have waisted so much polish trying to achieve this effect…. Thanks soooo much for this tip! Trying for sure