How to Contour Your Eyes

Today, I will show you how to achieve a pretty and simple eye contour in a matte finish.
If you're going to take time to contour your face, you'll want to do the same with your eyes if you don't want to wear a ton of makeup because it will accentuate them in the same way that contour accentuates your face.
Tools and materials:
- Matte eyeshadow
- Makeup brushes
- Eyeliner
- Mascara
- False lashes
- Tweezers
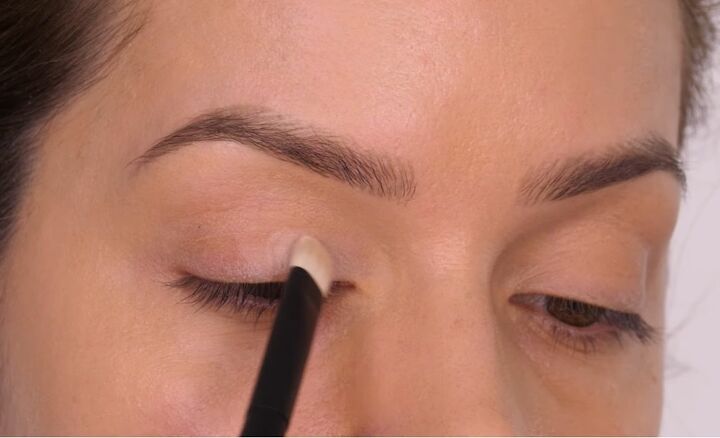
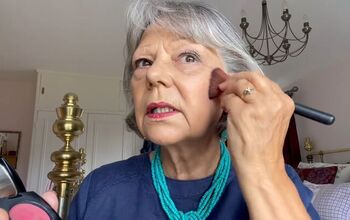
1. Apply eyeshadow
First, take a matte eyeshadow in a neutral-toned light beige shade and apply it on the mobile lid from the inner corner and halfway across.
Use a very fine brush to apply the eyeshadow to get a precise finish.
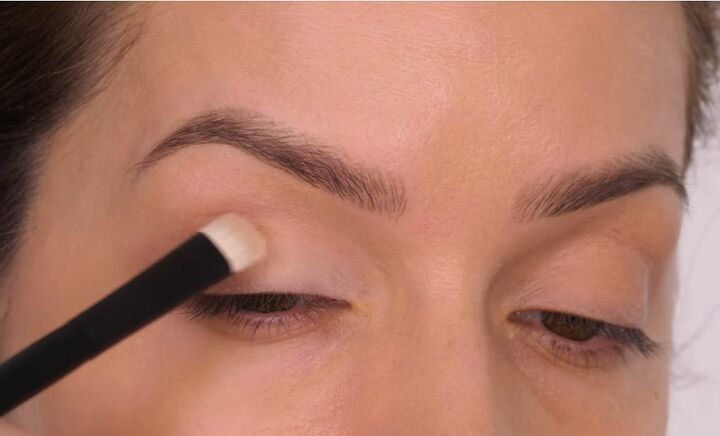
Then take a very warm-toned light peach shade and place it in the middle of the eye, going back towards the outer corner.
Applying lighter tones to the mobile lid makes the most of this space.
So even if you have hooded eyes, go in with a lighter shade on this area, even over the fold of your hood, and it will make the most of that space.

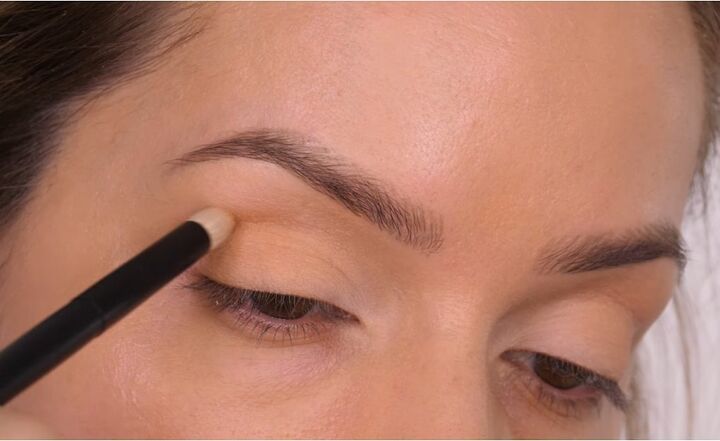
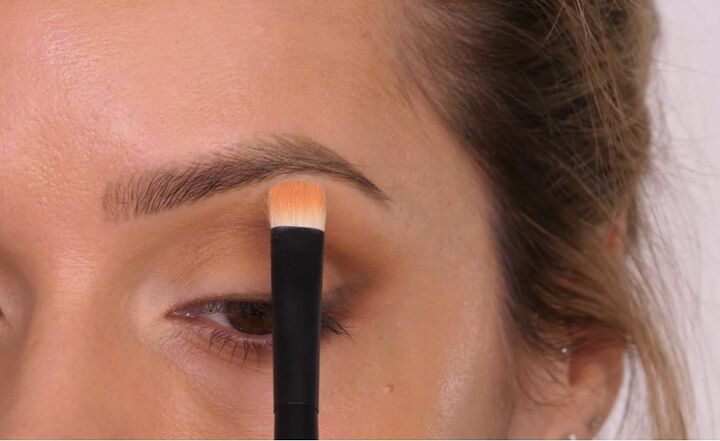
Now take a warm-toned light brown eyeshadow with a slightly yellow undertone to it and work it into the eye socket.
Again, even if you have hooded eyes, you still have an eye socket, and you can work that in. A pointed brush will do all the work for you because it will sink into that socket and just work the bristles backward and forwards.
I like to pull my colors out slightly on the outer edge to create a bit more of an almond shape, but if it's not that suitable to your eye shape (for example, if you have a fold on the outer corner), you can keep it more rounded.
Next, take a medium brown shade, also very warm-toned, use the same brush and work into that socket, building up that contour color.
Take that same shade underneath your lower eyelashes and then soften everything with a blending brush.
Going back to the pencil brush, very softly, blend a bit more of that brown just into the socket on the outer edge.
Again, if you're keeping it slightly rounded, just pat it where you need it.
Remember, dark matte shades will push things back so if you are trying to disguise a bit more of a hooded eye, be strategic with your placement.
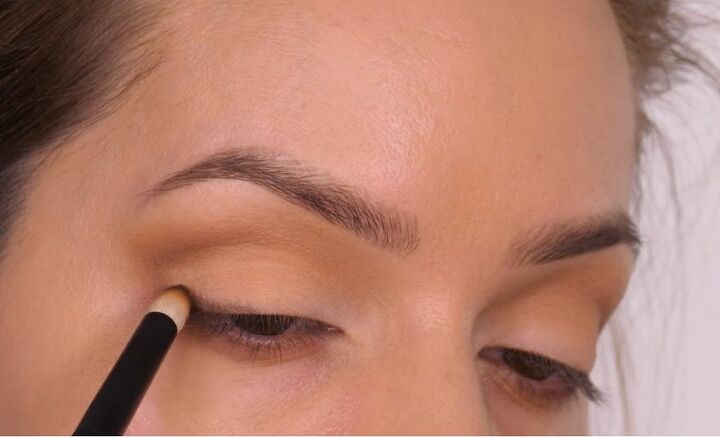
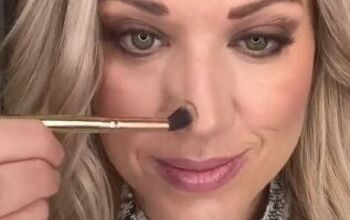
2. Define the bottom of the lids
Using the point of a pencil brush, dip it into a neutral-toned dark brown. Use that to smoke out the eyelash line on the outer third of the lid to make the lash line look fuller.
Softly work it up to the V shape. You really want the lightest sweep on the skin with this.
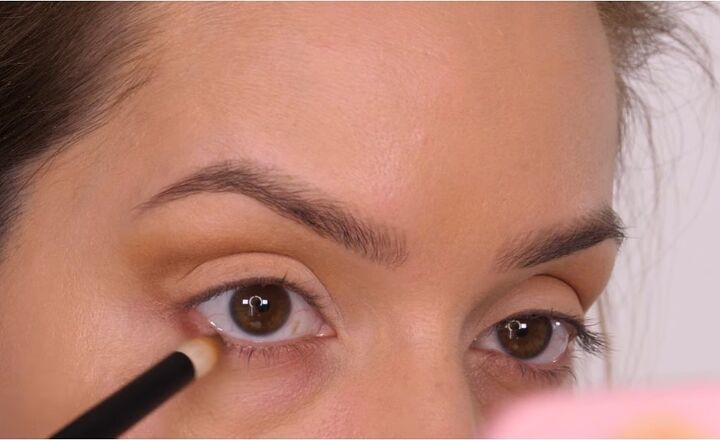
Go back in with your pencil brush and a very light amount of the same eyeshadow, look down into a mirror and softly run that close to the root of your eyelashes.
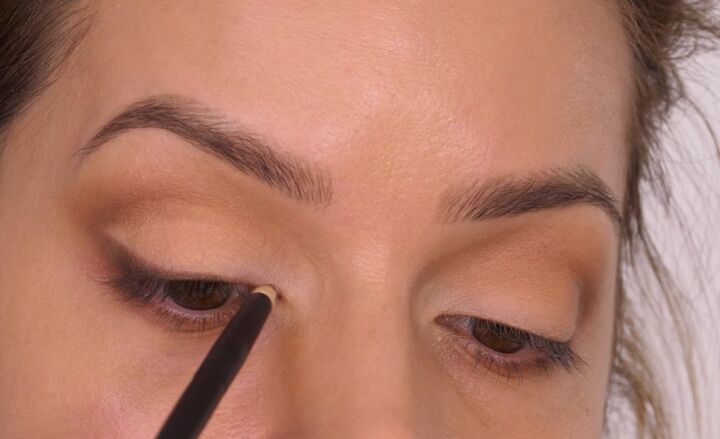
3. Apply eyeshadow to the brow bone
Take a flat shader brush and go back in with the first, lightest shade that you used.
Run that over the brow bone to mattify this area. It will match the rest of the eyelid and just looks a lot cleaner.
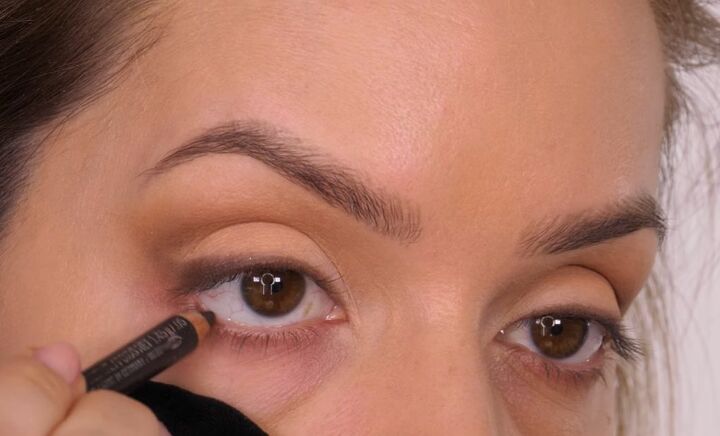
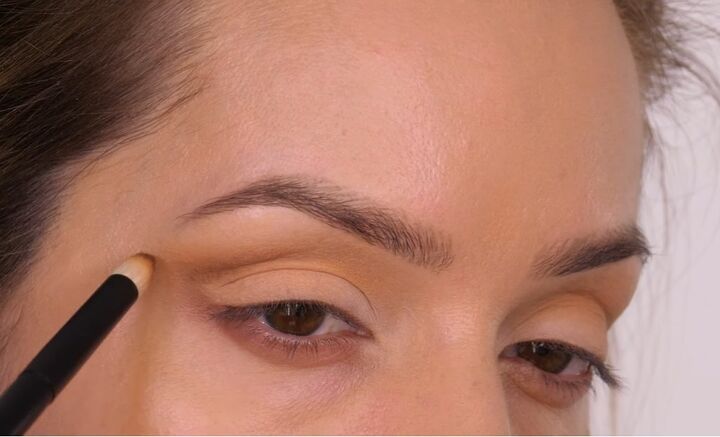
4. Apply eyeliner
This step's completely optional, you can apply cream eyeliner, I'm applying a coffee-colored eyeliner, and take it halfway across.
That way, we're not going to make the eye appear any smaller, but it adds a very soft sultry finish.
I also like to blink onto the tip of the pencil and run that along my top waterline.
Otherwise, once you apply your mascara, if you can see the pink tones, the eye just doesn't look quite as finished.
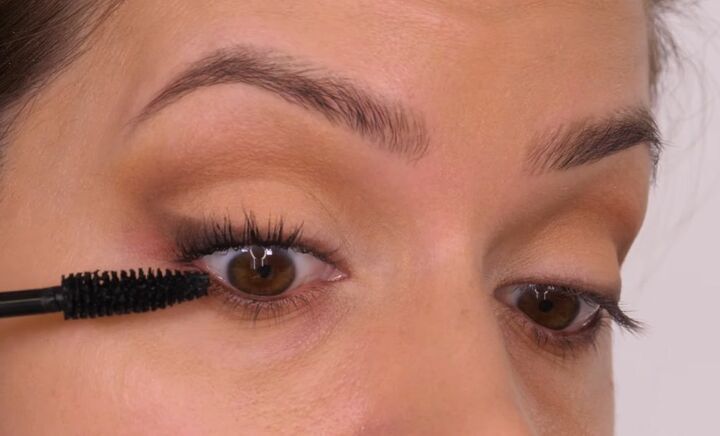
5. Apply mascara
If for you this is a daytime event and you don't want to apply any false eyelashes, you can leave it with a couple of coats of mascara.
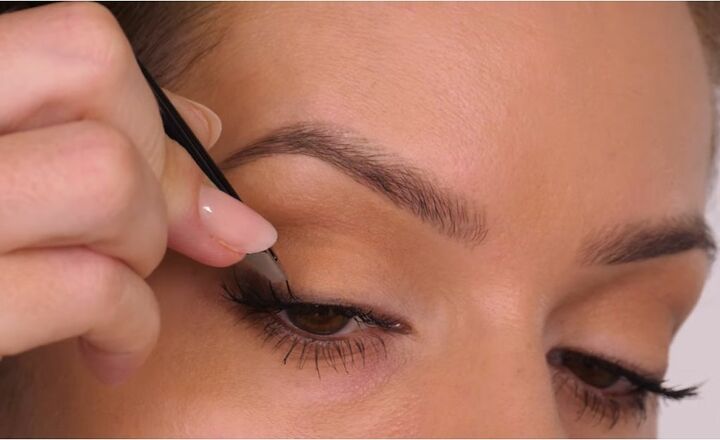
6. Apply false lashes
I added some individual false lashes. I really love a spiky lash, especially if you're wearing a minimal amount of makeup on the lid. Sometimes something too fluffy can almost overtake the eye.
Then I apply a light coat of mascara, just to darken my natural eyelashes so that they don't look lighter against the individual false lashes.
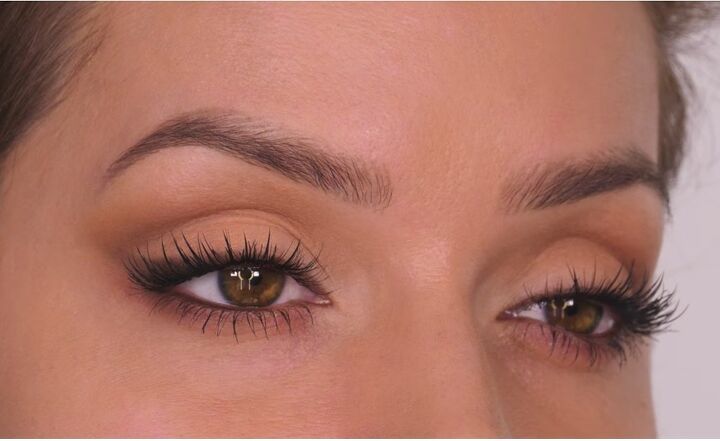
Eye contour
I hope you found this useful. It's great for those of you that don't like to wear a lot of makeup but want to wear something that makes it look like you've made an effort.
Not everybody wants to wear a shimmer, especially if it's a daytime look or a special occasion that's in the day, and matte shades are the best for creating a subtle finish. Sometimes it's the simplest of makeup that makes the biggest impact.
If you enjoyed this tutorial, let me know in the comments down below!
Products used:
By Mario - Master Mattes Eyeshadow Palette
UK & Global - Sephora: https://go.shopmy.us/p-856396
US - Sephora: https://go.shopmy.us/p-561600
rephr 02 Brush
Global: https://go.shopmy.us/p-804827
rephr 03
Global: https://go.shopmy.us/p-856324
rephr 26 Brush
Global: https://go.shopmy.us/p-804829
rephr 27 Brush (not 15 as mentioned in the tutorial - oops!)
Global: https://go.shopmy.us/p-804828
MAC Cosmetics - Coffee Pencil (Costa Riche for US)
UK & Global - Look Fantastic: https://go.shopmy.us/p-347916
UK - MAC: https://bit.ly/3FhIZLB
US - Ulta: https://go.shopmy.us/p-347911
US - MAC: https://bit.ly/3Utklx1
MaxFactor 2000 Calorie Mascara - The Full Volume
UK - Amazon: https://amzn.to/3hZVpzG
UK - Superdrug: https://bit.ly/3Emoflm
UK: https://go.shopmy.us/p-801270
SHEIN - Eyelash tray as shown and used:
https://rstyle.me/cz-n/gimvbtbrw4f
How to apply magnetic lashes
The author may collect a small share of sales from the links on this page.


Comments
Join the conversation
Wow, that looks great! Thanks for the step by step, you made it very easy to follow.
What eyelash glue do you use for the lashes?