5 Easy Face Lift Makeup Tips & Tricks for Mature Skin

I'm going to be showing you my top five tips for face lift makeup for mature, over-50s skin.
How I used to apply my face products no longer works for my more mature skin because the contours of my face are in a different place. I've learned some great tips that have really made a difference in my makeup routine, and I'm going to share them with you.
Tools and materials:
- Highlighter
- Contour
- Blush
- Makeup brushes
- Makeup sponge
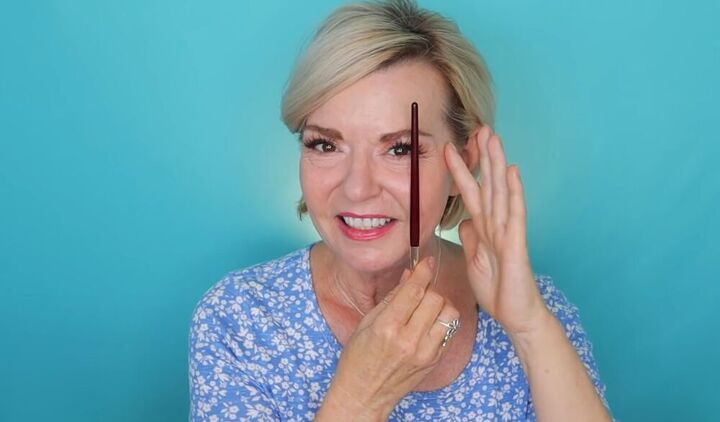
1. Find the center of your iris
Find the center of your iris when you're looking straight forward. The reason you want to do this is because you don't want to put any product on the inside of where that line is.
Everything will go on the outside, or what I call "the upstairs area" of the face. You want to keep all of the product on the outer side of that line.

2. Apply contour higher than the hollow of your cheek
I have just a little bit of shadow where my cheekbone protrudes out, and then my cheek kind of dips in a little bit.
If I contoured in the dip, it would look fine, but I found that contouring a little above that hollow area gives my face more of a lift.
I'm going to take my product, and I'm going to feel where that little hollow is. Then, I'm going to place it a little bit higher than my cheek. That's going to create a face lift illusion in that area.
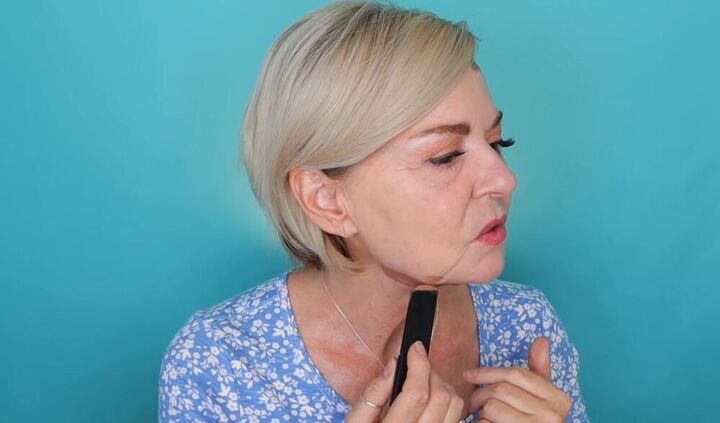
3. Contour your chin area
The reason I contour my chin area is that darkness helps an area to recede, whereas lightness helps an area to come forward.
I want to actually push back my chin and neck area so that it's a little bit in shadow and it looks a little bit less prominent on my face. This helps to counteract that double chin wobbly neck thing that I've got going on! I run the contour right along my chin line and down onto my neck.
In addition, I have these little jowl areas on either side of my face. I'm going to draw my contour up into those a little bit because I want them to recede and not look so obvious. Creating dark and light areas helps to give the face a little bit more of a sculpted look.

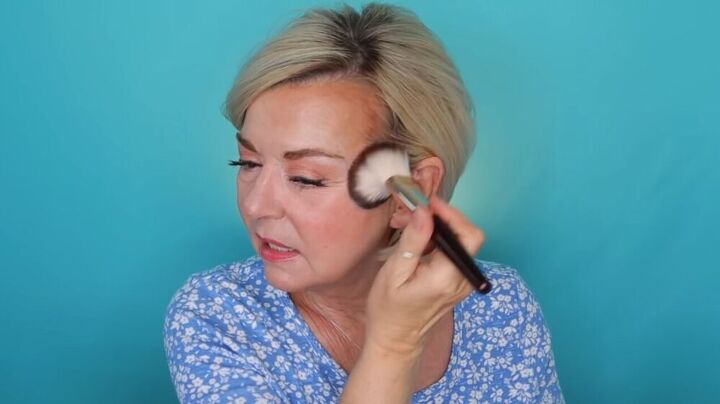
4. Change the placement of blush and highlighter
When I was younger—and I think this is true for almost all of us—we learned to put blush on the apples of our cheeks, which is wonderful when you have really beautiful pronounced apples on your cheeks. As I've gotten older, the contour on my face has shifted.
Apply your blush to the upstairs area of the cheek as shown. You don't want it to come down any lower than the center of your iris, and it will really lift up into the hairline and the temple area. This way, the blush will stay in place both when you're smiling and not smiling.
Once you've blended the blush in, place the highlighter right at the very top of the blush area and tap it in. You don't want to get it into the eye area because you don't want to accentuate any crow's feet and lines around your eyes, but you do want to draw attention to a more lifted cheek look.
5. Blend, blend, blend!
I blend my products as I go along, but also blending them really well when I finish really helps. I have found that blending for my more mature skin is one of the most crucial things for helping that these face lift makeup techniques more effective.
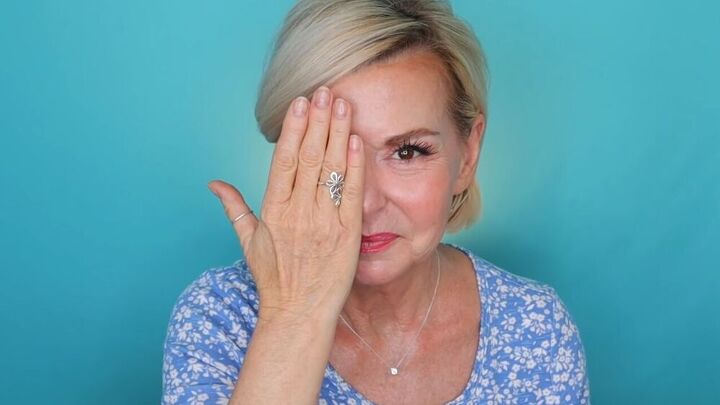
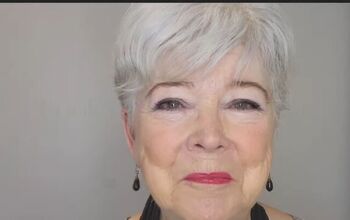
Here is the final look! The way that I've contoured my face has helped create a youthful, lifted appearance. It was a lot of fun for me to share what I've learned, and I hope that you find the face lift makeup tips useful as well.
The author may collect a small share of sales from the links on this page.


Comments
Join the conversation
Thank you. The information appears to be helpful. I'm going to try all your tips and keep it "upstairs".
Wow you look very beautiful! I am going to try it myself if only I could come out looking as beautiful as you 😀
Thanks for the video!