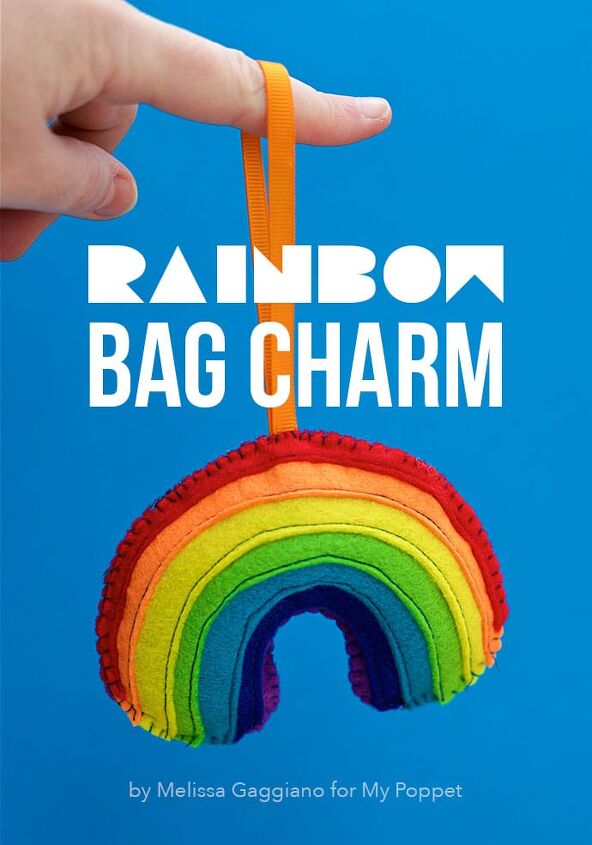
Felt Craft: Rainbow Bag Charm
There is much to love about rainbows. Children will stop playing, rush to a window and point. Adults will pull their cars out of traffic to take a photo. And even though there is a science behind why we see rainbows, there’s not getting past the fact that they are just so pretty and make us feel so very good.
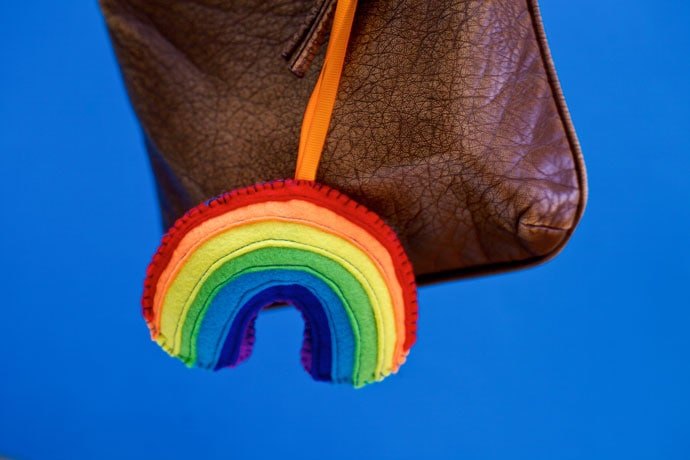
With this in mind I decided that we would make a rainbow bag charm so you can take a rainbow with you wherever you go. This little rainbow would look great on a tote bag, shopping basket or school backpack. You could even use it as a key ring! No losing keys at the bottom of your bag.
Let’s get started!
Felt Craft: Rainbow Key Ring Ornament
You will need:
- Scrap felt – red, orange, yellow, green, blue, dark blue and purple.
- Fabric scissors
- Fabric marker [air drying] or chalk
- blue thread
- Sewing machine
- Dress makers pins
- Needle
- Hobby Filler (or stuffing of choice)
- 22cm length of this ribbon (any colour)
How to:
1/ Print template at 100% and cut out the pattern pieces.
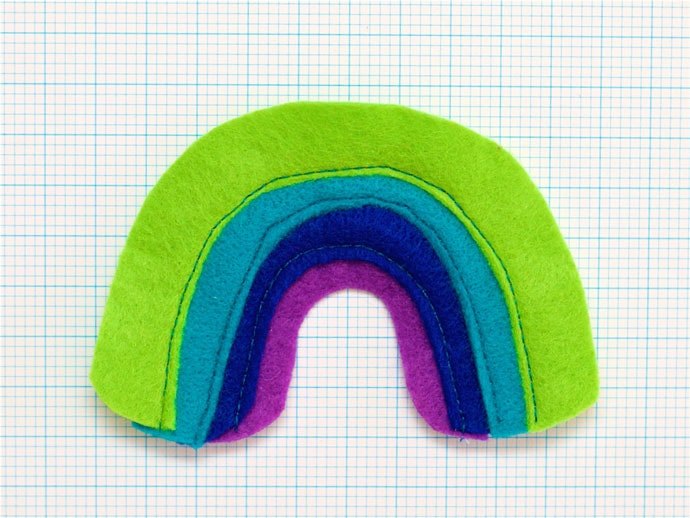
2/ Place the dark blue piece over the purple piece. Lining up the inner edge of the dark blue to the reference markers on the purple piece. ‘Plain machine stitch’ along the dark blue inner edge.
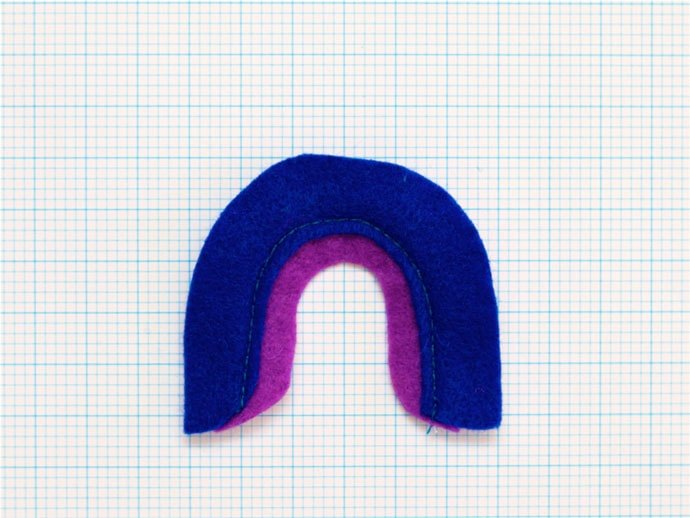
3/ Pin the blue piece over the dark blue piece. Lining up the inner edge of the blue to the reference markers on the dark blue piece. ‘Plain machine stitch’ along the blue inner edge.
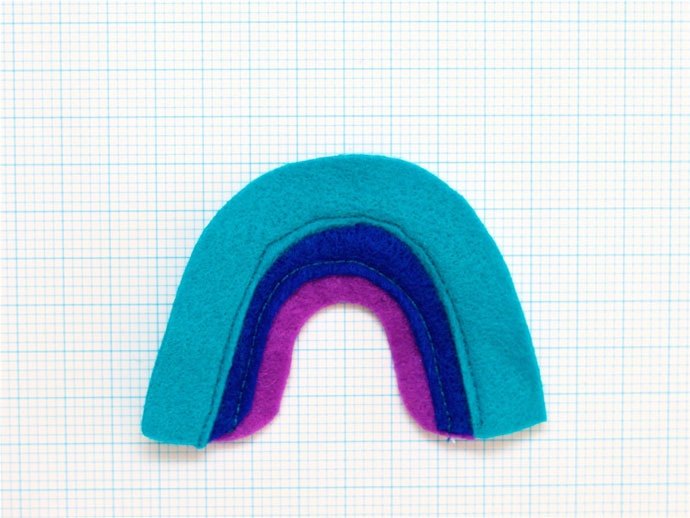
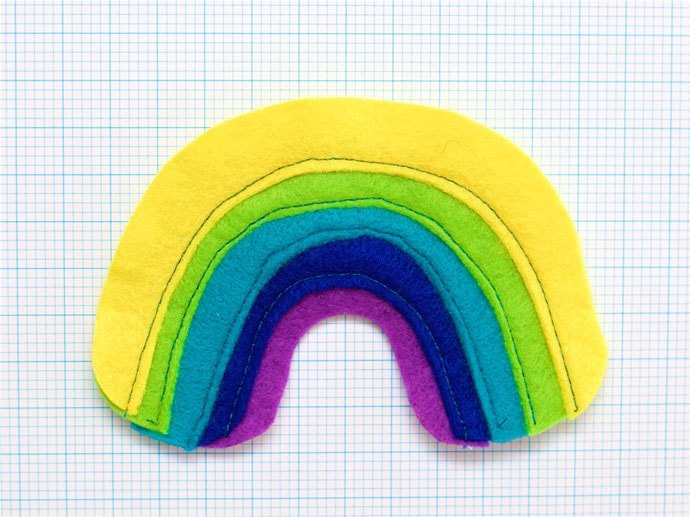
4/ Pin the green piece over the blue piece. Lining up the inner edge of the green to the reference markers on the blue piece. ‘Plain machine stitch’ along the green inner edge.
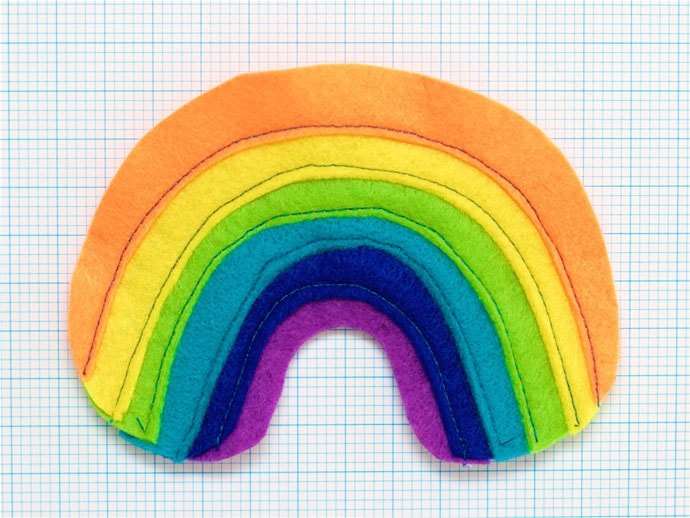
5/ Pin the yellow piece over the green piece. Lining up the inner edge of the yellow to the reference markers on the green piece. ‘Plain machine stitch’ along the yellow inner edge.
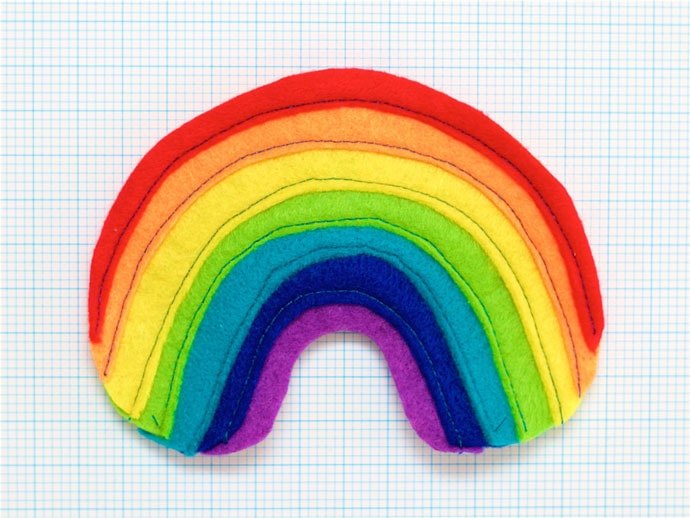
6/ Pin the orange piece over the yellow piece. Lining up the inner edge of the orange to the reference markers on the yellow piece. ‘Plain machine stitch’ along the orange inner edge.
7/ Pin the red piece over the orange piece. Lining up the inner edge of the red to the reference markers on the orange piece. ‘Plain machine stitch’ along the red inner edge.
8/ Repeat steps 1-7 for the second lot of rainbow felt pieces.
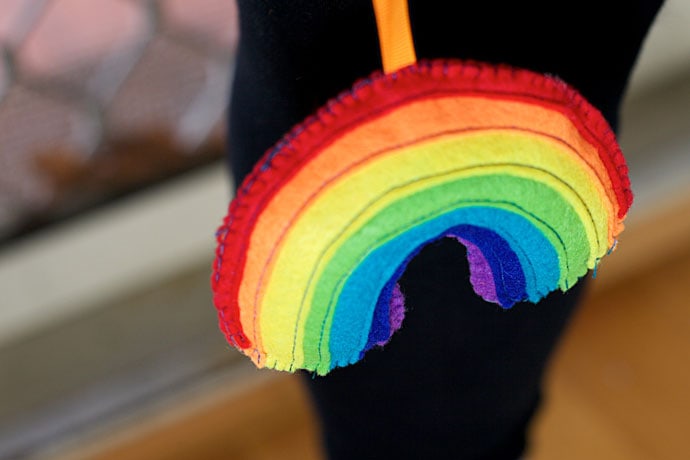
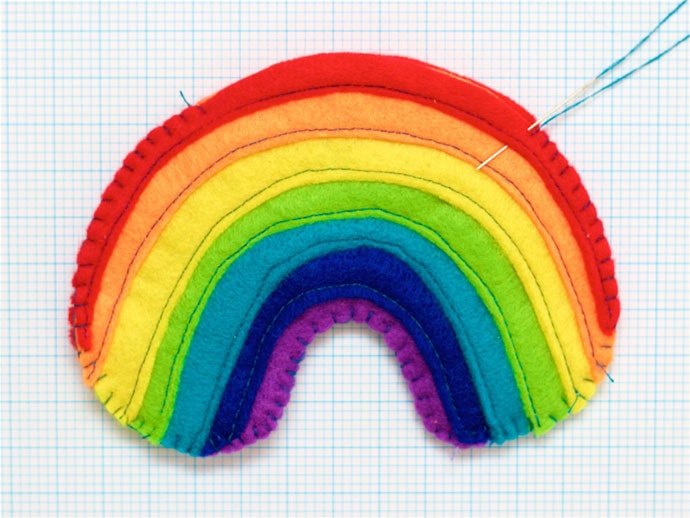
9/ Pin the two rainbow sections together (right sides outward). Blanket-stitch around the rainbow’s edge. Leave an opening at the top of the rainbow, with a recommended gap of 7cm.
10/ Fill the rainbow with hobby filler.
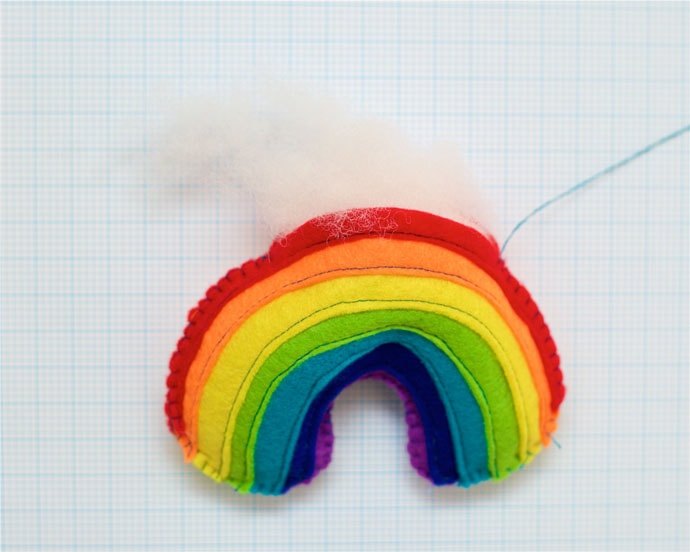
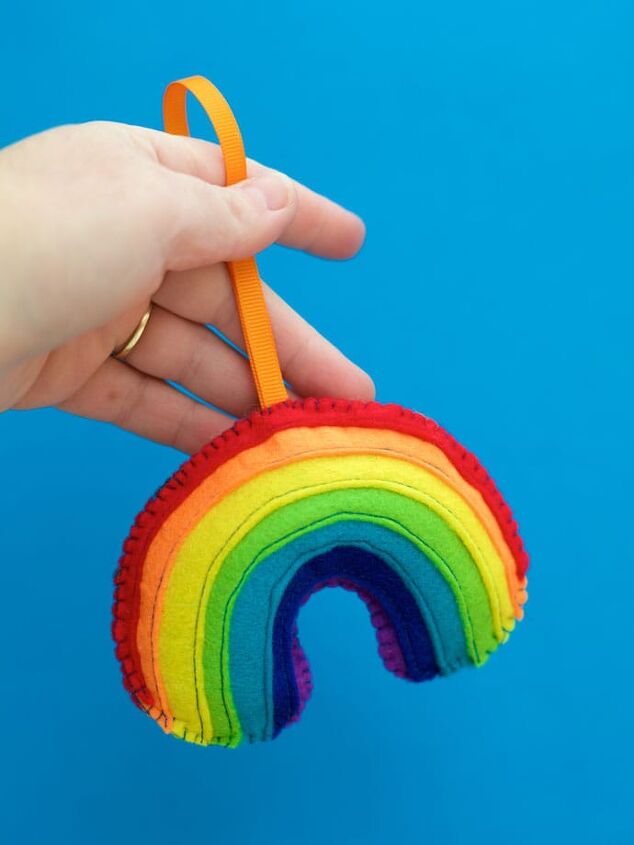
11/ Fold the ribbon length in half and pin into the top middle of the rainbow. Close up the rainbow top with a continued blanket-stitch. Make sure to stitch through the ribbon so that it holds. Voila! You have created your very own rainbow, ready to be attached to a bag or key ring.
The author may collect a small share of sales from the links on this page.


Comments
Join the conversation