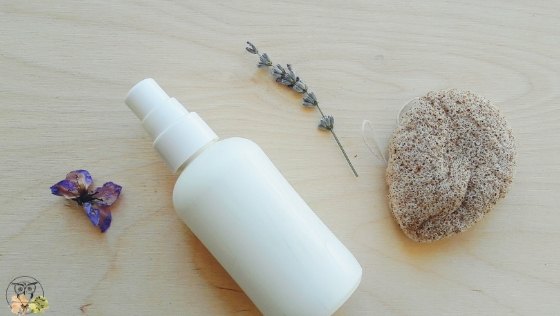
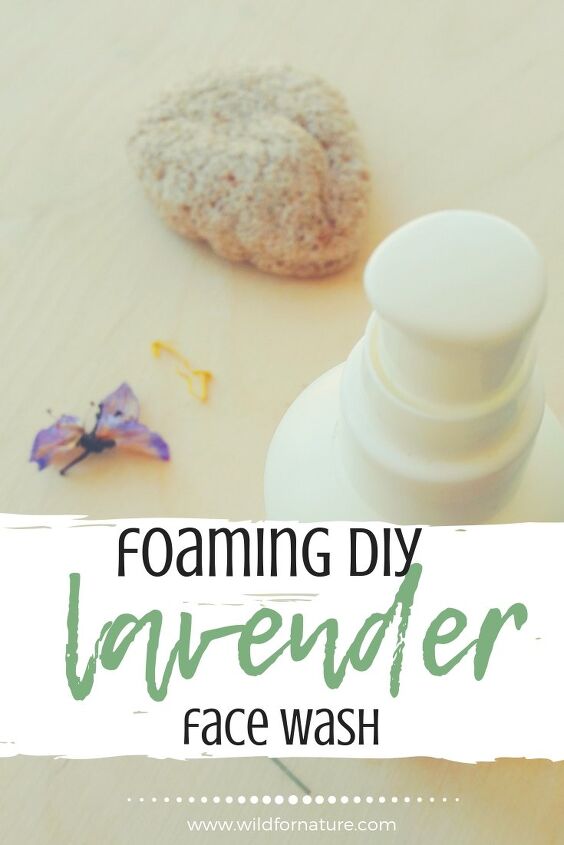
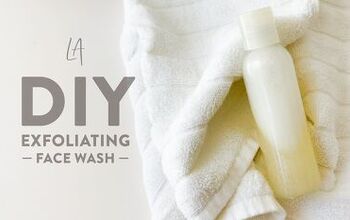
Foaming Lavender DIY Face Wash Recipe
Hey guys! Today we’re making a lovely foaming lavender DIY face wash. Now, I’m not sure we could call this the best face wash for combination skin. I certainly didn’t plan it when I started making it. But I do have combination skin and I love its cleansing properties. It can remove my makeup and it smells divine! If you’re a lavender fan, this one is for you!
Okay, I know you had to wait a bit long the recipe; longer than expected (but not as long as for the DIY dark circle serum) as I needed to test and experiment. There were a few tries that went severely wrong (see more below).
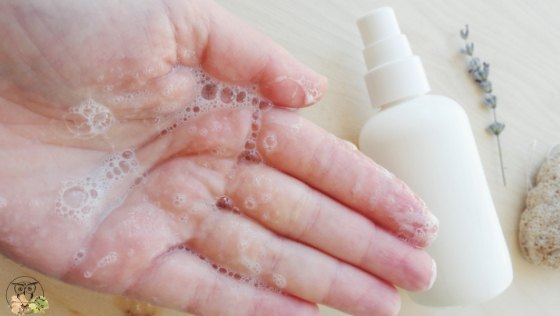
I whipped this one up as I wanted something foamy and lathery and would properly cleanse my face. And I have to say this is a lovely foaming facial cleanser that somewhat removes makeup (but not too thoroughly; I use it after I remove makeup completely). Above all, it’s full of lavender in scent and in appearance! It’s not that I’m a great lavender fan, but it surely complements this DIY face wash nicely!
100% vegan
Gentle
Easy to make
Effective
Fragrant!
WE'LL TALK ABOUT..
What is foaming facial cleanser?
A foaming cleanser is a type of cleanser that isn’t milky nor creamy. When you add water to it, it lathers and helps to remove impurities, dirt, and makeup.
It also removes excess oil and it doesn’t excessively dry out your skin.
How do you make foaming face cleanser?
You can see the recipe below on how to make it, but in general, you’ll need the following ingredients:
- A surfactant (coco glucoside, caprylyl/capryl glucoside…)
- A thickener (xanthan gum, guar gum, hydroxyethylcellulose)
- Distilled water or hydrosol
This is the base to build a foaming face wash on. You’ll need other ingredients as well (preservatives are non-negotiable), but if you already have knowledge in DIY skincare formations, you can easily come up with other ingredients yourself.
There are tons of other options to include into a cleanser as long as they’re water-soluble. Ideally, you’ll want to add something conditioning and moisturizing as well (think panthenol, allantoin, aloe vera, glycerin, and others)
Castile soap face wash: yes or no?
That all depends on who you ask. There are tons of bloggers and DIY skincare aficionados who are seriously in love with castile soap and list all the top 10 reasons and recipes to start using it immediately.
If you browse around you’ll find information that castile soap is made from safe plant oils and it’s appropriate for all skin types, even dry and sensitive.
Well, I have to say I disagree. I’ve made shampoo and I have struggled to make the best face wash for combination skin with castile soap.
The result? I’ve ended up pouring both down the drain. Castile soap (I’ve used this one and failed to read the ingredients) was ridiculously drying to my hands, my scalp, and my face. I’ve done thorough research afterward to find alternatives I could use in my skincare and I have to say that the results are impressively different from what I expected.
I’ve tossed castile soap out the door and I’m never using it again. I would be very happy if someone could actually confirm this so that I know I’m not alone in this (even though I’ve found answers on Quora and a few websites that support my findings).
I was happy to find that VermontSoap said:
Liquid castile soap is de-greasing by nature. That means it removes more oils than it puts back. Most facial skin types are too sensitive and not oily enough to use Castile liquids on a regular basis.
DIY Foaming Face Wash: the problems
Now, this is a gentle and effective cleanser. I love its purple-ish color and the fact that it smells of lavender. But before we get to the ingredients and the actual recipe, I’ll share a short story of the grey hair and pains this recipe has caused me!
Mind you, this recipe hasn’t been an easy one; I’ve done more complicated recipes in the past few weeks than this one, but DIY face wash gave me the worst headaches.
I’ve started out with using HEC as a thickener and I have to say that it’s by far super extra incredibly superior to xanthan gum. The texture is amazing; it’s not as gooey as xanthan and it incorporates nicely with other ingredients.
I had no problems of diluting it in water- I measured it into the hydrosol, stirred it long enough and voila!, I had a perfectly lovely, thick, and fragrant formulation. HEC has a more gel-like structure and it’s not as runny; in other words, while xanthan may look like bogey when used in any concentration (in my experience), HEC distributed nicely through the product without any strangely gooey and runny parts.
It would have become my thickener to go if it weren’t for the grey hair it caused me! Hydroxyethylcellulose is a stubborn thing to work with.
I’ve browsed the web extensively to find answers and to this day, I still don’t know what went wrong. My best guess is that it hates my preservative. I use Cosgard (INCI: Benzyl Alcohol (and) Dehydroacetic Acid) and benzyl alcohol may cause the beautiful thick gel to turn sour and get a chemical smell.
I found on Humblebee&Me that she’s faced problems with HEC as well. In the end, she eliminated benzyl benzoate from the recipe and successfully formulated this lovely body wash.
Honestly, what I formulated turned a depressive shade of purple within minutes. The smell was sour-chemical like. Within a day, it lost all gel consistency and turned runny.
Some tried to convince me the product is still okay and safe to use (humor me and look at the photo below: would you want to put that on your face?). Well, I found information on Formula Botanica about 4 signs of product instability.
My purple-brown blob of DIY face wash couldn’t be used any longer (the wash separated completely; when I last checked it, it almost said hello, since there were so many living things in there).
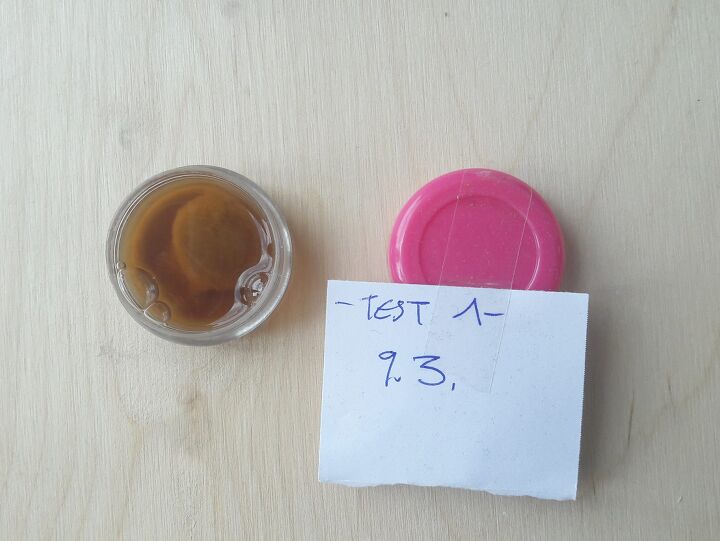
I fought, I shed a tear, and then I replaced the HEC with xanthan gum. Now, I weep for the lovely gel texture still. And would happily replace it with bogey slimy xanthan. But I have to change my preservative first and give it another go.
Now, enough complaining. The recipe and ingredients, please!
DIY face wash recipe: the ingredients
As I’ve already mentioned, there are a few necessary ingredients to make this product a successful one. Let’s have a look at them one by one before heading to the recipe section!
- Distilled water and hydrosol: the base of the recipe. Since it’s a foaming face wash, it’s supposed to be water-based. I decided to go with lavender.
- Coco glucoside: the famous surfactant/foamer. This thingy successfully (and even more so) replaces the oh-so-popular castile soap. It does its job very well.
- Vegetable glycerin: serves well as a base to dilute xanthan gum in. But its main task is to be a humectant (it draws moisture to the skin)
- Urea powder: moisturizer and very soothing to the skin.
- Xanthan gum: a thickener; it changes water to a gel-like consistency
- Cosgard: a preservative
Lavender DIY Face Wash
Ingredients:
- 52g lavender hydrosol
- 30g distilled water
- 10g coco glucoside
- 4g urea powder
- 3g vegetable glycerin
- 0.5g xanthan gum
- 0.5g Cosgard
- 2g mica powder (optional)
- A pump bottle
Process:
- Weigh the glycerin and xanthan into a small cup
- Stir well and break up any xanthan clumps. Set aside
- Combine and weigh water and hydrosol in a measuring beaker/cup
- Add urea and stir well until it has fully dissolved
- Combine xanthan with water and urea, stir well
- Measure coco glucoside into the beaker and stir carefully
- Add mica and stir until fully incorporated
- Check the pH grade before adding a preservative
- Measure and add a preservative to the mix
- Stir and package your DIY face wash into an appropriate bottle!
Notes:
- Combine glycerine with xanthan; xanthan dilutes fastest this way with minimal/zero clumps
- I’ve already checked the pH so you don’t have to- it should be around 5.5; if you change any of the ingredients, make sure to check it though! You can easily do so with one of these pH test strips.
- I’ve used a pump bottle, but you can use anything else you have at hand as well. The consistency is runnier than your regular gel so a pump is the easiest way to go!
- Choose your own color of the mica powder; I went with purple but any other kind will do just as well. You can also omit it if colorful products aren’t your thing (*wink*). In that case, replace mica with more water/hydrosol.
- Since this is a very water-based product, a broad-spectrum preservative is a must. If you’re new to them, you can have a look at a more detailed guide on how and when to use preservatives here.
- You can substitute lavender hydrosol with a different hydrosol if lavender isn’t to your taste.
What do you think of this DIY foaming face wash? Let me know in the comments below!
Stay Wild!
Kat
Help support Wild for Nature
Many of you have asked if there’s a way to help support Wild for Nature. I’ve signed up for Buy Me Coffee. If you love what I do, learn from me, sell anything you made from my recipes, and want to see Wild for Nature grow even more, I’d be thrilled if you’d consider buying me a coffee! It works as a one-time or a monthly donation of $3. You can also get beautifully designed PDFs with a series of recipes and other resources I publish there, to help you learn and get creative at home! I can then use that money to further develop and grow Wild for Nature and you can help me continue with wild creations and resources!
The author may collect a small share of sales from the links on this page.


Comments
Join the conversation
You were asking if anyone finds liquid Castille soap drying. Did you dilute it? That's what's so great about it. If you missed this soapy fact, you're not alone! I pour 1/4 of what I need into a container, then dilute it with 3/4 distilled water.
3-1 is recommended but my skin is very dry. Hope this helps!