Cute and Easy Hairstyle for Special Events

If you need hairstyles for special events, this double-bun updo is the perfect classy hairstyle for you.
It’s so elegant and it’s one of my favorite classy hairstyles for long hair.
Tools and materials:
- Bobby pins
- French pins
- Dry shampoo (optional)
- Rubber elastic

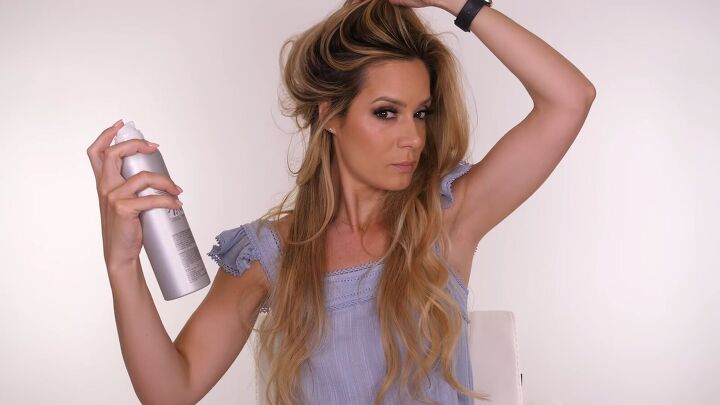
Here’s the hair I’m starting with.
I washed it yesterday and styled it with a volumizing hot brush, so I’m working with the day-old hair I’ve slept on. Let’s get started!
1. Apply dry shampoo to the roots of your hair
Adding dry shampoo to the root helps it hold the style better.
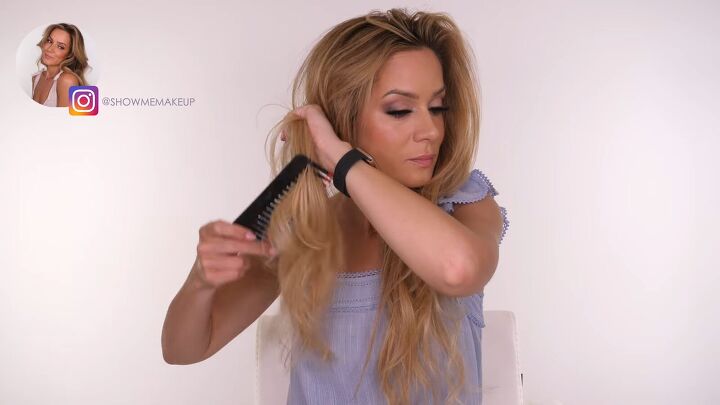
2. Comb your hair
Comb your hair through to make sure there aren’t any big knots or tangles, paying particular attention to the ends.
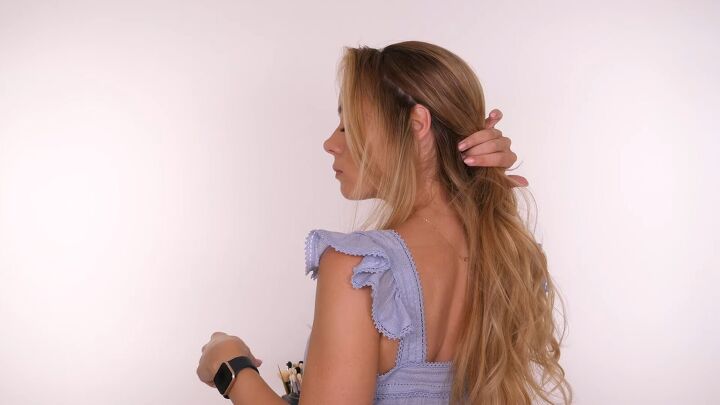
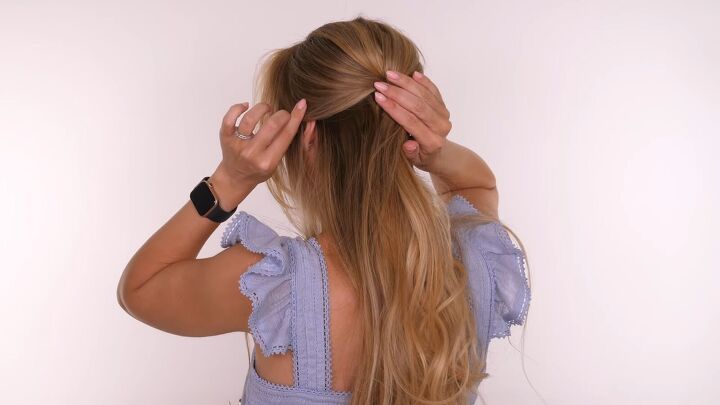
3. Separate the front sections
Separate the front sections of your hair, mainly your fringe or bangs as well as a small amount of hair in front of your ears.
I’m using my fingers but you can also use a tail comb.
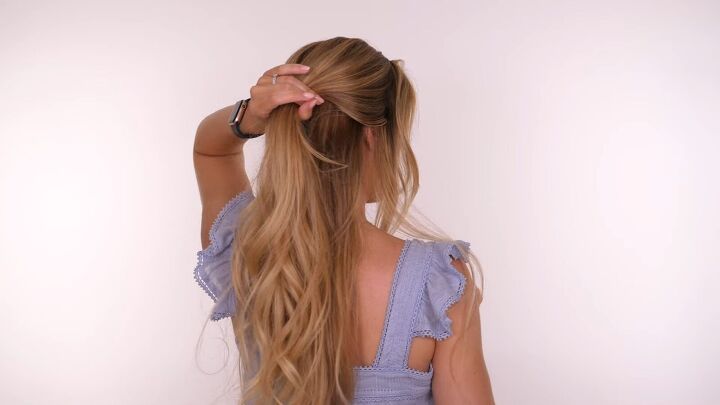
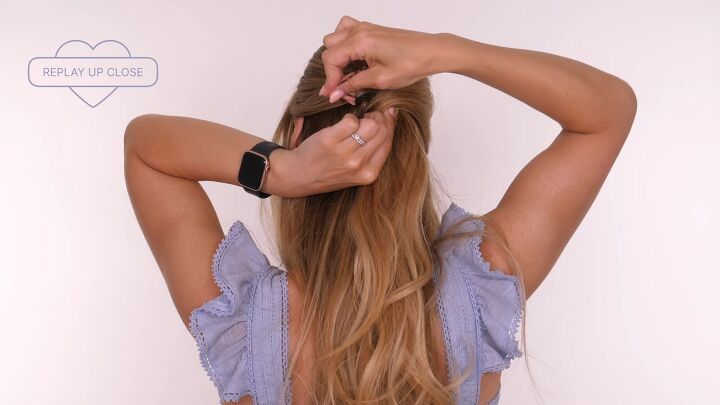
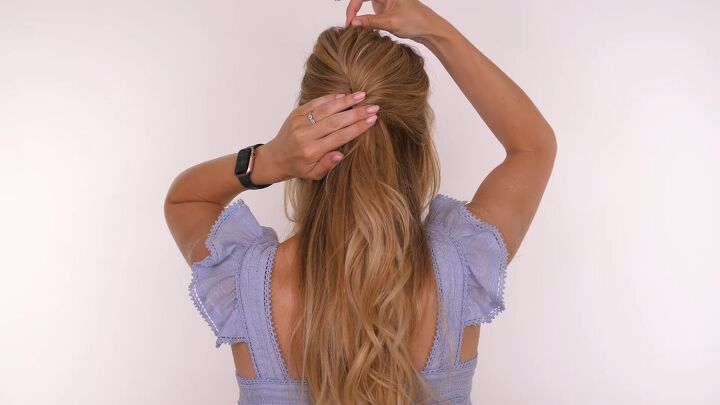
4. Separate the top of your hair from the bottom
Separate the rest of your hair as if you were going to do a half-up, half-down hairstyle. Go from the top of the ears to the back of the head.
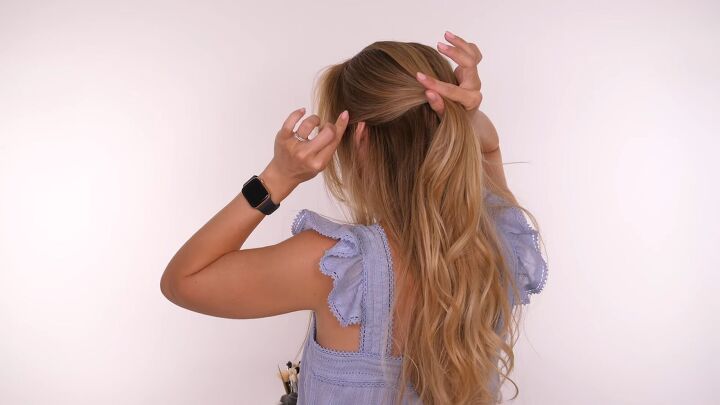
5. Cover the ears with your hair
Pull down the bottom half of this style to cover the ears for a lovely, sweeping effect.
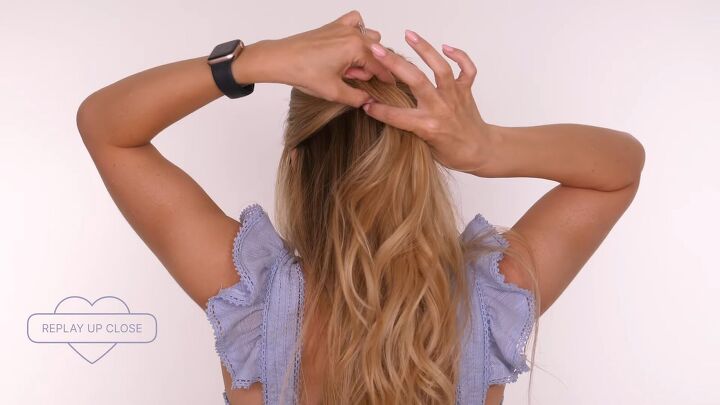
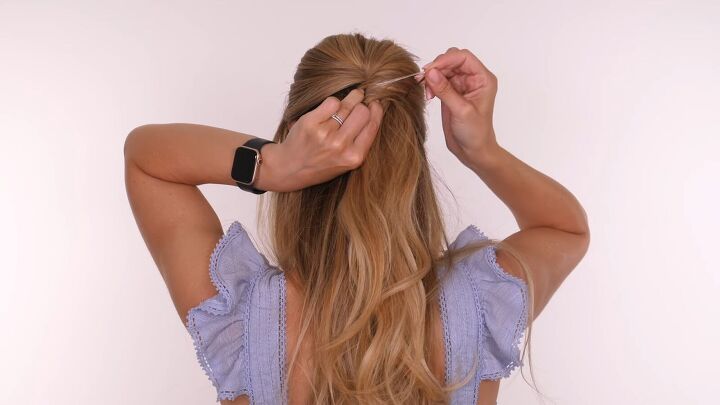
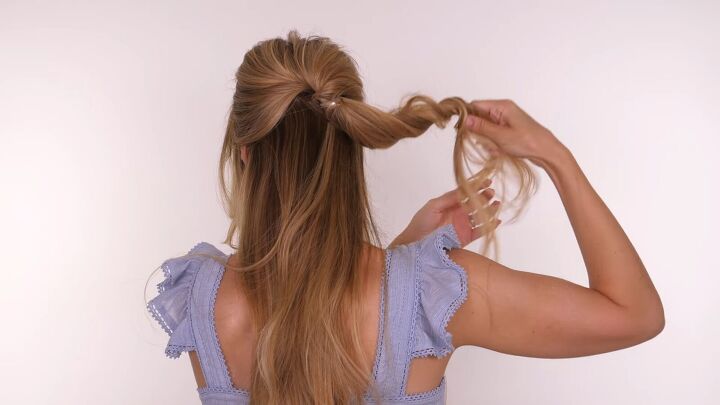
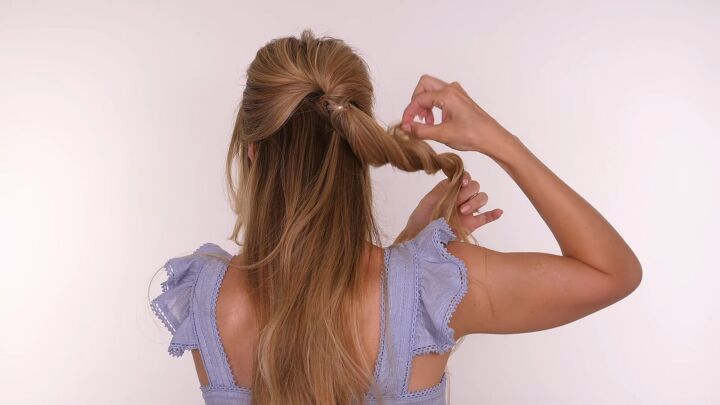
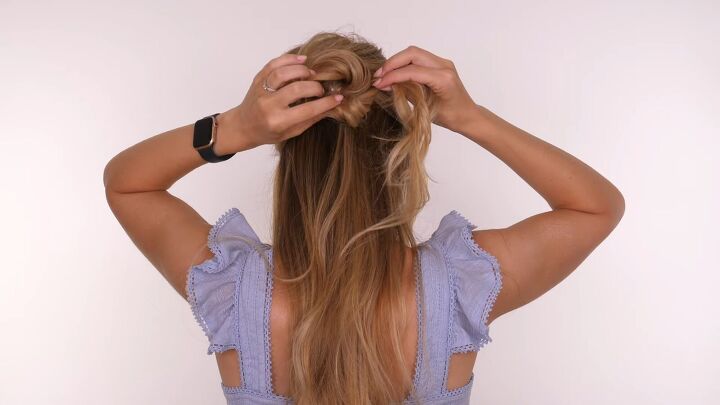
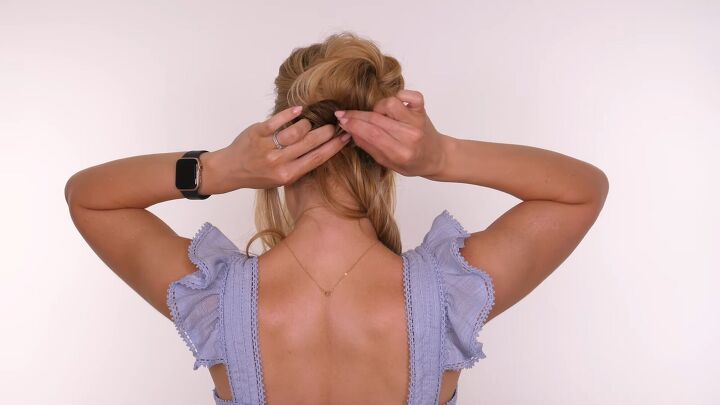
6. Twist the ponytail
Using one hand, pinch the root of the hair.
Then, rotate the ponytail almost like a French twist with the opposite hand.
Once you let go, it’ll look like this.
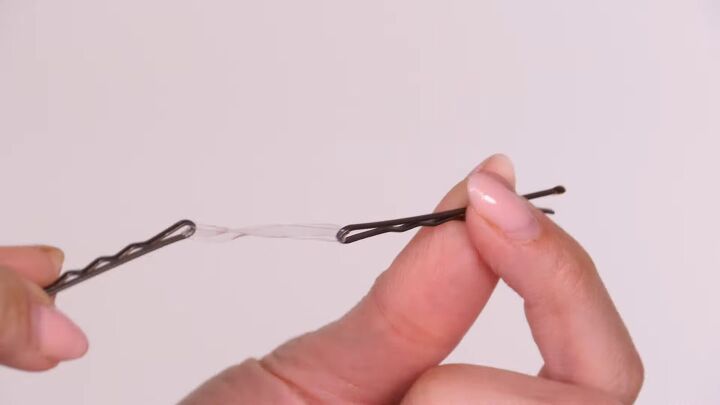
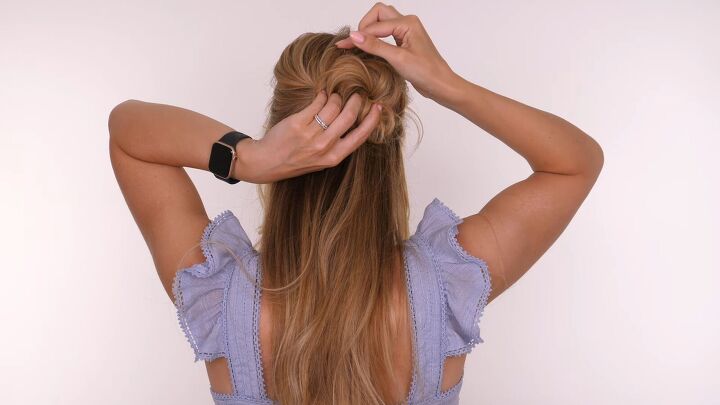
7. Create a hair band with bobby pins
To secure this twist in place, place a bobby pin on both sides of a clear elastic band.
8. Secure the twist with the bobby pin headband
Pop the first bobby pin on one side of the French twist.
While holding that pin in place, stretch the other bobby pin in your other hand over the top of the French twist.
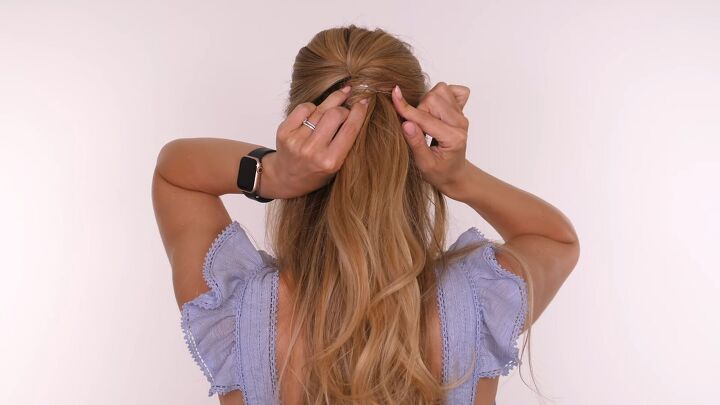
Push that in place on the opposite side. The pins will cross over one another and securely hold your hair in place.
9. Tease
Tease the top of your hair. You can keep it smooth, but I like my hair to look a bit more textured.
10. Adjust the hair at the ears
You can pull more hair over the top of your ears if it's popped out of place.
Hold the back of your hair in place while you tug at the base of the top section.
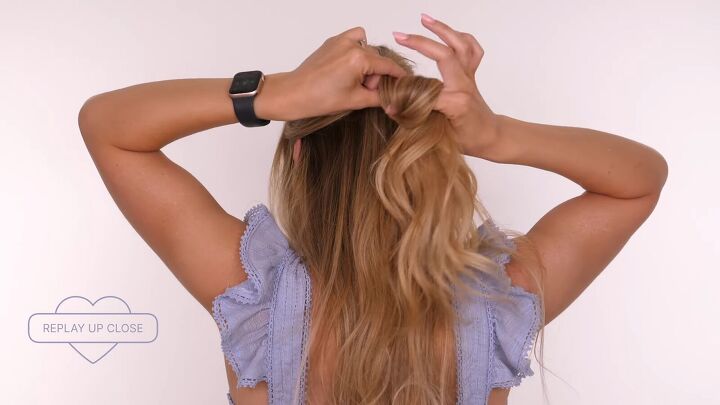
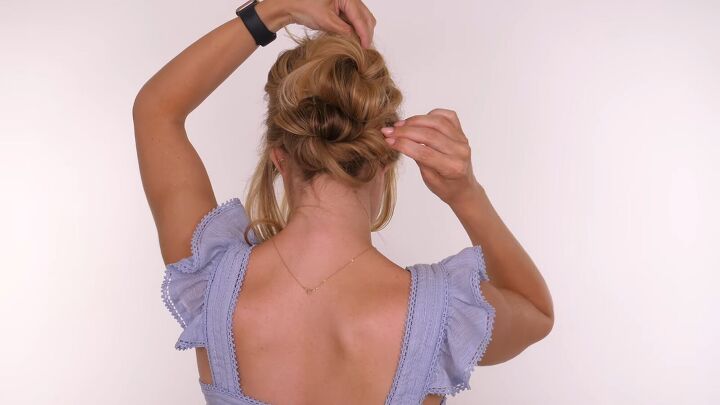
11. Wrap the twisted ponytail around to create a bun
Take the ponytail section of the top half of your hair and rotate it to create a twist.
Keep it loose, gently pulling at the twist to create a loopy finish.
Wrap it up and over to create the first bun. Wrap it tightly enough that it holds its shape but don’t pull it too tight.
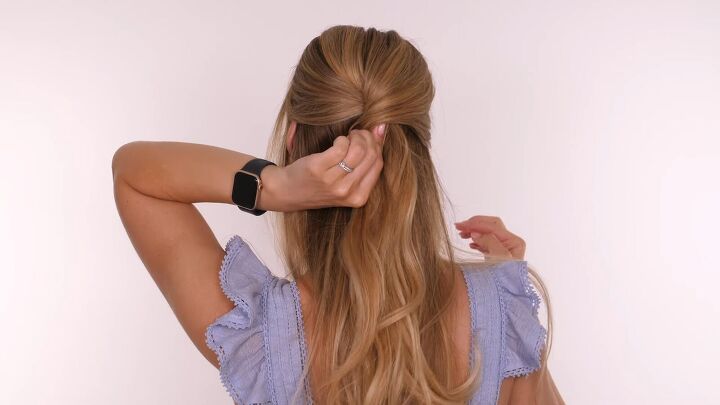
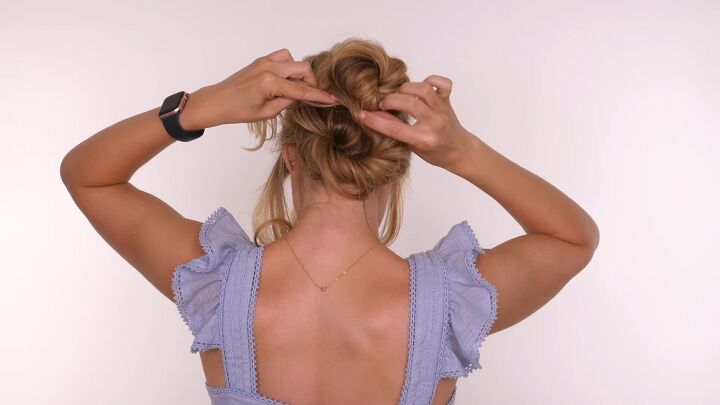
12. Secure
Use a few French pins that are U-shaped and pop them into the bun to secure them in the French twist shape.
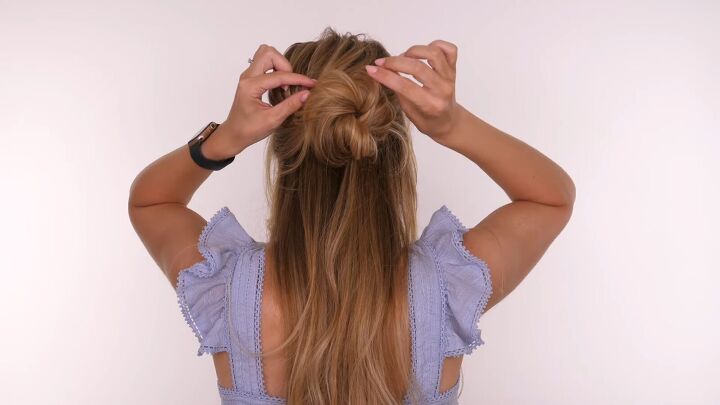
Make sure the bun sits slightly off-center so it’s asymmetrical to the second bun.
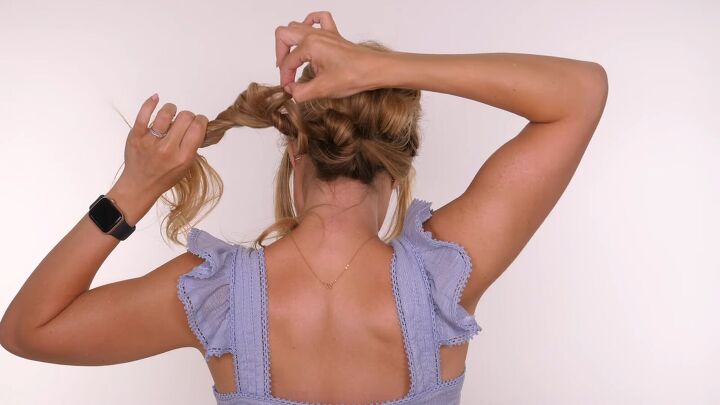
13. Twist the lower half of your hair and pin half of the bun
Use the same process to create the second bun with the lower half of your hair but with a tighter twist.
The base of it should be nice and tight but pull at the rest for the loopy finish.
When winding it, let go of the ponytail here so you can secure the bun in place with the French pins before you finish.
Aim for that slightly asymmetrical finish by placing the bun a bit to the left. It adds a lovely shape rather than them sitting directly on top of one another.
14. Pin the rest of the bun underneath the top
With the rest of the twisted ponytail, hold it upwards so you can pin it just here in the middle.
Then take it back down and tuck it underneath the top bun. Pull and add texture as you go.
I tucked my ends underneath the bun, but if you like the loose tendril finish, you can leave them out.
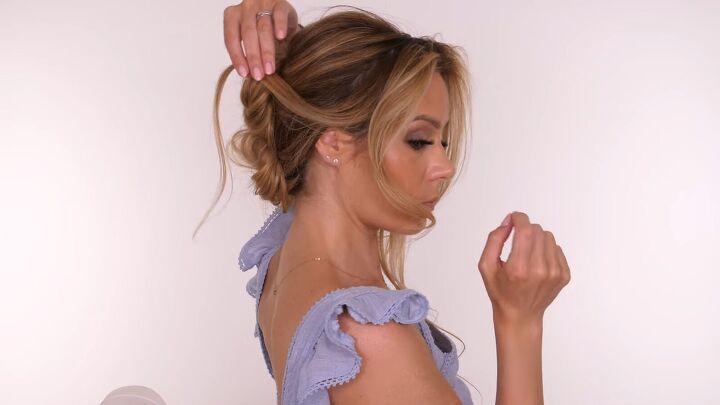
15. Pin back the long section of hair at the front
Wrap the ends from the front over the top of the bun, continuing the trend of the swooping finish on the side.
Tuck the ends underneath the bun and you can pin them back.
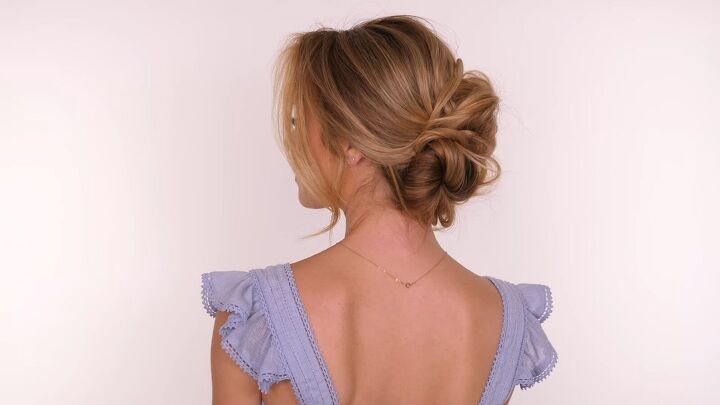
Cute hairstyle for special events
In just under six minutes, you’ll have this beautiful classy hairstyle with zero product apart from dry shampoo, which is entirely optional.
Let me know what event you’d wear this gorgeous updo at in the comments below.
The author may collect a small share of sales from the links on this page.


Comments
Join the conversation