Spooky Halloween Special Effects Makeup Tutorial

Halloween is just around the corner and I wanted to show you this optical illusion of the face being detached from the body. If you love Halloween special effects makeup, this tutorial has your name written all over it.
Tools and materials:
- Lenses
- Black eyeliner
- Eyeshadow
- Makeup brushes
- Highlighter
- Contour
- Foundation
- Mascara
- False lashes
- Rhinestones
- Green paint
- Primer
- Brow pencil
- Makeup sponge
- Skull stencil
- Multi stick
- Spirit gum
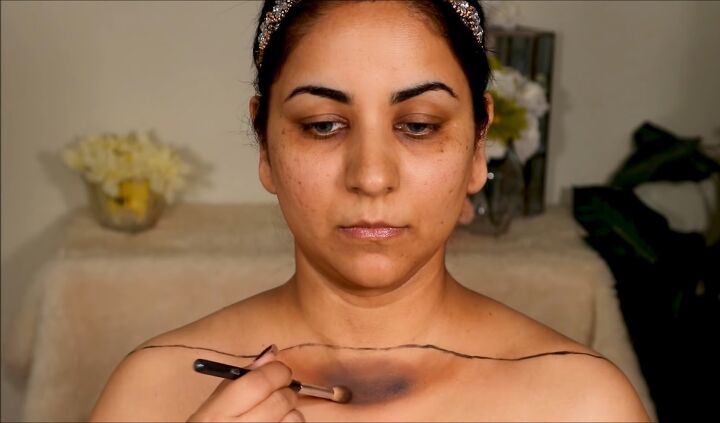
1. Neck makeup
Mark where you want your neck and shoulders to be using a black eye pencil and then take a brown eyeshadow to start carving out your neck. It's going to be the same width as your actual neck and in the form of a semicircle.
Shade inside using a blending brush. Then with the same blending brush, take a charcoal shade and use it to deepen the neck right in the center. Then take a black eyeshadow and add more depth to the neck by using it right at the bottom, so it gives the illusion of being very deep.
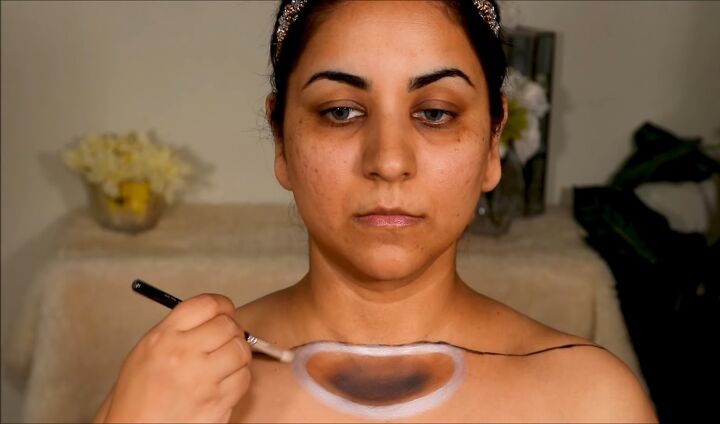
Now finish up with some highlights and contours, take a white multi-stick to go around the neck so it gives the illusion of the neck being raised.
That's going to be the border of the neck. Then use the brown again to contour your fake shoulders to make them look realistic.
2. Face makeup
For the face, I decided to create a glam skull. Start with some primer spray; this helps to set as well as seal and make your makeup last longer. Then apply foundation with a damp beauty sponge.
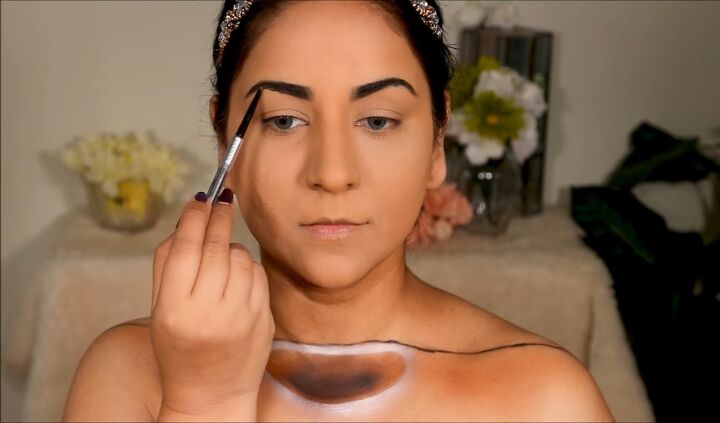
Use a concealer to cover up your dark circles as well as a base on your lids before you apply shadows. Then set your entire face using some fixing powder. Use a brow pencil to fill in your brows.
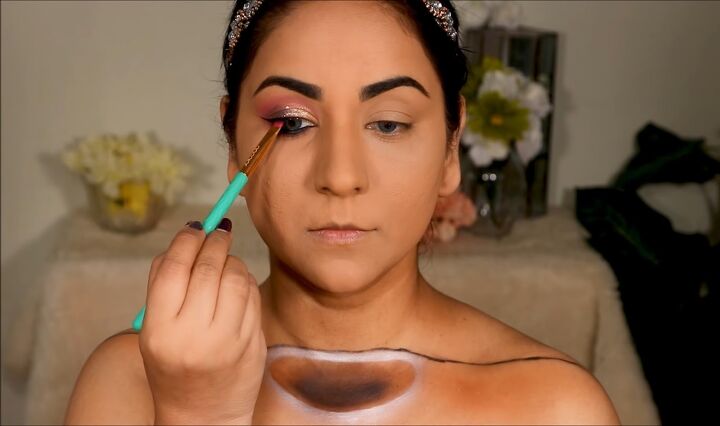
For the eyeshadows, take a transition shade and use it in your crease as well as your lower lash line. Use a small blending brush to blend this out. Next, take a gold shimmer and create a soft-cut crease using a flat shader brush.
Blend it out with a purple shade and a flat shader brush in the outer corner of your eye. Then, use a pressed gold glitter in your waterline. Take a black eye pencil and intensify the water line using some black eyeshadow.
Also, use black eyeshadow to draw out a small wing in your top lash line. Finish up with a coat of mascara and false lashes. Add sapphire lenses for a more dramatic look.
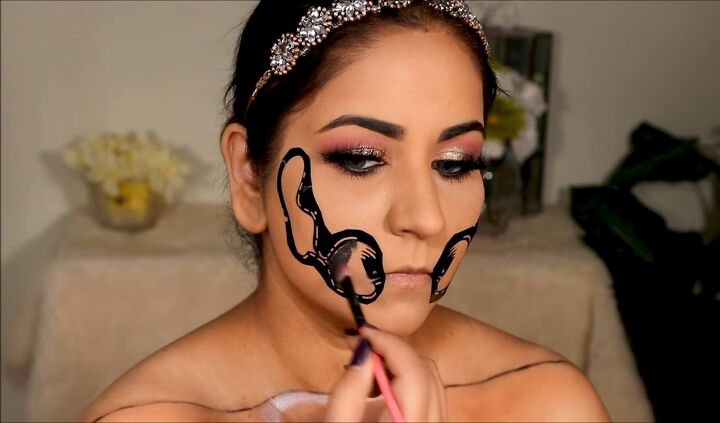
3. Draw the skull
Now take a skull stencil and stick it to the side of your face. Then use a black multi-stick to trace it and a brush to shade and soften it. To add more dimension, go over it with a transition shade.
Use a little bit of some light eyeshadow to highlight your cheekbones and then use the brown again to contour your nose to draw out the hollow in your nose. First, use the black multi-stick and then shade it with some pink eyeshadow.
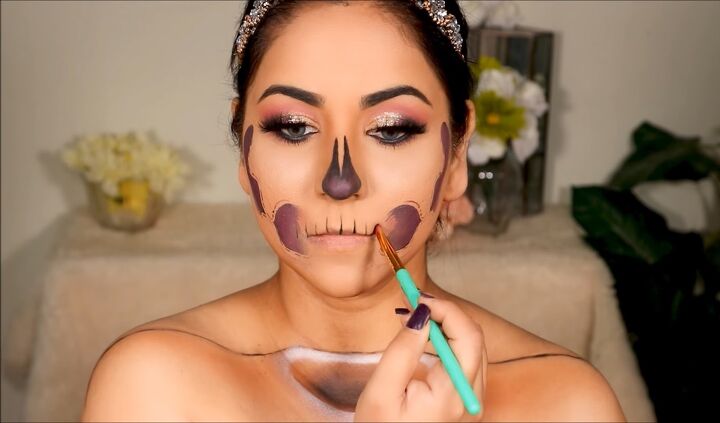
Using the black eyeshadow again with the definer brush, mark where you want to place your teeth.
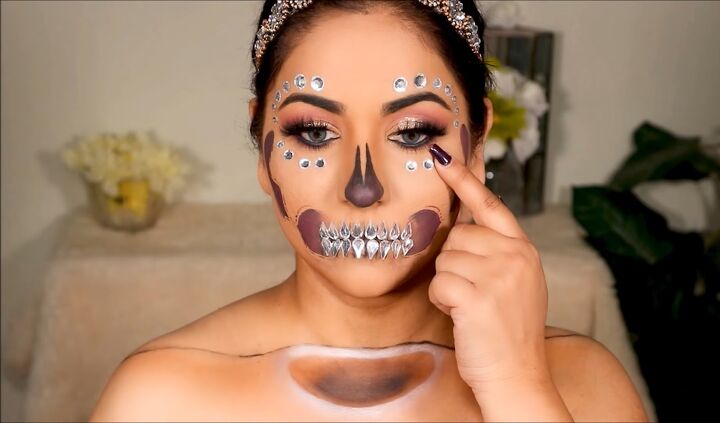
4. Apply the rhinestones
Now comes my favorite part of attaching rhinestones. Before you attach them, use some spirit gum as this is the only thing that's strong enough.
Apply this, let it get a little tacky, and then start attaching the rhinestones. You can attach these the way you want, just use your creativity and fly with it.
I'm just going to be using them on my forehead, around my eyes, my mouth of course for the teeth as well as my chin. Proceed to use some black eyeshadow to add a little bit more depth under your jawline as well as your shoulders.
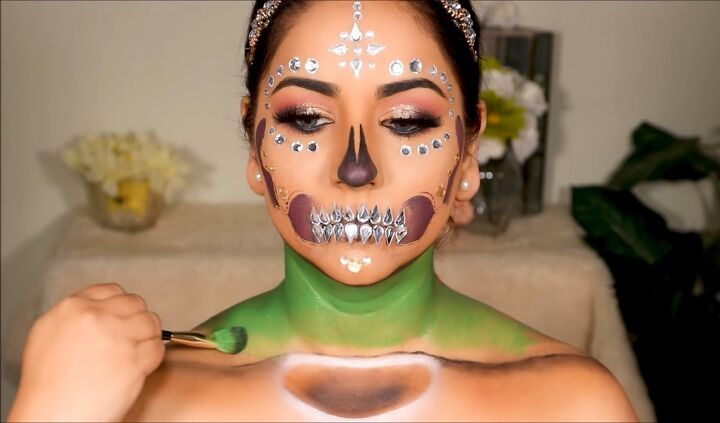
5. Green screen effect
Now I could have easily used a black background and painted my neck black. That does the trick, and it looks like your face is floating, but I just wanted to use technology because I wanted my neck to be transparent with different kinds of backgrounds.
So, I painted my neck green and created a green screen. Then with the help of keying in premiere pro, I made my neck transparent by morphing it with my background.
Honestly, it takes a little bit of practice but, once you get it, it looks fantastic. If this sounds too complicated, you can paint your neck black and use a black screen in the back as I said.
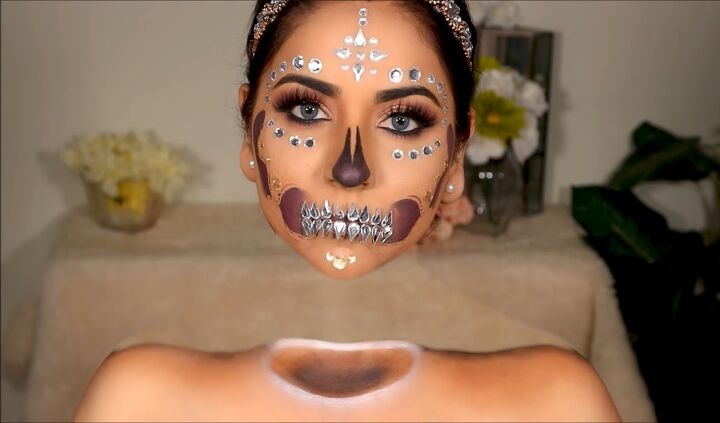
Halloween special effects makeup
And here is the finished detached floating head Halloween look. I love how the special effects make it look really out of this world. The skull makeup together with the rhinestones looks wonderfully spooky and I’m very pleased with the finished look!
The author may collect a small share of sales from the links on this page.


Comments
Join the conversation
Awesome excellent work. Thank you
Although green is the most common, because it contrasts well with human skin, you can use any colour that has enough contrast. You just have to then select in Premiere the colour you want to make transparent. So you could have used black and selected only the neck area for transparency (or your hair and lashes would end up transparent too).