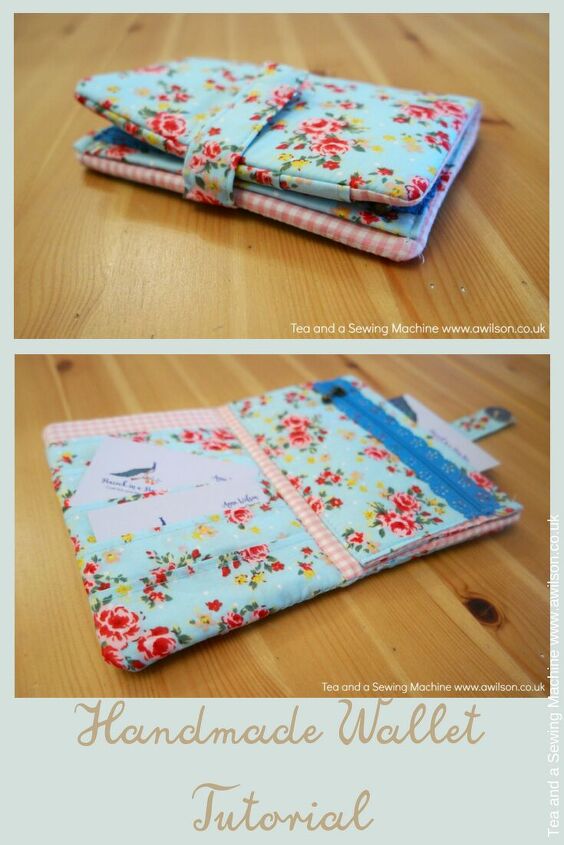
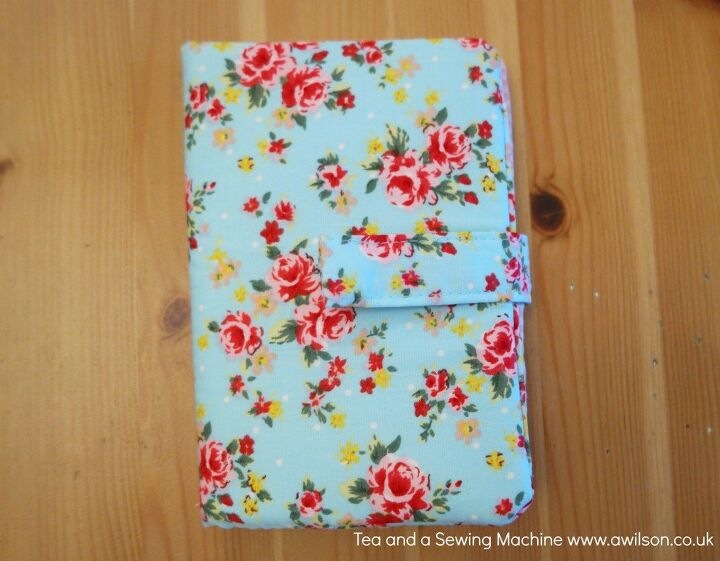
Handmade Wallet Tutorial
Although I quite like my current wallet, it’s looking distinctly tatty.
It also has 2 major disadvantages.
The first is that it’s huge and it takes up an awful lot of room in my bag.
The second is that because it has so many useful pockets inside, I feel obliged to fill them all up with junk. The pockets of my purse get so full of old bus tickets and receipts that it won’t stay closed! Pockets are nice, but I just don’t need that many.
So I now have a handmade wallet that’s quite a bit smaller and enough pockets to be useful, but not too many!
I already had some fabric that I liked (most of it is a dress which is currently in the pile of unfinished projects!), and some little bits of Soft and Stable that are to small to use in bags.
The only things I had to buy were zips!
This is a good project for using up fabric left over from other projects, and it would make a nice gift for somebody if you don’t need a new purse yourself.
Here’s the tutorial for my handmade wallet!
Sewing a Handmade Wallet
You Will Need
Cotton fabric for the outer
Cotton fabric for the lining (a fat quarter of each will be enough)
Sew in interfacing (you could use fusible interfacing if you prefer)
Foam interfacing like Soft and Stable
Fusible interfacing
1 lace zip
1 magnetic snap
Usual sewing supplies
A zip foot is useful but not essential
Cutting Out
If you’d rather not faff about with making your own pattern pieces, I have the pattern for this handmade wallet for sale here.
A 1 cm (1/4 inch) seam allowance is included.
For the purse outer, cut a rectangle 24 cm x 17 cm from outer fabric and from foam interfacing.
For the purse lining, cut 2 rectangles 13 cm x 17 cm from lining fabric.
For the card pockets, cut 5 rectangles 13 cm x 10 cm. I cut them from the outer fabric, but you could use the lining fabric (or something different!) if you prefer.
For the coin purse section, cut a rectangle 17 cm x 21 cm from outer fabric, lining and sew in interfacing.
For the strap, cut a rectangle 7 cm x 11 cm from outer fabric.
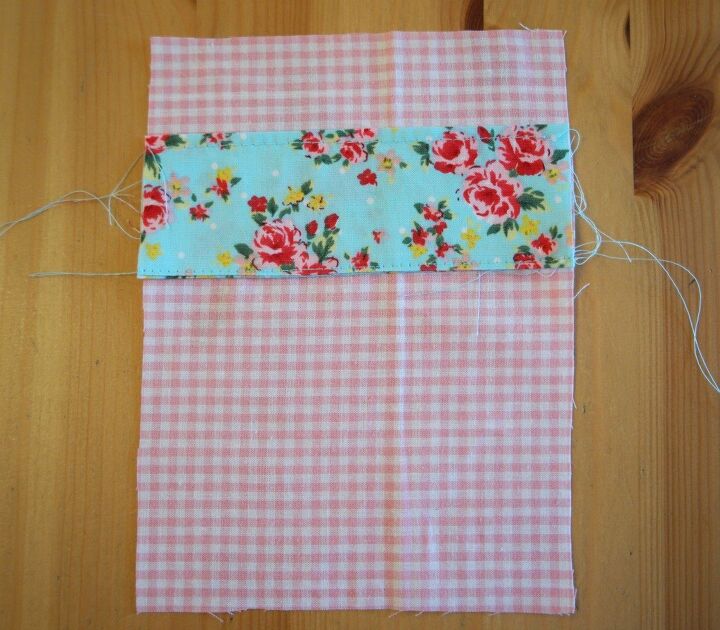
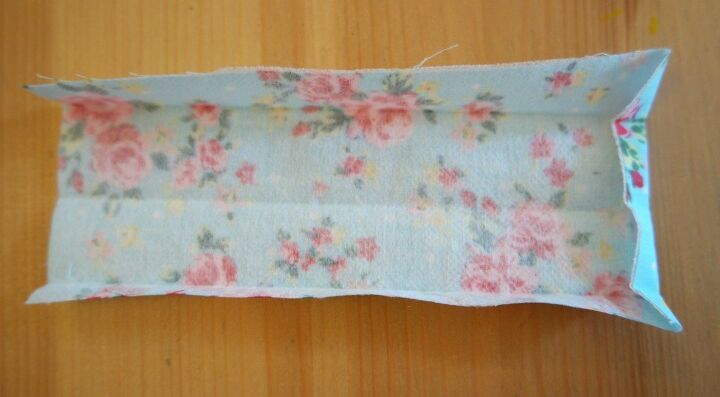
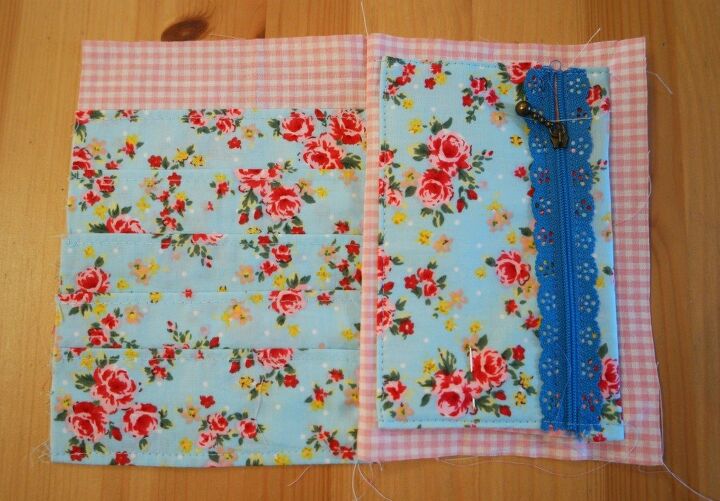
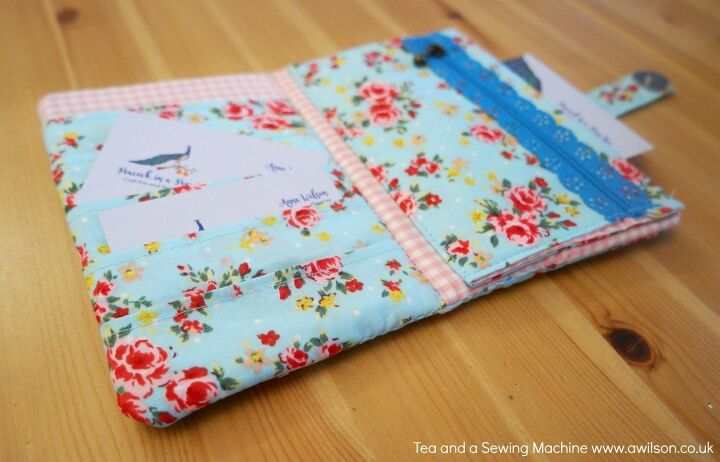
1. Making the Card Pockets
Take one of the card pocket pieces and fold it in half lengthways, with the right sides together. Sew along the long open edge.
Turn it the right way out and press. You might like to sew along the folded edge, but you could leave it.
Repeat with the other card pockets.
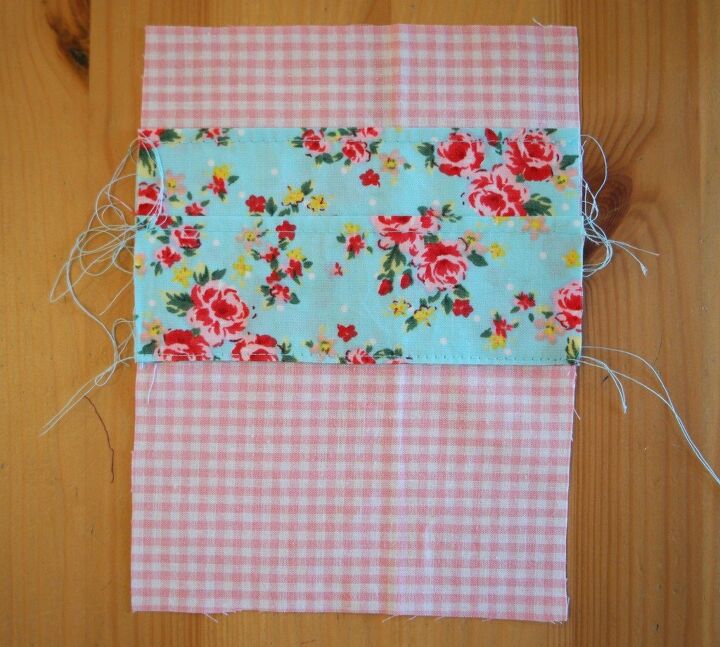
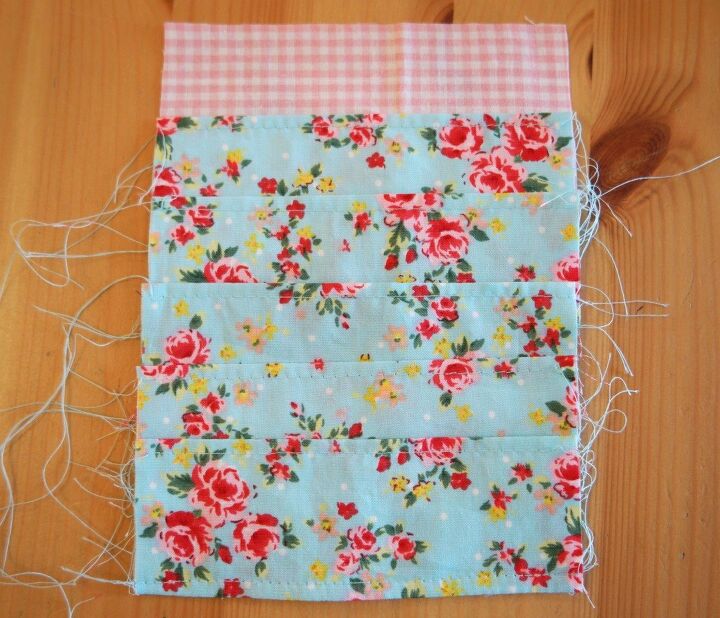
Take one of the card pockets and one of the lining pieces. Pin the card pocket to the lining so that the top of the pocket is 3 cm down from the top of the lining. Sew along the bottom of the pocket.
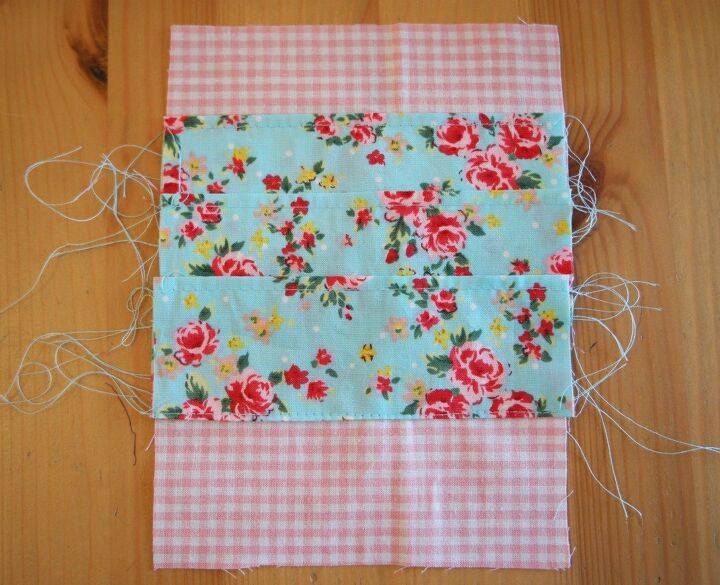
Take another card pocket. The bottom of this one needs to be 10 cm down from the top of the lining. Pin, then sew along the bottom.
The third card pocket needs to be 13 cm down from the top of the lining, and the fourth 15 cm down.
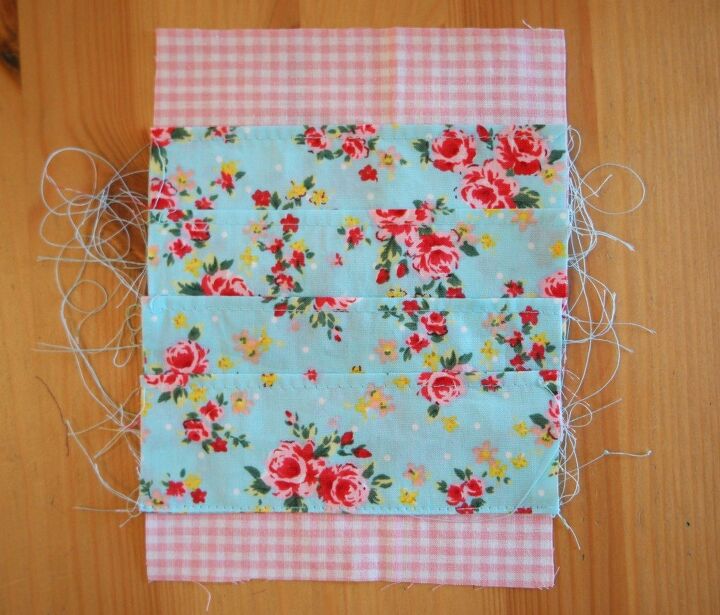
For the fifth pocket, line the bottom edge of the pocket up with the bottom of the lining.
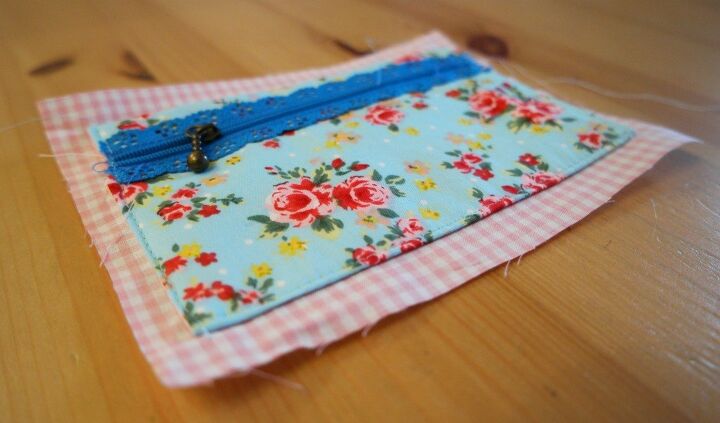
2. Coin Purse Section
Take the lining,the outer and the interfacing. Pin them so that the lining and the outer have their right sides together and the interfacing is on the outside.
Sew all the way round, leaving a gap in one of the short edges.
Trim the seams then turn it the right way out.
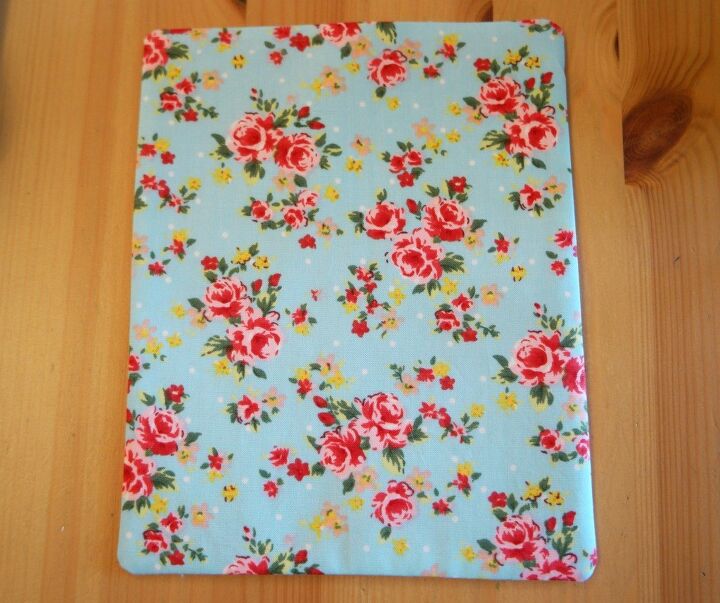
Press it and slip stitch the opening.
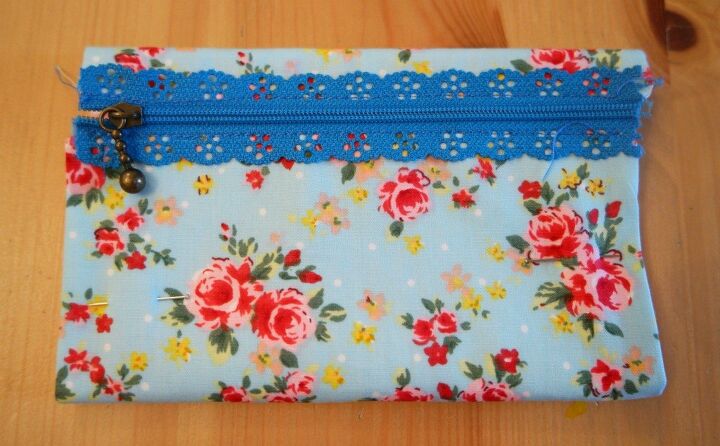
Before sewing the lace zip onto the short ends of the purse, you’ll need to trim it down a bit. Cut about 4 cm (1 1/2 inches) off each end of the zip. Check first with your purse piece that you’re cutting off the right amount!
This will mean that it doesn’t have a closed end any more, but this will make it easier to sew the zip to the purse, as well as making it the right length.
Pin one half of the zip to one of the short edges, ensuring that the teeth of the zip are past the edge of the purse. Sew the zip to the edge of the purse.
Reattach the other half of the zip and pin the other half to the other short edge. Unzip it, then sew the other bit of the zip to the purse.
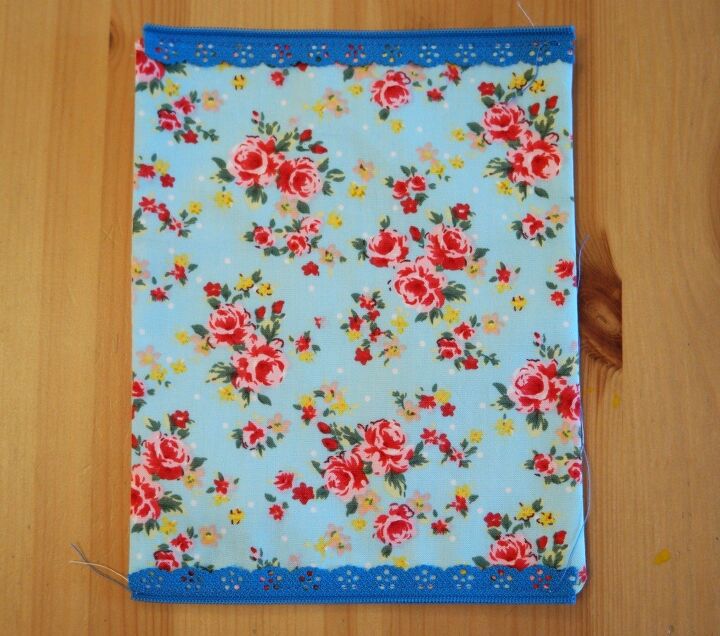
Zip it back up, then squash the purse so that the zip is a cm or 2 down from the top.
This is a bit fiddly and you might prefer to use the kind of zip that separates without having to hack a bit off the end.
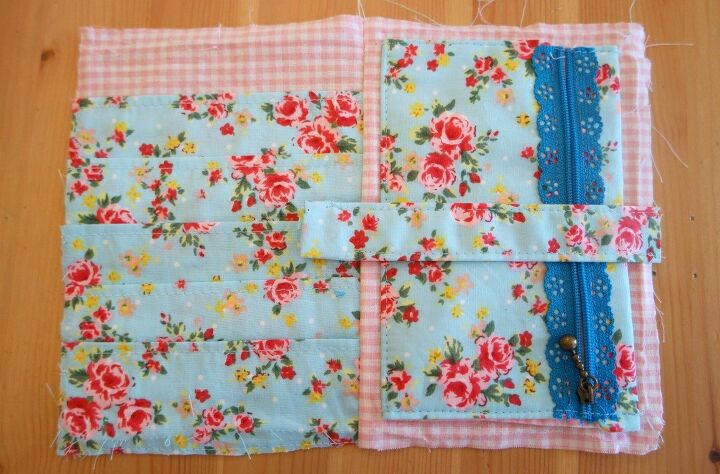
Pin the purse to the lining.
Sew along the sides and the bottom. Leaving the top free will give you a pocket for notes.
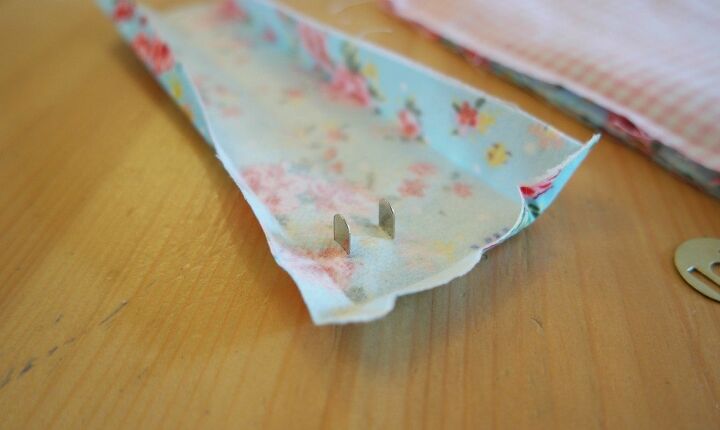
3. Making the Strap
Fuse a piece of interfacing to the wrong side of the strap piece.
Fold one of the short edges over by a cm.
Now fold it in half lengthways and press. Open it out, then fold one of the long edges inwards almost to the centre. Press it (with your finger will do), then fold the other long edge over by a cm. Press again.
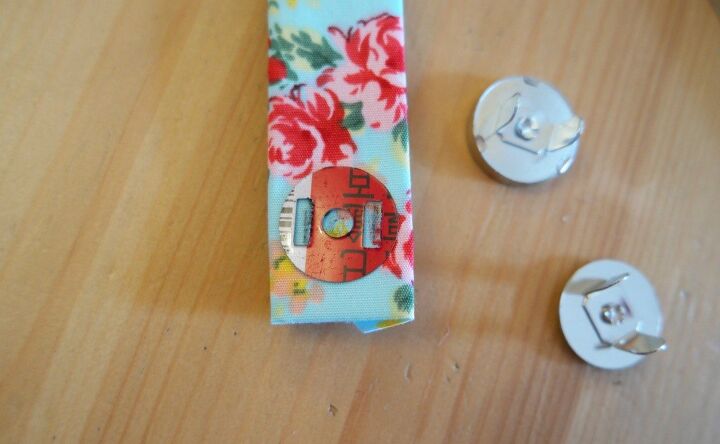
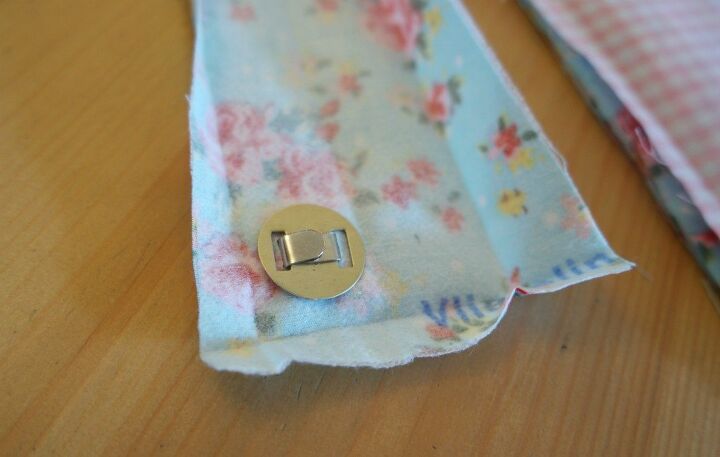
Open it out again and attach the snap.
4. Assembling the Wallet
Find the centre of right hand half of the outer by folding it in half horizontally, then vertically. Where the folded lines cross, fuse a small piece of interfacing to the wrong side. Attach the snap.
Take both the lining sections and pin them with the right sides together. Before pinning, check that the section with the card pockets is underneath with card pockets the correct way up, and that the top of the coin purse is on the left.
Sew down the right hand side.
Take the strap and pin it to the right hand edge in the centre, with the snap facing downwards.
Pin the outer to the lining with the foam interfacing on top of the outer.
Sew round the outside edge of the wallet, leaving a gap on one side.
Turn the wallet the right way out and slip stitch the opening.


Tips
Iron everything as you go. It’s tempting to skip this, but the finished purse will look much nicer if you do, and it will be tricky to iron once the purse is assembled.
Use a longer stitch for top stitching.
If the fabric you’re using for the lining is very light, using some fusible interfacing will give it some more weight.
For left handed people, you might prefer to have the zip of your handmade wallet the other way round. Decide what is most comfortable for you before sewing!
If you liked this handmade wallet tutorial and your new wallet needs a new bag to ride around in, you might like to have a look at these tutorials.
The author may collect a small share of sales from the links on this page.


Comments
Join the conversation
I love it, very cute. I'll be trying it as soon as I can find time. Maybe no one else needs it, but I could've used a few more pics for the lining, zipper, & fusible steps, & all the steps that didn't have specific pics for them really. I'm a bit challenged in some ways. ...Thank U, though, for a sweet project idea. Can't wait to try it. 🙃