How to Make Polymer Clay Earrings Inspired by Swan Lake

This tutorial will show you how to make polymer clay earrings inspired by swan lake. It is a fun, relaxing, and creative process, and we can’t wait to show you how these cute polymer clay earrings turn out. So, be prepared to be inspired, and let’s begin!
Tools and materials:
- Polymer clay of different colors
- Acrylic roller
- Slicer
- Ball stylus
- Needle
- Cookie cutters
- Paper as a working surface
- Pin
- Dotting tool
- Earring kit
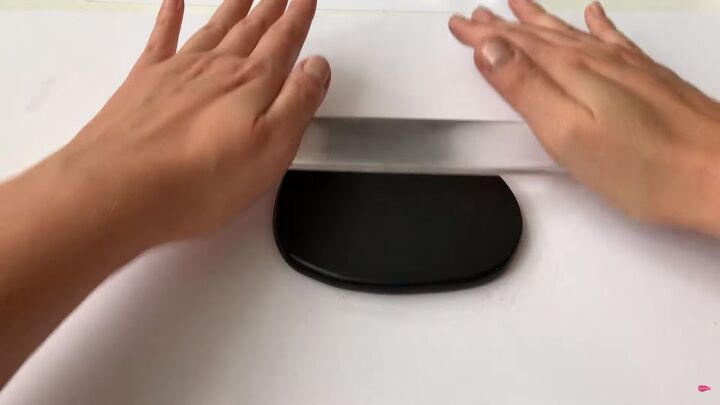
1. Prepare the base
Roll your black polymer clay with an acrylic roller. Alternate sides each time you roll. Do this until your clay flattens like a pancake.
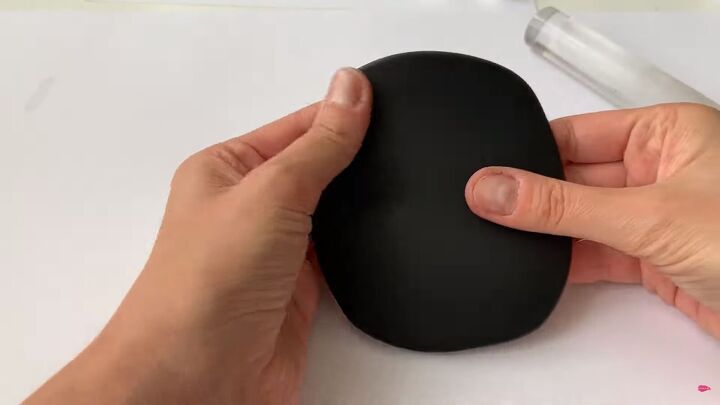
Once it’s flat, gently tug the sides to stretch it out more.

Carry on rolling it out and pull at the ends again. Repeat this process until you have a flat and smooth base.
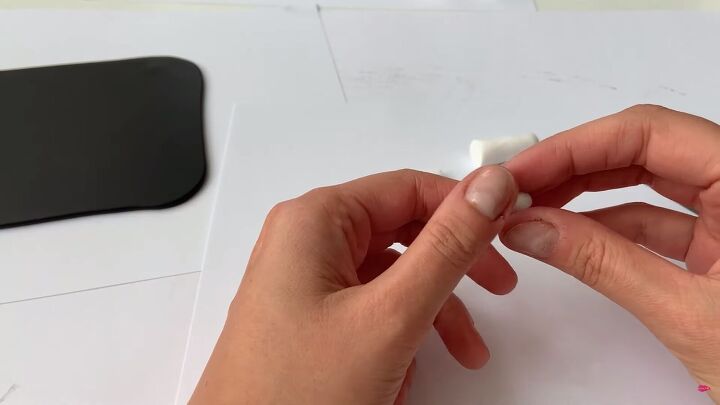
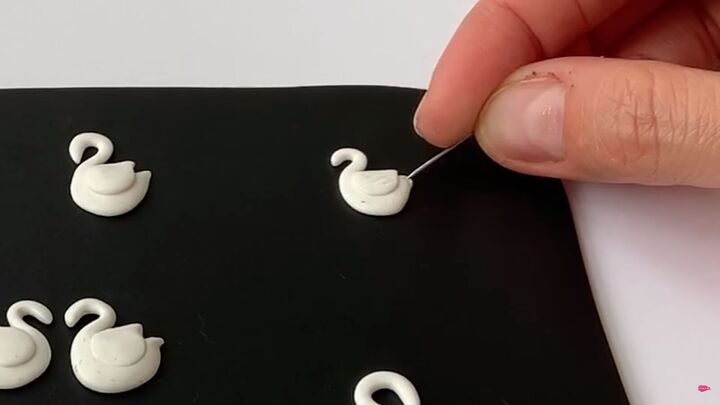
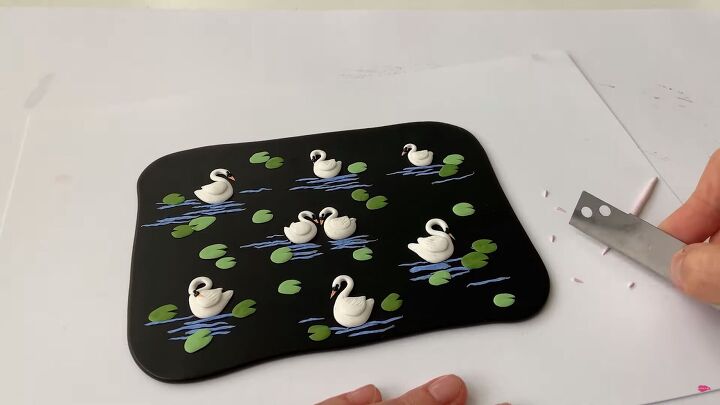
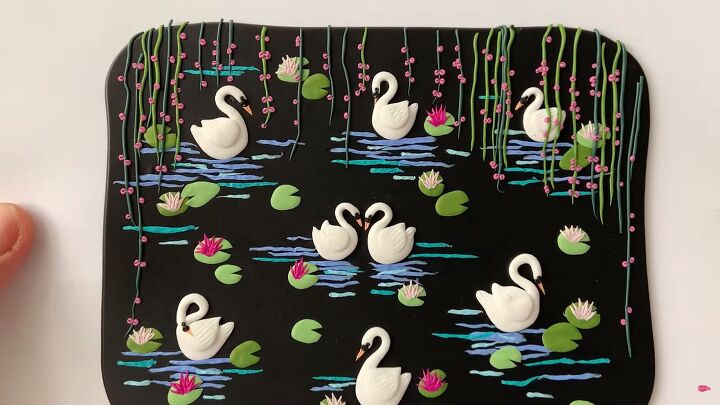
2. Make the swans
Cut a small piece of white clay and roll it into a ball.
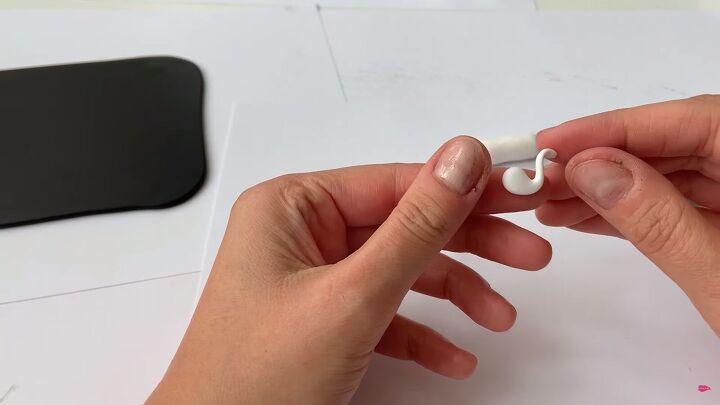
Gently press one end of the ball and flatten that end between your fingers. Pull the end while rolling it between your fingers to create a small tube. Pull the tube part upward and curl the end.
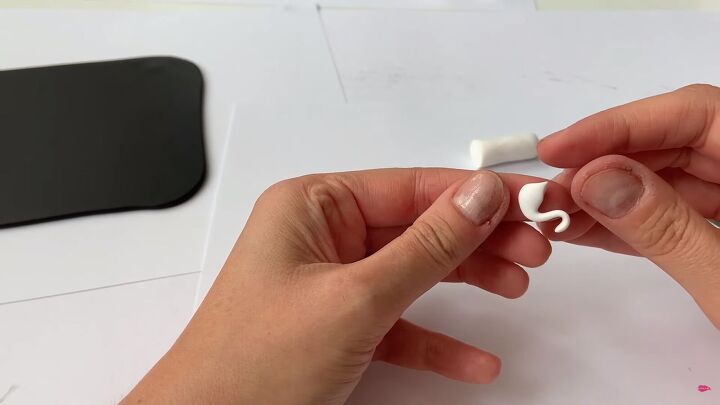
To make the swan’s tail, carefully pinch the rounded part between your fingers.
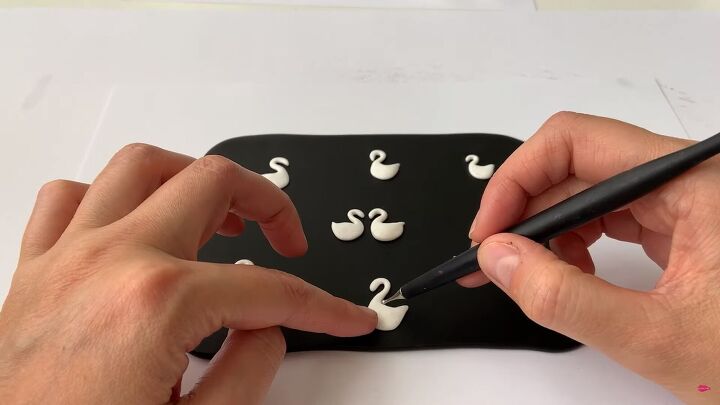
Lay your swan on the black base. Carefully press it down so it doesn't lose its shape. Now, make more swans. Play around with the shapes, like curling the necks. Use a dotting tool to smoothen out any edges.
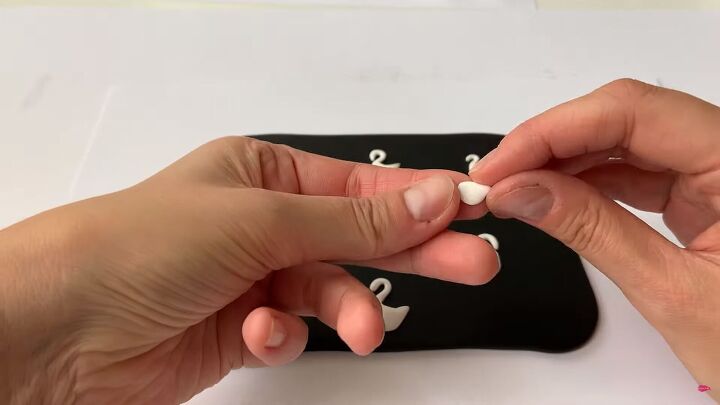
3. Make the wings
Roll a small piece of clay into a ball and flatten it between your fingers. Pinch one end to form a wing shape.
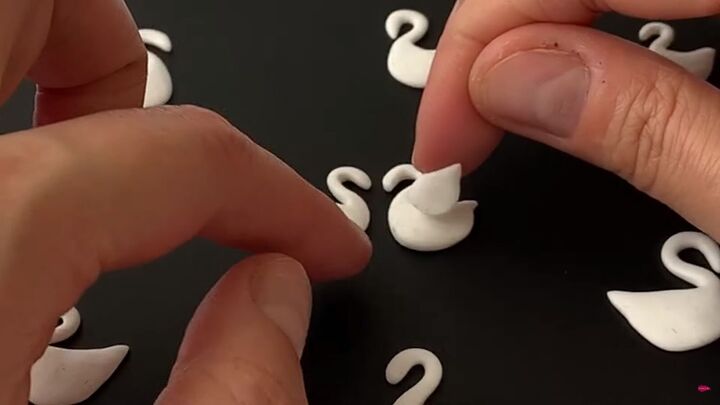
Place it diagonally on the swan’s main body, ensuring the tip of the wing faces outward. Then, gently press it down. Repeat the process for all the swans.
Create indentations in the wings and tail area using a pin.
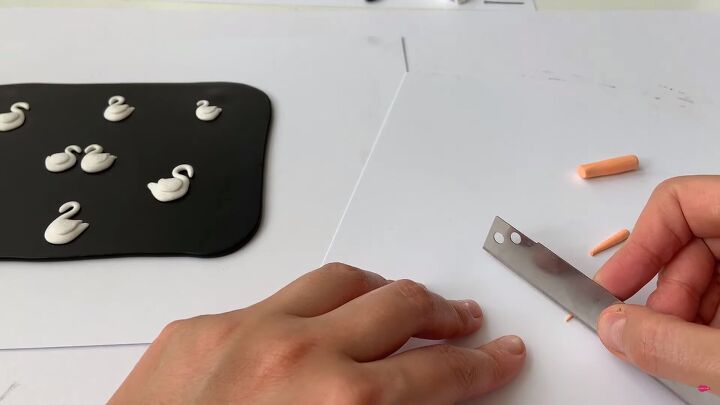
4. Model the beaks
Cut off a piece of peach-colored clay and roll it into a tube. Roll the end of this tube to create a smaller tube. Cut off the ends and repeat to make a couple of pieces.
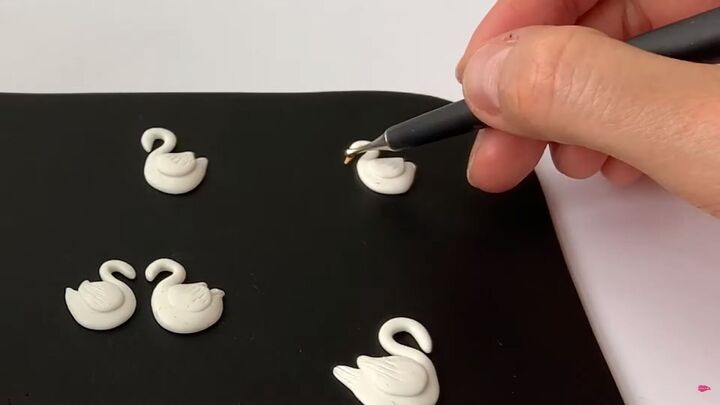
Place these pieces (with the tip pointed out) on each swan using a dotting tool. Using a pin, create an indentation in the middle of the beak.
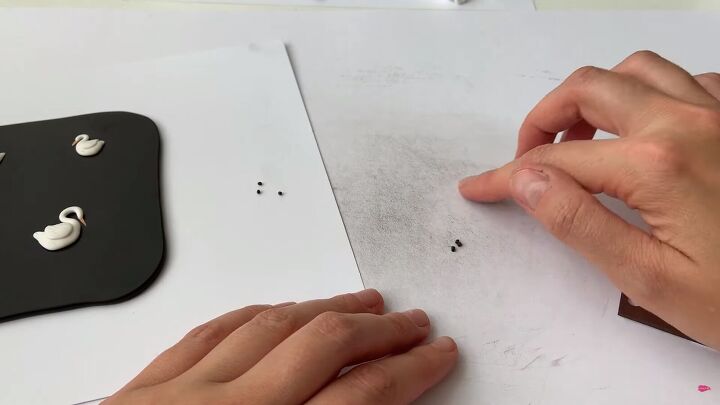
5. Add the base and eyes
Roll a piece of black clay until it forms into a thin tube and cut small pieces.
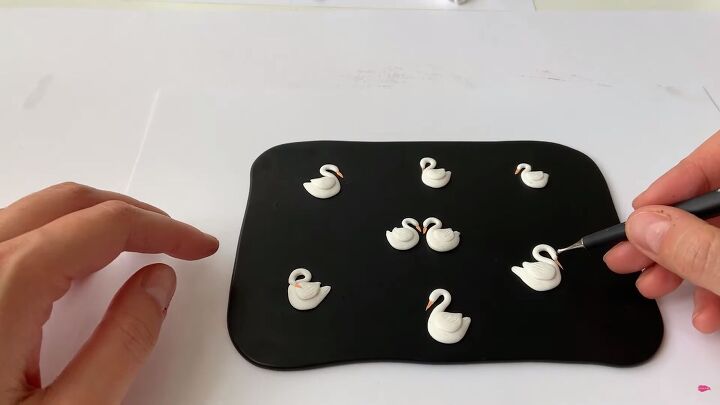
Roll each piece into a tiny ball and place it on top of the beak using the dotting tool.

Roll the clay into a long thin rope and cut out the eyes. Then, place on each swan.
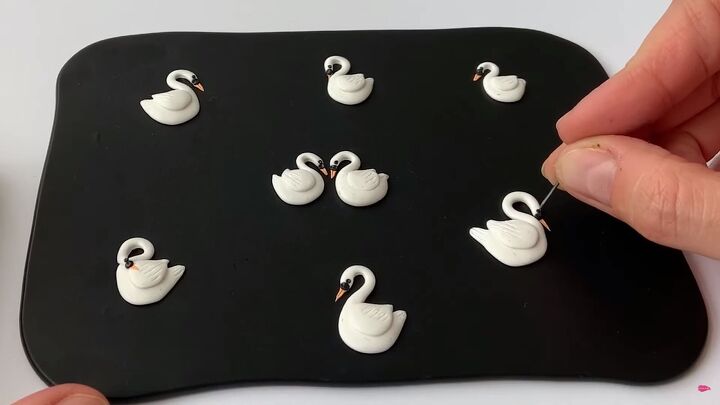
Indent the middle of each eye.
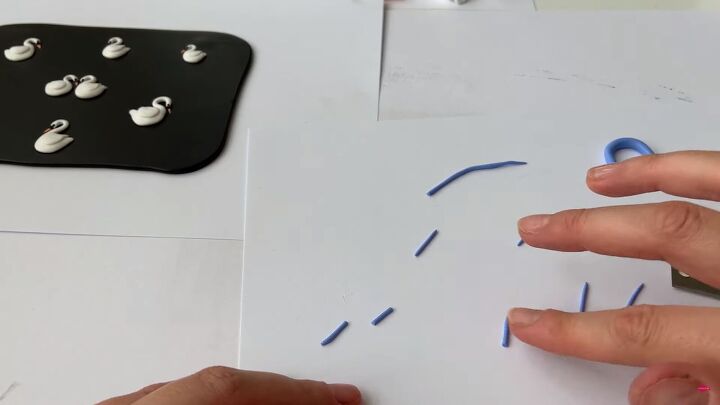
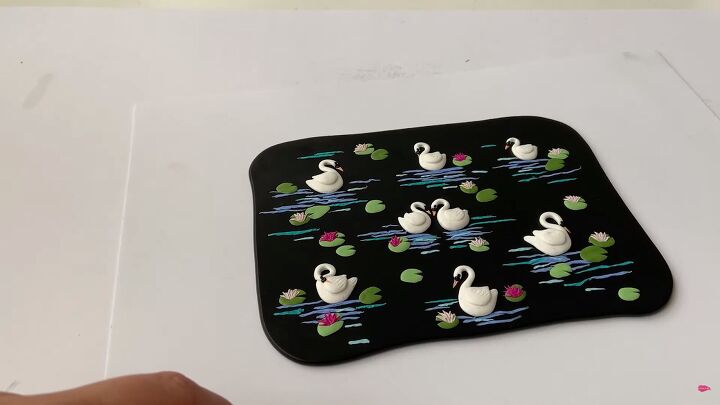
6. Make the water effect
Roll a pastel blue clay into a long thin tube.
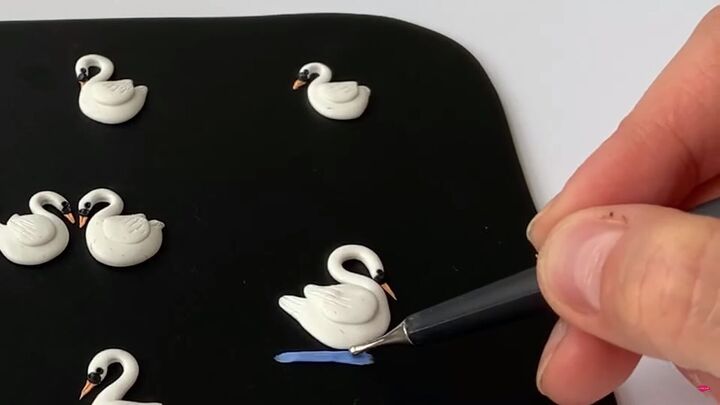
Place under each swan and feather it out with a dotting tool. The pieces should not be straight but have slight curves, just like a ripple effect.
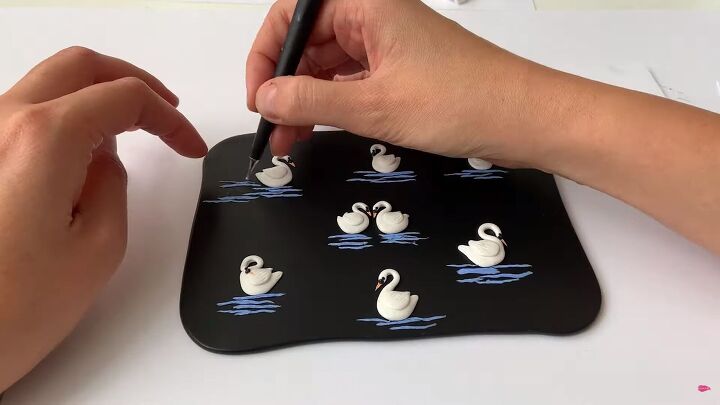
Place another piece under the first and repeat. Add as many various-sized pieces as needed under and around the swans.
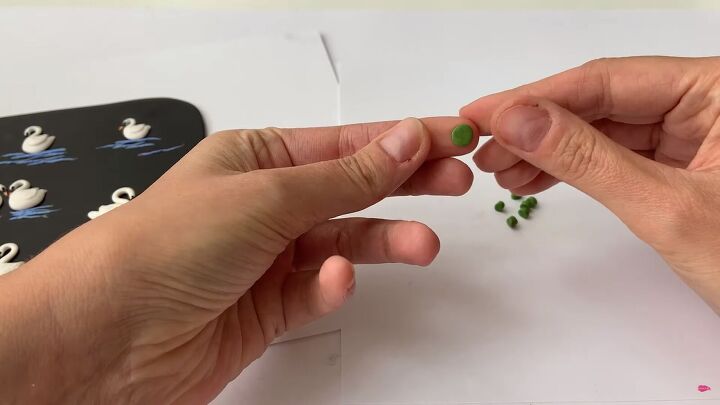
7. Model the lillies
Roll green moss-colored clay into a tube and cut out the pieces. Shape each piece into a ball. Then, flatten it between your fingers.
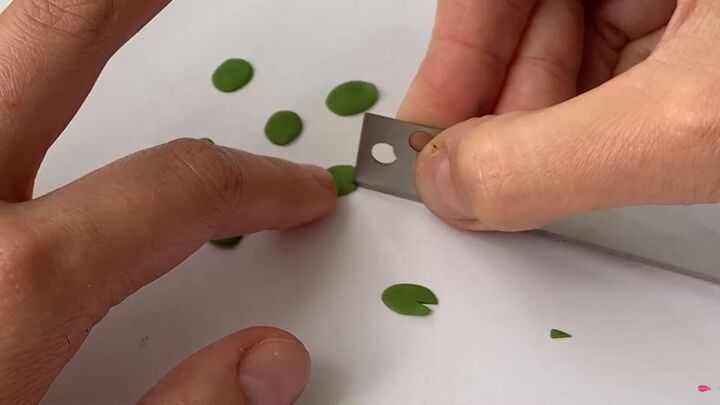
With your blade, cut out a small triangular piece.
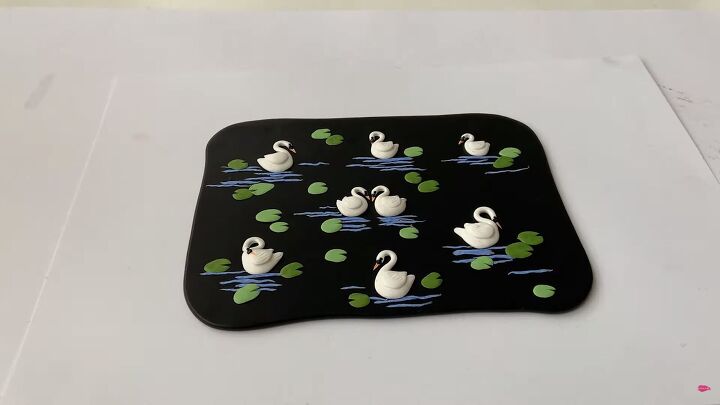
Place the leaves in between the ripples. Repeat the same but with a lighter shade of green.
To make the lilies, roll a soft pink clay into a thin tube and cut the feathered-out edges as you roll it out.
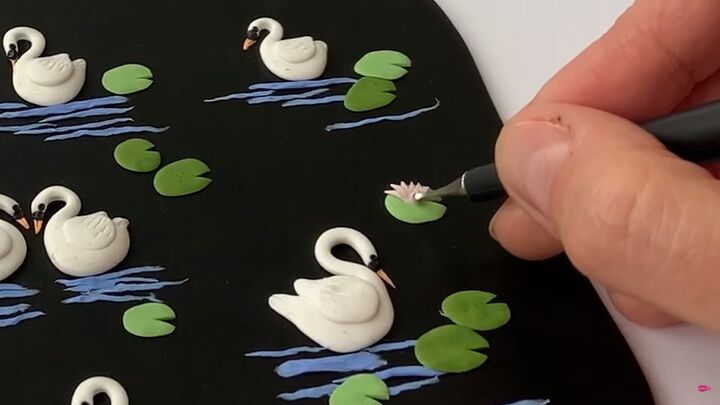
Place each petal on the leaf and press down the center. Layer the petals together to create a 3D effect. Then, make lines on each petal with a pin.
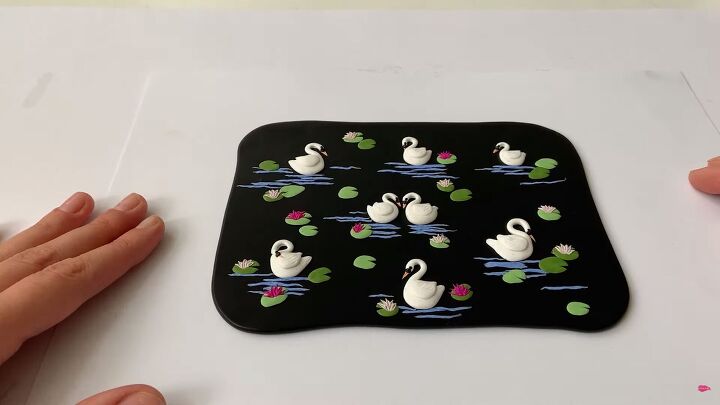
Repeat this process until you have something like this. I used a beautiful bright purple color, too.
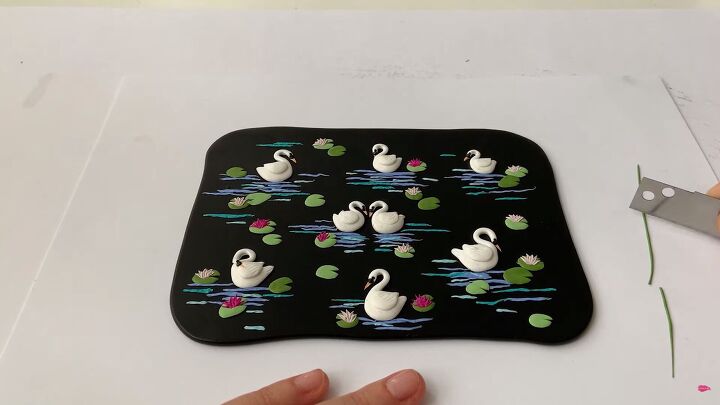
8. Add more ripples
Roll turquoise clay into thin tubes with the ends feathered out.
Place it around the ripples using the same water effect technique. Place shorter, pearl light blue pieces in between the ripples.
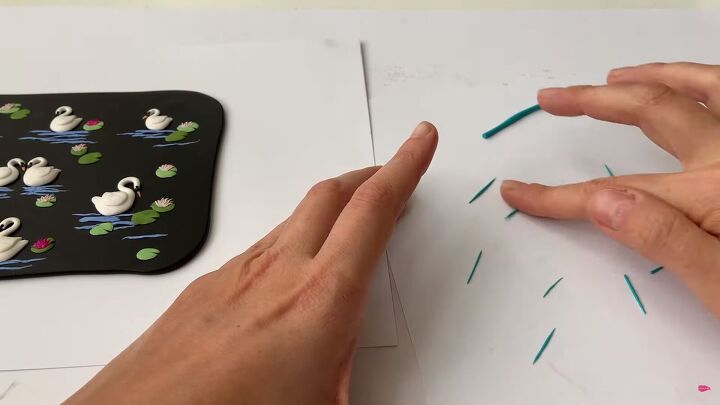
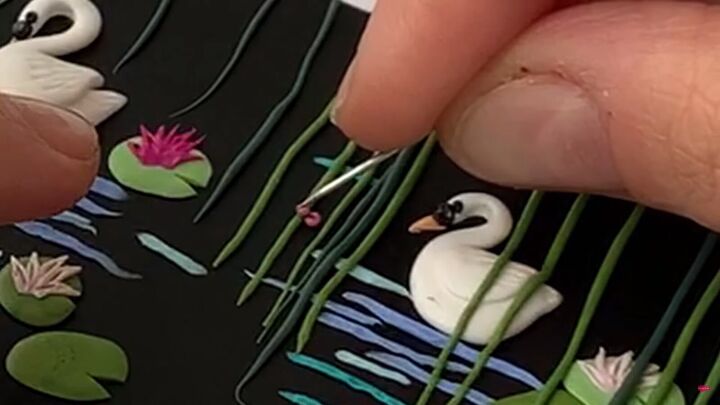
9. Model the lianas
Roll a dark green piece of clay into a thin tube and cut.
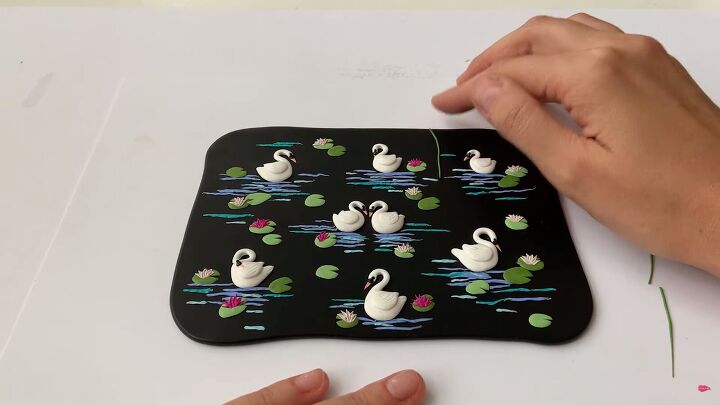
Carefully place each piece in between the swans.
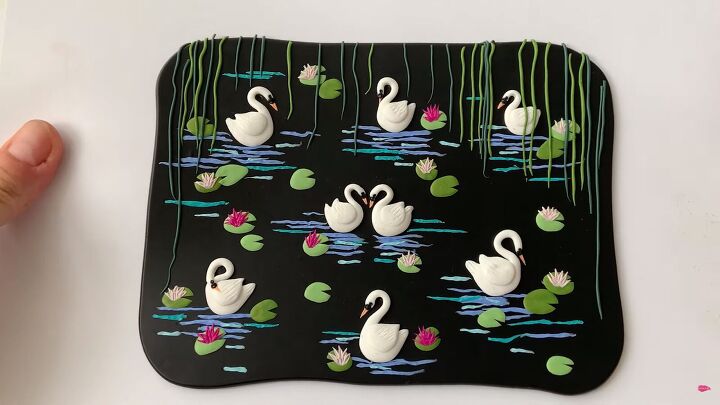
Repeat the process using a darker shade of green. You want the pieces to look wispy and whimsical.
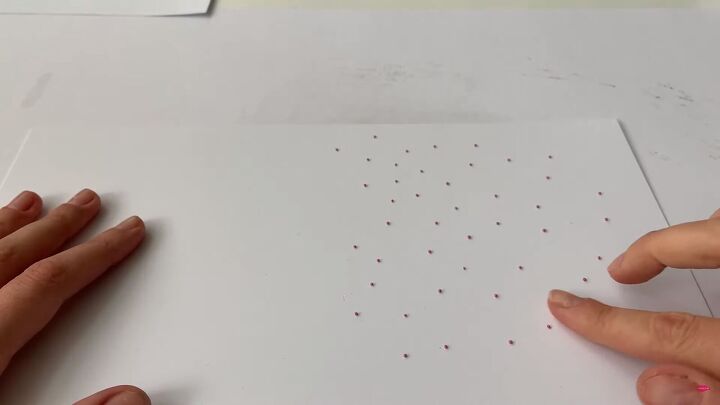
Next, roll a dark purple clay into a thin tube and cut even pieces. Then, roll each piece is a ball.
Place each piece on the stalk, as shown. Add a small indentation to the middle of each.
Repeat this method with a light yellow clay and place each piece throughout the creation.
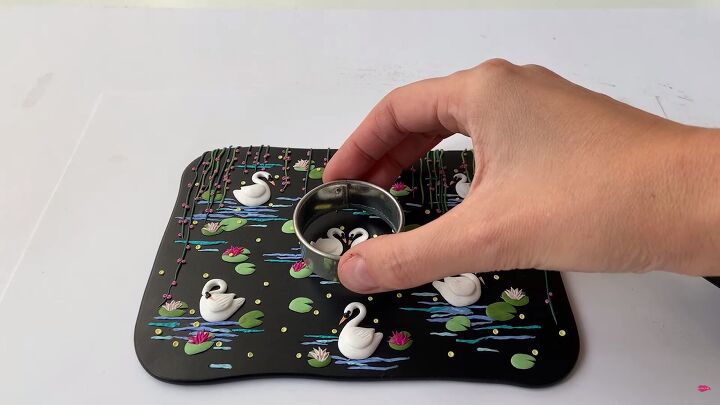
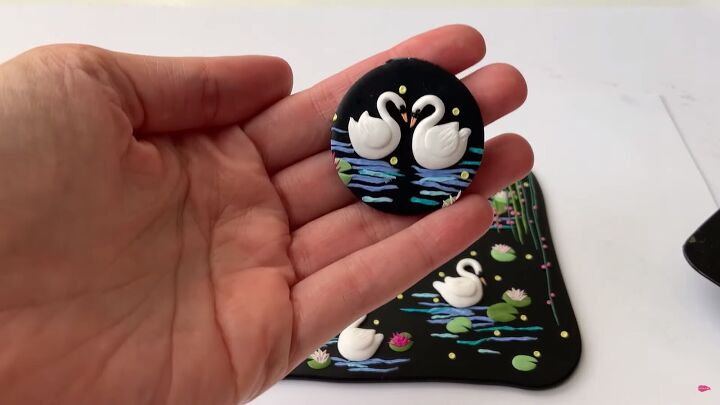
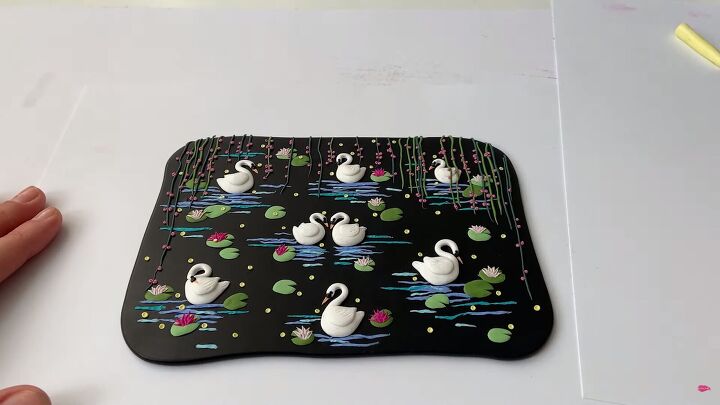
10. Cut the clay
Let’s make the DIY polymer clay earrings using a round cutter. Also, make smaller circles and then bake accordingly.
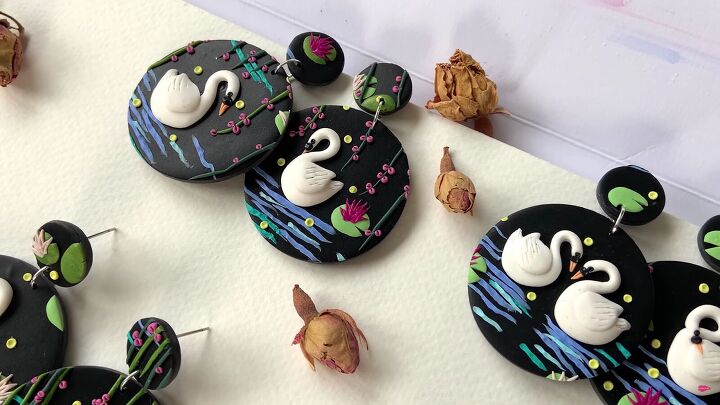
How to make polymer clay earrings inspired by Swan Lake
I hope you found some great inspiration in this tutorial. Thank you for joining us and we hope you have a cute polymer clay earring idea for your next project!
The author may collect a small share of sales from the links on this page.


Comments
Join the conversation