Pastel Resin Pumpkin Charms
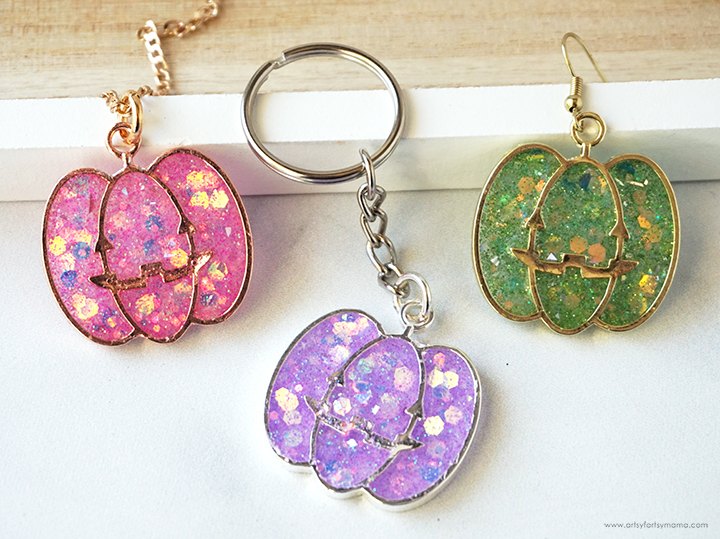
I'm loving the pastel Halloween trend happening right now. As you know, resin is one of my favorite materials to craft with, and stunning charms like these Pastel Resin Pumpkins are one of my favorite go-to gift ideas! These pumpkin charms are a great beginner project if you are new to resin crafting. I love how these pumpkins turned out, and am excited to share them as gifts for friends to wear all throughout spooky season! I hope you get inspired to make some for yourself.
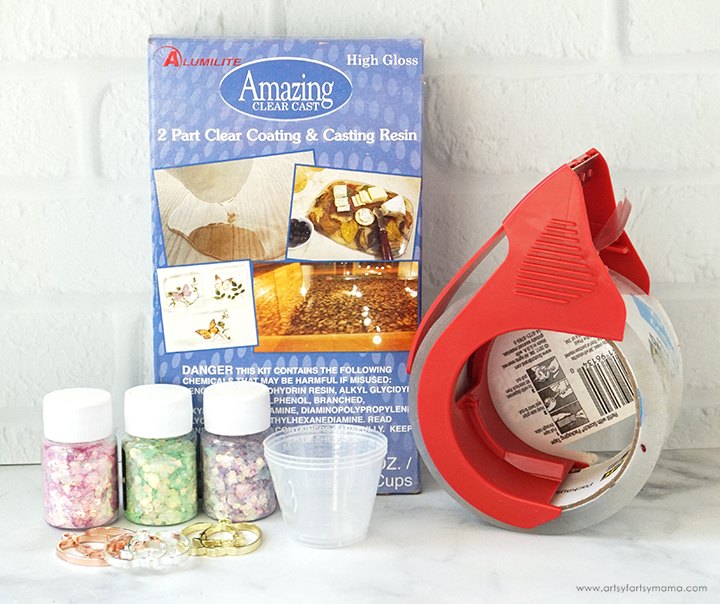
To make your own Pastel Resin Pumpkin Charms, you will need these supplies: Pumpkin Open Bezel CharmsAmazing Clear Cast
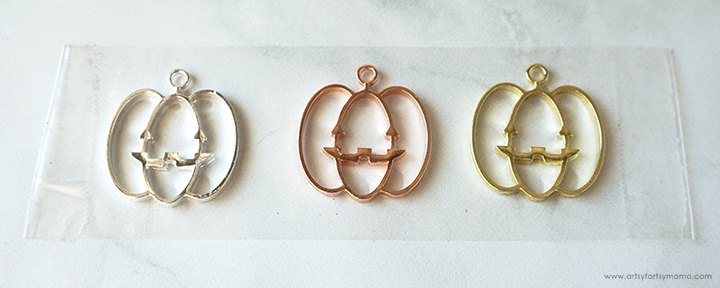
Cut a 6-8 inch piece of packing tape and fold the ends over. This makes it easier to grab and move the project around without getting stuck to it. Place the pumpkin bezels on the sticky side of the tape and use a brayer tool to press them down REALLY well. Turn the tape over and press them again. I'd recommend even scraping the tape down well with your fingernails so that the bezels are stuck to the tape as much as possible.
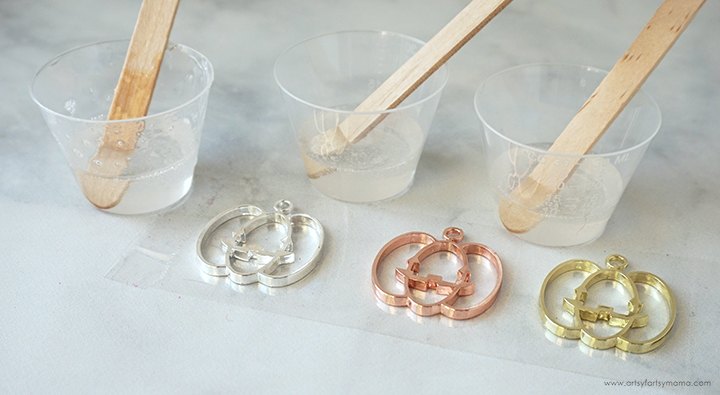
Prepare about 5ml Amazing Clear Cast (per charm) according to package directions. Be sure to work in a well-ventilated area and wear disposable gloves. Pour in equal parts of resin and hardener to the mixing cup. Slowly stir the resin mixture together with a stir stick for two minutes. If the resin looks cloudy or has any streaks running through it, you need to keep stirring it until it becomes clear.
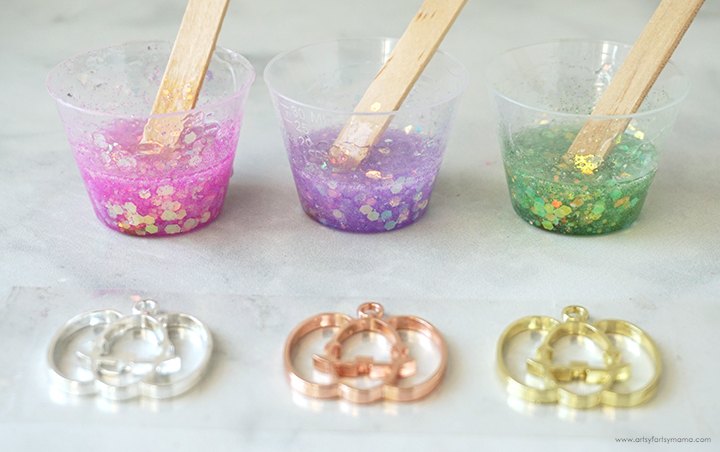
Add a generous amount of pastel iridescent glitter in the color of your choice into each mixing cup. Stir the resin mixtures well for another minute or two until the glitter is evenly incorporated. Give the resin a few minutes to "rest" and allow the bubbles to rise to the top.
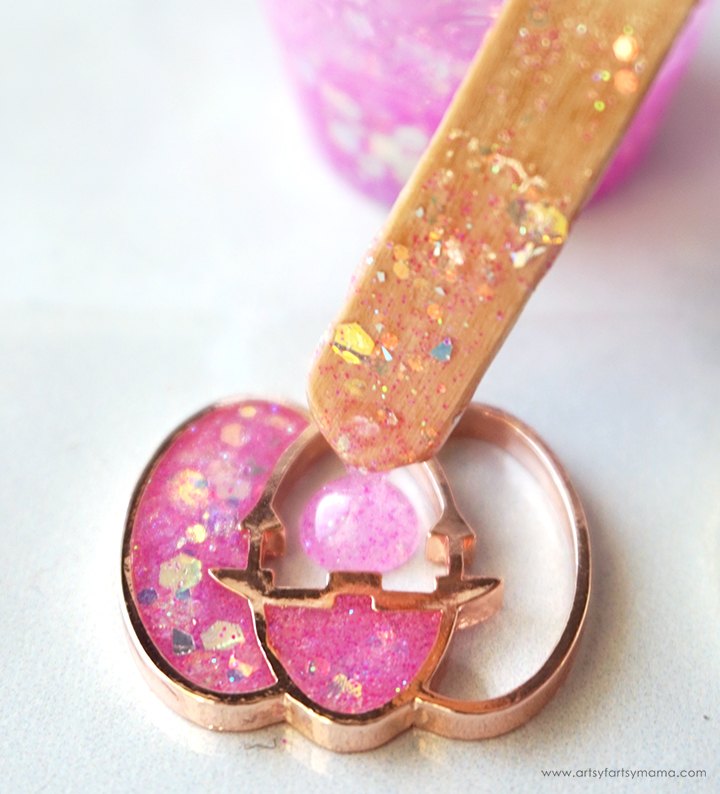
Use your stir stick or toothpick to carefully fill the bezel charm with the glittered resin. Be careful not to overfill! If the resin starts to leak underneath the charm, don't panic! Just leave it there to cure and remind yourself that it will all be okay!
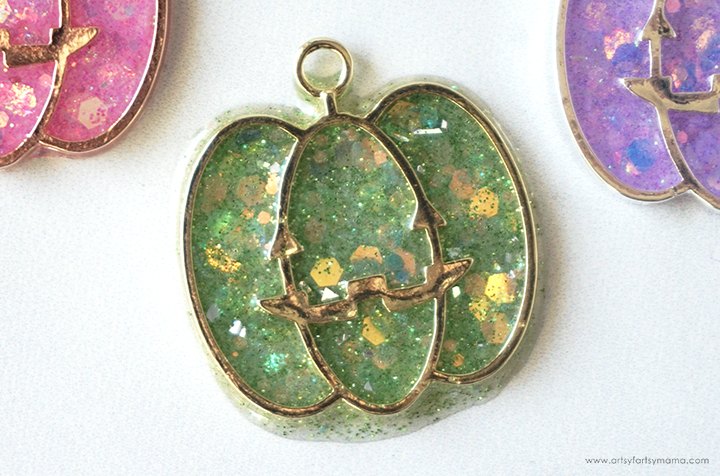
Carefully and slowly peel the packaging tape away from the bezel. As long as the resin is cured, the tape should come off easily and without a problem. If the resin isn't pulling away from the tape, you may need to let it cure for a bit longer. If there is any sticky residue left behind on the charm from the tape, you can gently wipe it away with some rubbing alcohol.
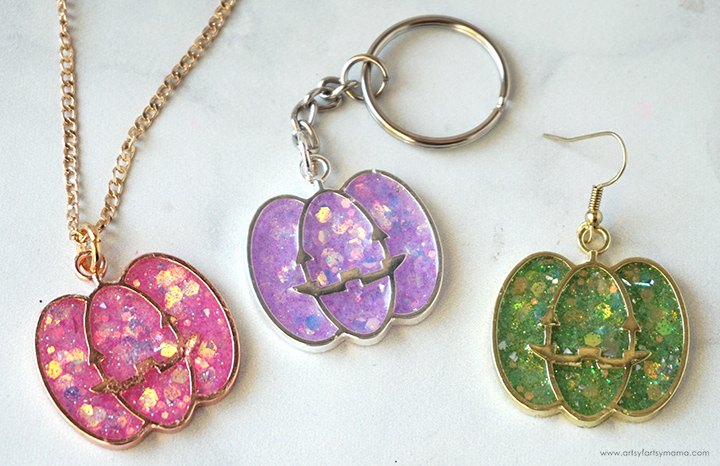
To make the charms into a necklace, zipper pull, or keychain, just add a jump ring to the charm hook. Thread a chain through for a necklace, or add a key ring with chain to the jump ring for a keychain. For earrings, use some jewelry pliers to attach earring hooks to a pair of matching pumpkin charms. Easy peasy!!
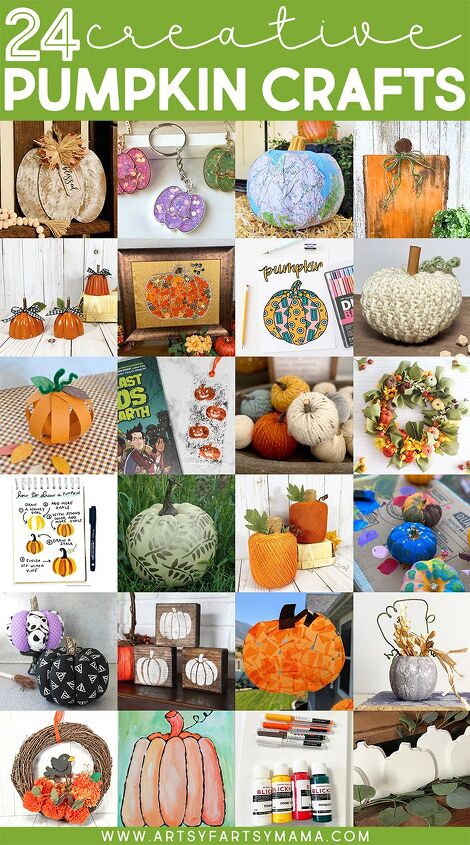
- Aged Metal Pumpkin - The Ruffled Daisy
- Pastel Resin Pumpkin Charms - Artsy-Fartsy Mama (you are here)
- Map Pumpkin - Little Dove
- Stained Wood Pumpkin - Me & My Inklings
- Bundt Pan Mini Pumpkins - Creatively Beth
- Jeweled Pumpkin Art - Jane Clauss
- Pumpkin Coloring Sheet - Liz on Call
- Alpine Stitch Crocheted Pumpkin - 5 Little Monsters
- Paper Pumpkin Craft - We Can Make That
- Halloween Pumpkin Bookmark - Creativities Galore
- Yarn Pumpkins - The Girl Creative
- Mini Pumpkin Wreath - Laura's Crafty Life
- How to Draw a Pumpkin - Smiling Colors
- Hand Painted Pumpkin - The Crafty Blog Stalker
- Crochet Thread Ball Pumpkins - Creatively Beth
- Painted Pumpkin Tips & Ideas - Raegun Ramblings
- No-Sew Fabric Pumpkins - Artsy-Fartsy Mama
- Wooden Pumpkin Blocks - Poofy Cheeks
- Pumpkin Suncatchers - Sunshine and Munchkins
- Faux Cement Pumpkin Cups - She's Crafty
- Wreath with Pom Pom Pumpkins - Me & My Inklings
- Watercolor Pumpkin - Homemade Heather
- Create a Pumpkin Landscape - Jenny's Crayon Collection
- Dollar Tree Pumpkin Mantel Decor - Michelle's Party Plan-It

The author may collect a small share of sales from the links on this page.


Comments
Join the conversation