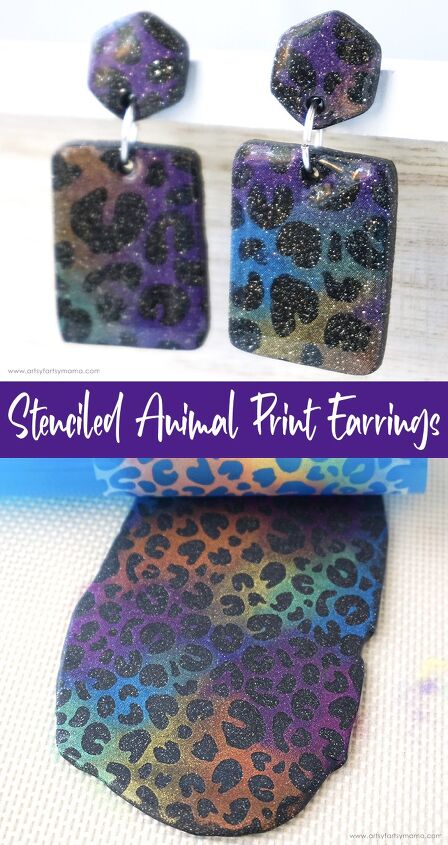
Stenciled Animal Print Earrings
Use custom stencils to create a pair stunning animal print earrings!
One thing I love about crafting is trying to combine multiple techniques. I have loved using stencils in different ways lately, so I decided to experiment and see if it would work with polymer clay. My experiment worked better than I imagined, and I am blown away by how stunning these animal print earrings turned out!! The process is easier than you'd think, and I hope you get inspired by this tutorial to try making a pair of earrings for yourself using Ikonart custom stencils.
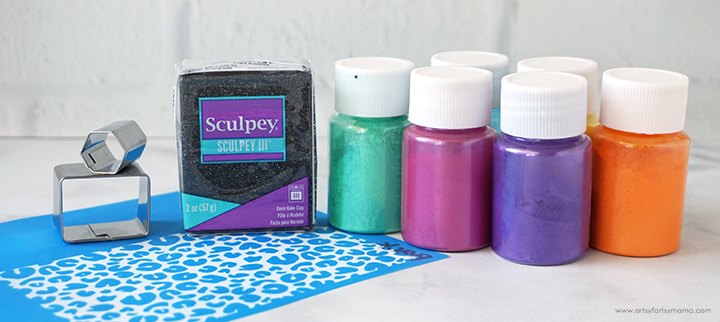
To make your own Stenciled Animal Print Earrings, you will need these supplies:
- Animal Print Design (personal use only)
- Ikonart Custom Stencil Kit
- Black Glitter Polymer Clay
- Acrylic Clay Roller
- 2 Craft Sticks
- Mica Powders
- Cotton Swabs
- Clay Cutters
- Baking Mat
- Gloss Glaze
- 10mm Jump Rings
- Earring Posts
- Jewelry Pliers
The first step in making the stencil with the Ikonart Kit is to print the design. Download the design and print using your favorite printing program on either inkjet or laser Ikonart Printer Film. For best results, make sure you adjust your settings to print as dark as possible.
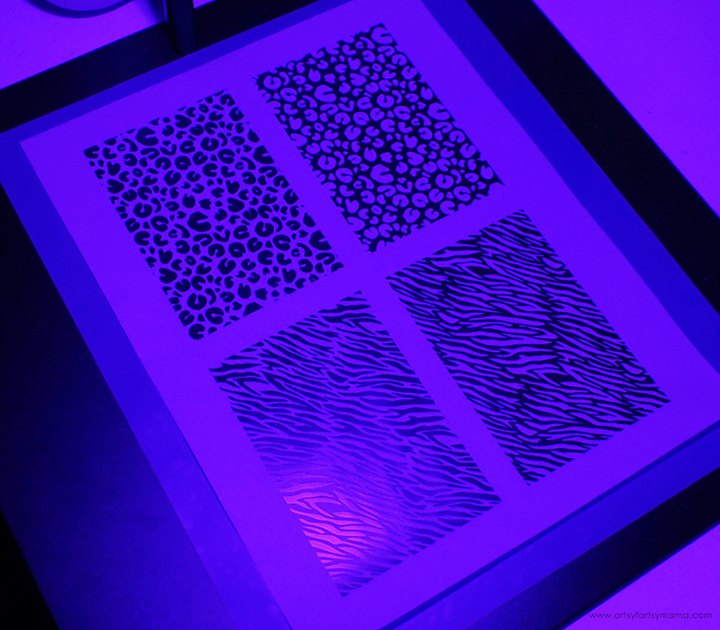
The next step in the process is exposing the stencil film. Set up the Ikonart exposure stand by following the directions included in the kit. Ikonart Stencil Film is light sensitive, so be careful to keep it out of sunlight and bright lights before exposure! Cut the film to the same size or slightly larger than the design print.
Lay the piece of film down on the base of the stand with the textured side facing up. Place the printed design on top of the stencil film, making sure it's right-side up - meaning that if there are words in your design, you should be able to read them.
Lastly, place the clear exposure sheet (found in the stencil film pack) on top and press it down well to seal the design tight against the stencil film. Turn the exposure light on and expose the film for 35 seconds.
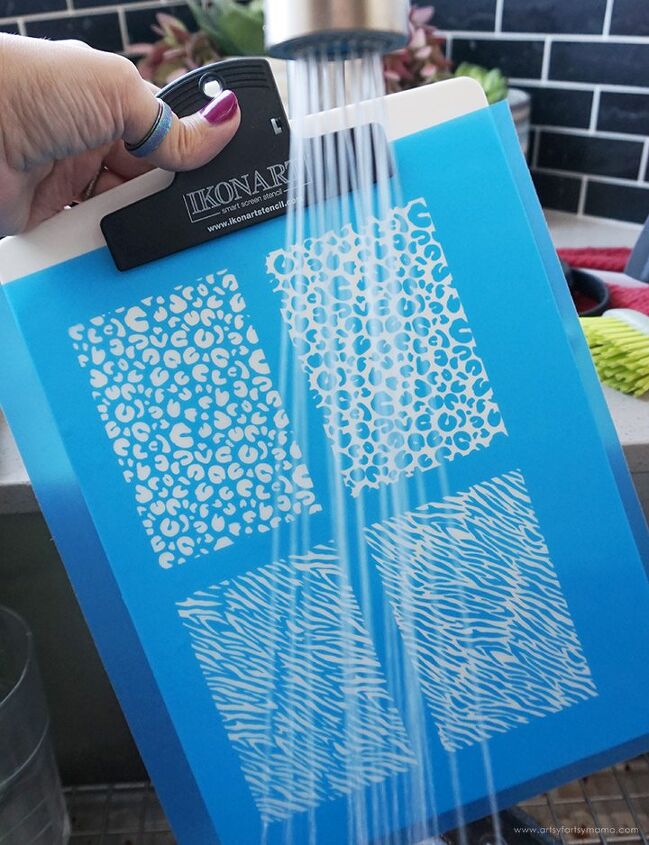
The final step in the stencil-making process is to washout, or rinse, the stencil. Clip the exposed stencil film to the Ikonart clipboard with the shiny side (carrier sheet) touching the clipboard. Use a kitchen sink sprayer to rinse the stencil film with warm/hot water until the design shows through and becomes completely clear. The washout process shouldn't take more than 3 minutes.
Gently blot any excess water off the stencil, and hang or lay flat to dry for about 45 minutes. When he stencil is dry, you shouldn't see any water spots or discoloration. Once dried, place the stencil back on the exposure stand and expose it again for at least 2 minutes. This extra exposure time will increase the durability of the stencil so you can get as much use out of it as possible.
Use a permanent marker and write "back" on the carrier sheet (shiny side) on the back of the stencil.
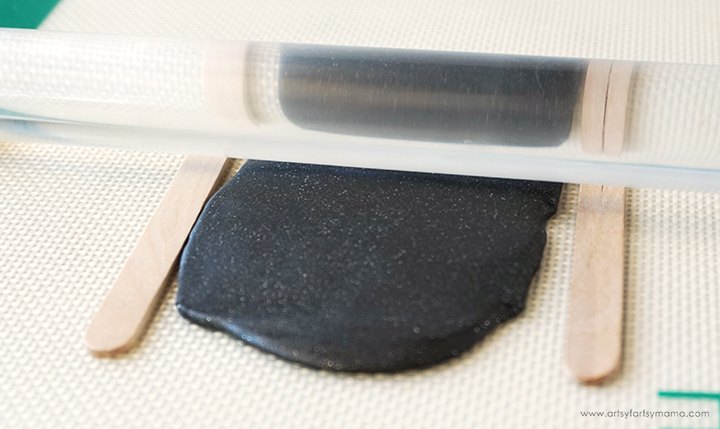
Take two sections of black glitter polymer clay and knead it well to get it into a smooth, pliable texture. Lay two craft sticks down parallel to each other, and then put the clay in between. Use the roller to flatten the clay. Having the sticks on either side of the clay will help to flatten the clay to an even thickness.
Tip: If you work directly on the baking mat, you don't have to worry about transferring your project when it's time to bak the clay, which reduces the chances of you dropping or ruining your project in the process.
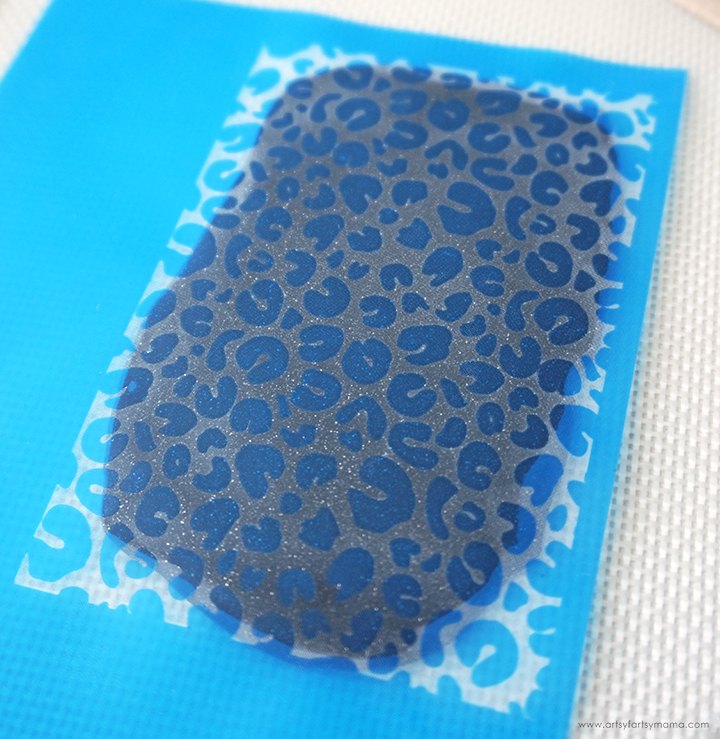
Remove the carrier sheet from the back of the stencil. Place the stencil over the clay, and rub it down gently with your fingers or the roller to make sure it is placed down well and to remove any air bubbles.
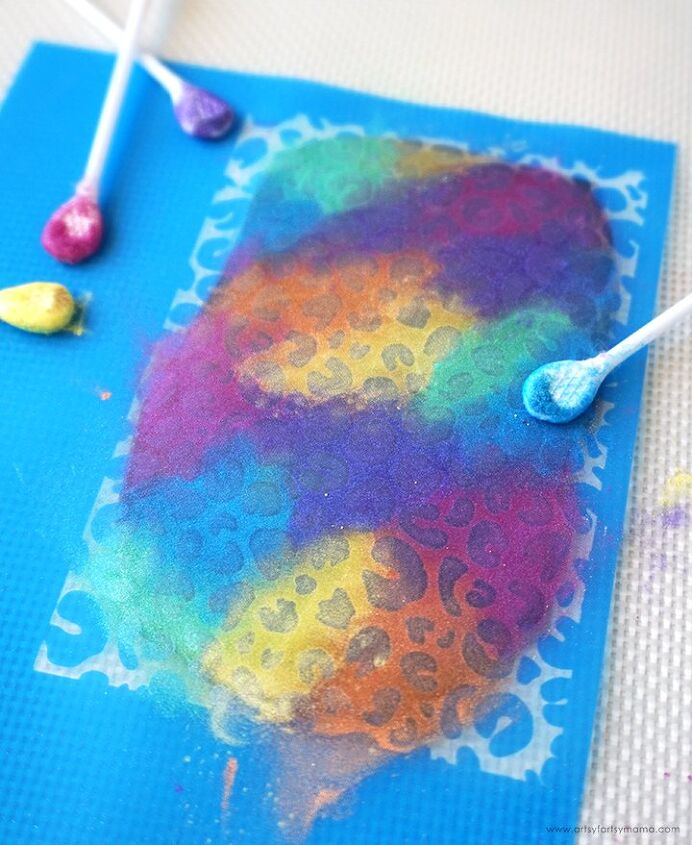
Use a fingertip or cotton swabs to apply mica powders over the stencil. I wanted to see what would happen using a variety of colors, so I just went crazy with it. For a more vibrant look, add 2-3 layers of powder.
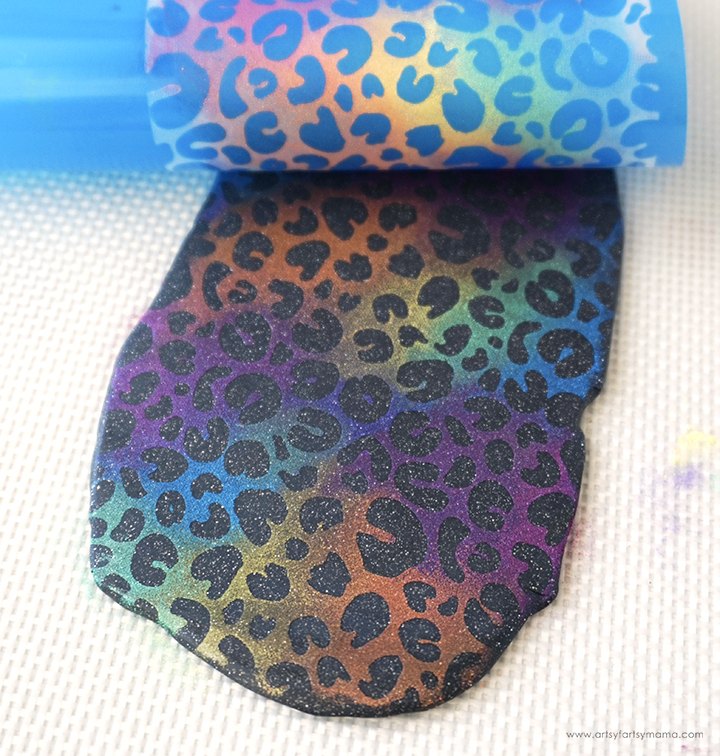
Once you are finished, slowly peel the stencil away to reveal the incredible result! I am blown away by all of the color and how the stencil created such a clean pattern on the clay. I honestly am SO excited to try more experiments with stencils and clay to see what else I can create!!
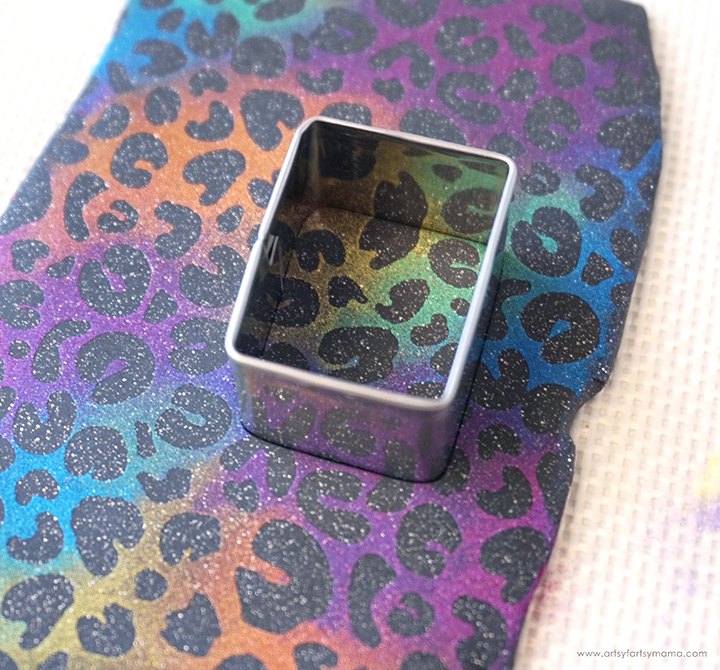
To cut out clay earring shapes, I like using "cookie" cutters in a variety of sizes. Place the cutter in the shape of your choice over the clay and gently press it straight down. Pull the cutter straight up. If the clay stays down, leave it there. If it comes up with the cutter, be careful how you remove it. Poking through the top to push the clay out will leave dents or holes in your work.
Here's a few tricks & tips that have worked for me:
- Place a piece of plastic wrap over the clay and then cut the clay.
- You clay or workspace might be too warm. Put the clay in the fridge or freezer to cool it down.
- Put your mouth over the cutter and blow to set the clay free.
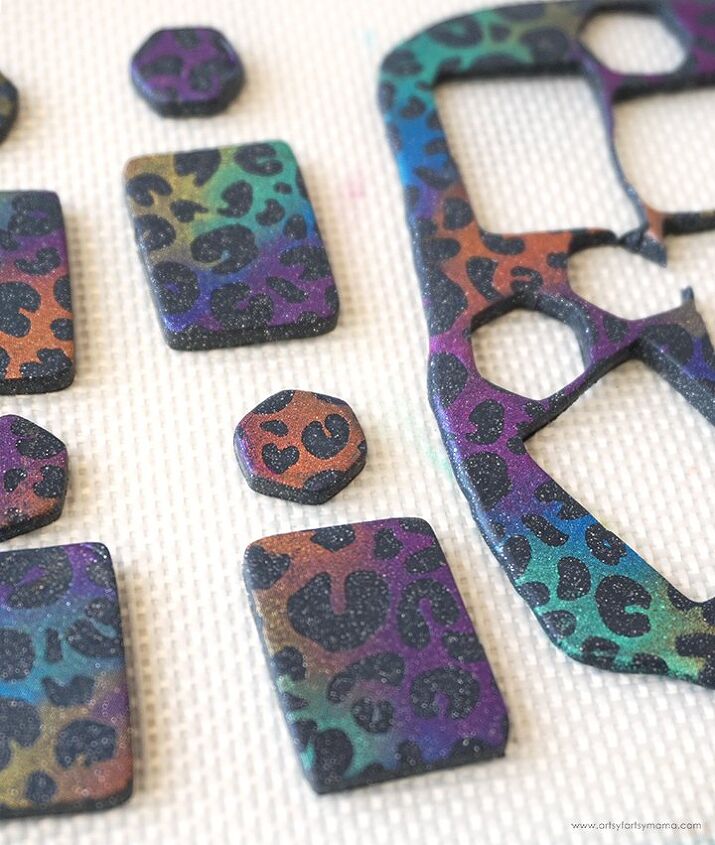
Place your cutters wisely to cut out as many pieces as possible. I was able to cut 8 small hexagon shapes and 4 rectangles, which will make 2 pairs of large earrings, and 2 pairs of small earrings. Save the clay scraps in an airtight container to use for another project or discard it.
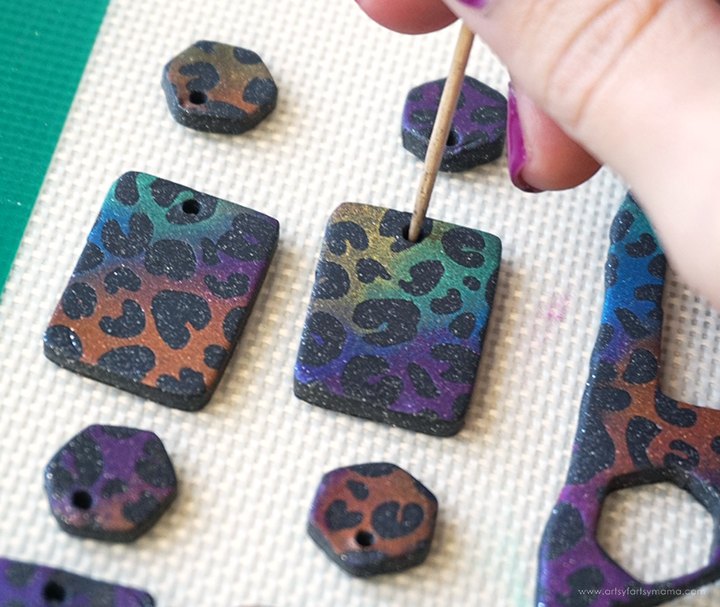
Use a toothpick to poke a hole in the bottom of the hexagon piece and at the top of the rectangle piece, but make sure you aren't putting the hole too close to the edge that it breaks apart. These holes are important to connect the pieces to make your earrings!
Preheat your oven and bake the earring pieces. Most polymer clays are usually baked at 275º for 30 minutes per quarter inch thickness, but refer to your specific clay packaging directions. Once baked, let the pieces cool completely before handling.
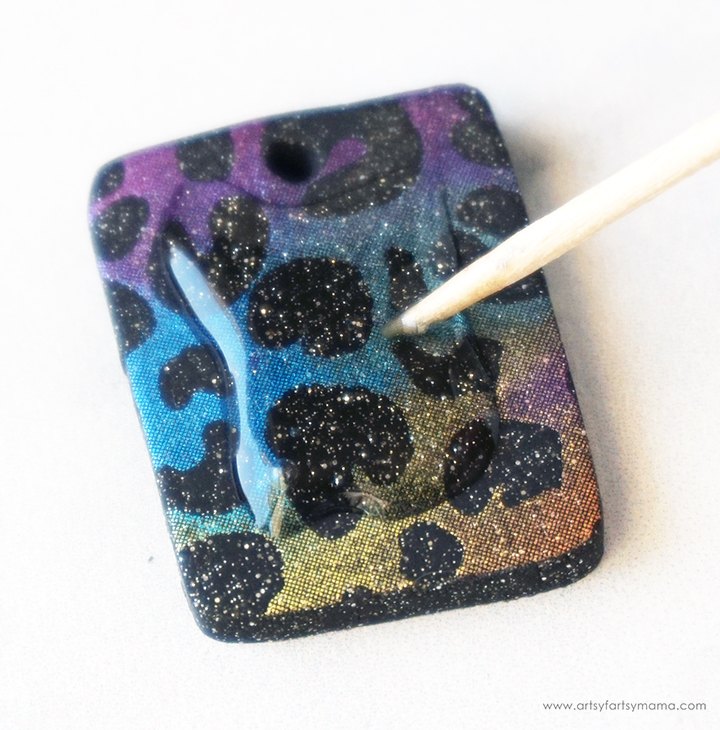
Even after baking, some of the powder can still be rubbed off. To protect your earrings and keep them looking good as new for as long as possible, I recommend covering them with a clear coat. Gloss Glaze is easy to apply and dries fairly quickly. Just add a little bit of glaze on the top of the clay pieces, and gently spread it around using a toothpick.
For an even more durable clear coat, you could apply a layer of resin to the top of the clay pieces. New to resin? Be sure to check out my helpful guide Resin 101: Getting Started with Resin.
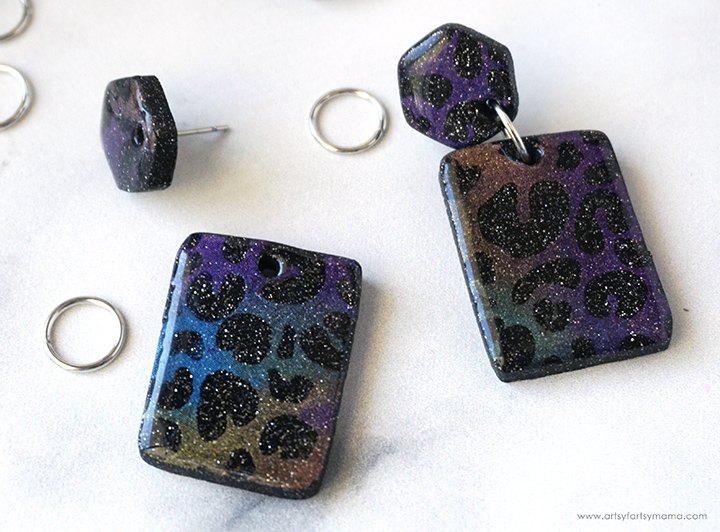
Use jewelry pliers to open the jump ring. Hook the ring through the holes in the rectangle and the hexagon pieces to connect them, and then close the jump ring. Repeat for any other sets of earrings. Next, turn the earrings over and use some strong adhesive to attach an earring post to the back of the hexagon piece. Once the glue has set, the earrings are complete!
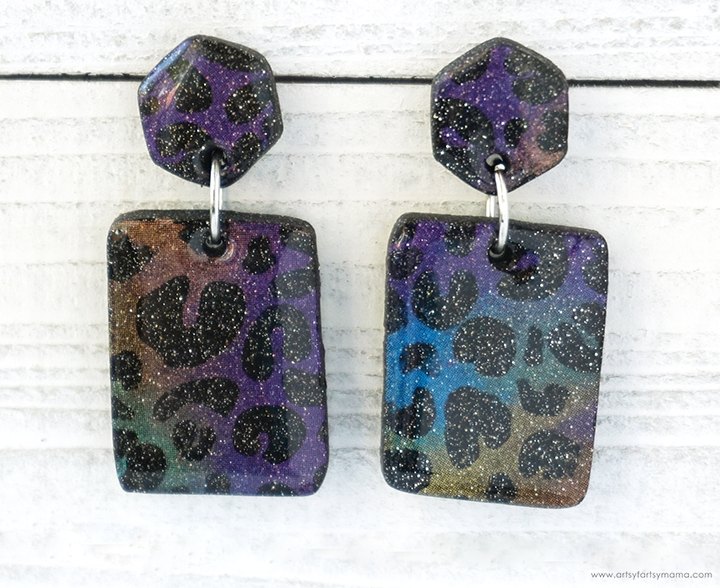
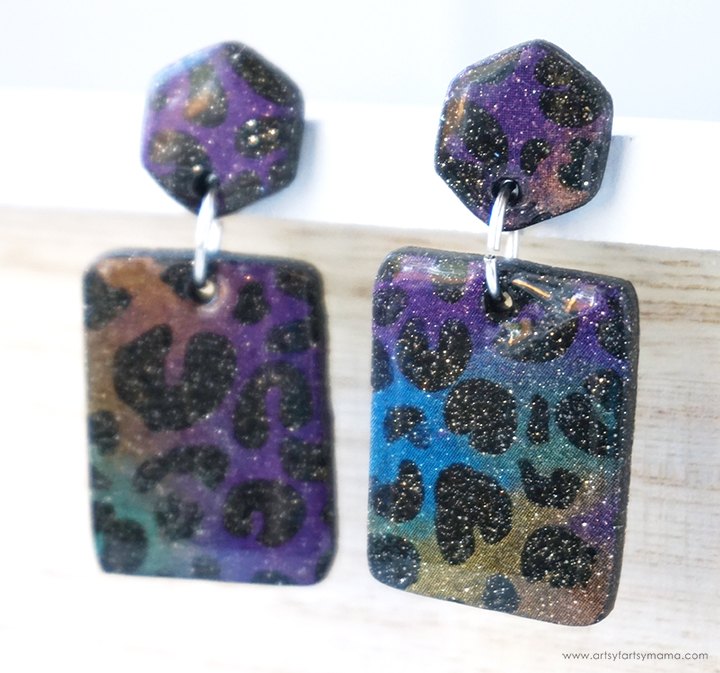
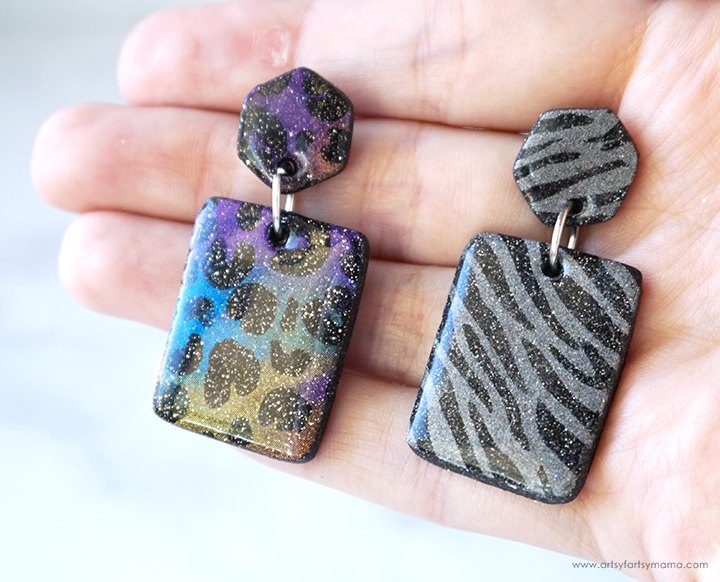
I am honestly blown away by how these earrings turned out, and can't wait to make a bunch of sets to give as gifts to friends!! I love how the black clay leopard spots show through the colorful powders, and that the glitter sparkles throughout it all!! I just can't get enough.
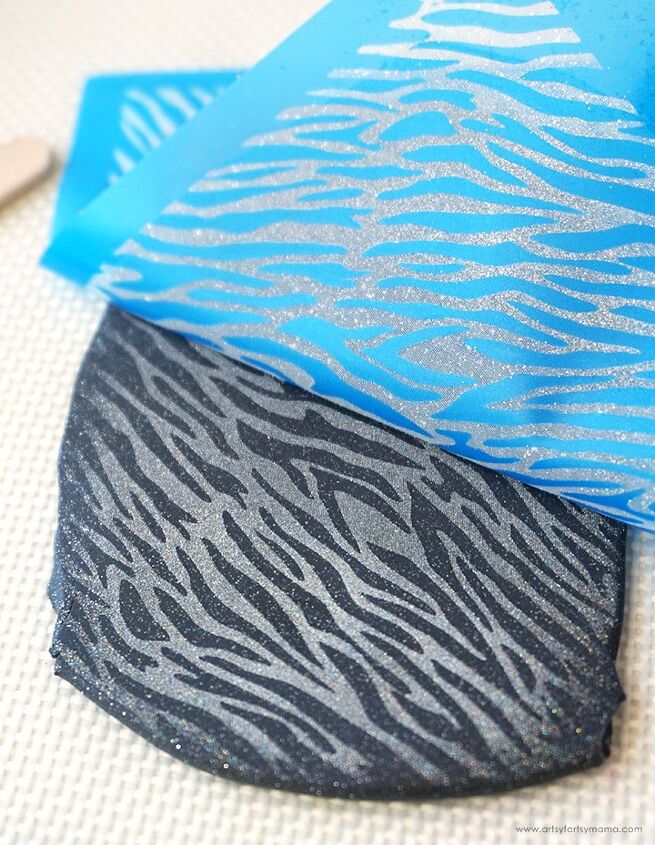
After trying the colorful leopard pattern, I decided to give the zebra stripe pattern a try using a silver holographic powder to see how it would work. Needless to say, I was not disappointed in the least when I peeled the stencil away. When the powder hits the light, the powder changes from a shimmery silver to a rainbow of sparkle!!
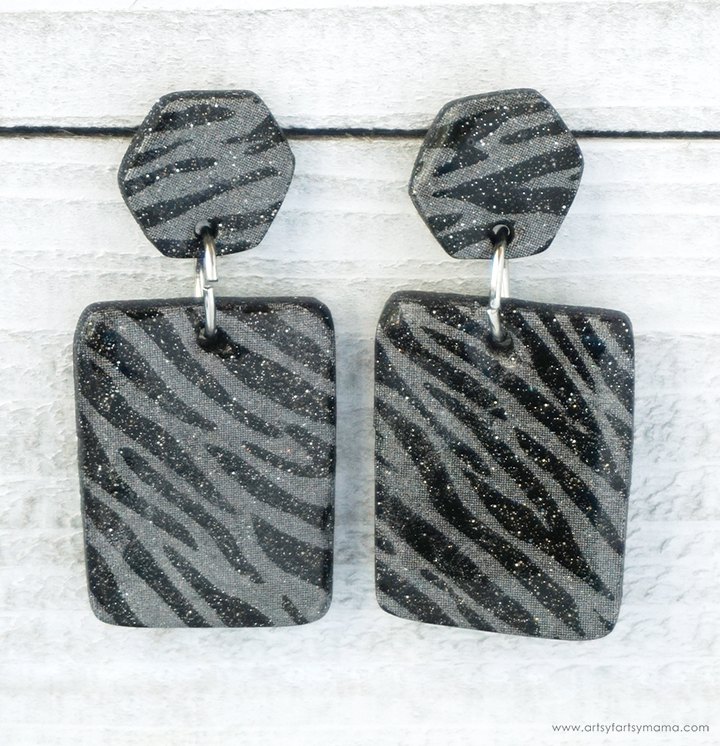
Bake, coat, and connect the pieces the same way as the leopard earrings. I love how these zebra print earrings came out, and think they will add such a fun pop of sparkle to any outfit.
I honestly can't wait to see what else I can create using stencils and polymer clay now that I made these animal print earrings!! Needless to say, the options are endless when it comes to incorporating Ikonart and crafting, and I'm really looking forward to spending more time experimenting to see what else I can come up with!
As always, I would love to see your creations! Share your creations on Instagram, Facebook, or leave a comment/photo on the project pin on Pinterest!
Don't forget to Pin, Like, and Share!
The author may collect a small share of sales from the links on this page.


Comments
Join the conversation