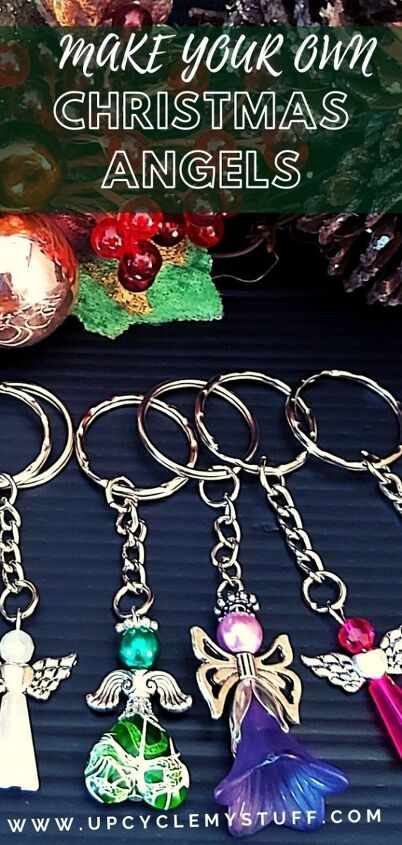
DIY Christmas Angels From Upcycled Jewellery
This tutorial about how to make these sweet DIY Christmas Angels is a guest post form Sharon Aslett of Shazazz Jewellery.
Shazazz Jewellery is a member of our Business Directory and Sharon specialises in upcycling costume jewellery to make new and unique pieces.
These DIY Christmas Angels are no different, here Sharon shows us how to make them and how you can use them to make your own one of a kind jewellery or christmas decorations.
This time of year I am always busy making Christmas Jewellery & stocking fillers. Usually I sell these at craft fairs, however not this year!
Do you have a lot of old beads or crystal beads hanging around from broken costume jewellery that you don’t know what to do with?
I’m going to show you how I make this kind of broken jewellery into DIY Christmas Angels that you can then transform into a lovely pendant, earrings or even Christmas Decorations – there are so many options! They make great gifts too!
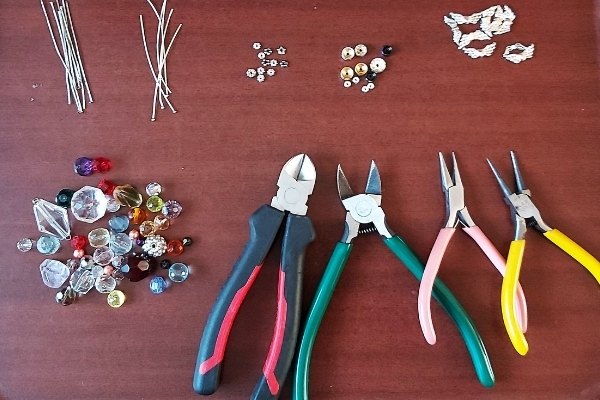
Materials Needed – DIY Christmas Angels
- Long head pins
- Angel Wing Beads
- A variety of colourful beads or crystals of various sizes (from broken costume jewellery)
- Base beads
- ‘Halos’ for your Angel
- Wire cutters
- Round Nose Pliers
- Long Nose Pilers
- Jump Rings and other jewellery findings depending on what you want to do with your Angel (i.e. bracelet, keychain, decoration).
Step 1: Choosing your Beads and Crystals
The first thing you need to do to make your DIY Christmas Angel is to choose the colourful beads or crystals you are going to use for the top & bottom of your Angel.
Because of the nature of my business I always have piles of old costume jewellery to hand ready to be upcycled.
I’ve no doubt you have one or two broken beaded necklaces squirrelled away somewhere too! This is just the project to use them for!
Step 2: Adding a Base Bead

Once you know what the main beads will be for your angel, go ahead and select a long head pin & add on a base bead.
These little beads can be useful as sometimes the larger bead holes are bigger than the head of your long pin….which would mean without the base bead your larger bead could fall right off!
Step 3: Stack your Angel
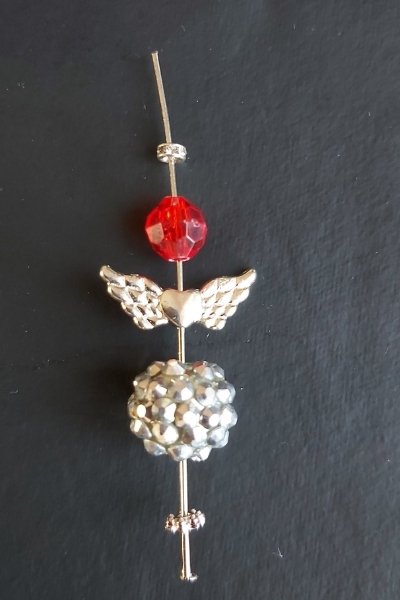
Add the large Angel bottom bead or crystal, followed by the Angel Wing beads, Top Bead or crystal & finally the ‘halo’ onto the head pin.
The ‘halo’ is just a smaller round bead. You might have something that would work in your pile of broken jewellery or you can find similar beads here.
Step 4: Cut off Excess Pin
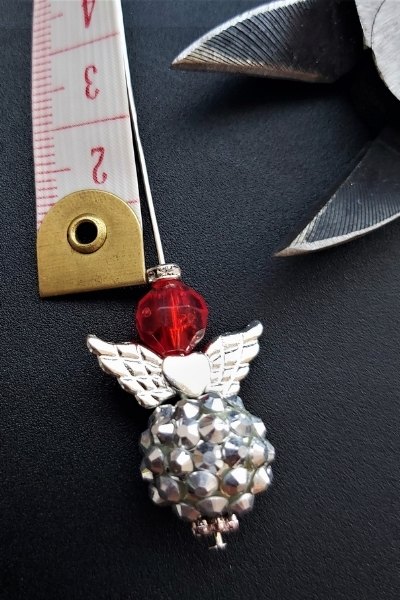
When you are happy with how all your beads look together, tip the beads to the bottom of the head pin & measure 1cm above the top of your ‘halo’ bead.
Then cut the head pin with your wire cutters at that 1cm mark.
Step 5: Create a Loop

Next, using the round nose pliers, bend the 1cm excess from. your long head pin into a loop.
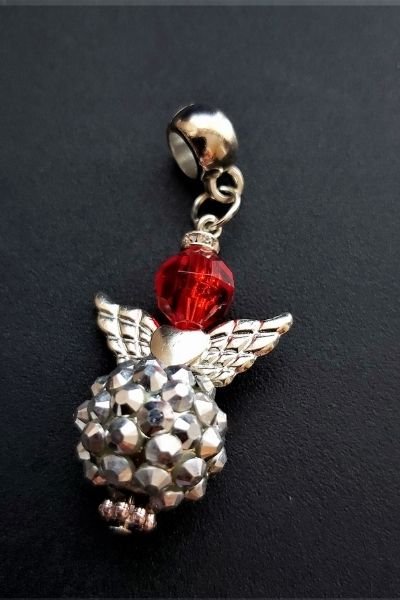
Step 6: Add Extras to Turn your Angel into Jewellery or Christmas Decorations
When your angel is complete and has that little loop at the top you can add it to all sorts of things.
You’ll need different jewellery findings depending on what you want to make.
Below I’ve added a jump ring and bail to make a pendant.

DIY Christmas Angels – What you Can Make with Them?
Below are some more ideas of things you can make with your Christmas Angels.
I use them to make Bracelets, Earrings, Pendants, Keychains and Christmas Decorations.
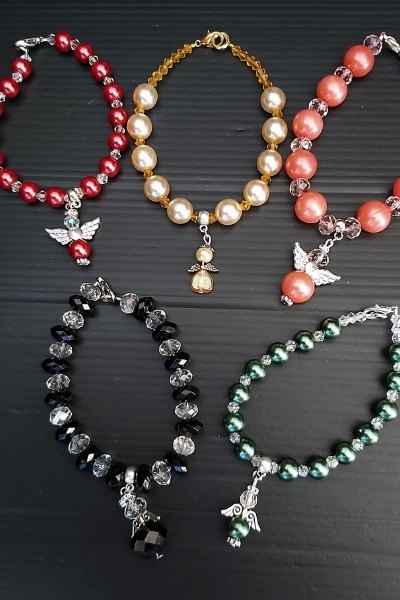
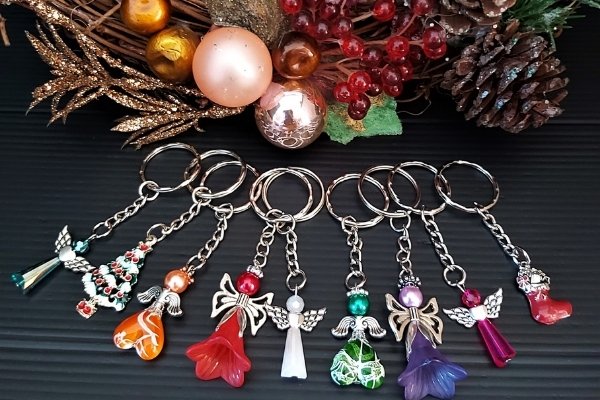
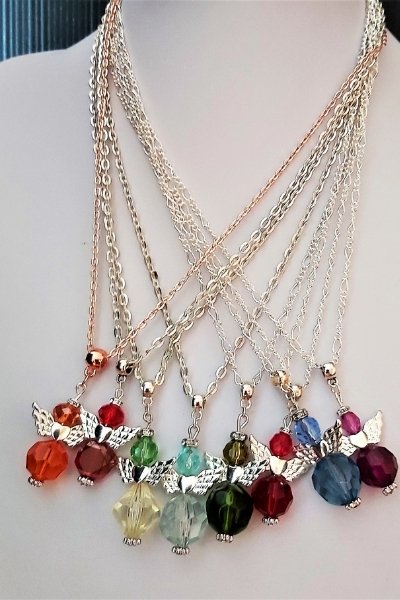
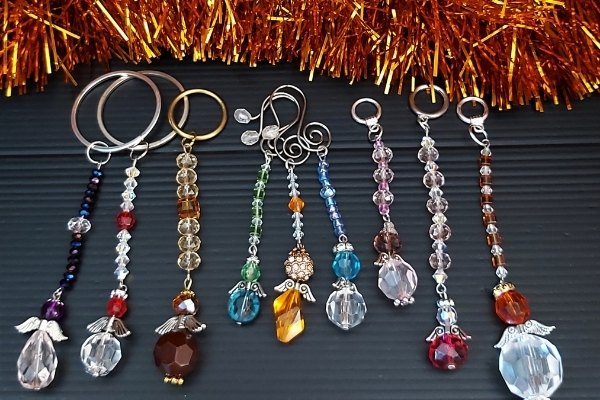
You can find similar items for sale in my online shop as part of my Christmas Collection!
If you liked this post and you want to come back to it later, don’t forget to Pin it!

Stockenchurch, Bucks, UK
- Full Range of Jewellery
- Current collections include: Statement Necklaces; Pendant Necklaces; Earrings, Bracelets & Festival Jewellery.
- Commissions Accepted
- Worldwide Shipping
The author may collect a small share of sales from the links on this page.


Comments
Join the conversation