Upcycle Tutorial: DIY Overalls From Jeans

Today, I want to show you one of my favorite thrift flips. I made a pair of DIY overalls from jeans that I thrifted.
As the overalls have no front opening, you need to start with a pair of jeans that you can pull on and off without undoing them.
Stretch jeans or a pair a size larger than you would usually wear would both work.
Tools and materials:
- Pair of jeans
- Cycling shorts as template
- Fusible interfacing
- 2 snap-on buttons
- 2 overall fasteners
- Hammer
- Fabric marker
- Measuring tape
- Ruler or straight edge
- Pins
- Scissors
- Leather sewing needle
- Sewing machine
- Serger (optional)
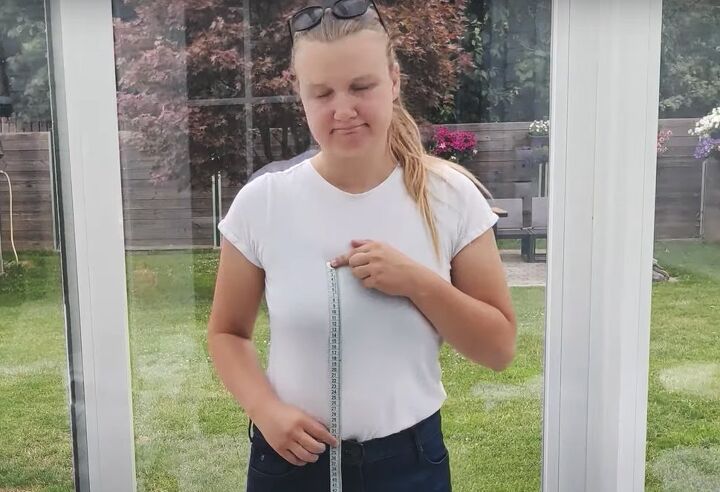
1. Take measurements
Wear the jeans.
I used a pair of cycling or modesty shorts to calculate the length I wanted and marked it on the front legs.
Measure the length of the front bib from the jeans waistband.
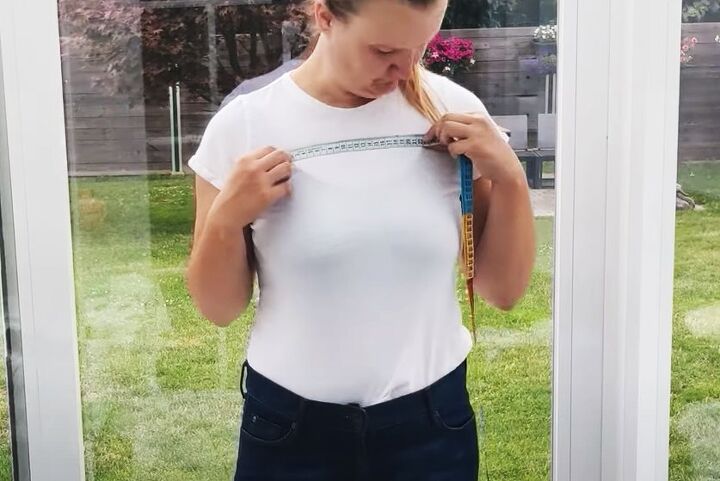
For the width of the top of the bib, measure between your bra straps.
Add 1 inch (3 cm) to both measurements for seam allowances.
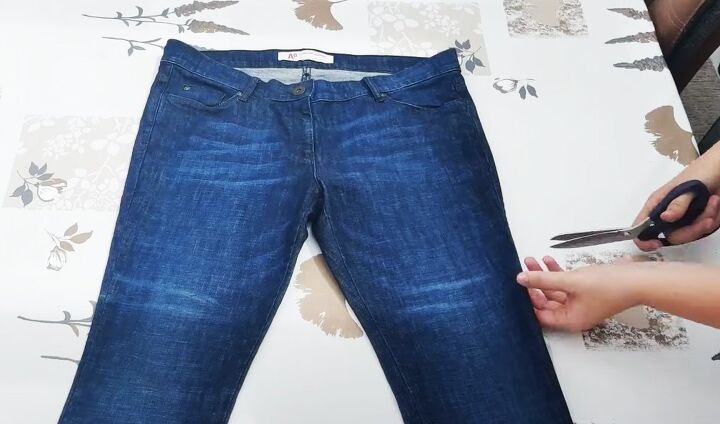
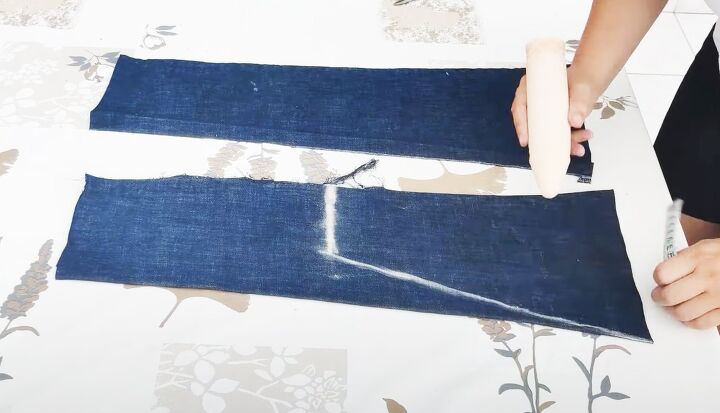
2. Disassemble the jeans
If you want an unraveled look for the hem, cut across the jeans legs slightly above the finished length you marked.
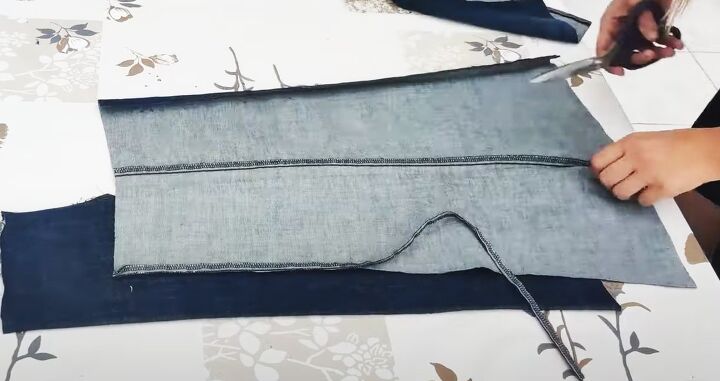
Cut open both seams of the remaining leg fabric. Cut off the flat felled seams.
3. Cut out the bibs and straps
Place two of the leg pieces side by side. Check that the width of the widest part isn’t wider than the front waistband of the jeans.
Measure the length of the bib from the base of one piece and mark half the top width from the straight edge.
Connect the end of this line to the outer edge of the bottom edge.
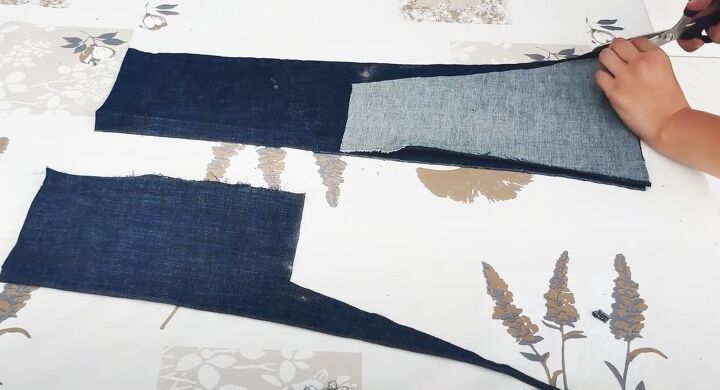
Cut this piece out, flip it over and use it as a template to cut a mirror image piece from the other half of the leg.
Make the back bib in the same way, but reduce the width at the top to 2 inches (5 cm) on each piece.
I made mine wider to start with and had to reduce it later when I added the straps.
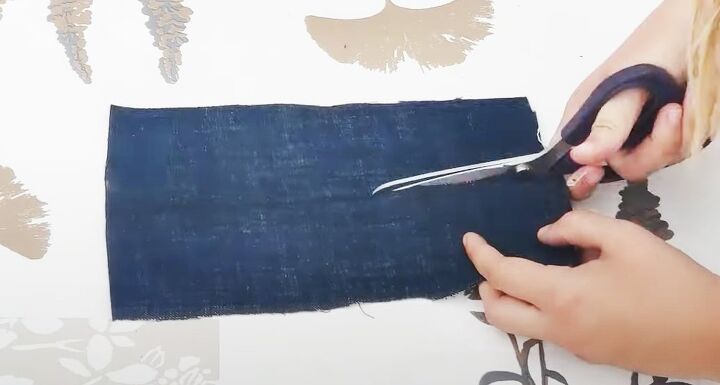
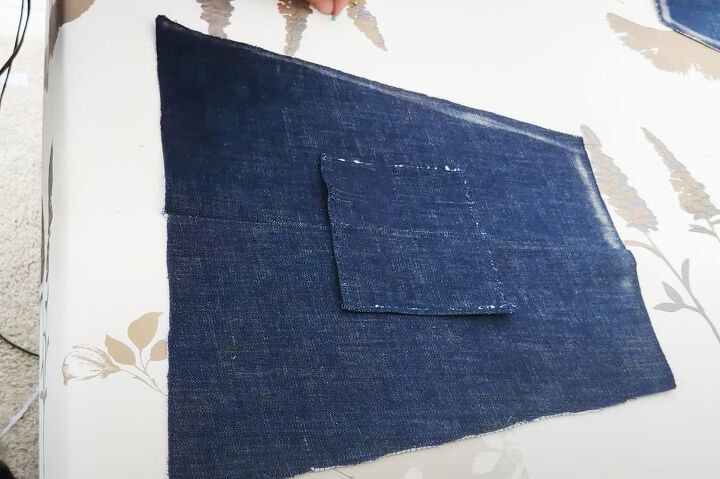
Cut 3 inch (8 cm) wide strips from the remaining fabric for the straps and front pocket.
Cut one of the strips in half to make the pocket.

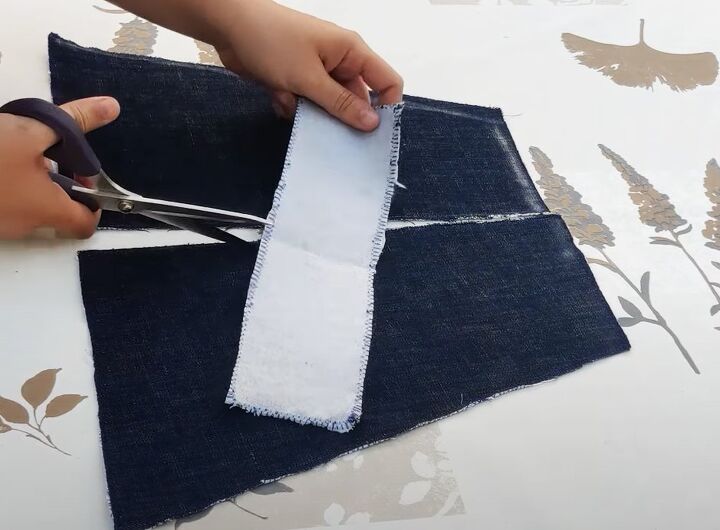
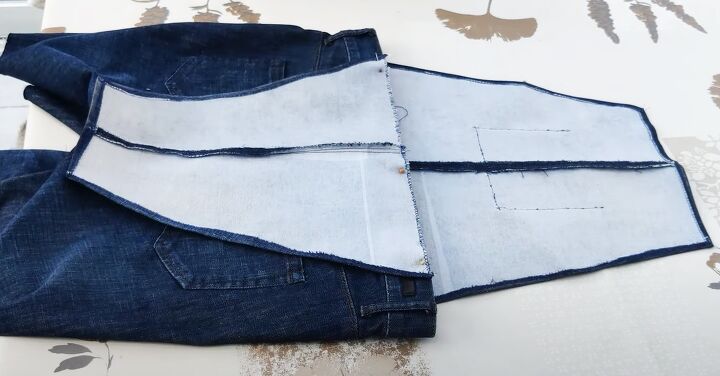
4. Assemble the bibs
Add fusible interfacing to the wrong side of the bib, strap and pocket pieces.
Optionally, zigzag stitch or serge the edges of each piece.
Join the straight edges of the front and back bibs and the long edges of the pocket, with the right sides facing. I sewed each seam twice.
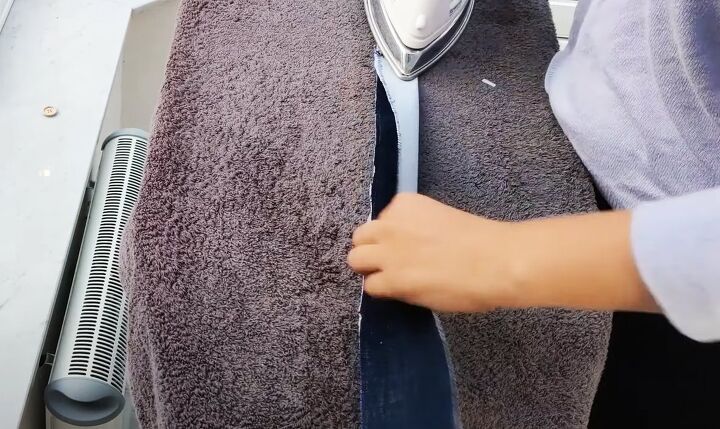
Press the seams open.
Turn under the top edge of the pocket and sew it in place.
Turn under and press the other pocket edges.
Center the pocket on the front bib and sew it around the other three edges.
Turn in, press and sew a narrow hem at the top and side edges of the bibs.

5. Sew on the bibs
Stitch the button on the waistband closed.
Pin the front bib to the front waistband, with the right sides together and the bib seam aligned to the front opening.
Sew it in place slowly and carefully, as you’ll be stitching through several thick layers of fabric.
I definitely advise using a needle for sewing leather at this stage.
Attach the back bib in the same way.
6. Attach the straps
Join the short edges of the strips to make two straps that are long enough to reach from the top of one bib over your shoulder to the other bib, with a few inches excess.
Press the seams open.
Fold each strip in half lengthways with the right sides together and sew as closely as you can to the edge.
Turn the strips right side out and press flat.

Pin and sew one end of each strap securely to the top of the back bib at an angle.
It was at this point that I realized my original width of 3 inches (8 cm) for the bib was too wide, and had to adjust it.
Hopefully you learned from my error and made yours the right width to start with!
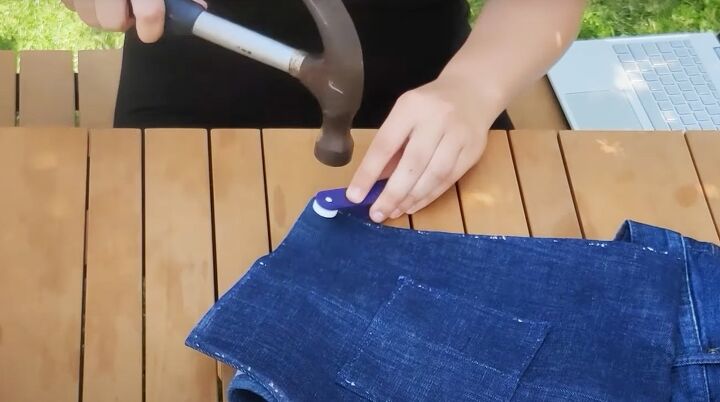
7. Attach the fastenings
Add snap-on buttons to the top corners of the front bib.
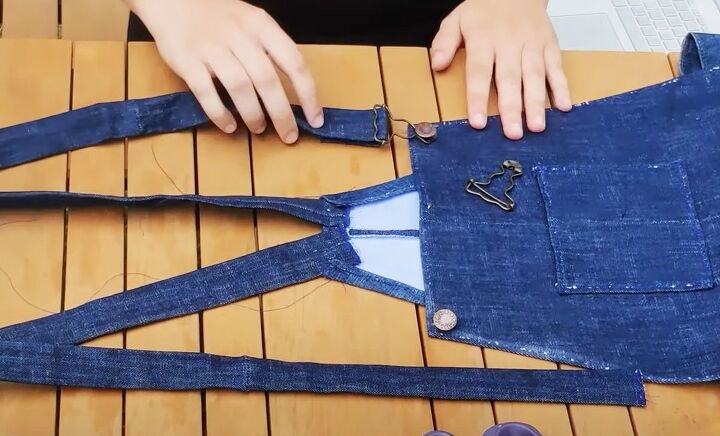
Feed the other end of each strap through the overall fasteners.
Try the overalls on and pin and sew the straps at the correct length. Cut off any excess.

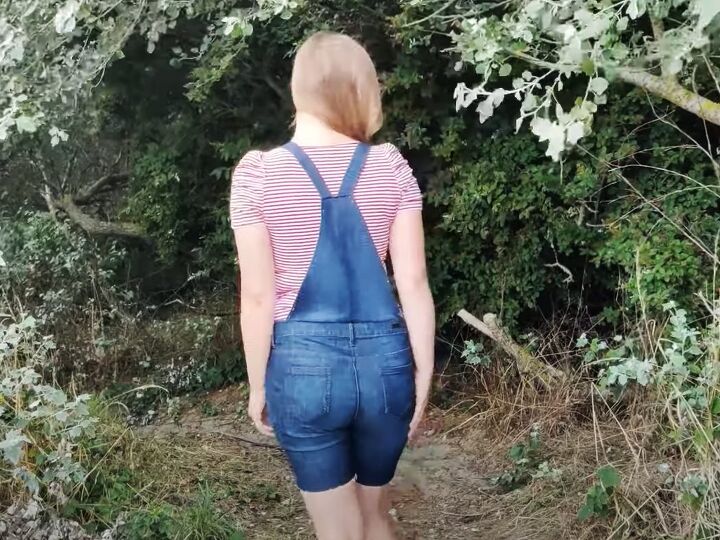
DIY overalls from jeans
I love how this thrift flip turned out. My DIY overalls are the perfect length and fit really well.
If you prefer, you can leave off the back bib completely and make longer straps that attach to the back waistband.
Please let me know what you think of this project in the comments.
The author may collect a small share of sales from the links on this page.


Comments
Join the conversation