How to Sew Your Own Jumpsuit - A Glamorous Outfit for a Holiday Party

In this tutorial, I’m going to show you how to sew your own jumpsuit. I was inspired by a gorgeous gold jumpsuit by Reformation (see below), but the price tag was $230! Instead, I decided to fashion my own DIY jumpsuit sewing pattern and make my own version, which cost me just $15.
This sexy and glamorous DIY jumpsuit is the perfect party outfit for the upcoming festive season. Follow this how to sew a jumpsuit tutorial to see exactly how I made my new velvet party piece and the steps to make your own too!
Tools and materials:
- Velvet fabric
- Sewing machine
- Fabric marker
- Measuring tape
- Pins
- Thread
- Scissors
- Seam ripper
- Elastic
- Bobby pin
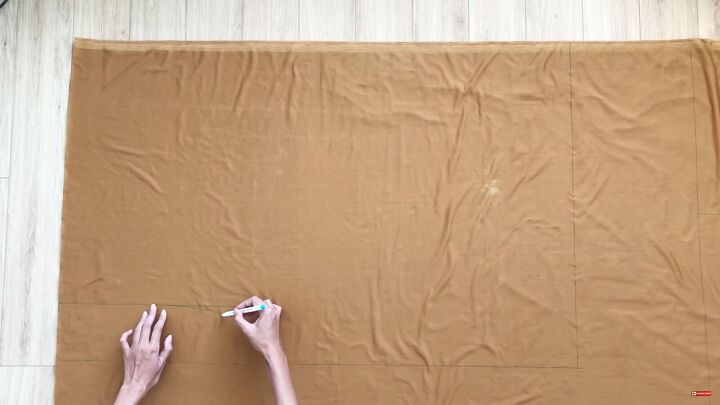
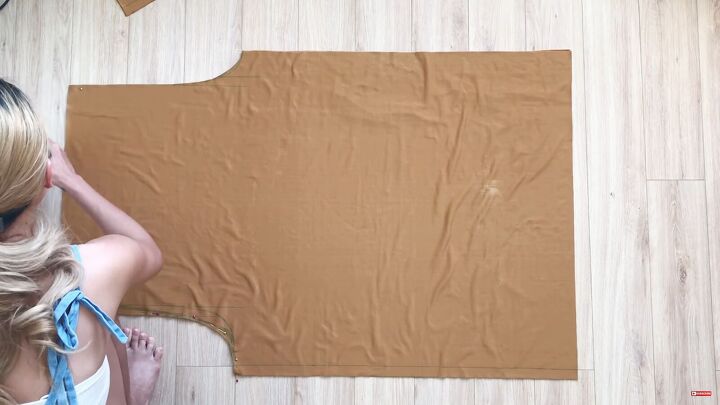
1. Make the DIY jumpsuit sewing pattern
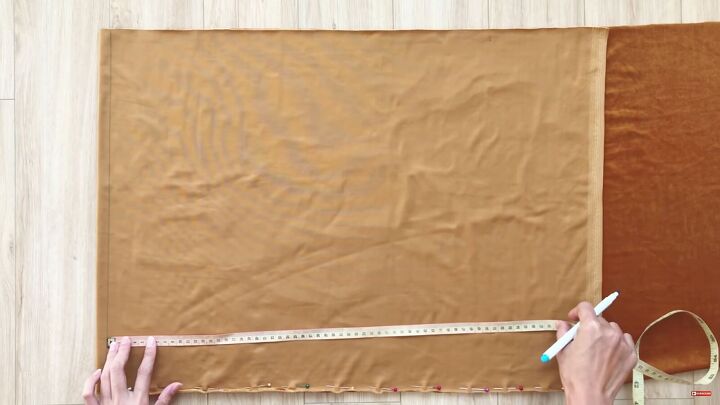
For the top part of the DIY jumpsuit, fold the fabric and pin the edges.
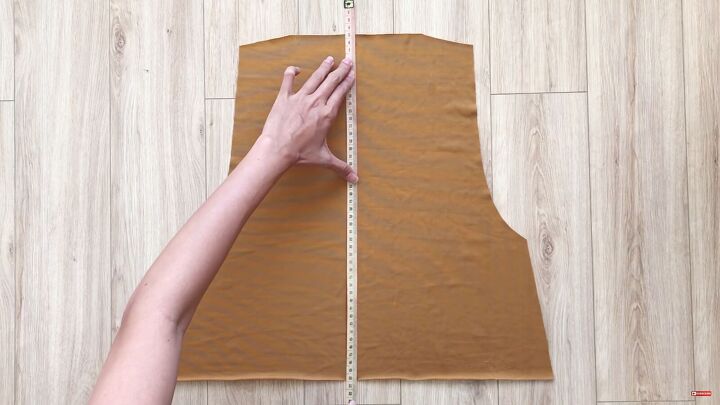
Measure 50cm (19.68”) width, which is half of your hip size + 4cm (1.57”). Then, measure and mark 42cm (16.53”), the length from my shoulder to the belly button.
Note that these sizes may differ for you, so be sure to measure yourself first.
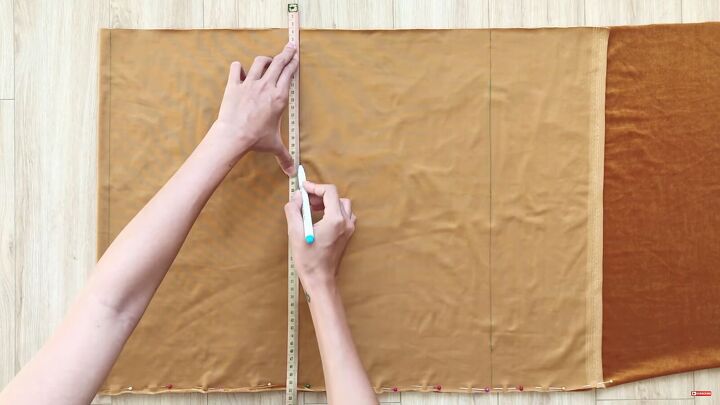
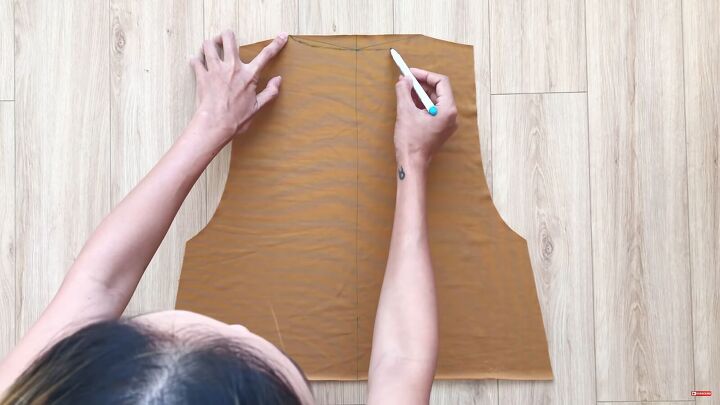
Divide the rectangle in half by marking the center of the width line and drawing a line across.
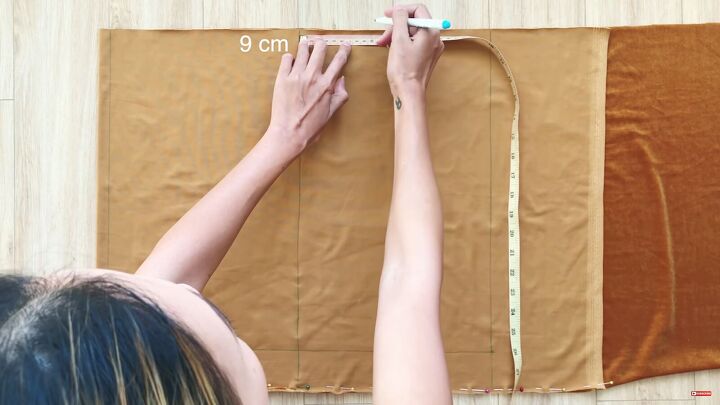
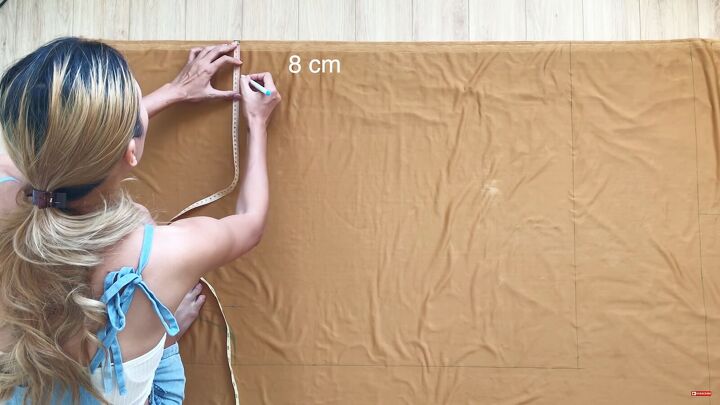
Mark 9cm (3.54”) on either side of the centerline. This opening will be for your neck.
Draw a line from these outer points downward.
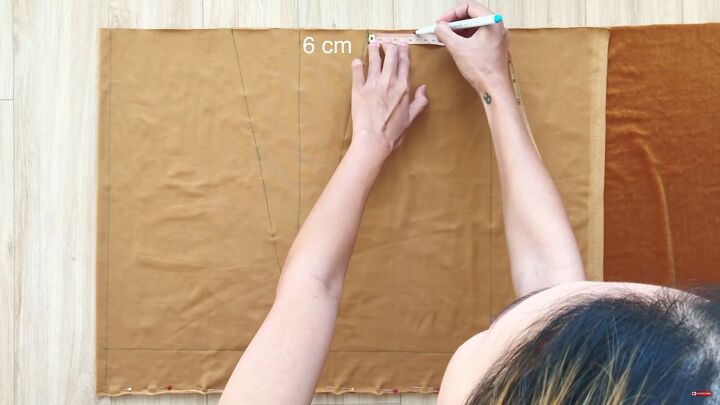
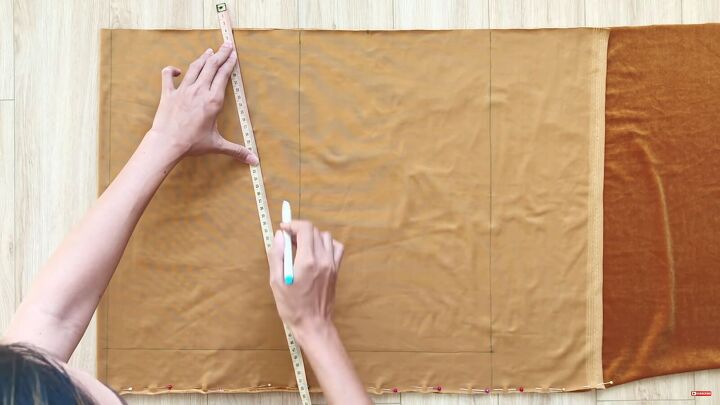
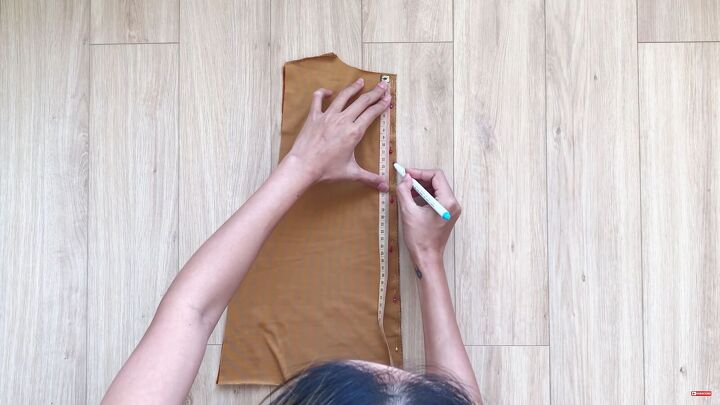
Mark 6cm (2.36”) from the 9cm (3.54”) markings on either side; this is the width of the top at the shoulder line.
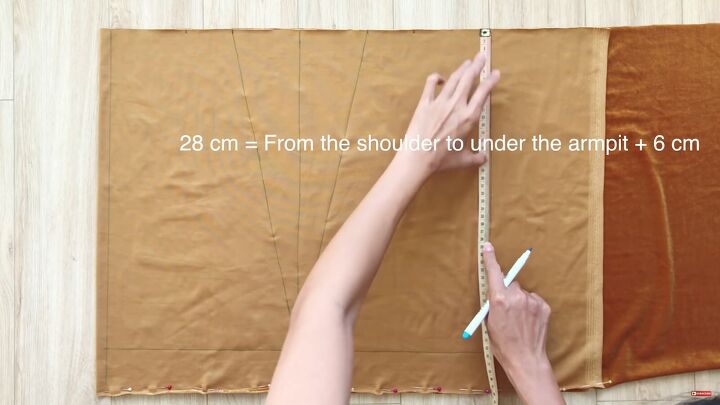
Measure 28cm (11.02”) from the shoulder mark downward. This will be the armhole.
Connect the two marks and draw a curved line.
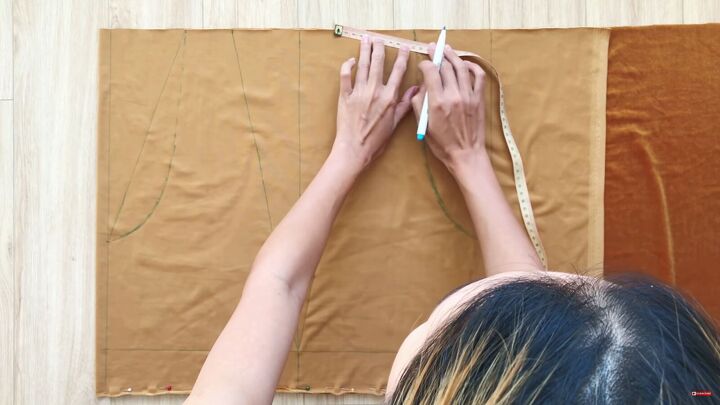
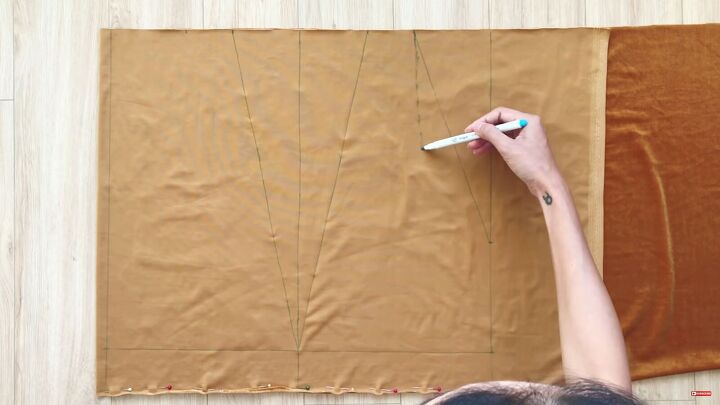
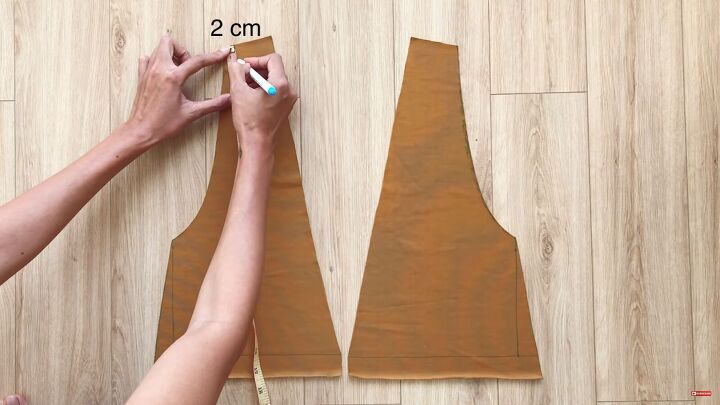
Mark 2cm (0.78”) at the top of the curved line and connect it to the adjacent line.
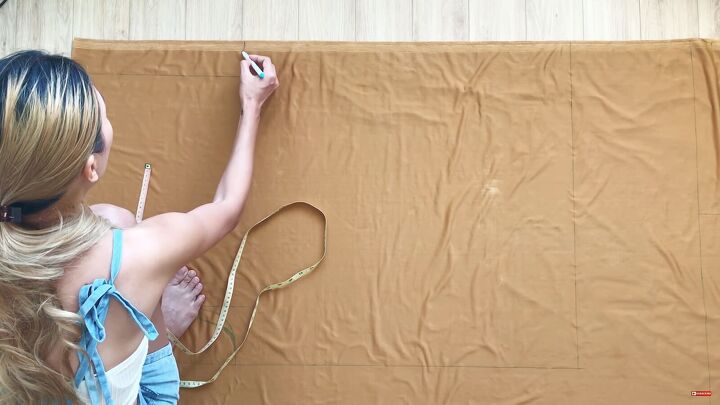
Draw 3cm (1.18”) inward from the bottom sides of the top and draw a line to connect the two.
Connect the top of these lines to the bottom line.
Make the top a little longer at the bottom, by about 3cm (1.18”). Then, elongate the side, diagonal lines.

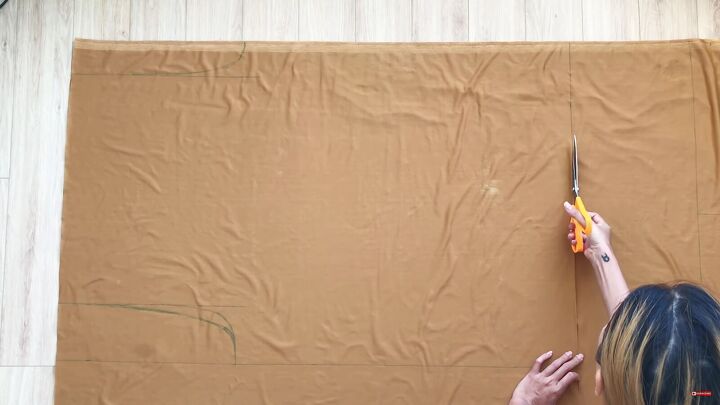
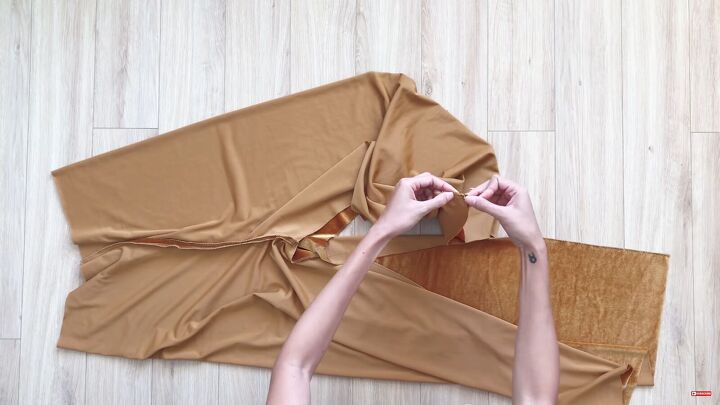
2. Cut
Cut out the pattern.

You should now have two pieces. Cut the neck area of one of the pieces.
Measure 2cm (0.78”) from the shoulder seam and cut to make it shorter at the back.
Draw a straight line down the middle of the back piece.
Mark 2cm (0.78”) from the top centerline and draw outward lines from that point. Draw a curve and cut it out, including the middle centerline.
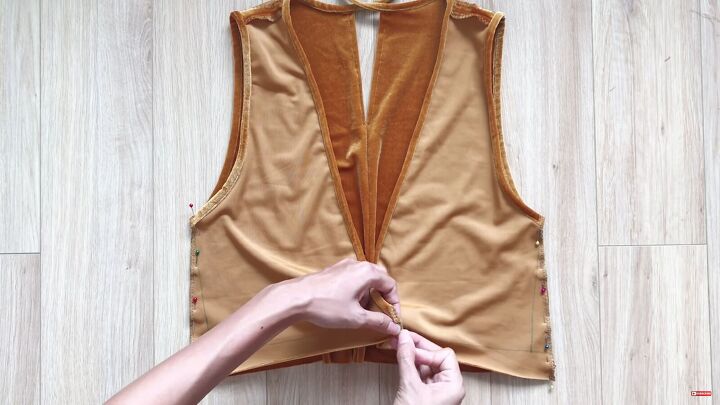
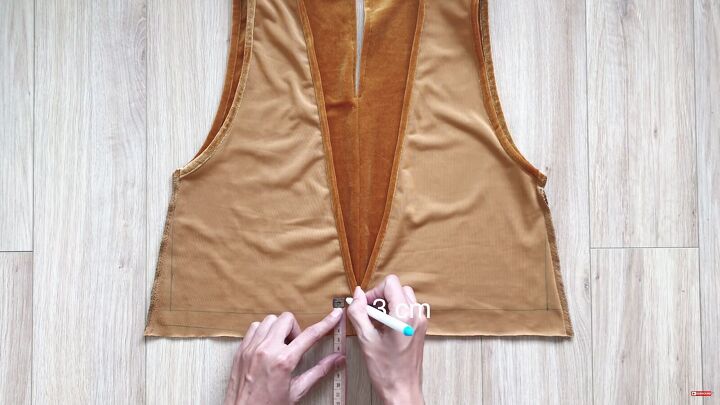
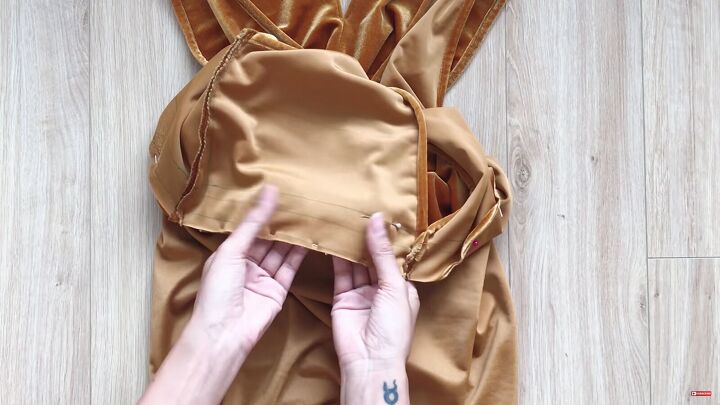
3. Sew the bodice
Pin the back pieces, mark 15cm (5.90”) from the top, and sew from that point downward.
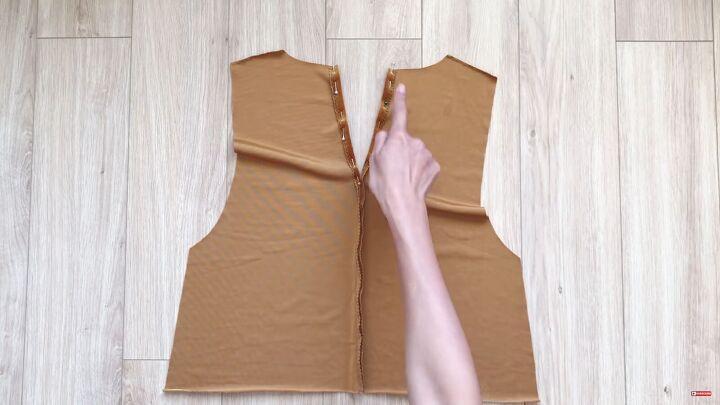
Fold the raw edges inside and sew.
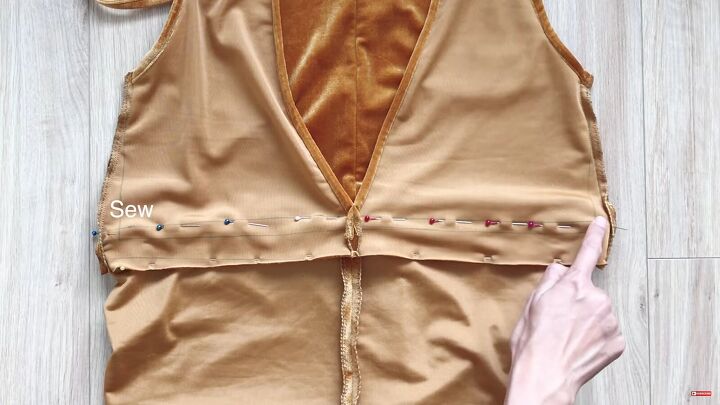
Connect the front and back parts at the shoulder seams and sew to secure.
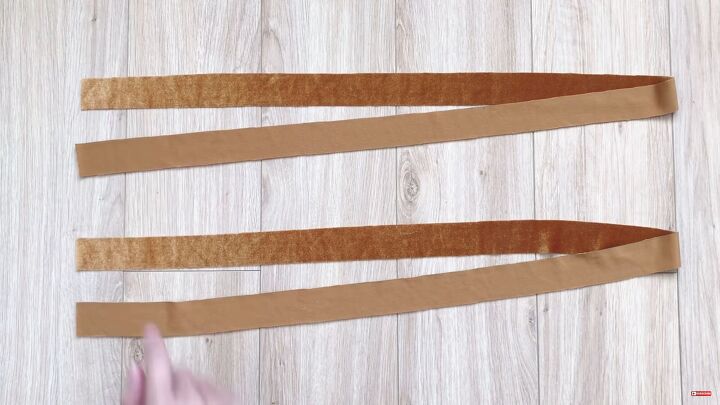
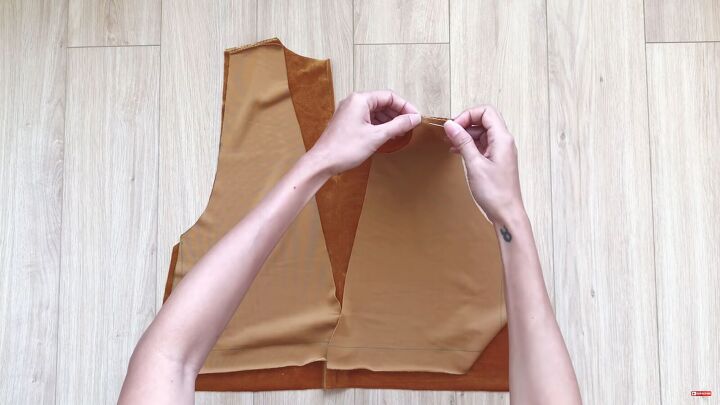
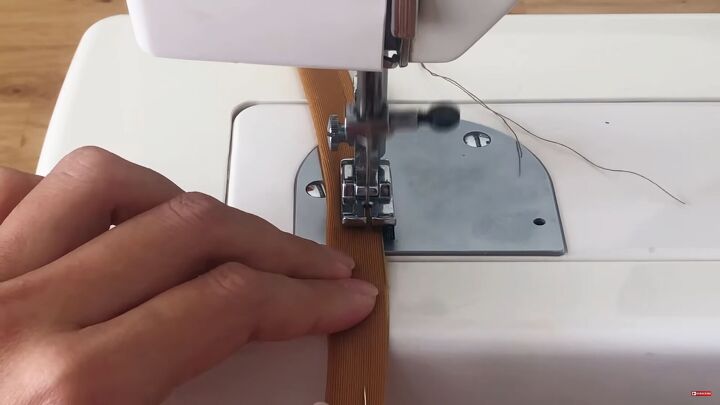
4. Sew the bias tape
Cut two long rectangles measuring 3 x 60cm (1.18” x 23.6”).
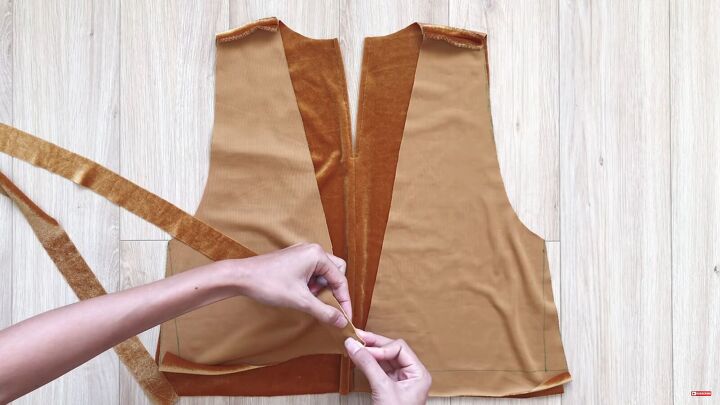
This is the bias tape for the front and back neckline. Pin as shown.
Tip: Watch my video from 7:28 to see exactly how I fold and create the bias tape.
5. Sew the side seams
Pin the side seams and front, middle parting, and sew to secure.
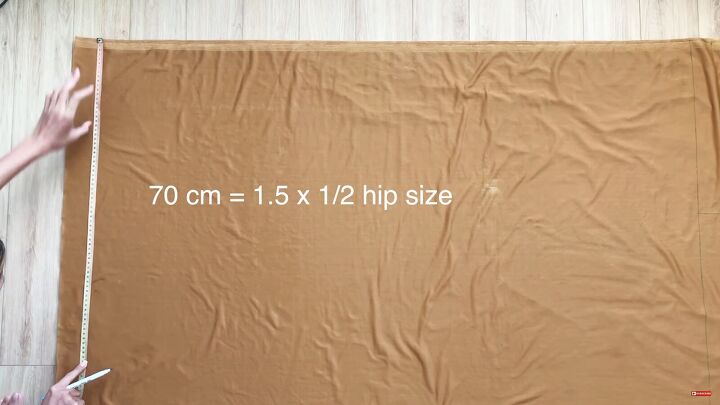
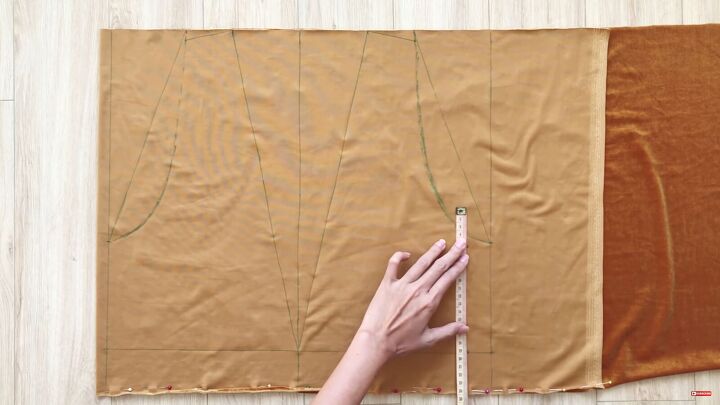
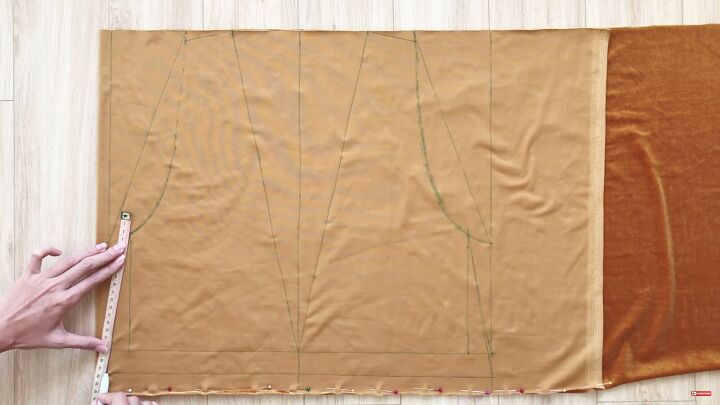
6. Draw the pants pattern
Now, fold your fabric and measure 1.5 x ½ of your hip size. Mine was 70cm (27.55”) in length. Then, measure your desired length.
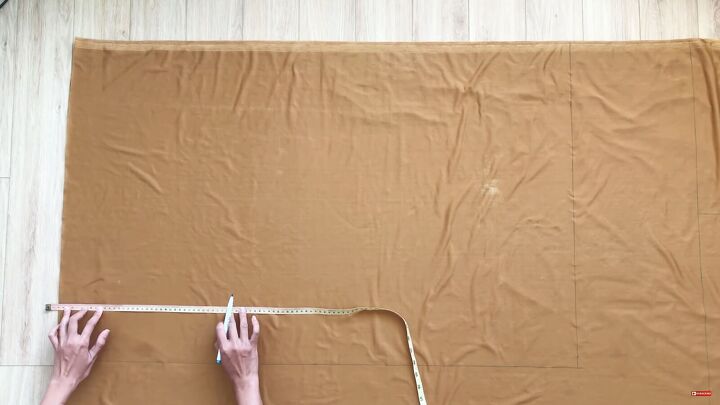
Mark 12cm (4.72”) from the width line, upward. Then, draw a straight line across.
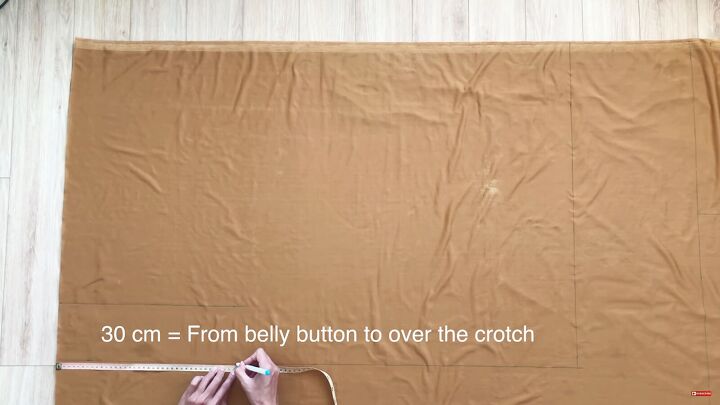
Then mark 30cm (11.81”) - the width from your belly button to your crotch.
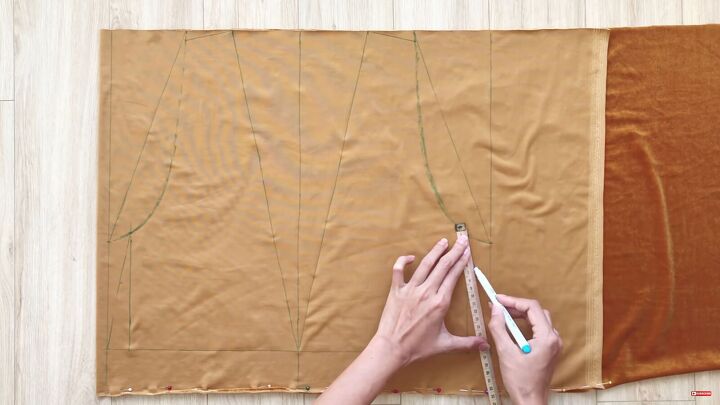
Connect this mark to the top line with a curved line.
On the opposite side, mark at 8cm (3.14”) and draw a straight line across.
Then again, mark 30cm (11.81”) and join the lines with a curve.
Tip: The width between the two crotch lines should be half of your hip + 4cm (1.57”).
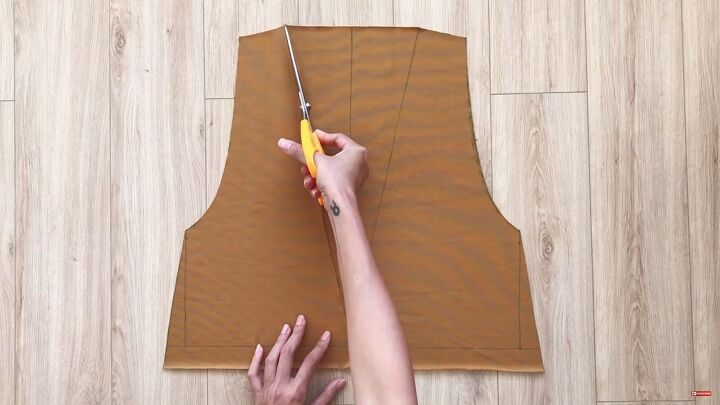
7. Cut out the pants
Cut out the pattern.
8. Sew the pants
Pin the seams of each crotch area and sew.
Turn the pants sideways and pin the inner seams. Then, sew to secure.
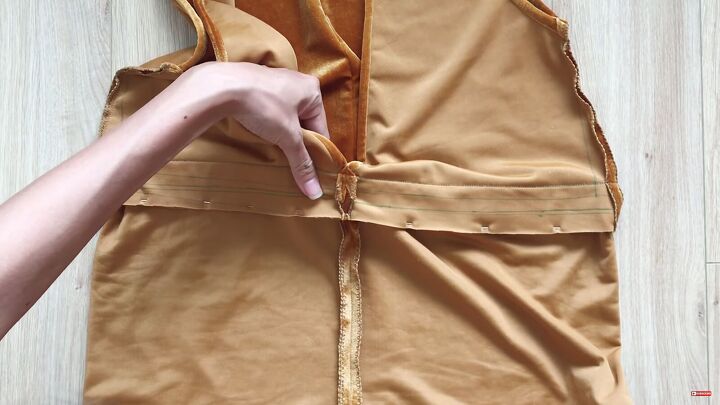
9. Assemble the DIY jumpsuit
Mark 3cm (1.81”) from the bottom of the top.
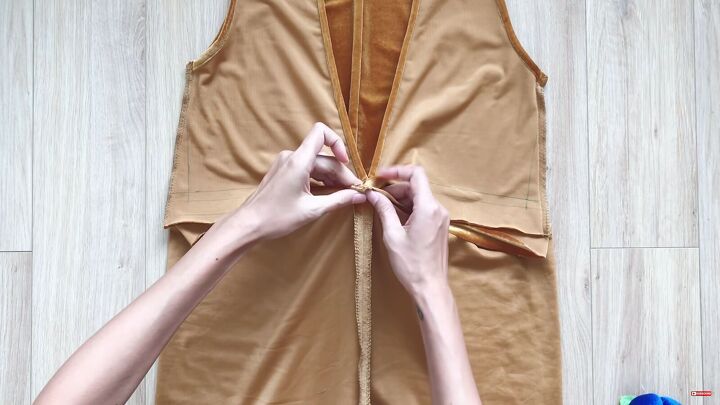
Pin the top and bottom together, making sure the seams align.
Fold the top fabric of the pants inside the top, and pin both layers at the 3cm (1.81”) mark you just made. This will create a tunnel for the drawstring.
Sew the top and bottom lines.
10. Insert elastic into the waist
Now, create the casing for the elastic and feed your elastic through the casing. Watch my video from 14:14 minutes to see how I do this.
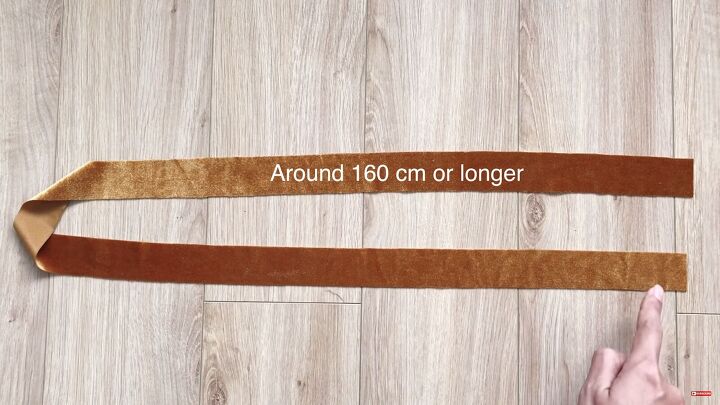
Cut a long rectangle that's 3 x 160cm (1.81 x 62.99 ”). This will be the tie for the jumpsuit.
Fold the strip in half, pin, and sew to secure. Then, turn it inside out.
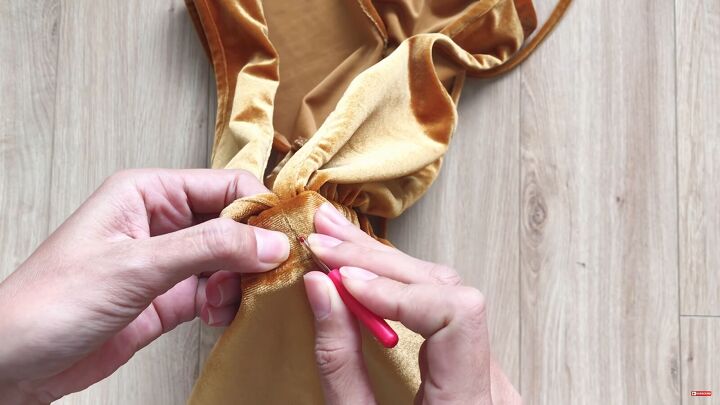
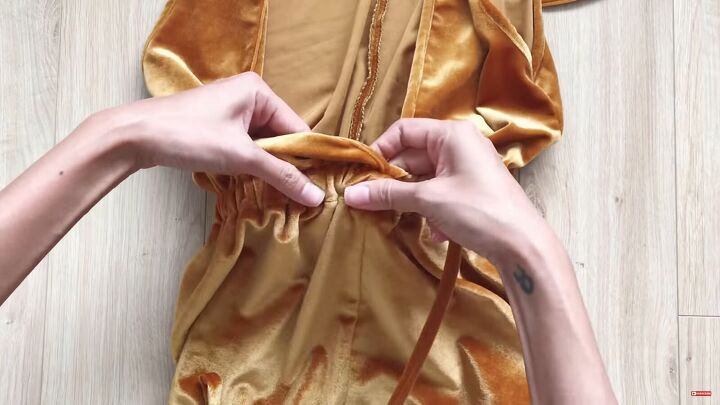
Open a hole in the middle of the waistline and insert the strip.
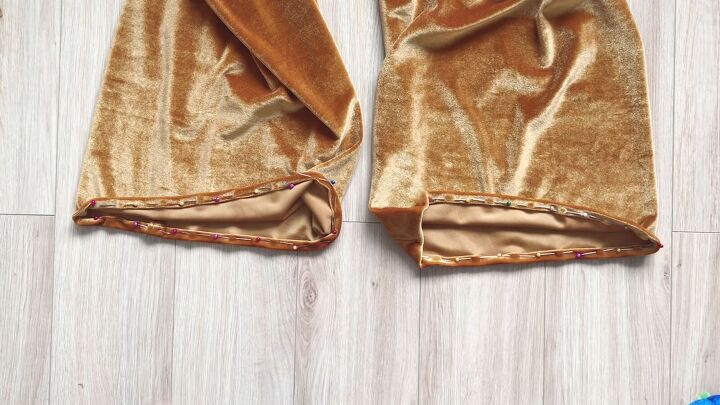
11. Hem the bottom
Hem the ends of the DIY jumpsuit by folding the fabric twice inside.

Sew your own jumpsuit tutorial
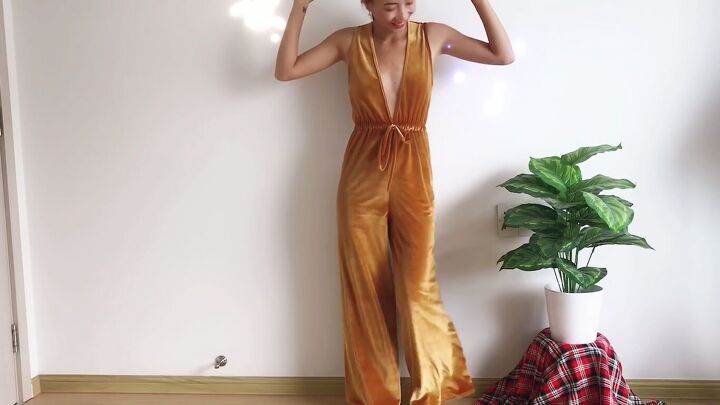
That is how you sew your own jumpsuit! What do you think? I love this DIY velvet jumpsuit and the eye-catching gold color. I think this is perfect for parties during the festive season or all year round!
Let me know what you think of this tutorial and the final result in the comments below.
The author may collect a small share of sales from the links on this page.


Comments
Join the conversation
Absolutely gorgeous! Your talent is amazing. Thanks for posting.
So. Well. Done. I'm 80, or I would try it! 😂