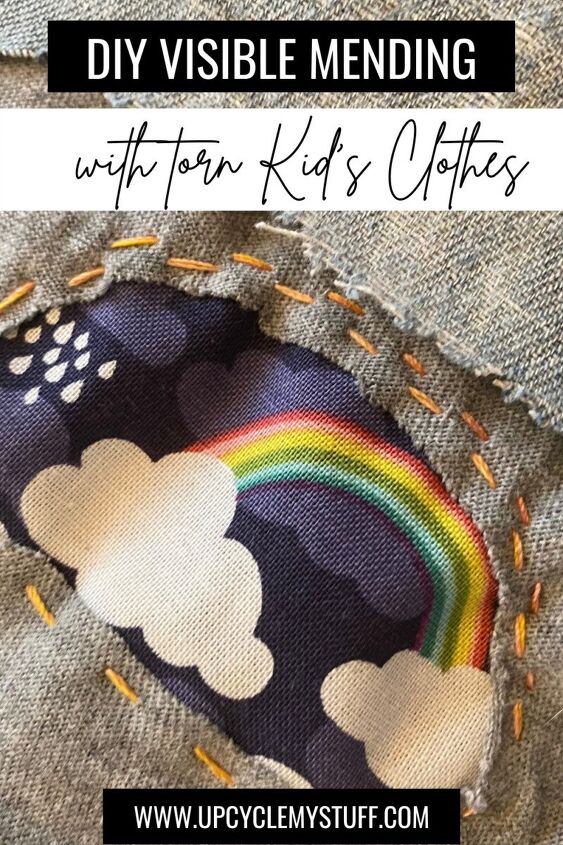
Visible Mending: Reverse Applique Patches for Jeans
I decided to turn my hand to some visible mending techniques to see if I could breath new life into a favorite pair of jeans that looked as though it was on it’s last legs.
We have a different pile of clothes for when the kids go to daycare or playgroup versus just hanging out at home with us. This visible mending reverse appliqué tutorial came about because my older son’s ‘daycare jeans’ – the comfiest pair – got two holes in the lining fabric.
My husband was about to toss them out when I said – let me try to fix them!
Favorite Pair of Kid’s Jeans
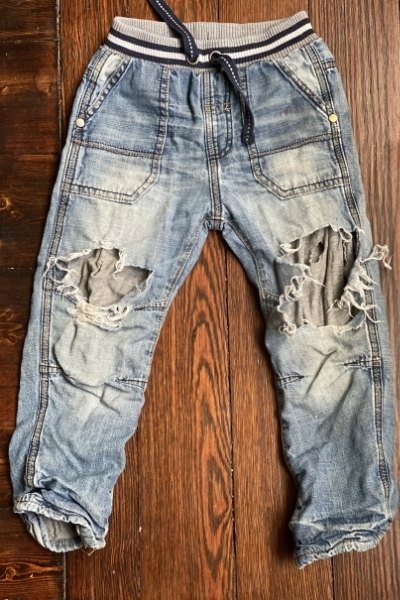
These jeans were a hand me down to start off with in our house.
They are denim on the outside and jersey on the inside lining with a stretchy waistband and bottom cuffs. This means they are more comfortable than his regular jeans and he loves them – so they get worn a lot!
When we got them they already had small intentional and ‘fashionable’ tears in the denim over the knee area – no doubt they were bought like that.
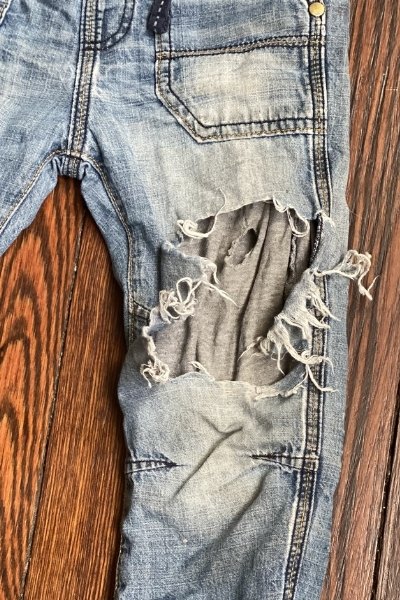
But as my son wore them, those wholes got bigger and bigger, and eventually the jersey underneath on both knees got torn too.
It was this torn jersey I was really trying to repair.
Materials Needed – Visible Mending Reverse Applique:
- Torn piece of clothing
- Fabric Scraps at least a 1/2 inch bigger all around than the hole you are trying to cover
- Embroidery floss, thick thread or yarn.
- Scraps of heat n’ bond
- Long fabric scraps approx 2″ thick in coordinating colours (optional)
- Bias Binding Maker (optional)
You can also scroll down for a printable version of the materials list and summary instructions.
What is Visible Mending?
Unlike the kind of mending or clothing repair you might be used to that aims to hide itself away so that the clothing being mended appears ‘new’ or unblemished, visible mending does what it says on the tin. It is mending that you can actually see.
It’s origins come from Japan and Sashiko stitching which has been hugely trendy in the last little while.
In common parlance these days, visible mending is anything from patches and strategically placed embroidery, to sashiko stitching, to darning socks with contrasting coloured yarn.
What is Reverse Applique?
Reverse applique, if you haven’t heard of it before, is when you put the patch under the fabric that is to be mended rather than over it.
My lightening bolt t-shirt applique project is what you call a raw edge applique – where you sew the patch on top of the fabric at the raw edge.
The third popular type of applique is called needle turn applique.
That is when you turn the raw edge of the applique piece under (and therefore hide it) before stitching the piece on top of the fabric you want to patch or decorate.
Reverse applique is what I used for this project and it means that the raw edge of the original hole will still remain visible – which is part of why I’m calling this a visible mending technique!
Step 1: Cutting Out the Patch for Reverse Applique
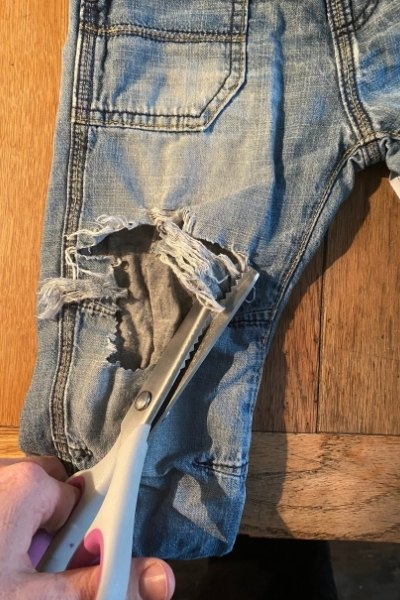
The first thing I did on this project was to cut off the straggly bits of denim from where the ‘fashionable’ tears had gotten bigger and bigger.
Arguably this was a mistake.
It made my life a bit harder at the end of this project (see the optional step 4 below), but at the time I just wanted to make the jeans look less ‘messy’ so I can’t say I totally regret it.
That bit doesn’t have anything to do with the reverse applique though, so lets get to that first.
Fussy Cut Patches
My son requested rainbow for his patches and luckily I had some leftover rainbow fabric – but not much!
Before you ask I don’t know what the name of the fabric is I’m afraid. I got it in a bag of fabric scraps I bought off of ebay – my favourite way to buy fabric!

First of all I made sure the fabric with the hole I wanted to patch was laying flat and smooth.
Then I placed the scrap of fabric over top, right side down and tried to work out where the pattern would show through depending on where I cut my patch.
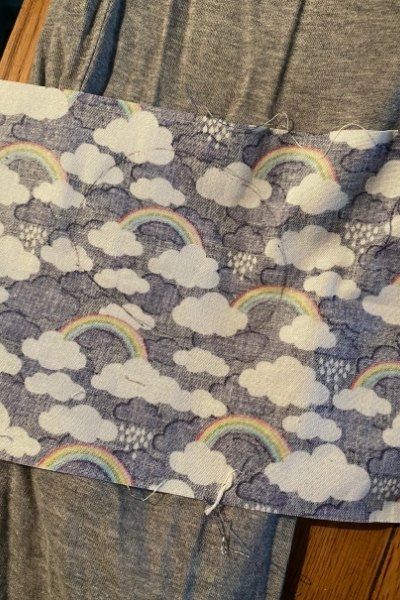
I manoeuvred the fabric so that you could see at least some of the colours out of the hole on each knee, then I traced an oval shape that was larger than the hole by at least a 1/2″ all the way around and cut out my patch.
Step 2: Heat N’ Bond to Attach Patches

Once the patches were cut to size I had a rummage in the little plastic bag of heat n’ bond scraps I keep from leftovers of larger projects.
I found some bits that I could cut to cover the edges of the patches. This is to temporarily hold the patch to the inside of the fabric before stitching it to secure it.
To secure it in place, put the webbed side of the heat n’bond on top of the right side of your patch around the edges and iron it in place as per the package instructions.
Make sure you are only placing the heat n’bond over the part of the patch that will disappear underneath the clothing not the part that will peak through.

Next turn your trousers inside out. Peel the paper off of the heat n’bond and put the patch down over the hole right side of the patch to wrong side of the trousers. Again make sure the heat n’bond is not going to peak through the hole. Then iron in place.
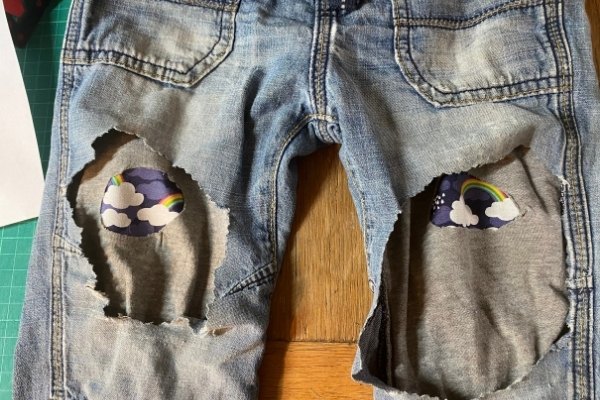
Your patches should now be securely in place – they will actually hold like this for a while but to make them extra secure and to add a bit more of that trendy visible mending style the next step is to add some contrasting stitches.
Step 3: Visible Mending Running Stitch
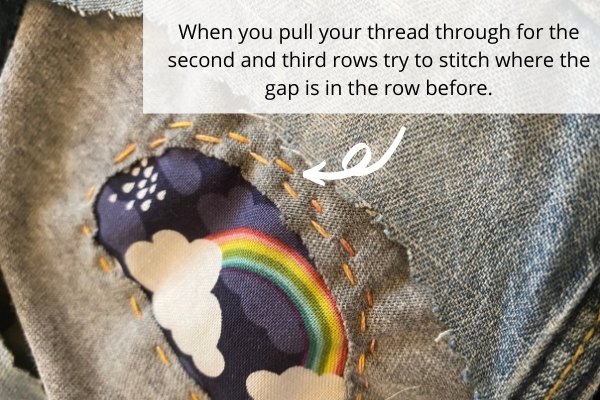
I used a machine embroidery thread for this part of my project, even though I did the stitching by hand.

I basically did a large running stitch or straight stitch around the edge of each patch. I went around three times making sure that as. I crossed the first stitch line I was alternating where the stitches appeared.
There are many other fancier visible mending stitches you can try. I’ve recommended a couple books on visible mending in this post on books about upcycling if you are super keen.

I personally like the simplicity of this running stitch and in a bright contrasting colour I think it does make the patch fabric ‘pop’ a bit more.
Step 4: Overcomplicate Things with Binding! (Optional)
This is where most people would stop with a visible mending project on a pair of jeans. Especially because you are more likely to be putting your patch directly onto some torn denim jeans and not onto the lining like mine.
(You can use the reverse applique technique above directly on to denim by the way!)
But I was working with this pair of jeans where the denim was already torn on the knee and it wasn’t that bit I was really trying to patch, it was the jersey layer underneath.
My sister pointed out after the fact that she wouldn’t have trimmed the wispy bits of denim around the knee and I did have to admit that it looked a bit funny when I was done my patches and there were these really neatly trimmed squares cut out of the denim around them!
So I had another think and decided to make the jeans even more colourful by adding a binding to the raw edge of the denim. I have half a hope this will also stop them tearing further but I’m not holding my breath on that one!
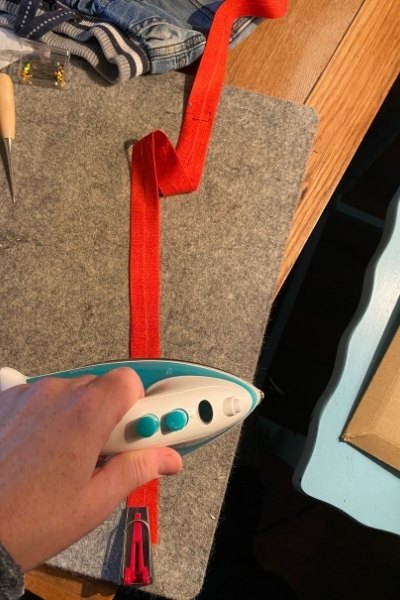
I had some bright long jelly roll length selvedge end strips from a moda scrap bag. I picked one in orange and one in yellow.
I used my bias binding maker tool to fold them into bias binding strips and iron them in half.
Step 5: Attaching Binding in a Square Shape
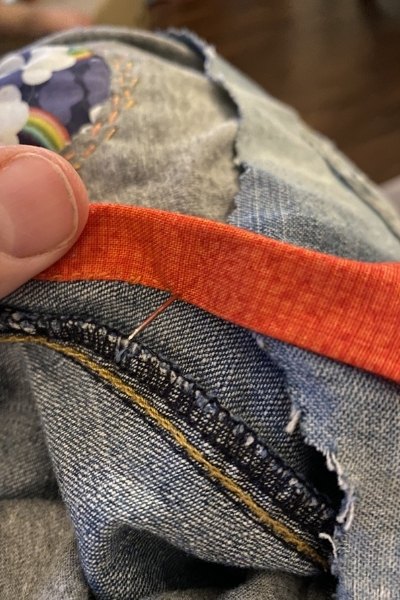
To start I folded under the raw edges on one end of the binding strip and enclosed the raw edge of the jeans inside the strip.
I have never attached binding in a square quite like this and it was very fiddly to fit under my machine so for the orange binding I hand sewed it in place.
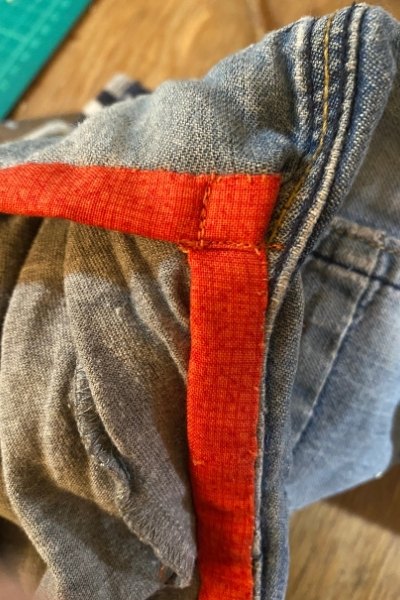
This left me with a large gapping oval type shape that I needed to ‘square off’ to help the pant leg lay flat again.
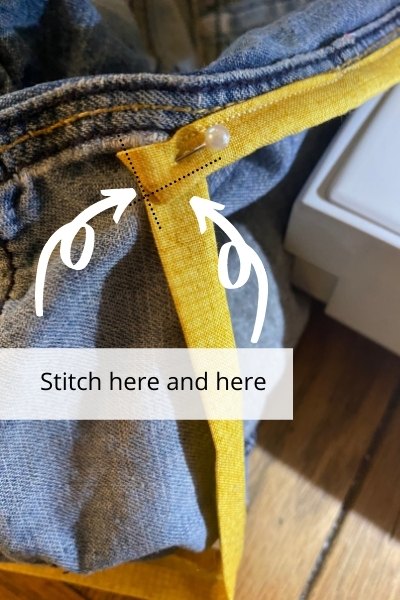
For that I used my sewing machine. I folded under a bit of the binding at each corner of the hole so that it made a corner and then stitched down both sides.
Having got my confidence up about fitting the jeans under the machine by doing that (and having lost my patience for hand sewing), I did the yellow binding by machine – much quicker if a bit more fiddly!
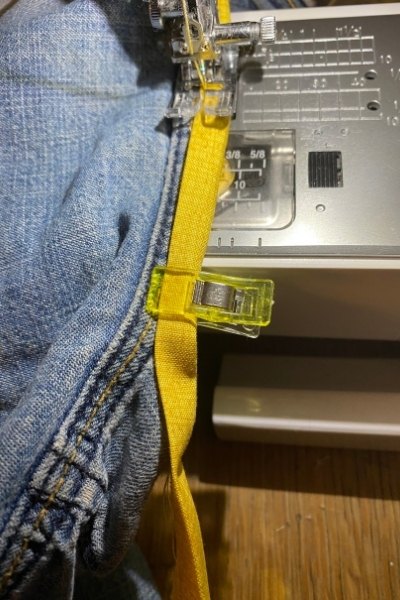
To finish it off you just turn the raw edge at the end under and stitch through along the edges to where you started.
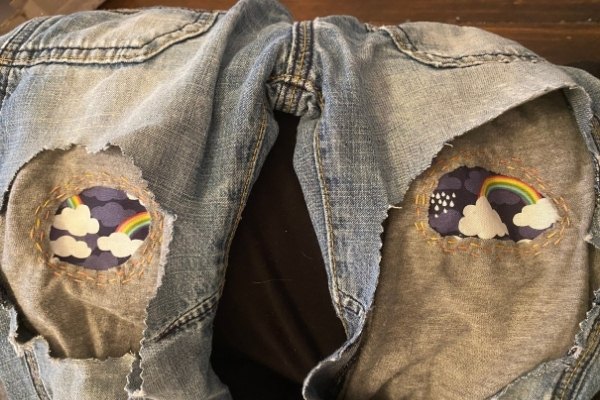
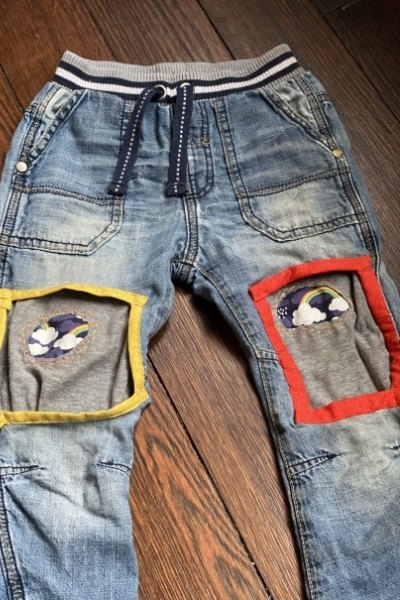
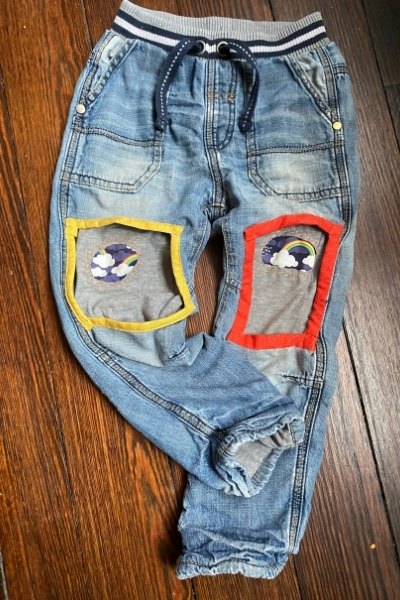
Finished Visible Mending Reverse Applique Patches on Kid’s Jeans
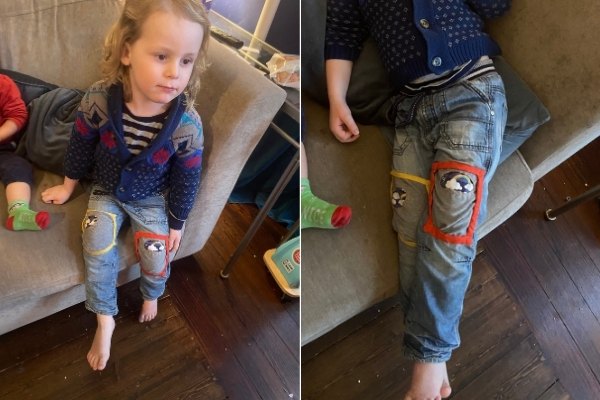
My son loves these. He’s not much for sitting still to get his photo taken, so I had to snap a couple shots while he was watching tv, but he is very happy with the repair job and his rainbows.
For myself, although I like the pop of colour that the binding brings, it felt a bit time consuming for a piece of clothing that I’m pretty sure he is going to treat as badly as he did before!
The reverse applique patches and running stich combination though I adore and I will absolutely be doing more of.
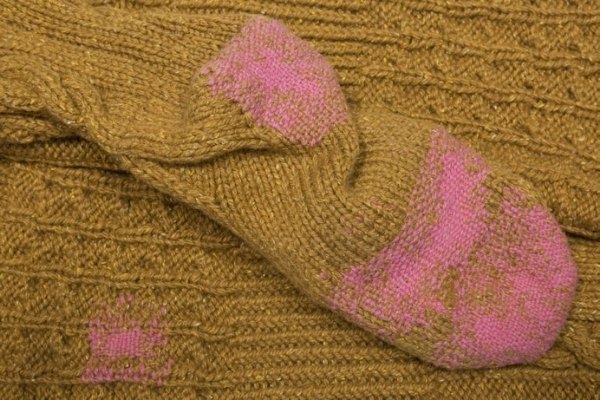
It’s also upped my confidence to try some more visible mending techniques. Darning an actual sock is on my hit list of things that have always felt too hard that I’m sure actually isn’t.
So watch this space!
If you like’d this post and you want to come back to it later, don’t forget to Pin it!
Materials
- Torn Jeans or Trousers
- Scrap Fabric
- Heat n' Bond
- Embroidery Thread or Yarn
Tools
- Needle
- Iron
- Sewing Machine (Optional)
Instructions
- Cut scrap fabric patch at least 1/2" larger all the way around than the hole you are patching.
- Use scraps of Heat n'Bond to fuse the patch in place from behind.
- Use a running stitch in a bright coloured embroidery thread or yarn around the patch - to secure it and for decoration.
- Add an extra pop of colour with bright binding if you have a double layer trouser like I did.
If you enjoyed this project you might also like these ones:
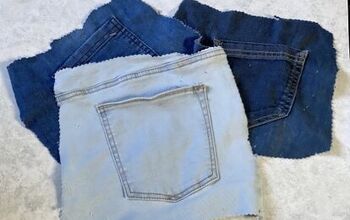
- How to Cut Up Old Jeans for Sewing & Upcycling Projects
- How to Applique on a T-Shirt (with FREE Template)
- 14 Ways to Upcycle Fabric Scraps as Gifts for Kids
- 17 Brilliant Ideas for Upcycling your Scrap Fabric
- What is Upcycling & What can you Upcycle?
- DIY Kid’s Apron from a Man’s Shirt
- DIY Kid’s Coat Rack from Pallet Wood
- 18 Upcycled Men’s Shirt Ideas
The author may collect a small share of sales from the links on this page.


Comments
Join the conversation