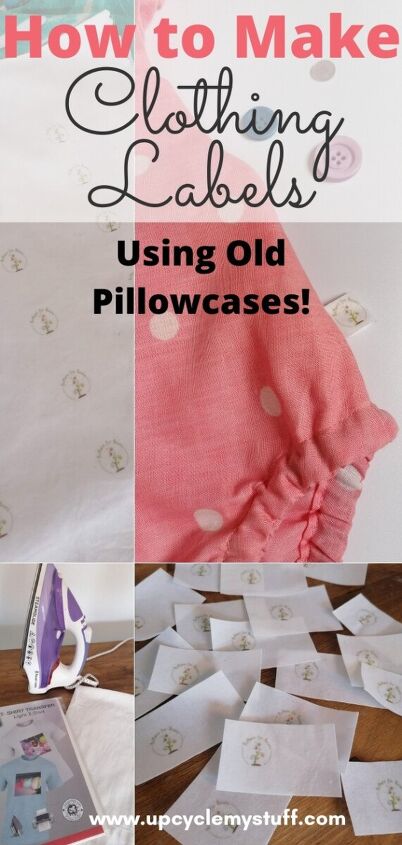
How to Make Clothes Labels Out of Pillowcases!
This tutorial about how to make clothes labels using old pillowcases or sheets was written by guest blogger Catherine Wainwright of eco-friendly upcycled clothing company Buttons for Beans.
Firstly, I just want to say a huge thank you to Kristen for inviting me to feature as her guest blogger this month.
I’m so excited to share my home-grown business with you all and to hopefully give you a few hints and tips to make your own clothing labels the upcycled way!
P.S. My homemade fabric labels are cheaper too!
As well as the detailed instructions below you will also find printable instructions for my technique for how to make clothes labels at the end of this post.
Why I wanted to make my own clothing labels
My name is Cat and I am the proud creator of Buttons for Beans, an upcycled clothing company for little ones.
Buttons for Beans has now been up and running for a couple of months and, during that time, I have been wondering how I can brand my clothes in a sustainable fashion that doesn’t cause wastage.
I really wanted to try adding garment labels with my logo on them to the outside of my makes but it seemed virtually impossible to find eco-friendly alternatives to the bulk options available online for clothing labels.
So, being the resourceful woman that I am, I set out to make my own clothing labels – using upcycled materials.
It wasn’t without trial and error but I got there in the end, and you can now add homemade upcycled clothing labels to your own handmade treasures too!
Materials Needed to Make Clothing Labels:
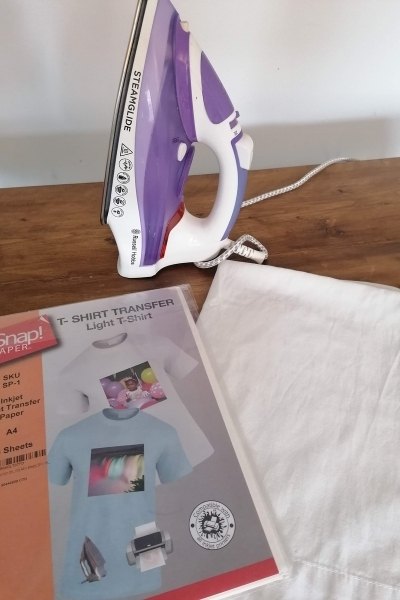
- Transfer paper – I ordered mine from amazon
- Material to recycle into labels – I used a 100% cotton white pillowcase but you can use just about anything (don’t forget to check what the instructions with your transfer paper recommends)
- A home printer and a laptop with Microsoft Word (or similar programme) installed
- An iron
- Baking paper or wax paper (if your transfer paper doesn’t come with silicon paper)
Step 1: Create a Label Template

First you need to create a label template to print onto your transfer paper.
I did this in Microsoft Word by importing my Buttons for Beans logo in a JPEG format, flipping the image horizontally, and then copying it for as many labels as is needed.
Don’t forget to space your labels out a bit to leave room for cutting and sewing!
Step 2: Print on your Transfer Paper
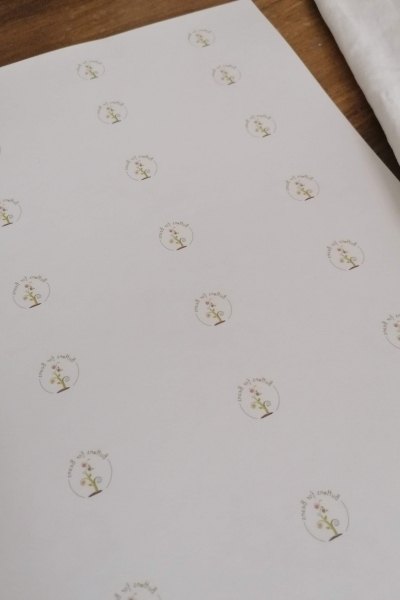
Put the transfer paper into the printer and follow the transfer paper instructions to print your clothing label design.
You may want to do a test print on scrap paper to see which way to feed the paper into the tray before you hit print and use your transfer paper.
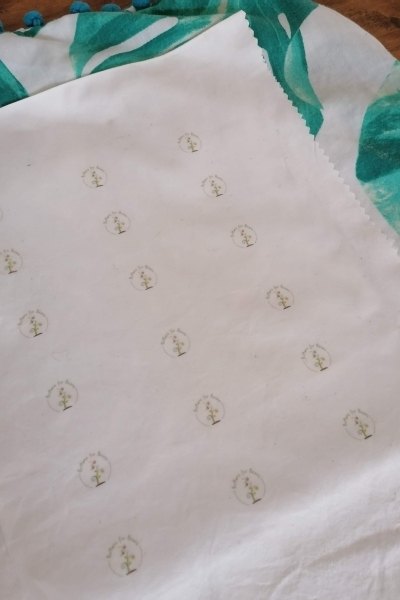
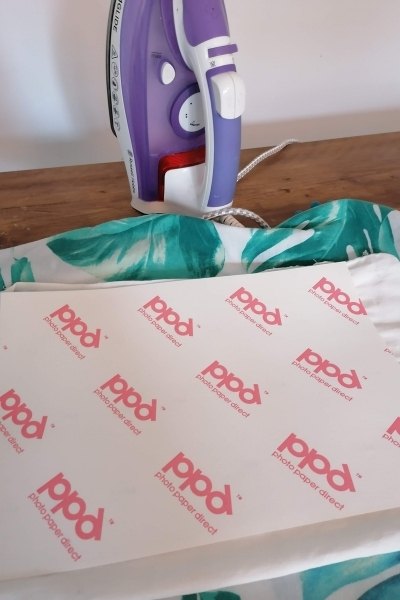
Step 3: Transfer your Clothing Label Design onto Fabric
You can use any clean unbobbly fabric that is compatible with your transfer paper. I used 100% cotton pillowcases but you could equally use sheets, or even material from men’s dress shirts if it is either white or a very light colour.
Lay out your material on a hard surface like a table or the floor with something underneath to provide a small amount of cushioning – something like another pillowcase would work fine. Most transfer papers I have used have advised not to do this on an ironing board.
Give it a once over with the iron to warm it up and get rid of any creases.
When your fabric is smooth and ready, lay your transfer paper on top with the labels facing down. Begin ironing all over, applying a firm pressure as you go for about 3 minutes (check transfer paper instructions).
Step 4: Use Silicon Paper or Baking Paper to Fix your Clothing Labels
Whilst still hot, peel off the backing paper and place the silicon paper (if supplied with your transfer paper) or baking paper on top.
This acts as a fixing agent, so your labels won’t fade too much in the wash.
Iron all over for roughly 30 seconds and peel off.
Step 5: Cut your Clothing Labels to Size

Finally, cut out your labels to the size you want.
I like to leave a long edge so that I can fold them to reduce fraying.
And that’s it! Now you are ready to sew your homemade clothing labels into your handmade clothes, pouches or bags.
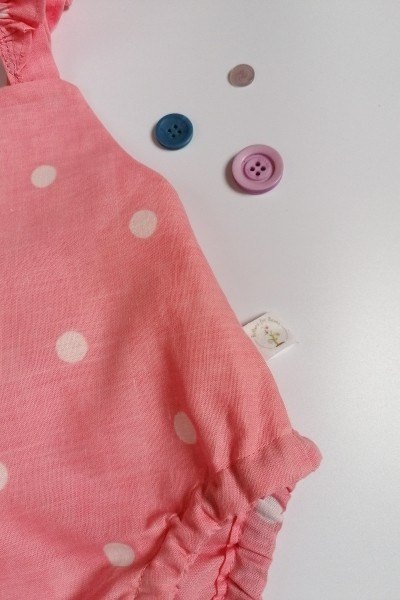
Finished Homemade Upcycled Clothing Labels!
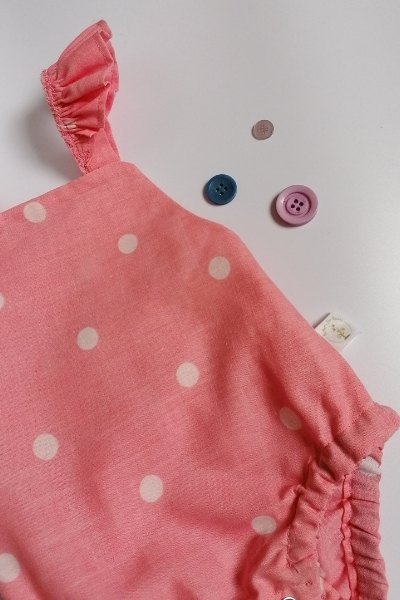
Here is one of my homemade labels in action on one of my upcycled baby rompers – I’m really pleased how these turn out and I’m so glad I found a way to make my labels as sustainable as my clothing!
These labels aren’t only for clothing though – you can use these labels on any product or gift that would look nice with a fabric label, or you could use the same technique to put name labels into kid’s clothing.
I hope you found this guide to making your own upcycled clothing labels useful and I would love to see your creations!
You can find me on Instagram or Facebook. You can also find my Etsy shop here.
If you liked this post and you want to come back to it later, don’t forget to Pin it!
Printable Instructions
Materials
- Transfer Paper
- Clean fabric to reuse - like pillowcases, sheets or men's dress shirts
- Baking Paper or Wax Paper (optional depending what type of transfer paper you use)
Tools
- Iron
- Printer
- Computer
Instructions
- Create a label template to print onto your
- transfer paper. Make sure it is reversed so that it is the right way around when it is transferred onto your fabric.
- Print labels onto transfer paper following the package instructions
- Pre-Iron your fabric and place it on a hard surface with a little cushioning - not an ironing board
- Lay your transfer label onto your fabric with the design facing the right side of the fabric.
- Iron all over applying a firm pressure for approximately 3 minutes (but check your transfer paper's instructions).
- While still hot, peel off transfer paper and apply either silicone paper (usually provided with transfer paper) or baking or wax paper. Iron for a further 30 seconds - this will fix your design in place.
- Allow to cool and then cut your clothing labels to size making sure to leave room for sewing them into your garments. (These can also be used for pouches, bags and other products that need fabric labels).
Subscribe to Upcycle My Stuff for more fun ideas like this one.

Catherine Wainwright is the owner and maker behind Buttons for Beans.
Buttons for Beans makes cute one of a kind upcycled kid’s clothing out of old duvet covers and other upcycled materials.
If you liked this project you might like these posts too:
- DIY Kid’s Apron from a Man’s Shirt
- How to Make a Bedside Pocket Organizer from Old Jeans
- Visible Mending: Reverse Applique Patches for Kid’s Jeans
- 14 Ways to Upcycle Fabric Scraps as Gifts for Kids
- How to make Kraft Tags from Upcycled Cardboard
- DIY Christmas Gift Tags from Cardboard & Scrap Fabric
- How to Reuse Christmas Cards as Gift Tags
- 9 Reasons to Start an Upcycling Business…and why it needs to be online!
- FREE UPCYCLING BUSINESS QUICK START GUIDE!
The author may collect a small share of sales from the links on this page.


Comments
Join the conversation